Do you ever wonder what lies beneath your flooring? Perhaps it’s time to explore! Removing the subfloor can feel like a big task, but it can also be rewarding. Imagine the satisfaction of finishing a project around your home. You’ll save money and feel accomplished!
In this article, we share a step-by-step DIY guide on how to remove subfloor. It’s easier than you think! Many people have done it, and so can you. With the right tools and a positive attitude, you’ll be on your way to a new and improved floor.
Did you know that your subfloor plays a crucial role? It supports everything above it. When it becomes damaged, it can affect your entire home. Let’s dive into the process and learn how to tackle this challenge together!
Table of Contents
How To Remove Subfloor: A Step-By-Step Diy Guide

How to Remove Subfloor: A Step-by-Step DIY Guide
Removing a subfloor can seem daunting, but it’s easier than you think! Start by gathering tools like a pry bar and hammer. Have a plan for your flooring project ready. First, you’ll want to clear the area and locate any hidden nails. Did you know that this process can reveal hidden moisture issues? Take your time to avoid damage. Following these steps leads to a strong, clean foundation for your new floor. Enjoy your DIY adventure!Understanding Subfloors
Definition and function of a subfloor. Types of subfloor materials commonly used.A subfloor acts like a base for your floor covering. It supports tiles, carpets, and hardwood. Without it, floors would become weak and creaky. There are different types of subfloor materials:
- Plywood: Strong and durable, used in many homes.
- Oriented Strand Board (OSB): Made from wood strands, it’s a cost-effective choice.
- Concrete: Found in basements, it provides excellent support.
Using suitable materials keeps your floors safe and stable.
What is a subfloor made of?
The main materials for a subfloor are plywood, OSB, and concrete. Each offers durability and support for flooring.
Tools and Materials Needed
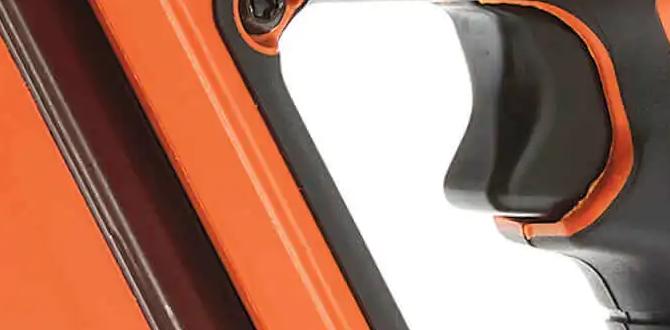
Essential tools for subfloor removal. Recommended safety gear.To take out a subfloor safely, you’ll need the right tools and materials. Here are some essentials:
- Pry Bar: Helps lift the subfloor.
- Saw: Cuts through tough boards.
- Hammer: Drives nails out easily.
- Screwdriver: Removes screws without hassle.
Don’t forget safety gear! Use:
- Gloves: Protect your hands.
- Goggles: Safeguard your eyes.
- Dust Mask: Keep your lungs safe from dust.
Having the right tools makes the job smoother and safer! Are you ready to get started?
What tools do I need to remove a subfloor?
You will need a pry bar, saw, hammer, and screwdriver to remove a subfloor. This equipment ensures a safe and effective process.
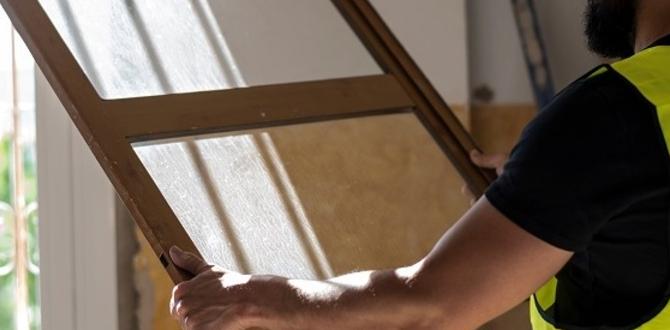
Preparing the Area
Clearing furniture and flooring materials. Ensuring safety and ventilation.Start by clearing the area around your subfloor. Move all furniture and flooring materials out of the way. This keeps your space safe and makes it easier to work. Safety comes first! Open windows for good air flow. Wear a mask and gloves to protect yourself from dust or fumes. Following these steps ensures a smoother project.
- Remove furniture and carpets.
- Open windows for ventilation.
- Wear safety gear.
Why is Safety Important?
Safety prevents accidents. It protects you from injuries or harmful substances during your project.
Identifying the Right Removal Method
Determining the type of fasteners used. Choosing between pry bar, saw, or sledgehammer.Before starting, check how the floor is attached. Walls and boards may have different fasteners. You need to know if it’s nails, screws, or glue. Look for heads on the surface or lumps below. This will help you pick the right tool.
Choose the best tool for your job:
- Pry Bar: Great for pulling out nails or boards.
- Saw: Use for cutting through tricky areas.
- Sledgehammer: Best for breaking up tough spots.
What should I look for to choose the right tool?
Identify the fasteners first. If you see nails, a pry bar works well. For screws, use a screwdriver or drill. For tough areas, try a sledgehammer. Knowing what you’re working with makes it easier!
Step-by-Step Removal Process
Step 1: Cutting through the flooring if applicable. Step 2: Removing nails and staples. Step 3: Detaching the subfloor panels.Start by cutting through the flooring if needed. Use a jigsaw or utility knife for lines. Then, remove any nails and staples with a pry bar. This helps free the subfloor. After clearing, detach the subfloor panels. Pull them up gently, starting from one corner. This careful approach makes the task easier and safer.
How do I remove the subfloor step by step?
To remove the subfloor step by step, follow these simple steps:
- Cut through the flooring.
- Remove nails and staples.
- Detach subfloor panels starting from a corner.
Dealing with Challenges
Handling damaged or stubborn subfloors. Tips for avoiding damage to joists.Dealing with stubborn subfloors can be tricky. If you find damaged spots, focus on safety first. Use a pry bar or hammer carefully to avoid harming the joists underneath. Here are some tips to keep those joists safe:
- Work slowly to avoid sudden breaks.
- Support weakened areas with blocks or braces.
- Always check for nails or screws hidden in the floor.
Remember, patience is key when taking out tough sections. Think about how important a strong floor is for your home!
How do you handle damaged subfloors?
You can handle damaged subfloors by carefully removing them piece by piece. Use a pry bar gently to lift the damaged boards, and be aware of the joists below.
Inspecting Underlying Structures
Checking for moisture damage or mold. Assessing the condition of floor joists.Before you start swinging a hammer, take a moment to look around. Check for moisture damage. If the wood feels spongy or has dark spots, you could have a mold party going on. Next, inspect the floor joists. Strong joists support your floors, but if they’re cracked or sagging, it’s like a bad hair day for your house. Remember, detecting these issues early keeps your home (and knees) happy!
| Issue | What to Look For |
|---|---|
| Moisture Damage | Dark spots, spongy wood |
| Mold | Musty smell, visible growth |
| Floor Joists | Cracks, sagging, weakened structure |
Cleaning Up and Disposal
Safe disposal methods for old subfloor materials. Tips for cleaning the workspace.After removing your old subfloor, it’s time to clean up. First, gather materials for safe disposal. You can recycle some wood parts or throw them away. Follow these friendly tips for cleaning:
- Wear gloves and a mask to stay safe.
- Clear all large debris first.
- Vacuum the area to remove dust.
- Wipe down surfaces with a damp cloth.
Keeping your workspace clean is important. A tidy area helps prevent accidents and makes your job easier.
What are safe disposal methods for old subfloor materials?
Wood from subfloors can often be recycled, while other materials should be disposed of according to local guidelines.
Preparing for New Flooring Installation
Ensuring the area is level and clean. Choosing the right underlayment for your new flooring.Before laying down your fabulous new flooring, make sure the area is as smooth as a pancake. A level and clean surface is key to avoiding those annoying squeaks and wobbles. You wouldn’t want your floor feeling like a rollercoaster ride! Next up, choosing the right underlayment is essential. Think of it as the special sauce that makes your flooring even better. Below is a quick guide for picking the best underlayment:
| Type of Flooring | Recommended Underlayment |
|---|---|
| Laminate | Foam underlayment |
| Hardwood | Cork or felt underlayment |
| Vinyl | Moisture barrier underlayment |
Choosing wisely keeps your floor cozy and sound. Now, you can dance like nobody’s watching!
Conclusion
In conclusion, removing a subfloor can be a simple DIY project. Start by gathering tools and following the steps carefully. Always measure twice and cut once to avoid mistakes. This guide helps you feel confident in your ability. If you’d like more tips or techniques, check out other DIY resources. Happy renovating!FAQs
What Tools And Materials Do I Need To Safely Remove A Subfloor?To safely remove a subfloor, you’ll need some tools and materials. First, get a pry bar to lift the boards. A hammer will help you break things apart. You’ll also need a utility knife to cut through any stuck pieces. Don’t forget safety goggles to protect your eyes! A dust mask is good too to keep you from breathing in dust.
How Do I Determine If The Subfloor Needs To Be Replaced Or Just Repaired?To find out if the subfloor needs replacing or repairing, start by checking for damage. Look for soft spots or areas that feel spongy. If the damage is small, you can probably just repair it. But if there are big holes or rot, it might be best to replace the whole subfloor. Always ask an adult for help if you’re not sure!
What Are The Safety Precautions I Should Take While Removing A Subfloor?When removing a subfloor, wear safety goggles to protect your eyes. Use gloves to keep your hands safe from sharp edges. Make sure the area is clear of any tools or tripping hazards. Always have an adult nearby to help in case of an emergency. Finally, check for any wires or pipes before you start to avoid accidents.
How Can I Identify And Address Any Potential Damage Or Mold Under The Subfloor Before Installation?To check for damage or mold under the subfloor, you can start by lifting a corner of your flooring. Look for dark spots or a musty smell, which might mean there’s mold. If you find any, you should clean it with soap and water. Dry the area well to stop mold from coming back. If the damage is big, you might need to ask an adult for help.
What Is The Best Method For Disposing Of Old Subflooring Materials?The best way to dispose of old subflooring is to take it to a local dump or recycling center. You can ask your parents or a grown-up for help. Sometimes, places that sell flooring will take your old materials back. If it’s safe, you might also be able to reuse pieces for crafts or other projects. Always remember to wear safety gear, like gloves and a mask!