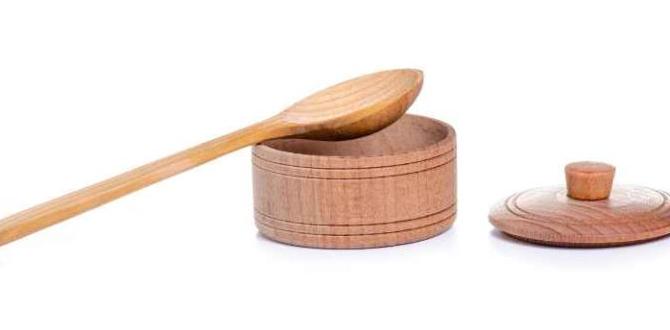
Have you ever wanted to add a unique touch to your jars or boxes? Making wooden lids is an exciting way to do just that! Instead of using plain old plastic or metal, why not dive into something special? Crafting wooden lids can make your items stand out.
Imagine using your own handmade wooden lids. They can fit perfectly on your favorite storage jars. Plus, they bring a warm, natural feel to your home. You might think it sounds difficult, but it’s easier than you think!
In this article, we’ll show you how to make wooden lids like a pro! You’ll discover fun tips and easy steps. With just a few tools and some creativity, you’ll be well on your way to crafting stunning wooden lids.
Are you ready to impress your friends and family? Let’s get started and explore the wonderful world of wooden lid crafting!
Table of Contents
How To Make Wooden Lids: Craft Like A Pro With Tips! — Introduction Creating Wooden Lids Can Add A Touch Of Elegance And Functionality To Various Wooden Projects. Whether It’S For Jars, Boxes, Or Containers, Knowing How To Make Wooden Lids Allows You To Customize Your Woodworking Skills And Enhance Your Craft. In This Article, We Will Explore The Step-By-Step Process Of Making Wooden Lids Like A Pro, Along With Tips And Essential Tools You’Ll Need. Essential Tools And Materials Before Diving Into The Crafting Process, Gather The Following Tools And Materials: – **Wood Materials:** Choose Your Preferred Wood Type (Such As Pine, Oak, Or Mahogany). – **Measuring Tools:** A Ruler Or Measuring Tape For Accurate Dimensions. – **Cutting Tools:** A Saw (Table Saw, Jigsaw, Or Scroll Saw) To Cut The Wood. – **Sanding Tools:** Sandpaper Or An Electric Sander For Smoothing Edges. – **Adhesives:** Wood Glue Or Finish Nails For Assembly. – **Finishing Supplies:** Natural Oils, Paint, Or Varnish For Sealing Your Lids. Step 1: Measure And Mark Start By Deciding On The Dimensions Of Your Wooden Lid. Measure The Diameter (For Round Lids) Or The Length And Width (For Rectangular Lids) Of The Container Or Project You Are Working On. Mark The Dimensions Clearly On The Wood Using A Pencil. Step 2: Cutting The Wood Using Your Cutting Tool, Carefully Cut The Wood According To Your Marked Dimensions. Take Your Time With This Step To Ensure A Clean And Accurate Cut, As Precision Is Crucial For The Lid To Fit Properly. Step 3: Sanding The Edges After Cutting, It’S Important To Sand The Edges Of The Wood To Remove Any Splinters Or Rough Spots. This Will Give Your Lid A More Polished And Finished Appearance. Step 4: Assemble The Lid If Your Design Includes Multiple Pieces For Added Detail, Apply Wood Glue Where Necessary And Clamp Them Together Until They Dry. For A More Secure Hold, You Can Also Use Finish Nails In Addition To The Glue. Step 5: Finishing Touches Once Your Lid Is Assembled And The Glue Has Dried, Apply Your Desired Finish. You May Choose To Stain, Paint, Or Seal Your Wooden Lid With Natural Oils Or Varnish. Allow It To Dry Completely Before Use. Conclusion Learning How To Make Wooden Lids Is Not Only A Useful Woodworking Skill But Also An Enjoyable Crafting Experience. With The Right Tools And Techniques, You Can Craft Stunning Lids That Enhance Your Woodworking Projects. So Grab Your Materials And Get Started To Craft Like A Pro!

How to Make Wooden Lids: Craft Like a Pro!
Crafting wooden lids is a fun project anyone can enjoy! Start by choosing the right type of wood; softwoods are easier to work with. Using simple tools like a jigsaw, you can shape the wood precisely. Sanding is vital for a smooth finish. Did you know that adding a natural oil can enhance the wood’s beauty? This creative task not only brings a personal touch to your containers but also boosts your DIY skills. Why not try your hand at making your very own wooden lid today?
Materials Needed for Wooden Lids
Common types of wood suitable for crafting. Essential tools for woodworking projects.
You will need the right materials to craft wooden lids. Some popular wood types include:
- Pine: Lightweight and easy to work with.
- Birch: Strong and smooth for a nice finish.
- Maple: Durable and perfect for detailed designs.
Besides wood, gather essential tools like:
- Hand saw for cutting.
- Sandpaper to smooth the edges.
- Drill for making holes.
Having these materials will help you create amazing wooden lids!
What wood is best for making wooden lids?
The best woods are pine, birch, and maple. Each type has unique properties that make crafting easier and more fun.
Choosing the Right Design for Your Lid
Popular styles of wooden lids (flat, domed, etc.). Considerations for design based on usage.
When making wooden lids, picking the right design is important. Popular styles include flat and domed lids. Flat lids are easy to stack and fit snugly. On the other hand, domed lids can add a nice touch and are great for larger containers. Consider how you’ll use the lid before choosing. Think about:
- Functionality: Will it hold food, or is it purely decorative?
- Size: Match the lid to your container’s size.
- Style: Choose a design that fits your personal taste!
What are the most popular styles for wooden lids?
Flat and domed lids are often chosen for their unique benefits and looks.
Measuring and Cutting the Wood
Importance of accurate measurements. Stepbystep instructions for cutting wood.
Getting accurate measurements is key in woodworking. It helps your wooden lid fit snugly. Start by gathering your supplies: a tape measure, a speed square, and a saw. Follow these steps:
- Measure the top of your container.
- Mark the measurements on the wood.
- Use the speed square to draw straight lines.
- Carefully cut along the lines with the saw.
Remember, measure twice, cut once. This will save you time and wood!
How do you accurately measure and cut wood?
To ensure accuracy, use a reliable tape measure. Double-check each measurement before cutting. This will help you avoid mistakes and wasted wood.
Sanding and Smoothing the Edges
Techniques for achieving a smooth finish. Recommended sandpaper grits for different stages.
To achieve a smooth finish on your wooden lids, sanding is key. Start with a coarser grit, like 80, to remove any rough spots. Then, move to a medium grit, such as 150, to level out the surface. Finally, end with a fine grit, like 220, for that silky feel. Remember, patience is a virtue—just like waiting for your favorite snacks to cook!
| Stage | Recommended Grit |
|---|---|
| Initial Sanding | 80 |
| Surface Smoothing | 150 |
| Final Touch | 220 |
With these techniques, your wooden lids will not only look great but feel amazing too! Who knew sanding could be so much fun? Just be careful not to sand your fingers along with the wood!
Assembling Different Lid Components
Joining methods for secure attachment. Optional embellishments to enhance appearance.
To create strong wooden lids, you need to use the right joining methods. Here are some options:
- Wood Glue: This is great for a smooth finish. It holds pieces tightly together.
- Screws: They offer sturdy support. Just drill carefully to avoid splitting the wood.
- Dowel Pins: These are perfect for alignment. They can make your lid stronger.
Enhance your lid’s beauty with embellishments. Think about adding:
- Carvings: Simple shapes make your lid stand out.
- Paint: A splash of color can brighten your project.
- Stains: Use this for a rich wood finish.
Mix and match techniques and designs to showcase your creativity!
What are the best ways to join lid components?
The best ways include using wood glue, screws, and dowel pins for secure attachment.
Wood Finishing Techniques
Types of finishes to protect and beautify the lid. Application methods for consistency.
Choosing the right finishes is key to protecting and making your wooden lids look great. Some popular types of finishes include:
- Varnish: Gives a hard, shiny surface.
- Oil: Penetrates wood for a natural look.
- Stain: Adds color while keeping the grain visible.
Applying these finishes consistently is important. Use a brush or cloth to spread them evenly. Make sure to follow the manufacturer’s instructions for the best results.
What is the best way to apply wood finishes?
The best way to apply wood finishes is to use a clean brush or cloth. Make sure it’s even and smooth. This will help the finish last longer and look better.
Common Mistakes and How to Avoid Them
Identify frequent errors in crafting wooden lids. Tips for troubleshooting and improving techniques.
Crafting wooden lids can be a fun project. However, many beginners make errors that can ruin their work. Here are common mistakes to watch out for:
- Not measuring correctly
- Using the wrong type of wood
- Ignoring safety equipment
- Skipping sanding steps
- Forgetting to test the fit
To avoid these mistakes, always double-check your measurements. Use quality wood that suits your project. Always wear safety gear like goggles. Sand the edges to make them smooth. Finally, test if the lid fits well before finishing.
What is the best way to improve crafting skills?
Practice is key! Try different techniques, watch tutorial videos, and ask for tips from experienced crafters.
Maintenance Tips for Wooden Lids
Best practices for care and upkeep. How to restore and repair damaged lids.
Taking care of wooden lids is easy and fun! Here are some tips:
- Keep lids dry to prevent warping.
- Use food-safe oil to condition them. This keeps the wood smooth and shiny.
- Store lids in a cool, dry place away from direct sunlight.
- If your lid gets scratched or damaged, sand it lightly and reapply oil.
Remember, a little care goes a long way. Your wooden lids will last longer and look great!
How to repair damaged lids?
If your wooden lid cracks, fill the space with wood glue. Clamp the lid and let it dry completely. For small dents, try sanding lightly and polishing with oil. This will make your lid look new!
Advanced Techniques for Experienced Crafters
Introduce specialized tools and methods. Ideas for customizing wooden lids for unique projects.
Experienced crafters can elevate wooden lid projects using special tools and creative methods. For precision, consider using a jigsaw or router. These tools help create unique cuts and designs. Also, think about personalizing lids with decorative techniques like wood burning or carving. This adds charm to your creations.
- Use paint or stain for beautiful finishes.
- Add handles for functionality and style.
- Experiment with different shapes for eye-catching designs.
How can you customize wooden lids?
You can customize them by adding unique colors, patterns, and shapes. Personal touches make each lid special!
Conclusion
To make wooden lids like a pro, start with the right materials and tools. Measure carefully and cut precisely for a perfect fit. Sand the edges to smooth out rough spots. Finally, finish your lid with paint or oil to protect it. Now that you know the basics, try making your own lid today! Happy crafting!
FAQs
Sure! Here Are Five Related Questions On The Topic Of Making Wooden Lids:
Sure! Here are five questions about making wooden lids. 1. What tools do you need to make a wooden lid? You need a saw, sandpaper, and a ruler. These help shape the wood and smooth it out. 2. How do you measure the wood for a lid? You use a ruler to measure the size of the container. Make sure to add a little extra for fitting. 3. What’s the best type of wood for lids? Softwoods like pine are good because they are easy to cut. Hardwoods like oak look nice too! 4. How can you make the lid fit better? You can sand the edges to make it fit snugly. Test it often while sanding. 5. Can you decorate wooden lids? Yes! You can paint, stain, or carve designs on them. This makes your lid look special!
Sure! Please go ahead and ask your question.
What Types Of Wood Are Best Suited For Crafting Durable And Aesthetically Pleasing Wooden Lids?
When making wooden lids, you can use several types of wood. Maple is strong and looks nice. Walnut has a rich color and is also very sturdy. Cherry is another great choice because it gets prettier over time. You should pick wood that feels smooth and nice to touch!
What Tools And Materials Do I Need To Successfully Create Wooden Lids For Various Containers?
To make wooden lids for containers, you need a few tools and materials. First, get some wood to use for the lids. Next, have a saw to cut the wood to the right size. You’ll also need sandpaper to make the edges smooth. Lastly, a drill helps to make holes for handles if you want them.
How Can I Ensure An Accurate Fit Between The Wooden Lid And The Container It Is Designed For?
To make sure the wooden lid fits well on the container, first measure the top of the container with a ruler. Write down the size. Then, cut the lid a little bigger than the size. This way, you can sand the edges if it’s too tight. Check the fit often while working!
What Finishing Techniques Can Be Applied To Wooden Lids To Enhance Their Appearance And Protect Them From Moisture?
You can use several finishing techniques on wooden lids. First, you can sand the wood to make it smooth. Then, apply a clear wood finish, like varnish or polyurethane, to protect it. You can also use wood oil, which makes the wood look shiny and helps keep moisture away. Finally, you can paint or stain the lid for color and style.
Are There Any Specific Design Considerations To Keep In Mind When Crafting Wooden Lids For Different Styles Of Containers?
When making wooden lids, you should think about the shape of the container. Round lids fit better on round containers, while square lids work for square ones. Also, make sure the lid is not too tight or too loose. It’s important for the lid to keep stuff inside safe but still easy to open. Finally, choose a smooth finish so it feels nice and looks good!


