Have you ever tried to clamp wood together while building something cool? It’s not easy without the right tools. That’s where wooden C clamps come in! These handy tools help hold pieces tightly while you work, making your projects easier.
Imagine crafting a perfect wooden table or a neat bookshelf. You can do it with a good clamp. But why buy expensive ones when you can make your own? Making wooden C clamps is simpler than you might think. Plus, it’s a fun DIY project!
Did you know that C clamps have been used for centuries? They come in many shapes and sizes, but making your own allows you to customize them to fit your needs. In this expert guide, you’ll learn how to create your own wooden C clamps. Let’s dive into this exciting world of DIY woodworking!
Table of Contents
How To Make Wooden C Clamps: Diy Expert Guide For Beginners

How to Make Wooden C Clamps: DIY Expert Guide
Creating your own wooden C clamps can be a fun and rewarding project. With a few simple tools and some quality wood, you can craft sturdy clamps for your woodworking needs. Begin by gathering materials like hardwood and screws. Cut your wood to size, and then assemble the pieces for a strong design. Did you know that making your own clamps can save you money? Plus, you can customize them to fit your exact needs!Step-by-Step Instructions
Detailed breakdown of measuring and cutting wood pieces. Yearbyyear guide to assembling the clamp parts.Start by measuring and cutting your wood precisely. Use a ruler for clear measurements. Aim for pieces around 1 inch thick for strength and durability. Don’t forget to wear safety glasses! Next, for assembly, lay out all the parts like a wooden puzzle. Connect the pieces step by step. You can follow this useful guide:
| Year | Action |
|---|---|
| 1 | Measure and cut wood to size |
| 2 | Sand edges for safety |
| 3 | Drill holes for screws |
| 4 | Assemble and secure |
Remember, patience is key! If you make a mistake, just grab some glue and a little creativity. They say, “If at first you don’t succeed, just add more wood!” Happy crafting!
Techniques for Enhancing Clamp Durability
Tips for selecting the right adhesive and finishes. Techniques for reinforcing joints and connections.To make your wooden C clamps last longer, choosing the right adhesive and finishes is key. Start with durable adhesives like epoxy, which stands up to stress. For finishing, use high-quality wood varnish to protect against moisture. Reinforcing joints strengthens connections. You can use techniques like doweling or adding corner braces. These methods keep your clamp steady and functional. Remember, a strong clamp is a happy clamp!
What adhesive is best for wooden C clamps?
Epoxy glue is great for wooden C clamps. It creates a strong bond that holds up well over time.
Tips for Choosing Adhesives and Finishes:
- Select epoxy for strong bonds.
- Use wood varnish for protection.
Techniques for Reinforcing Joints:
- Consider doweling for added strength.
- Use corner braces for extra support.
Common Mistakes to Avoid
List of frequent errors in measurements and assembly. Advice on preventing common structural issues.Many builders make some common mistakes when making wooden C clamps. These errors can lead to weak structures. Here are a few to watch out for:
- Incorrect measurements can cause parts to not fit together.
- Forgetting to mark your drill points can lead to accidents.
- Using the wrong type of wood can weaken your clamp.
To prevent these issues, always double-check your measurements. It’s also smart to use quality wood and tools. This will help your clamps hold up under pressure.
What are some common mistakes in making C clamps?
Common mistakes include wrong measurements, bad wood choices, and improper assembly. Always pay close attention to each step. This will help you make sturdy clamps that last.
Maintenance Tips for Wooden C Clamps
Guidelines for cleaning and upkeep. Best practices for storing and protecting clamps.Taking care of wooden C clamps is simple and can keep them in great shape for a long time. Start by wiping them down with a damp cloth after each use to remove dust and debris. For tougher grime, a mild soap solution works wonders. Always store clamps in a dry place, away from moisture to prevent warping. You can even hang them up or keep them in a toolbox, like a superhero hiding in a secret lair. Remember, a little maintenance can go a long way!
| Maintenance Tips | Best Practices for Storage |
|---|---|
| Wipe after use | Store in a dry place |
| Use mild soap for tough stains | Hang or place in toolbox |
Alternative Designs and Variations
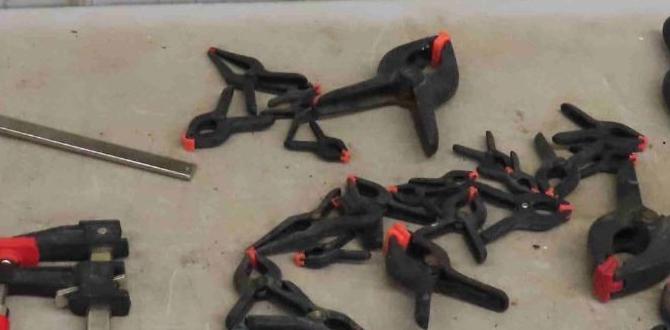
Exploration of different sizes and styles of C clamps. Insights into adapting designs for specific projects.Wooden C clamps come in many shapes and sizes. You can create small clamps for simple tasks or larger ones for heavy-duty projects. Try adding unique designs, like curved handles or decorative patterns, to make them special. Adjusting the clamp’s size can help fit your project perfectly. Consider the material too. Different types of wood change strength and style. This way, you can customize your clamp just the way you need it!
What are different sizes and styles of C clamps?
There are mini clamps for tiny projects and big clamps for larger tasks.
Popular styles include:
- Standard C clamp
- F-style clamp
- Corner clamp
Frequently Asked Questions
Answers to common queries about wooden C clamps. Clarifications on tools and methods used in the process.Many people have questions about making wooden C clamps. It’s important to understand tools and methods used. Here are some common queries:
What tools do I need?
You will need wood, a saw, wood glue, and a screwdriver.
Can I use different types of wood?
Yes! Hardwoods like oak and maple are great choices.
What techniques should I know?
- Measuring accurately
- Cutting straight lines
- Using glue properly
These tips help you create strong and useful wooden C clamps!
Conclusion
In conclusion, making wooden C clamps is fun and rewarding. You need simple materials and tools. Follow clear steps to create strong clamps for your projects. Remember to measure accurately and sand your clamps for a smooth finish. Now that you know how to make them, try building your own! Check out more DIY guides for exciting projects ahead!FAQs
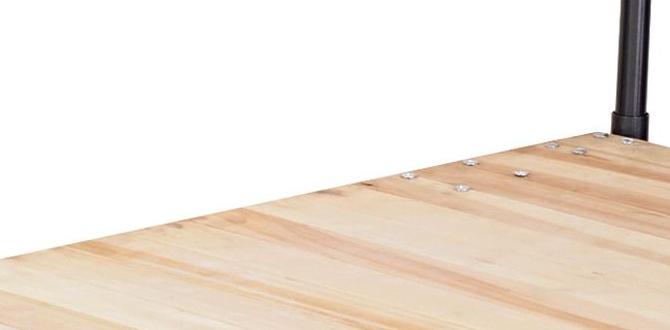
What Materials Do I Need To Make Wooden C Clamps At Home?To make wooden C clamps at home, you need a few materials. First, get some sturdy wood, like pine or oak. You will also need screws to hold everything together. Don’t forget to have glue and sandpaper for a smooth finish. Lastly, have a saw to cut the wood into the right shapes.
What Are The Essential Tools Required For Constructing Diy Wooden C Clamps?To make DIY wooden C clamps, you need a few simple tools. First, get a saw to cut the wood. Next, use sandpaper to smooth the edges. You will also need screws to hold the pieces together. A drill will help you make holes for the screws. Finally, a measuring tape is handy to measure the wood pieces.
Can You Provide A Step-By-Step Guide For Creating Wooden C Clamps From Scratch?Sure! Here’s how to make wooden C clamps step by step: 1. First, we need to gather our wood pieces. Cut two pieces of wood into the shape of a “C.” 2. Next, we take one piece and make a smaller block for the clamp’s screw. This will help it hold things tight. 3. Then, we drill a hole through the center of the clamp to fit a long screw that we’ll use to tighten it. 4. Now, we attach the handle to the screw. This helps you turn it. 5. Finally, sand the edges so they are smooth and easy to use. Now you’re done!
How Can I Ensure That My Wooden C Clamps Are Strong And Durable For Woodworking Projects?To keep your wooden C clamps strong and durable, use good quality wood. We should check for cracks or soft spots. Always apply a protective finish, like oil or wax, to keep them safe from moisture. Store them in a dry place to prevent damage. Regularly inspect them for any signs of wear and fix them right away.
What Are Some Common Mistakes To Avoid When Making Wooden C Clamps?When making wooden C clamps, it’s easy to make mistakes. First, don’t skip measuring your wood. If your pieces aren’t the right size, they won’t fit. Next, remember to sand the edges. Rough edges can hurt your hands and make the clamp hard to use. Finally, make sure the screw turns smoothly. If it gets stuck, your clamp won’t work well.