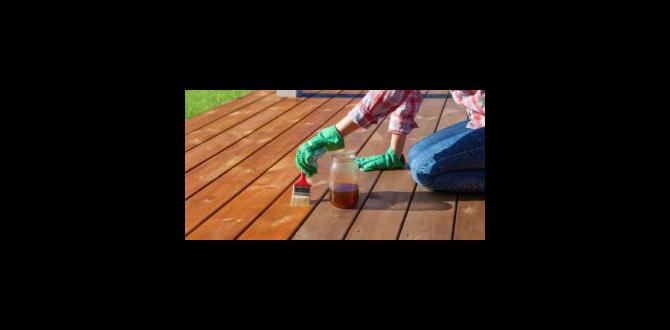
Have you ever wondered how to make wood slick? Imagine running your hand over a beautifully smooth surface, feeling the wood slide effortlessly beneath your fingers. Sounds nice, right? Many people enjoy woodworking, but they often struggle to achieve that perfect finish. Fortunately, there are simple ways to make wood slick.
In this article, we will explore five proven techniques. Each method will help you achieve that desired slickness without fuss. You don’t need to be a pro to get amazing results. Whether you’re building furniture or crafting art, knowing how to make wood slick can enhance your projects.
Did you know that the finish on wood can significantly change its feel and appearance? A slick finish not only looks great, but it also protects the wood. So, let’s dive into these five techniques and discover how to turn your rough wood into a smooth masterpiece!
Table of Contents
How To Make Wood Slick: 5 Proven Techniques Explained

How to Make Wood Slick: 5 Proven Techniques
Do you want to make your wooden surfaces smooth and shiny? Here are five effective techniques to achieve that. First, consider sanding to remove roughness. Next, try applying different oils or finishes to enhance the shine. Don’t forget to wax for extra protection. Another tip is using a wood conditioner before finishing. These simple methods can transform your wood projects into shiny masterpieces. With the right technique, your wood can look brand new!Understanding Wood Surfaces
Types of wood and their characteristics. Importance of surface smoothness for various applications.Every piece of wood is different. Some woods are strong, while others are soft. Common types include oak, which is tough, and pine, which is lighter. Smooth surfaces matter greatly. A smooth finish helps wood look nice and feel good to touch. It can also prevent splinters and help with painting or staining. Here are key points:
- Oak: Strong and durable.
- Pine: Soft and easy to work with.
- Birch: Sleek and fine grain.
- Maple: Tough but light.
- Cherry: Rich color and smooth.
Technique 1: Sanding
Recommended sandpaper grits for different stages. Tips for effective sanding techniques.Sanding is a key step in making wood smooth and sleek. Start with rough sandpaper like 60-grit to remove big bumps. Next, use 120-grit to smooth things out. Finally, finish with fine sandpaper like 220-grit for a polished look. Here are some tips for effective sanding:
- Always sand in the direction of the wood grain.
- Keep the sandpaper flat to avoid uneven spots.
- Change sandpaper when it becomes dull.
These steps will help you achieve that perfect finish! It takes time, but your hard work will pay off.
What sandpaper grit should I use?
Use 60-grit for heavy-duty sanding, 120-grit for smoothing, and 220-grit for finishing touches. This way, your wood will look great!
Technique 3: Using a Planer
How a planer works and its advantages. Safety precautions and setup for optimal results.A planer is a tool that makes wood smooth and flat. It works by shaving off thin layers of wood. This gives you a clean surface. Using a planer is fast and efficient. It helps make lumber ready for projects.
For safety, wear goggles and ear protection. Secure the wood tightly and keep hands away from the blade.
Here’s how to set up your planer:
- Check the blades to ensure they are sharp.
- Adjust the depth of cut for a smooth finish.
- Clear the area of obstacles.
These steps help achieve great results easily!
How does a planer work?
It shaves off layers of wood for a smooth finish and a uniform thickness, making it perfect for projects.
Technique 4: Buffing and Polishing
Equipment needed for buffing and polishing. Stepbystep process for achieving a slick surface.To make wood shine, you’ll need a few tools. Get a buffing wheel, polishing compound, and a soft cloth. Start by using the buffing wheel with the compound. Move it gently over the wood surface. This helps to remove tiny scratches and marks. Next, use the soft cloth to wipe away any dust. Finally, polish the surface for a brilliant shine. This technique can make your wood look brand new!
What equipment do you need for buffing and polishing?
You will need:
- Buffing wheel
- Polishing compound
- Soft cloth
Technique 5: Chemical Treatments
Types of chemical treatments available. Application guidelines and safety measures to consider.Chemical treatments can make wood very smooth. Many options exist, like varnish, lacquer, and wood oil. These products create a protective and shiny layer on the surface. Knowing how to apply them safely is essential. Follow these guidelines:
- Wear gloves and a mask.
- Work in a ventilated area.
- Read the instructions on the label.
- Test on a small area first.
By paying attention to safety, you can enjoy the results of your smooth wood.
What are common types of chemical treatments for wood?
Common types of chemical treatments include varnish, lacquer, and wood oil. Each has unique benefits that enhance the wood’s appearance and durability.
Maintenance of Slick Wood Surfaces
Best practices for cleaning and maintaining slick finishes. Longterm care tips to preserve wood quality.Keeping wood surfaces slick is simple with regular care. Clean them wisely to avoid scratches and dullness. Use a soft, damp cloth for dusting and a gentle soap solution for deeper cleans.
Long-term care is important too. Follow these tips:
- Protect from heat: Always place mats under hot items.
- Avoid water: Excess moisture can cause damage.
- Use coasters: Prevent water rings with coasters.
- Refinish periodically: Reapply finish as needed for shine.
With these steps, you’ll keep your wood looking great for years!
How can I clean slick wood surfaces?
Use a soft cloth and gentle cleaner for best results. Always wipe in the direction of the wood grain to avoid scratches.
Conclusion
In conclusion, making wood slick can be easy with five proven techniques. You can use sanding, oil, wax, polish, or specialized products. Each method gives wood a smooth finish. Try these techniques on your projects for a polished look. If you’re curious, look up more tips online to perfect your skills. Enjoy working with wood and have fun!FAQs
What Types Of Finishes Can Be Used To Make Wood Slick And Smooth?You can use different finishes to make wood slick and smooth. One option is varnish, which creates a hard, shiny surface. Another is polyurethane, a strong finish that protects the wood well. You can also use wood oil, which soaks into the wood and brings out its natural shine. Lastly, you can try beeswax, which gives a nice glow and makes the wood feel soft.
How Does Sanding Technique Affect The Slickness Of The Wood Surface?Sanding technique really changes how smooth or slick wood feels. If you use finer sandpaper, the wood gets smoother. This means it feels nicer to touch. Rubbing in the same direction also helps. So, the way you sand makes a big difference!
Are There Specific Oils Or Waxes Recommended For Achieving A Slick Finish On Wood?Yes, there are specific oils and waxes that can help make wood look shiny and smooth. You can use mineral oil or tung oil for a nice finish. Beeswax is also great because it adds shine and protects the wood. Just remember to apply a thin layer and let it dry.
What Safety Precautions Should Be Taken When Using Chemicals To Treat Wood For A Slick Surface?When using chemicals to treat wood, you should wear gloves and goggles to protect your skin and eyes. Make sure to work in a well-ventilated area to avoid breathing in fumes. Always read the instructions on the chemical labels for safe use. Keep any chemicals out of reach of pets and children. Finally, wash your hands after handling the chemicals.
How Can Temperature And Humidity Influence The Application Of Finishes To Achieve A Slick Result On Wood?Temperature and humidity can change how finishes stick to wood. When it’s too cold, finishes can take longer to dry. If the air is very humid, the finish may not dry well and can feel sticky. You want warm and dry weather for the best results. This helps the finish go on smoothly and look shiny after it dries.


