Have you ever looked at a piece of wood and wondered how to make it flat without a planer? You’re not alone! Many DIY enthusiasts face this challenge. Flat wood is essential for building sturdy furniture or completing craft projects. But fear not! There are simpler ways to achieve a smooth surface.
Imagine you have an old piece of wood in your garage. It may not be perfect, but it holds potential. With some creative thinking and the right techniques, you can transform it into something amazing. Did you know that you can use basic tools you already have? It’s true! You don’t need expensive equipment to get the job done.
In this article, we will explore different methods to flatten wood without a planer. You’ll learn practical tips and tricks that will boost your DIY mastery. Ready to turn that rough piece of wood into a gem? Let’s dive in!
Table of Contents
How To Make Wood Flat Without A Planer: Diy Mastery Tips

How to Make Wood Flat Without a Planer: DIY Mastery
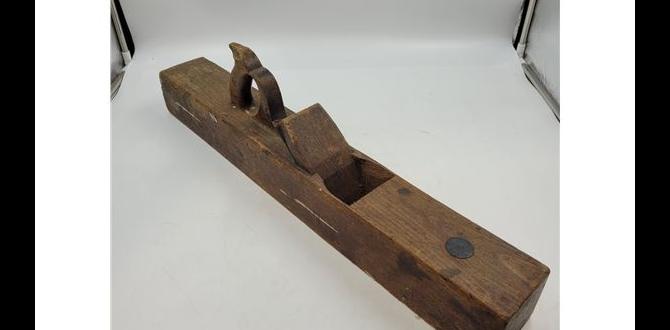
Flattening wood without a planer may sound tricky, but it can be easy! You can use simple tools like a hand plane, jack plane, or even a level and a sanding block. Start by finding high spots on the wood and work on those. Did you know that a straight edge can help you spot these areas? With patience and the right techniques, anyone can make wood flat. It’s a fun challenge that can boost your DIY skills!
Understanding Wood Movement
Explanation of wood expansion and contraction. Importance of moisture content in wood thickness.
Wood is a living material that expands and shrinks. This happens because of changes in moisture. When wood gets wet, it swells, and when it dries, it shrinks. Keeping wood at the right moisture level is vital for its thickness and shape.
- High moisture levels: Wood will expand.
- Low moisture levels: Wood will contract.
To avoid problems, always check the moisture content. This helps keep your wood flat and perfect for your projects.
What is wood movement?
Wood movement refers to how wood changes size due to moisture. Wood can expand or contract based on its environment. It is essential to understand this to work with wood effectively.
Essential Tools and Materials
List of tools needed for flattening wood. Types of wood recommended for beginners.
To flatten wood, you need some simple tools. First, grab a saw to cut the wood to size. Next, use a hand plane or sanding block to smooth the surface. A square ensures your corners are perfect. You might also want a level to check your work. For beginners, softwoods like pine or cedar are easy to handle. They are less dense and great for practice.
What tools do I need to flatten wood?
You need a saw, hand plane, sanding block, square, and level.
Types of wood recommended for beginners:
- Pine
- Cedar
- Fir
Using Hand Tools for Flattening Wood
Techniques for using hand planes effectively. Stepbystep guide to using a chisel for flattening.
Hand tools can flatten wood without fancy machines. Start with a hand plane. Hold it firmly and push it along the wood. Use even pressure to make smooth cuts. Move from one end to the other. Check your work often.
For chiseling, follow these steps:
- Choose a sharp chisel.
- Position it at a small angle on the wood.
- Tap the handle gently with a mallet.
- Work slowly for better control.
Technique matters! Practice makes perfect.
How effective are hand tools for flattening wood?
Hand tools are very effective at flattening wood, especially for beginners. They allow for greater control and less chance of mistakes compared to power tools.
Utilizing the Sacrificial Board Technique
Explanation of the sacrificial board method. Benefits and limitations of this technique.
The sacrificial board method is a clever way to flatten wood without a planer. You attach a piece of wood, called the sacrificial board, to your workpiece. As you shape the wood, the sacrificial board protects it from damage. This technique has many benefits, but also a few limits.
- Benefits: Protects the workpiece, creates a flat surface, and is easy to use.
- Limitations: The sacrificial board must be thicker than the wood and can waste material.
Overall, this method can help anyone trying to master DIY woodworking!
What are the advantages of using a sacrificial board?
Benefits of using a sacrificial board include smooth, flat surfaces and added protection for your project. This method is popular among DIY enthusiasts for its effectiveness.
Techniques for Achieving a Flat Surface
The “Winding Stick” method explained. Benefits of the straightedge and shim technique.
One effective way to check if wood is flat is by using winding sticks. Place two sticks on opposite ends of the wood. Look across the tops. If one stick is higher, the wood is not flat. This method is simple yet helpful. Another way is the straightedge and shim technique. Place a straightedge on the wood and see if it touches everywhere. If it doesn’t, use shims to level the surface. This helps prepare the wood nicely.
How can you make wood flat without a planer?
You can use winding sticks or the straightedge and shim method to flatten wood. These methods are easy and don’t require fancy tools. Plus, they can help you save money on equipment!
Finishing Touches: Sanding and Sealing
Importance of sanding after flattening. Recommendations for sealants to protect the wood.
Sanding is an important step after flattening wood. It smooths the surface and helps prepare it for sealing. Without sanding, the wood can feel rough and uneven. Plus, it makes the final product look better. Sealing protects the wood from damage and wear. Here are some good options for sealants:
- Polyurethane – This is durable and water-resistant.
- Linseed oil – This gives a natural finish and nourishes the wood.
- Shellac – Fast drying and great for a glossy finish.
Always remember to let the sealant dry fully before using your wood project. This keeps the wood looking beautiful for years.
Why is sanding necessary?
Sanding gives the wood a smooth finish and helps the sealant stick better.
Common Mistakes to Avoid
Frequent errors in DIY wood flattening. Tips for ensuring the best results without a planer.
When flattening wood, mistakes can happen. Watch out for these common errors:
- No proper measurement: Always measure your wood carefully.
- Ignoring grain direction: Plan your cuts based on the grain.
- Using dull tools: Sharp tools work much better.
- Rushing the process: Take your time for the best results.
Following these tips will help you get smooth wood without a planer. Remember, practice makes perfect!
What are the frequent errors in DIY wood flattening?
Many people make mistakes while trying to flatten wood. The most frequent errors include…
not measuring correctly, ignoring the grain direction, and using dull tools.
Conclusion
In conclusion, making wood flat without a planer is possible using methods like hand tools or sanding. You can use techniques like a straight edge or a hand plane. Remember to take your time and practice. DIY projects can be fun and rewarding! For more tips, check out other articles on woodwork. Let’s keep creating together!
FAQs
What Alternative Tools Can I Use To Flatten Wood Without A Planer?
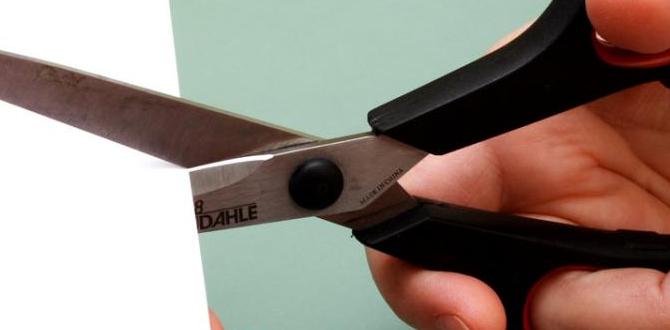
You can use a hand saw to remove any bumps. A scraper is also helpful for smoothing out the wood. A sander, like a belt sander, can make the surface nice and flat. Finally, you can use a straight edge and a chisel to help create a flat surface.
How Do I Effectively Use Hand Tools Like Chisels And Hand Planes To Achieve A Flat Surface On Wood?
To use chisels and hand planes to get a flat surface, start with a rough piece of wood. Use your hand plane to shave off bumps and uneven spots. Hold the plane firm and push it smoothly over the wood. For details, use the chisel to trim small areas. Keep checking your work to ensure it’s flat as you go!
What Techniques Can I Employ To Check The Flatness Of My Wood Without Relying On A Planer?
To check if your wood is flat, you can use a straight edge. Place it on the wood and look for gaps. If you see light under the straight edge, your wood isn’t flat. You can also take a ruler and measure from the wood surface to the ruler. Make sure the measurements stay the same all along. This shows if your wood is even.
Can I Use A Belt Sander Or Orbital Sander For Flattening Wood, And If So, What Is The Best Method?
Yes, you can use both a belt sander and an orbital sander to flatten wood. First, start with the belt sander for big, tough spots. Move it back and forth across the wood evenly. Then, switch to the orbital sander for smooth finishing. Always wear safety glasses and a mask for protection!
What Precautions Should I Take To Ensure Safety And Prevent Damage To The Wood While Flattening It By Hand?
To stay safe while flattening wood by hand, always wear safety goggles to protect your eyes. Keep your hands away from sharp tools and use them carefully. Work on a flat surface to avoid mistakes. Make sure the wood is secure so it doesn’t move. Lastly, take your time and check your work often to prevent damage.