Have you ever wanted to bring new life to your old furniture? If so, you’re in the right place! Learning how to make wipe on poly can be a fun and easy project for anyone, even beginners. Picture this: you find a faded table or a scratched chair hiding in your garage. With just a few supplies, you can transform it into a beautiful piece of art.
Wipe on poly is a simple finish that protects wood while adding a lovely shine. It’s not just for professionals; it’s for anyone who enjoys DIY projects. You might be surprised to know that even kids can help out! Using wipe on poly can be a great way to bond with family while making something special.
This DIY guide will walk you through each step. You will learn everything about materials, application, and tips to get the best results. By the end, you’ll feel ready to tackle any woodworking challenge. So, why wait? Let’s dive into the world of wipe on poly and start creating something amazing!
Table of Contents
How To Make Wipe On Poly: A Diy Guide For Beginners

How to Make Wipe on Poly: A DIY Guide for Beginners
Discover how simple it is to make wipe on poly at home. This easy DIY project allows you to create a durable finish for your wood projects. You’ll learn about the right materials and the mixing ratio to achieve the best results. Did you know that wipe on poly can enhance the natural beauty of wood? With just a few steps, you can protect your furniture while adding a touch of elegance. Dive into this guide and unleash your creative side!Understanding Wipe on Poly
Definition and purpose of wipe on poly. Advantages over traditional finishes.Wipe on poly is a clear finish that protects wood surfaces while making them shine. It’s like a superhero cape for your furniture, shielding it from scratches and spills! Compared to traditional finishes, it’s easier to apply and dries faster. You won’t need to be a professional to get a nice look. Plus, you can wipe it on with a cloth, which beats using a brush any day—no messy hair involved!
| Advantages of Wipe on Poly |
|---|
| Easy application |
| Quick drying time |
| Less mess |
| Great protection |
Materials Needed for Wipe on Poly
List of essential supplies. Recommended brands and types of wipe on poly.To start your wipe on poly project, gathering the right materials is key. Here’s what you will need:
- Wipe on Polyurethane: Choose a water-based or oil-based type from brands like Minwax or Varathane.
- Soft cloths: Use lint-free cloths for smooth application.
- Sandpaper: Get 220-grit sandpaper to prepare your surface.
- Brush: A foam brush can help spread the finish evenly.
These materials ensure a good finish on your project. Remember, choosing the right products makes all the difference!
What is the best brand of wipe on poly?
The best brands are Minwax, Varathane, and Rust-Oleum. These are trusted and work well for beginners.
Preparing Your Workspace
Importance of a clean and organized area. Safety precautions to take before starting.Before you dive into your DIY adventure, tidy up your workspace. A clean area helps you find tools faster and avoids accidents. Picture searching for a paintbrush while balancing on one leg—it’s not fun! Safety is key, too. Wear gloves, goggles, and a mask to safeguard yourself from dust and chemicals. A clean and organized spot is like a superhero cape; it makes everything easier!
| Safety Precautions | Importance |
|---|---|
| Wear gloves | Protects skin from chemicals |
| Use goggles | Shields eyes from splashes |
| Wear a mask | Prevents inhaling dust and fumes |
Remember, starting with a safe and neat space means you can focus on making that wipe-on poly without any drama! Who knew DIY could be so stylish and safe?
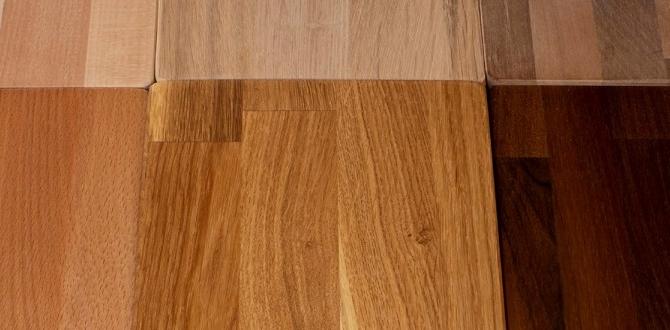
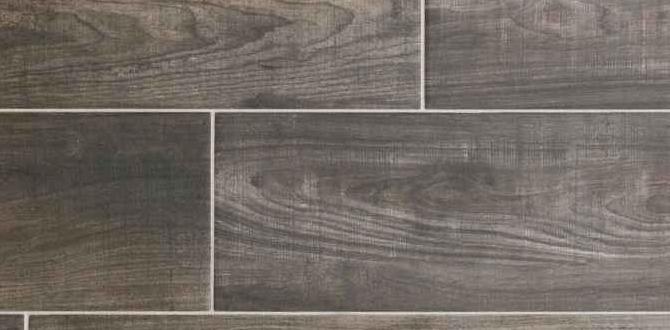
Choosing the Right Surface
Types of surfaces suitable for wipe on poly. Preparing the surface for application.Picking the right surface is key for wipe-on poly. Wood is a superstar surface that accepts stain and finish well. But don’t forget about metals and even painted surfaces; they can work too! Just make sure they are clean and dry. Preparation is half the battle! Here’s a simple table to help you remember:
| Surface Type | Preparation Tips |
|---|---|
| Wood | Sand smooth and clean off dust. |
| Metal | Clean with vinegar; no rust allowed! |
| Painted Surfaces | Make sure paint is sticking well; wipe dust away. |
Now you’re ready to rock! Remember, good surfaces lead to great finishes. Who knew DIY could make you feel like a superhero? Get your cape on and let’s dive in!
Mixing Wipe on Poly
Stepbystep instructions for mixing. Tips for achieving the right consistency.To mix wipe-on poly, start by shaking the can well. Then, pour a small amount into a clean container. You want a smooth mix, so use a stir stick. Mix gently and don’t create bubbles; we’re not making a cake! Aim for a consistency like thick, syrupy honey. It should flow easily but not drip everywhere. If it’s too thick, add a touch of mineral spirits to thin it down. Remember, a good mix makes for an even finish!
| Step | Action |
|---|---|
| 1 | Shake the can |
| 2 | Pour into a container |
| 3 | Stir gently |
| 4 | Check the consistency |
| 5 | Add mineral spirits if needed |
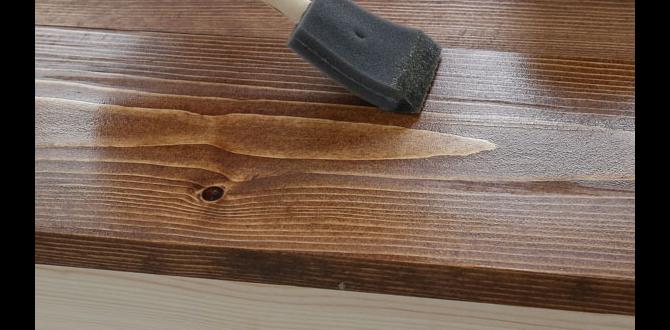
Application Techniques
Best practices for applying wipe on poly. Tools used for application and how to use them.Applying wipe-on poly is all about technique. Start with a clean surface. This helps the poly stick better and look nice. Use a soft cloth or a foam brush for smooth application. Avoid drips and runs! Trust your hands; gentle strokes work best. Always follow the product instructions for drying times.
- Use thin layers.
- Sand lightly between coats.
- Keep it dust-free.
Drying and Curing Times
Understanding the drying process. Factors that affect curing time.Drying is a bit like waiting for pizza to cool—tough to endure, but essential! The first coat usually dries in about 2 to 4 hours, depending on the temperature and humidity. Warmer, drier air can speed things up! Now, curing takes a bit longer. It’s like letting a cake sit so it tastes better. Curing can take anywhere from a few days to a few weeks, again influenced by weather and how thickly you applied the poly. Remember, patience is key; don’t rush it!
| Condition | Drying Time | Curing Time |
|---|---|---|
| Warm & Dry | 2 – 4 hours | 3 – 7 days |
| Cool & Humid | 4 – 8 hours | 2 – 4 weeks |
Common Mistakes to Avoid
Typical errors beginner DIYers make. How to troubleshoot issues during application.Many beginners make mistakes with wipe-on poly. Here are some common errors to avoid:
- Not preparing the surface: A clean surface is key for a smooth finish.
- Using too much product: Apply thin layers for better results.
- Neglecting to stir: Mixing helps distribute the finish evenly.
If you face issues, like streaks or bubbles, try these fixes:
- Wipe away excess product to reduce streaking.
- Sand lightly between coats for a smooth surface.
These tips can help make your DIY project a success!
What are common mistakes in using wipe-on poly?
Beginner DIYers often overlook prep work. Surface preparation is vital. A clean and smooth base helps the poly stick better. Many also apply too much product, leading to drips or uneven finishes.
Maintenance and Care for Finished Surfaces
Recommended cleaning methods. Tips for prolonging the life of the finish.Keeping your finished surfaces looking great is easy! For cleaning, a damp cloth works wonders—like magic but without the wand. Avoid harsh cleaners; they can be trickier than cats at bath time. To extend your finish’s life, place coasters under cups. Nobody likes water rings, right? Also, try to move furniture carefully; dragging it can ruin your finish faster than a squirrel can run! Here’s a quick table with cleaning tips:
| Cleaning Method | Tips |
|---|---|
| Damp Cloth | Use lightly; no harsh chemicals! |
| Coasters | Prevent water rings and scratches! |
| Soft Cloth | Dust often to keep surfaces shiny. |
With these simple tricks, your finishes will stay as stunning as a starry night!
Conclusion
In conclusion, making wipe-on poly is simple and fun! You need just a few supplies and easy steps. Remember to mix, apply, and sand for the best results. Follow our guide, and you’ll create a smooth finish on your projects. Now, grab your materials and give it a try. Happy crafting, and don’t forget to explore more DIY tips!FAQs
What Materials Do I Need To Make Homemade Wipe-On Polyurethane Finish?To make homemade wipe-on polyurethane finish, you need just a few materials. Get some regular polyurethane and a clear mineral spirit or paint thinner. You will also need a container to mix them in and a stir stick. Finally, have some clean rags ready for applying the finish.
How Do I Properly Mix The Ingredients For Wipe-On Poly To Achieve The Desired Consistency?To mix wipe-on poly, start with a clean container. Pour the poly into it, then add a bit of mineral spirits. Mix well with a stir stick until it looks smooth. You want it to be thin enough to spread easily but thick enough to cover nicely. Test a little on a paper towel to see if you like the consistency.
What Surfaces Can I Effectively Use Wipe-On Poly On, And How Should They Be Prepared?You can use wipe-on polyurethane (poly) on wood surfaces like furniture, cabinets, or floors. First, make sure the surface is clean and smooth. You should sand it lightly to get rid of rough spots. Then, wipe off any dust before applying the poly. This helps the finish stick better and look nice!
How Do I Apply Wipe-On Poly To Ensure An Even Finish And Avoid Runs Or Streaks?To apply wipe-on poly, first, shake or stir the can well. Use a clean cloth or paper towel to wipe it on. Start at one corner and move steadily without stopping. Don’t apply too much at once; a little goes a long way. If you notice drips or streaks, use your cloth to smooth them out quickly.
What Tips Do You Have For Drying And Curing Wipe-On Poly For The Best Results?To dry and cure wipe-on poly, start in a warm, dry place. Make sure the room is well-ventilated so air can flow. Wait at least two hours before adding more coats. After your last coat, let it cure for a few days before using the item. Patience gives the best results!