Have you ever looked at a small wooden cone and wondered how it was made? These little shapes can add charm to many crafts. They can be used for decorations, toys, or even party favors. Making small wooden cones is easier than you might think! With just a few tools and some wood, you can create your own unique cones.
Imagine surprising your friends with your new DIY skills. Picture them admiring your handmade creations. You might be surprised to know that crafting these cones can be done in just a few simple steps. It’s a fun way to spend an afternoon, and you’ll feel proud of what you create.
In this DIY guide, we’ll explore how to make small wooden cones. Whether you are a beginner or have some experience, you can follow along. We’ll cover the materials you need and the steps to bring your ideas to life. So, let’s get started on this exciting journey of woodworking!
Table of Contents
How To Make Small Wooden Cones: A Diy Guide For Beginners

How to Make Small Wooden Cones: A DIY Guide
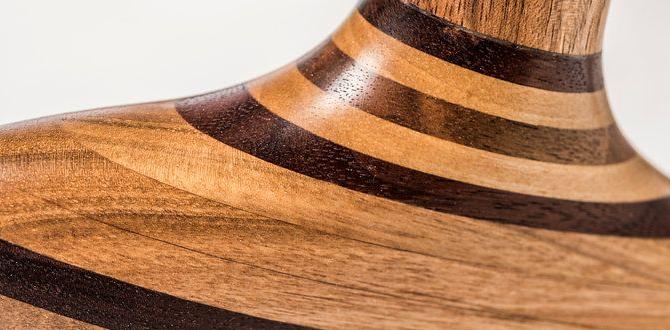
Crafting small wooden cones can be a fun project for everyone! Start with a piece of wood, like a dowel, and use simple tools to shape it. You can create unique decorations for your home or festive events. Did you know that these cute cones can also be used as Christmas tree ornaments? Step by step, you will learn how to easily carve, sand, and finish your wooden cones. Get ready to unleash your creativity!
Materials Needed
List of essential tools and supplies for crafting wooden cones. Safety gear and precautions for woodworking.
To make your small wooden cones, you’ll need some tools and supplies. Here’s a quick checklist to help you gather what you need:
| Tools and Supplies | Usage |
|---|---|
| Wood Blocks | Your main cone material! |
| Saw | For cutting the wood to size. |
| Sandpaper | Smooth those edges like a pro! |
| Paint or Varnish | Add some color or shine. |
| Glue | For any assembly needed. |
| Safety Goggles | Protect those precious eyes! |
| Dust Mask | Keep the sawdust away from your lungs! |
Always wear your safety gear and work in a space with good airflow. Woodworking is a lot of fun, but we want to keep all our fingers and eyes safe, right? So, gear up and let’s get crafting!”
Choosing the Right Wood
Types of wood suitable for making cones. Pros and cons of different wood types.
Picking the right wood for your small cones is like choosing the best ice cream flavor—each has its perks! Softwoods, like pine, are easy to shape but can dent easily. Hardwoods, like oak, are tougher but harder to work with. Each type of wood has its own personality! Check out this handy table to understand their pros and cons:
| Type of Wood | Pros | Cons |
|---|---|---|
| Pine | Lightweight, easy to carve | Dents and scratches easily |
| Oak | Strong and durable | Harder to carve, heavier |
| Cedar | Resistant to moisture, smells great! | More expensive |
Choosing the wrong wood could leave your cone looking like it had a rough day. So pick wisely and get ready for some fun!
Preparing Your Workspace
Setting up a safe and organized work area. Importance of proper lighting and ventilation.
Creating a fun workspace is key to making small wooden cones! First, choose a clean, flat surface where you can spread your materials. Keep tools nearby but out of the way. Good lighting helps you see details—no one wants to cut off a finger because of a shadow! Also, open a window for fresh air to fly away any dust bunnies. Remember, safety first! After all, no one wants a “cone of shame” as a souvenir.
| Workspace Tips | Why It Matters |
|---|---|
| Clean Surface | Prevents mess and accidents |
| Good Lighting | Helps you see what you’re doing |
| Open Window | Keeps air fresh and clears dust |
Step-by-Step Instructions
Detailed process of cutting the wood into cone shapes. Techniques for sanding and smoothing the cones.
Start by cutting the wood into cone shapes. Use a saw for clean cuts. First, mark a circle on the wood. Then cut along the line, creating a round base. For the cone, cut from the edge to the center in a spiral shape. After cutting, it’s time to sanding and smoothing. Use sandpaper or a sanding block. Smooth all surfaces gently. Focus on the edges for a nice finish. Your cones are now ready for decoration!
How can I smooth the wooden cones after cutting?
You can smooth the wooden cones by using fine sandpaper. This helps to remove rough edges and makes them feel nice to touch.
- Start with coarse sandpaper for big bumps.
- Finish with fine sandpaper for a smooth surface.
- Always sand in circles for a better finish.
Decorating Your Wooden Cones
Ideas for painting and finishing techniques. Adding embellishments and personal touches.
Get ready to unleash your creativity on those wooden cones! First, grab some paint and let your imagination run wild. Bright colors can make the cones pop like popcorn! Once painted, consider finishing with a glossy coat or a soft matte touch. That makes them feel fancy! You can also add glitter, ribbons, or stickers for flair. Why not even glue on tiny pine cones? They could be the “cone-nection” to nature! Check out this table for fun decorating ideas:
| Technique | Description |
|---|---|
| Painting | Use fun colors to brighten up your cone. |
| Glossy Finish | Make it shine and look polished. |
| Embellishments | Add glitter, ribbons, or tiny objects. |
Now, go ahead and make your wooden cones unique. Just like you, they deserve to stand out!
Common Mistakes to Avoid
Pitfalls beginners often encounter when making wooden cones. Tips for troubleshooting and correcting errors.
Many beginners stumble while making wooden cones. One common mistake is using the wrong type of wood, which can lead to splinters and tears. Another pitfall is cutting without measuring accurately. Measure twice, cut once, right? Also, failing to sand the edges can leave your cones feeling rough. If you mess up, don’t fret! Just try another piece of wood. Remember, every expert was once a beginner!
| Common Mistake | Solution |
|---|---|
| Using the wrong wood | Choose softwood for easy shaping. |
| Bad measurements | Double-check your sizes before cutting. |
| Rough edges | Always sand your cones for a smooth finish. |
Creative Uses for Wooden Cones
Suggestions for incorporating wooden cones in home decor. Ideas for festive decorations and crafts.
Wooden cones can add charm to your home! Use them as cute table centerpieces or fill them with fairy lights for a magical glow. They make great holiday decorations too! Stack them up as a unique Christmas tree or use them in a festive wreath. You can even paint them to match your favorite season. Get crafty and let your creativity shine! Your wooden cones will be the talk of the town, or at least, the talk of the living room!
| Creative Uses for Wooden Cones | Description |
|---|---|
| Table Centerpieces | Place colorful wooden cones on dining tables to enhance your decor. |
| Festive Trees | Stack them for a fun and unique holiday tree. |
| Painted Decor | Brighten your space by painting them for different seasons. |
Additional Resources
Recommended books and websites for further learning. Online communities and forums for DIY enthusiasts.
If you’re eager to dive deeper into the world of DIY woodworking, there are plenty of helpful resources. Check out books like “The Complete Manual of Woodworking” for some exciting tips. Websites such as Instructables also offer inspiring projects. Don’t forget to join online communities like Reddit’s DIY group, where you can share your work and get advice. Remember, even the best woodworkers started with a single plank!
| Resource Type | Recommended Resources |
|---|---|
| Books | “The Complete Manual of Woodworking” |
| Websites | Instructables |
| Online Communities | Reddit DIY |
Conclusion
In conclusion, making small wooden cones is fun and easy. Start by gathering your materials and tools. Then, follow each step carefully to shape and finish your cone. Experiment with different sizes and paints to personalize your creation. So, grab your supplies and start crafting today! For more tips, check out our other DIY guides. Happy crafting!
FAQs
What Materials And Tools Are Needed To Create Small Wooden Cones?
To make small wooden cones, you need some wood, like pine or cedar. You’ll also need a saw to cut the wood into shape. Use sandpaper to smooth the edges. A drill helps make holes if you want to add something. Finally, paint or varnish can make your cones look nice!
Are There Specific Types Of Wood That Work Best For Making Wooden Cones?
Yes, some woods are better for making wooden cones. Softwoods like pine and cedar are great. They are easy to carve and shape. Hardwoods like maple or oak can also work well. Choose a wood that you like and feels nice to touch!
What Are The Step-By-Step Instructions For Shaping And Sanding Small Wooden Cones?
To shape small wooden cones, start with a block of wood. You can use a saw to cut a rough cone shape. Next, hold the wood and use a knife to trim the edges carefully. Sand the cone with sandpaper to make it smooth. Make sure to sand all sides evenly. Keep sanding until it feels nice to touch!
How Can I Finish And Decorate My Wooden Cones For A Polished Look?
To finish your wooden cones, start by sanding them with fine sandpaper. This makes the surface smooth. Next, you can paint or stain them. Use bright colors or beautiful patterns for decoration. Finally, add a clear sealant to protect your cones and give them a shiny look!
What Are Some Creative Uses For Small Wooden Cones In Home Decor Or Crafts?
You can use small wooden cones as cute Christmas trees by painting them green and adding glitter. They also make great candle holders—just place a small candle on top. You can create fun little animals by gluing eyes and felt to the cones. We can even use them as unique markers for garden plants by writing names on them. They are perfect for adding a warm touch to your room!