Do you love playing cornhole? It’s a game that brings friends and family together. But have you ever thought about making your own cornhole board? With just a little time and effort, you can create a great set for your backyard. One important part is the legs. You need strong and sturdy legs to support your boards.
Imagine impressing your friends with your very own handmade cornhole boards. Sounds fun, right? In this easy DIY guide, we will show you how to make cornhole board legs. It’s simpler than you might think. Even if you’re new to woodworking, you can do it!
Let’s dive in and start building those legs. You’ll be on your way to playing cornhole in no time!
Table of Contents
How To Make Corn Hole Board Legs: Easy Diy Guide

How to Make Corn Hole Board Legs: Easy DIY Guide
Making corn hole board legs is a fun and simple project. First, gather the right materials — you will need wood, screws, and tools. Did you know that using a sturdy design helps your game last longer? Next, measure and cut the wood pieces accurately. Finally, attach the legs with screws for stability. This DIY guide shows that anyone can create a charming corn hole game at home. Ready to impress your friends with your skills?Understanding Corn Hole Board Dimensions
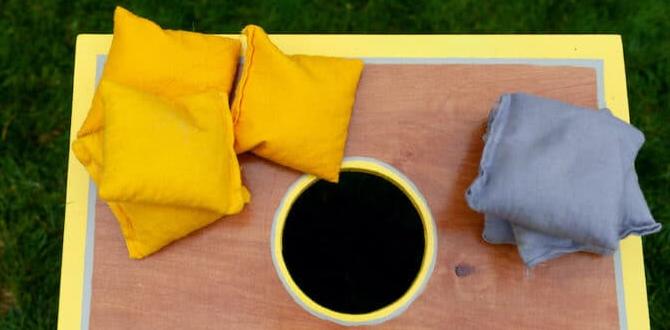
Standard sizes for corn hole boards. Importance of proper leg dimensions.Cornhole board dimensions can affect the fun of the game. The standard size for a cornhole board is 24 inches wide and 48 inches long. The hole should be 6 inches in diameter and be placed 9 inches from the top. Proper leg dimensions are also important. The legs should be 12 inches tall to give the board a slight angle, making it easier to toss bags. Accurate measurements help ensure smooth gameplay and avoid frustration.
What Are the Standard Sizes for Cornhole Boards?
Standard size: 24 inches wide and 48 inches long. Hole size: 6 inches in diameter and 9 inches from the top.
Key Points on Leg Dimensions:
- Leg height: 12 inches tall.
- Leg angle: Slight incline for better play.
Materials Needed for Building Legs
List of tools and materials required. Tips on selecting sustainable materials.To build sturdy legs for your corn hole board, gather some key materials. You’ll need wood, preferably plywood, for solid support. Don’t forget screws and wood glue to hold everything together. A measuring tape and saw are essential tools to shape your legs. For finishing touches, grab sandpaper to smooth rough edges. Choosing sustainable materials, like reclaimed wood, can make you a green warrior! Plus, it’s like giving Mother Nature a high five!
| Materials | Tools |
|---|---|
| Plywood | Measuring Tape |
| Screws | Saw |
| Wood Glue | Sandpaper |
With these supplies, you’re all set to build legs that could stand up to a playful game or even a clumsy dance party!
Step-by-Step Instructions for Cutting Legs
Guidance on measuring and marking cuts. Safety precautions when using power tools.Start by measuring the leg length. Using a tape measure, decide how tall you want your corn hole board to be. Mark the cuts with a pencil. Make sure your marks are straight—no one wants wobbly legs!
Safety first! Always wear goggles when using power tools. It’s better to look like a dork than to risk a trip to the ER. Trust us, you won’t win any DIY awards with a bandaged head.
| Tool | Purpose | Safety Tip |
|---|---|---|
| Power Saw | Cutting legs | Wear goggles! |
| Tape Measure | Measuring lengths | Check twice! |
Assembly of Corn Hole Board Legs
Detailed steps for attaching legs to the board. Recommended types of fasteners and adhesive.To attach the legs to your cornhole board, follow these steps:
- First, position each leg at the back of the board.
- Use a drill to make pilot holes for screws.
- Next, secure the legs with screws that are about 2.5 inches long.
- For extra strength, add wood glue before inserting the screws.
For best results, use deck screws or lag screws, as they provide strong support. Make sure the screws are tight, and you’re ready to play!
What are the best fasteners for cornhole board legs?
The best fasteners are deck screws or lag screws since they give strong support for your cornhole board legs.
Ensuring Stability and Durability
Techniques for reinforcing leg structures. Maintenance tips for longevity of the boards.To make your corn hole board legs strong, use some simple techniques. Adding braces can keep legs steady. You can also use glue and screws for extra strength. For long-lasting boards, follow these tips:
- Check for cracks or loose parts regularly.
- Store boards in a dry place to prevent warp.
- Clean the surface to keep it smooth.
With a bit of care, your boards can last for years of fun!
How can I reinforce corn hole board legs?
You can reinforce legs by using braces, screws, and strong glue. These methods improve stability and make your boards last longer!
Customizing Your Corn Hole Board Legs
Ideas for painting and staining options. Adding unique designs or logos for personalization.Personalizing your corn hole board legs can make them unique and fun. You can explore different painting or staining options, like bright colors or earthy tones. This helps your boards stand out! Consider adding unique designs or logos to express your personality. Use stickers, stencils, or your own art. Let your creativity flow!
What are some ways to paint or stain corn hole board legs?
You can use bright paint, deep stains, or even chalkboard paint to personalize the legs. This allows you to change designs easily. Use brushes or spray paint for different effects!
Here are some ideas for designs:
- Stripes or polka dots
- Your favorite sports team logo
- Initials or family names
- Fun patterns like flames or stars
Final Touches and Game Setup
How to position the legs for optimal gameplay. Tips for setting up your corn hole game area.Getting your game area ready can be a blast! First, position those legs properly. Make sure they are strong and sturdy for happy tossing. A good rule is to have the boards set at a 27-degree angle for the perfect toss. Trust me, an angle too steep might send your bags into space! Next, think about your setup area. Make sure it’s flat and clear. Grass is nice, but avoid the bumpy fields—no one wants to trip while showing off skills.
| Setup Tips | What to Avoid |
|---|---|
| Flat surface | Bumpy ground |
| Good distance between boards | Too close together |
| Check for obstacles | Playing near bushes or trees |
Now you’re ready to have fun! Just gather your friends and let the games begin. And remember, the more snacks, the better the gameplay!
Conclusion
In conclusion, making corn hole board legs is fun and easy! You need basic materials and simple tools. Measure carefully and cut straight to ensure stability. Don’t forget to sand and paint for a smooth finish. Now, gather your supplies and start building! For even more helpful tips, check out other DIY guides. Enjoy your game!FAQs
What Materials Do I Need To Build Sturdy Legs For A Corn Hole Board?To build sturdy legs for a corn hole board, you need some strong wood, like 2×4 boards. You will also need screws to hold the legs together. A drill helps make holes for the screws. Finally, sandpaper can smooth the wood. With these materials, you’ll make solid legs!
How Do I Determine The Ideal Height For Corn Hole Board Legs?To find the right height for your cornhole board legs, you want the top of the board to be 24 inches off the ground. You can measure from the ground to where the board sits. Use a ruler or tape measure for accuracy. Make sure both boards are the same height to keep the game fair and fun!
What Tools Are Essential For Constructing Corn Hole Board Legs?To build the legs for a cornhole board, you need a few important tools. First, grab a measuring tape to measure the wood. Next, you’ll need a saw to cut the pieces to the right size. A drill is essential for making holes and putting the legs on. Finally, a screwdriver helps to tighten everything down.
Are There Specific Designs Or Styles For Corn Hole Board Legs That Can Enhance Stability?Yes, there are designs for corn hole board legs that can make them more stable. For example, you can use wider legs to help balance the board. You can also make the legs adjustable so they fit uneven ground. Another idea is to add cross supports between the legs, which helps keep the board steady. These styles keep the game fun and safe!
How Can I Ensure That The Legs Are Easily Foldable Or Removable For Storage?To make the legs easy to fold or remove, you can use simple clips or hinges. These parts can help the legs snap on and off easily. Test them a few times to make sure they work well. Always follow the instructions carefully when setting them up. This way, you can store your item without any trouble!