Firstly, unplug the device from the power source. Turn the nailer over and move its slider away by making use of the slider latch. Check the arrows on the slider for directions and place the nails accordingly in the nail compartment. Push the slider back in and test the gun.
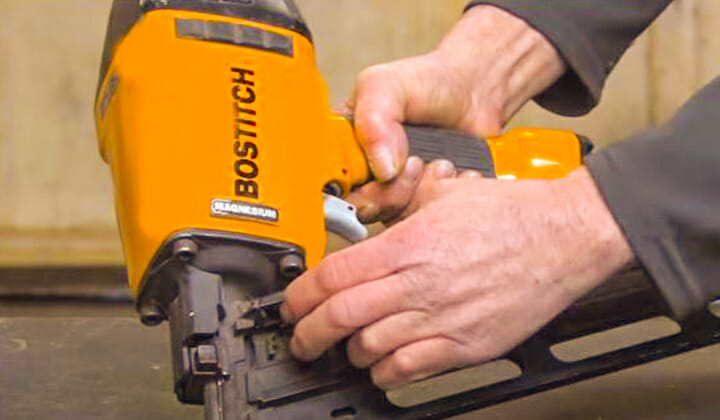
Table of Contents
How to Load a Bostitch Finish Nailer
Bostitch is a brand of reliability and performance. Their finish nailers are manufactured keeping the user comfort in mind. This is why the loading of a Bostitch finish nailer is comparatively much easier and more comfortable than other brands of nailers. Following some systematic steps will help you through.
Step 1: Disconnect the Nailer From Power Source
Before you start doing anything, make sure you have unplugged your Bostitch finish nailer from the power source. Whether your nailer is pneumatic or electric, this is the first step you must comply with. As for a pneumatic gun, detach the air compressor hose as well.
Step 2: Turn the Nailer Over
The following step is to turn your Bostitch finish nailer upside down if you are holding it in your hands. Otherwise, point the nail gun in the opposite direction of you if the gun is on a table.

Step 3: Move the Slide Away to Make Room for Nail Placement
There should be a slide latch located at the rear end of your Bostitch finish nailer. Lifting or depressing that slide latch or cartridge release will give you access to the nail compartment.
Hold the slide latch after depressing or lifting it up and then move the slide away from your nail gun. You will see different groves for nail placement.

Step 4: Check the Arrow Directions for Nail Placement
While moving the slide away from the nail gun, you will see arrows appearing on the slide. These arrows indicate which side or grove of the nail gun the nails should rest against.
The arrows also indicate where the nails must point to. To be more precise, the indication here is the bottom of the nail gun and the side. You may have to break your nail bars into pieces to fit a couple of them into the compartment.

Step 5: Insert the Nails
The final step for you is to insert the nails into the rail according to the arrows. Once you are done doing that, push the slider in the direction of the nail gun. Slide it in until you hear a clicking noise.
That is how the loading process will be finished. Lastly, switch your Bostitch finish nailer on and test it on some pieces of wood.

How to Load a Bostitch Framing Nail Gun
The loading of the framing nails in a framing nail gun is a bit different. The process can be a bit tricky at first but it becomes pretty clear once you are done with the basics.
The Bostitch framing nailers have a spring fastening device that holds the long metal strips known as “nails” in place. The first step for you is to remove or slide the spring assembly and lock it in.
[aawp box=”B000A7PAS0″ template=”vertical”]
Once the spring assembly is slid back and latched, you have to load the nails through the slot on the top of the rack assembly. Drop the nails into place and release the latch mechanism. That will hold the nails in the rack.
You can do that by pushing the release button. That will slide the nails down and load them in the rack. That is how you will be finished loading a framing nailer.
How to Load a Brad Nail Gun
The brad nails are much thinner than regular nails. Therefore, the loading process of such nails requires more caution and should be done in a specialized manner. To load a brad nail gun, you have to unplug it from the power source same as before.
Secondly, invert your nail gun to reach the slide latch more comfortably. The slide latch should be at the base of the nail gun. Lift the slide latch and pull the slider out from the nail gun while raising the slide latch.
As you move the slide out, you will see arrows appearing. They indicate the direction the nails should be pointing at. Inside the nail compartment, you will see different groves. You must make sure that the nail head is sitting on those groves.
The groves are designed in such a way that the nail will slide along them, but won’t jump outside. Once you have put enough nails inside the compartment, push the slider back in until you hear a distinguished noise.
Frequently Asked Questions
How do I unload my Bostitch finish nailer?
To unload your Bostitch nail gun, you have to pull back and press down on the push-bar button. This will enable the pusher to ride over the existing nails while holding upright. As a result, the nails will slide back toward the magazine slot.
Do the Bostitch finish nailers need oil?
Oil allows the Bostitch finish nailers to operate smoothly all season and winter. It helps get the job done even in high temperatures. Moreover, lubricants or oils help keep nail jamming to a minimum.
Conclusion
The loading of nails in a Bostitch finish nailer is something you must learn before using it. The steps are pretty easy. However, you will have trouble doing them if you are not familiar with the tool.
