Have you ever had a hole in your favorite wooden project? It can be so frustrating! But don’t worry. Installing wood button plugs is an easy fix. In this step-by-step guide, you’ll learn how to make your project whole again.
Imagine this: you’ve just finished creating a beautiful table. You step back, and there it is—a little hole that spoils the look. What can you do? Wood button plugs are the perfect solution. They come in different colors and sizes to match your wood. So, you can fix that hole in no time.
Did you know that wood button plugs have been used for centuries? They are a simple way to make furniture look great. With just a few tools, you can turn a mistake into a masterpiece. Interested in finding out how? Let’s dive in and get started!
Table of Contents
How To Install Wood Button Plugs: A Step-By-Step Guide
Installing wood button plugs is simpler than you might think. First, gather your materials like the button plugs and wood glue. Then, prepare the holes by cleaning them. Apply glue to the plug and gently push it into place. Wait for it to set before sanding for a smooth finish. Did you know that button plugs can hide imperfections and give your project a polished look? With just a few easy steps, you can enhance your woodworking projects!
What are Wood Button Plugs?
Definition and purpose of wood button plugs. Common applications and benefits in woodworking.
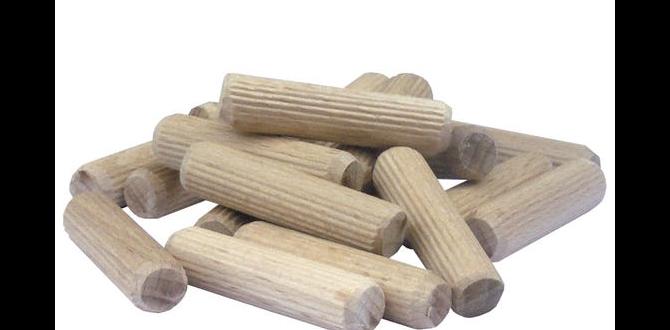
Wood button plugs are small, round pieces made from wood. They fill holes or gaps in projects, making them look neat. It’s like putting a little hat on your furniture! People often use them in woodworking, especially in tables or floors. They add strength and a polished finish. Who doesn’t love a good-looking piece of woodwork? Plus, they prevent dust from hiding in those sneaky holes! Overall, wood button plugs are fun and handy little helpers in crafting.
| Function | Benefits |
|---|---|
| Fills holes | Improves appearance |
| Supports structure | Increases durability |
| Enhances design | Adds character |
Preparing the Surface
Importance of surface preparation. Steps to clean and measure the area where plugs will be installed.
Getting the surface ready is like cleaning your room before company comes over; it makes everything look great! First, wipe off any dirt or dust from the spot where the wood button plugs will go. Use a damp cloth and maybe some soap if things are sticky. Then, grab a ruler to measure the area. This step is super important because measuring helps you place the plugs correctly; no one wants wonky buttons! Remember, happy surfaces equal happy plugs!
| Steps to Prepare Surface | Description |
|---|---|
| 1. Clean | Wipe away dust and dirt. |
| 2. Measure | Use a ruler to find the right spot! |
Choosing the Right Size Button Plugs
How to measure for the correct diameter. Considerations for depth and fit.
Finding the right size button plugs is like searching for the perfect snack—size matters! First, measure the hole’s diameter using a ruler; this will help you pick plugs that fit snugly. Remember, too tight and you might create a wood jam! Next, think about depth. Plugs should sit flush with the surface, not sticking out like a sore thumb. A quick tip: use a small piece of tape to mark your measurements on the plug. That way, you won’t confuse it with leftover pizza crumbs!
| Measurement | What to Measure |
|---|---|
| Diameter | Width of the hole |
| Depth | How deep the plug should go |
Drilling the Holes
Stepbystep guide on drilling holes for button plugs. Tips for ensuring accuracy and avoiding damage to the surrounding area.
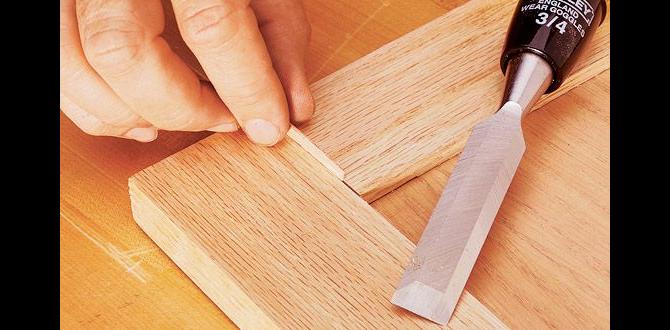
To drill holes for button plugs, start with the right tools. Use a drill and a suitable drill bit. First, mark the spot where you want the hole. Hold the drill steady and align it with your mark. Then, apply gentle pressure and start drilling. After you make a hole, check its depth to match your plug. This helps avoid damage around the hole. For best results:
- Keep your drill straight.
- Use a clamp to hold the wood.
- Go slow at first to avoid splintering the wood.
These steps ensure accurate holes. You want the fits to be snug and neat!
How do you drill a hole without splitting wood?
To avoid splitting wood, use a sharp drill bit and go slow. You can also drill a pilot hole first to guide your larger drill bit.
Installing the Button Plugs
Detailed instructions for inserting the plugs into the holes. Techniques for ensuring a snug fit.
Begin by lining up the wood button plugs with the holes. Give each one a little tap, but don’t go Hulk mode—gentle taps work best! If they’re loose, try a drop of wood glue for extra hold. Remember, snug is the name of the game; you don’t want them to pop out at a surprise party. Use a hammer with finesse, not fury!
| Steps | Tips |
|---|---|
| Align the plug | Check the fit first |
| Tap lightly | Don’t go crazy |
| Apply glue if needed | A little goes a long way |
Following these steps will help your button plugs fit snugly. Remember, a tightly fitted plug is a happy plug!
Finishing Touches
Sanding the installed plugs for a seamless look. Options for staining or sealing wood button plugs.
To finish your project, smooth out the wood button plugs with sandpaper. This will help them blend nicely into your wood surface. After sanding, you have two choices: staining or sealing. Staining adds color and highlights the wood grain. Sealing protects your plugs from moisture and damage. Use a brush or cloth to apply your chosen finish for a polished look.
What is the best finish for wood button plugs?
For wood button plugs, stain adds color, while sealant protects the wood. Use both for a great finish!
- Sanding helps achieve a smooth look.
- Stains enhance the wood’s natural beauty.
- Sealants keep the plugs safe and lasting longer.
Common Mistakes to Avoid
Discuss frequent errors during installation. Tips for troubleshooting issues that may arise.
Installing wood button plugs can be tricky. One common mistake is using the wrong size hole. If the hole is too big, the plug won’t fit snugly. Another error is poor glue choices, which can lead to loose plugs later. Always check your tools; using dull ones can ruin your work. If you face troubles, try sanding the edges of the plug for a better fit or adding more glue for extra security. Remember, patience makes perfect, even for your wood plugs!
| Common Mistake | Tip |
|---|---|
| Wrong hole size | Measure before you drill! |
| Poor glue choice | Use wood glue for strength! |
| Dull tools | Keep them sharp for neat cuts! |
Maintenance and Care
How to care for the installed wooden plugs to ensure longevity. Signs of wear and when to replace button plugs.
To keep your wood button plugs looking great, regular care is key! Dust them off with a soft cloth. Use a gentle wood cleaner if they get dirty. If you notice chips or fading, it might be time for a change. Check for signs like loose plugs or uneven surfaces.
Here’s a handy table to help you spot the signs of wear:
| Signs of Wear | Action Needed |
|---|---|
| Chips or Cracks | Consider replacing them! |
| Loose Fit | Re-install or replace. |
| Color Fading | Time for a new look. |
Remember, well-cared wooden plugs can last for years. Treat them like family, and they’ll stick around!
Conclusion
In conclusion, installing wood button plugs is a simple process. First, gather your tools and materials. Then, follow the steps carefully to ensure a snug fit. Don’t forget to sand and finish for a polished look. You can elevate your woodworking skills by trying this project. For more tips, check out other guides and keep practicing!
FAQs
What Tools Do I Need To Install Wood Button Plugs Effectively?
To install wood button plugs, you need a few simple tools. First, grab a drill to make holes and a drill bit that matches the size of your plugs. You’ll also want some wood glue to stick the plugs in place. A hammer can help tap the plugs if needed. Lastly, use a saw to trim any excess wood if the plugs are too tall.
How Do I Choose The Right Size Wood Button Plugs For My Project?
To choose the right size wood button plugs, first, measure the hole where you want to use the plug. Make sure the plug will fit snugly but not too tight. You can use a ruler or measuring tape for this. Next, check the plug size options available at the store. Pick a size that matches your hole measurement best.
What Is The Best Adhesive To Use When Installing Wood Button Plugs?
The best adhesive to use for wood button plugs is wood glue. It helps the plugs stick well to the wood. You should apply it carefully and press the plug in tightly. If you want a faster set, you can also use super glue. Just be careful, as it dries very quickly!
How Can I Ensure A Flush Finish When Installing Wood Button Plugs?
To make wood button plugs fit perfectly, start by drilling a hole that’s just right for the plug size. Next, clean the hole and the plug to remove any dirt. Apply glue to the sides of the plug and carefully push it into the hole. Use a hammer with a small block of wood to tap it in gently. When it’s in, the plug should be even with the wood surface.
Are There Any Tips For Staining Or Finishing Wood Button Plugs After Installation?
Yes! First, clean the button plugs with a damp cloth to remove dust. You can use a small brush to apply stain or finish. Be careful not to get any on the surrounding wood. Let it dry completely before touching it again. If you want a shiny look, add a clear topcoat after the stain dries.