Build a beautiful handmade wooden spice rack! This easy DIY woodworking project is perfect for beginners looking to add custom storage and a touch of rustic charm to their kitchen. Get started with our step-by-step guide and simple tool recommendations.
Tired of that chaotic spice cabinet or messy countertop? We’ve all been there, rummaging through jars to find that one elusive spice. A handmade wooden spice rack isn’t just a storage solution; it’s a way to organize your kitchen, showcase your spices, and add a beautiful, personalized touch. It’s a project that’s surprisingly achievable, even if you’re just starting out with woodworking. In this guide, I’ll walk you through everything you need to know to build one. We’ll cover materials, tools, and simple steps to create a spice rack you’ll be proud of.
This project is a fantastic way to put some basic woodworking skills to good use. We’ll make it as straightforward as possible, so you can feel confident every step of the way. Let’s get those spices in order and add some handcrafted style to your kitchen!
Table of Contents
Why Build a Handmade Wooden Spice Rack?
There are tons of reasons why making your own wooden spice rack is a brilliant idea. For starters, it’s incredibly rewarding. You get to create something useful and beautiful with your own two hands. Plus, you can customize it to perfectly fit your space and your style.
- Customization: You decide the size, the number of shelves, and even the type of wood. Need it to fit a specific narrow space? No problem! Want a rustic farmhouse look or something sleek and modern? You can do that.
- Cost-Effective: While store-bought racks can get pricey, especially for good quality wood, DIY allows you to control costs. You can often use scrap wood or find affordable materials.
- Skill Building: This is a perfect beginner project. You’ll learn basic measuring, cutting, and assembly techniques that are fundamental to many other woodworking projects.
- Kitchen Organization: Say goodbye to cluttered cabinets! A well-designed spice rack keeps your spices visible and easily accessible, making cooking much more enjoyable.
- Unique Decor: A handmade wooden piece adds warmth and character that mass-produced items just can’t match. It’s a conversation starter and a functional piece of art.
Choosing Your Wood and Design Style
Before we grab our tools, let’s think about the look you’re going for. The type of wood you choose will greatly influence the final appearance and durability of your spice rack. For beginners, common and easy-to-work-with woods are best.
Popular Wood Choices for Spice Racks:
- Pine: This is a fantastic choice for beginners. It’s affordable, lightweight, and easy to cut and sand. Pine has a beautiful natural grain but can be easily stained or painted to match your kitchen decor.
- Poplar: Similar to pine in workability and cost, poplar is a bit harder and takes paint exceptionally well if you’re planning a painted finish.
- Oak: If you want a more premium look, oak is a great option. It’s strong, durable, and has a lovely, distinct grain pattern. It’s a bit harder to work with than pine but well worth the effort for a stunning result.
- Maple: Another hard wood that’s strong and has a smooth, fine grain. Maple takes stains beautifully and offers a clean, modern or traditional look.
When considering your design, think about where the spice rack will live. Will it be mounted on the wall, sit on a countertop, or slide into a cabinet opening? For a beginner-friendly project, a simple wall-mounted rack is often the easiest to start with.
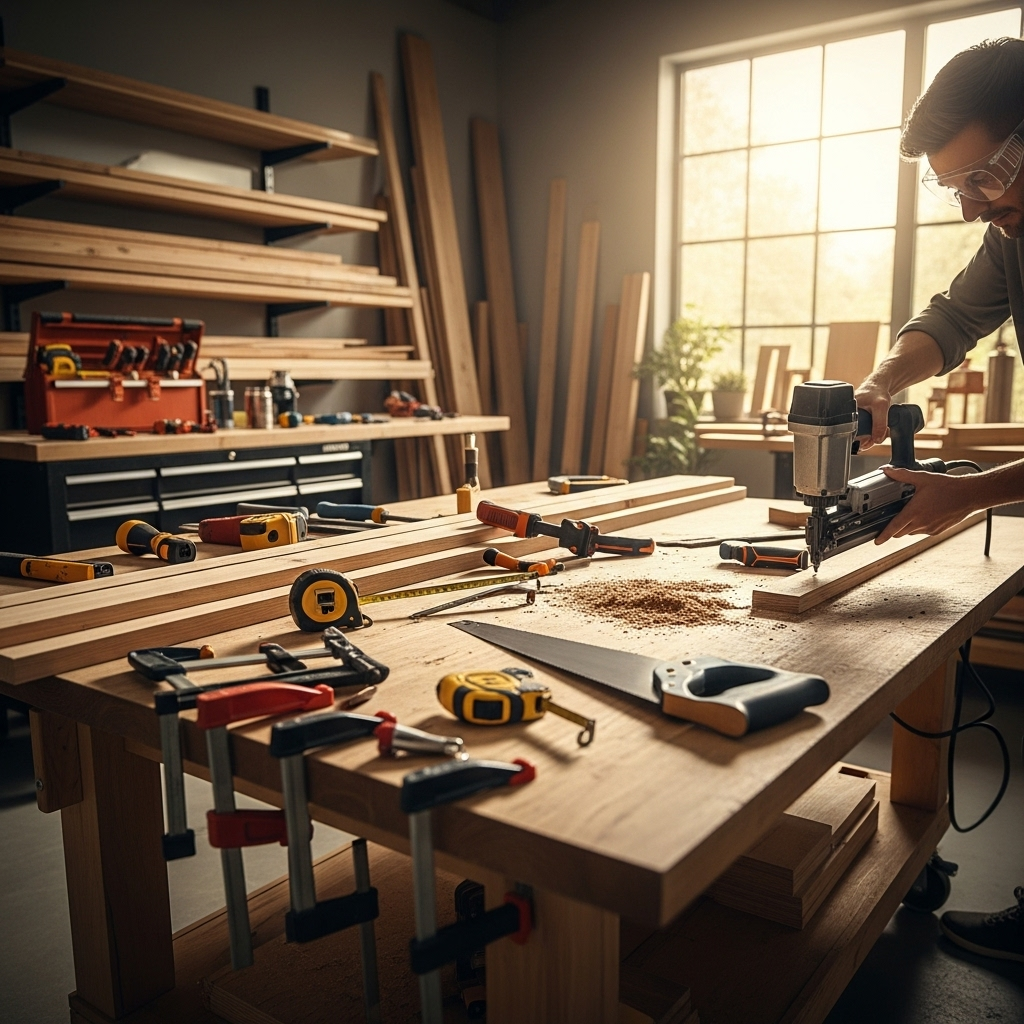
Essential Tools and Materials
You don’t need a whole workshop to build a great spice rack. Here’s a list of the basics that will get the job done. If you’re new to woodworking, investing in a few good quality basic tools will serve you well for many projects to come.
Must-Have Tools:
- Measuring Tape: For accurate measurements.
- Pencil: To mark your cuts.
- Safety Glasses: Always protect your eyes!
- Hand Saw or Circular Saw/Miter Saw: A hand saw works, but a circular saw or miter saw makes cutting much faster and more precise. For beginners, a miter saw is a great investment as it makes straight, accurate cuts very easy. Check out resources like WoodworkingTools.com’s guide to miter saws for selection tips.
- Sander (Orbital or Belt) or Sandpaper: To smooth out rough edges.
- Drill and Drill Bits: For pilot holes and driving screws.
- Clamps: To hold pieces together while gluing or screwing.
- Screwdriver Bit Set: For your drill.
- Wood Glue: A strong adhesive for added durability.
- Screws: Wood screws are best. Choose a length appropriate for your wood thickness.
Materials:
- Wood Boards: The dimensions will depend on your design. For a simple rack, 1×4 or 1×6 lumber is common.
- Wood Screws: (e.g., 1 1/4 inch wood screws for 3/4 inch thick boards).
- Sandpaper: Medium (120-grit) and fine (220-grit).
- Wood Stain or Paint (Optional): To finish your piece.
- Polyurethane or Clear Coat (Optional): For protection.
Step-by-Step: Building Your Handmade Wooden Spice Rack
Let’s get building! We’re going to create a simple, two-tier wall-mounted spice rack. This design is manageable for beginners and looks fantastic. I’ll provide approximate dimensions, but feel free to adjust them based on your spice jar sizes and available space.
Project Overview:
This project involves cutting pieces of wood to size, assembling them into a basic frame with shelves, and finishing the wood.
Cutting List (Example for a rack approximately 24 inches long, 14 inches tall):
Using 1×6 lumber (which is actually about 3/4 inch thick and 5.5 inches wide):
| Part | Quantity | Dimensions |
|---|---|---|
| Side Panels | 2 | 14 inches x 5.5 inches |
| Top/Bottom Shelves | 2 | 22.5 inches x 5.5 inches |
| Shelf Supports (optional for deeper shelves or added strength) | 2 | 5.5 inches x 3.5 inches (if you decide to add these for the bottom shelf) |
| Back Panel (optional, for additional rigidity) | 1 | 24 inches x 14 inches (use 1/4 inch plywood or a thinner board) |
Note: The 22.5-inch shelf length accounts for the thickness of the side panels (0.75 inches each) when assembled. 22.5 + 0.75 + 0.75 = 24 inches total width.
Step 1: Measure and Cut Your Wood
This is where accuracy matters. Double-check your measurements before you cut.
- Put on your safety glasses!
- Lay out your wood and mark your cut lines using your measuring tape and pencil.
- If using a hand saw, clamp your wood securely and saw slowly and steadily along your lines.
- If using a power saw (like a miter saw or circular saw), set your depth to just over the thickness of your wood, ensure your wood is securely supported, and make your cuts. A miter saw is excellent for making precise 90-degree cuts. Always follow your tool’s safety guidelines. For more on safe saw operation, check out guides from reputable sources like OSHA’s regulations on woodworking machinery.
- Cut all the pieces according to your cutting list.
Step 2: Sand Everything Smooth
Sanding is crucial for a professional-looking finish and to prevent splinters.
- Start with medium-grit sandpaper (120-grit) to remove any saw marks or rough edges.
- Pay extra attention to the cut edges.
- Once all rough spots are gone, switch to fine-grit sandpaper (220-grit) for final smoothing.
- Wipe away all the dust with a clean cloth or tack cloth.
Step 3: Assemble the Side Panels and Shelves
We’ll start by creating the basic box structure. This is where clamps and wood glue will be your best friends.
- Lay one of the side panels flat on your workbench.
- Apply a bead of wood glue along the top edge of the side panel where one of the shelf pieces will attach.
- Position the top shelf piece so its end is flush with the edge of the side panel. Ensure it’s square (at a 90-degree angle). Clamps are great here to hold it in place while you work.
- Mark pilot hole locations. It’s important to drill pilot holes slightly smaller than your screw diameter to prevent the wood from splitting.
- Drill pilot holes through the side panel and into the end of the shelf piece.
- Drive screws through the side panel into the shelf.
- Repeat this process for the bottom shelf, making sure it’s parallel to the top shelf. If you’re adding shelf supports, attach them now to the side panels where the bottom shelf will rest.
- Apply glue and attach the second side panel to the other ends of the shelves, aligning everything carefully.
- Clamp the entire assembly together firmly.
- Wipe away any excess glue that squeezes out with a damp cloth.
- Let the glue dry completely according to the manufacturer’s instructions (usually at least a few hours, preferably overnight).
Tip: Using a combination square can help ensure your shelves are perfectly square to the side panels during assembly.
Step 4: Attach the Back Panel (Optional but Recommended)
If you’re adding a back panel, this step provides extra stability and prevents the rack from racking (wobbling side-to-side).
- Carefully flip the assembled rack over so the back is facing up.
- Position your back panel (if using plywood or a thinner board) so it’s flush with the outer edges of the side and top/bottom shelves.
- Apply a thin bead of wood glue along all the edges where the back panel meets the main assembly.
- Secure the back panel using small screws or brad nails. If using screws, drill pilot holes first. Space them about 6-8 inches apart around the perimeter.
Step 5: Finishing Touches
This is where your spice rack really starts to shine!
- Do a final light sanding with 220-grit sandpaper to ensure all surfaces are smooth and any dried glue is removed.
- Wipe down the entire rack to remove any dust.
- Staining or Painting: If you’re staining, apply your chosen stain according to the product instructions. Wipe off excess stain. If painting, apply a primer first, followed by your paint.
- Sealing: Once the stain or paint is completely dry, apply a protective topcoat like polyurethane or a clear varnish. This will protect the wood from moisture and wear. Apply 2-3 thin coats, allowing each to dry thoroughly and lightly sanding with very fine grit (320+) between coats for a super smooth finish.
Step 6: Mounting Your Spice Rack
Choose a sturdy wall location. Make sure you know what’s behind the wall (electrical wires, plumbing) before drilling. If mounting into drywall without hitting a stud, use appropriate wall anchors for the weight of the loaded rack.
- Decide where you want to hang your spice rack.
- Mark the desired height on your wall.
- Use a level to ensure your marks are straight.
- If mounting into studs, locate them using a stud finder and mark your screw placement.
- If not using studs, install heavy-duty drywall anchors at your marked spots.
- Drill pilot holes through the back of your spice rack (or through the back panel if you added one) where you want to hang it.
- Align the rack with your marks/anchors on the wall and drive screws through the back of the rack into the wall studs or anchors.
Alternative Designs and Enhancements
Once you’ve built your first spice rack, you might get inspired to try different designs or add features!
- Adjustable Shelves: Instead of fixed shelves, you could use shelf pins to allow for adjustable shelf heights.
- Tiered Shelves: For a deeper rack, stagger the shelves so smaller jars can be seen behind larger ones.
- Angle Shelves: Angling the shelves slightly can make it easier to read spice jar labels.
- Drawer or Cabinet: Incorporate a small drawer or cabinet at the bottom for less-used spices or other kitchen tools.
- Decorative Edging: Use a router with a decorative bit to add a routed edge to the shelves or side panels.
- Cutout Designs: For a decorative touch, cut out shapes or patterns in the side panels.
- Door: Add a simple door with a small handle to conceal your spices.
Troubleshooting Common Beginner Issues
Don’t worry if things aren’t perfect the first time! Every woodworker encounters small hiccups. Here are a few common ones and how to fix them.
- Wood Splitting: This usually happens when screws are driven into wood without pilot holes, or the pilot hole is too small. If it happens, you can often glue the split, clamp it, and then carefully redrill the pilot hole. For future builds, always drill pilot holes!
- Uneven Cuts: If your cuts aren’t perfectly straight, it can make assembly tricky. Use a hand plane to shave down high spots before assembly. Small gaps can often be filled with wood filler after assembly, before finishing.
- Wobbly Rack: This is often due to not having perfectly square joints or not reinforcing the assembly enough. Ensure your clamps are holding pieces tightly and square during glue-up. Adding a back panel significantly improves stability.
- Sanding Marks: If you can still see saw marks after sanding, you might need to go back to a coarser grit sandpaper and work your way up to finer grits again. Ensure you’re sanding with the grain of the wood.
Frequently Asked Questions (FAQ)
Q1: What is the easiest wood to use for a beginner spice rack?
A1: Pine is generally the easiest wood for beginners because it’s soft, lightweight, and inexpensive. It’s very forgiving to cut and sand.
Q2: How many shelves should my spice rack have?
A2: This depends on how many spices you have! A common and practical size is a two or three-tier rack. Measure your most commonly used spice jars to determine shelf depth and height needed.
Q3: Do I need to use wood glue if I’m also using screws?
A3: Yes, absolutely! Screws hold pieces together mechanically, but wood glue creates a much stronger, long-lasting bond through chemical adhesion. It’s best practice to use both for maximum durability.
Q4: What kind of screws should I use?
A4: For most projects using 3/4-inch thick wood, 1 1/4-inch or 1 1/2-inch wood screws are a good choice. Make sure to drill pilot holes first to prevent splitting the wood. Using screws with a washer head can help distribute pressure and prevent them from sinking too deeply.
Q5: Can I make a spice rack without any power tools?
A5: Yes! You can build a simple spice rack using just a hand saw, measuring tape, pencil, sandpaper, a drill (even a hand drill), and a screwdriver. A hand saw will require more effort and practice to get straight cuts, but it’s definitely achievable.
Q6: How do I calculate the shelf length if my wood is a different thickness?
A6: If your wood is thicker than 3/4 inch, you’ll need to add twice that thickness to your desired shelf span for the total width. For example, if your side panels are 1 inch thick and you want the internal shelf span to be 22 inches, the shelf length would be 22 inches + (2 * 1 inch) = 24 inches.
Q7: How deep should the shelves be?
A7: Most standard spice jars are about 2-3 inches in diameter. A shelf depth of 5.5 to 6 inches is usually sufficient to hold a row of jars comfortably, with some room for labels at the front and to prevent them from falling off the back.
A Rewarding Project for Every Home
Building your own handmade wooden spice rack is more than just a DIY project; it’s an investment in your kitchen’s functionality and aesthetics. It’s fantastic for beginners because it teaches fundamental woodworking skills without being overwhelming. You get the satisfaction of creating something unique and personalized that you’ll use every single day.
From choosing the right wood to the final coat of finish, each step brings you closer to a beautifully organized kitchen. Remember to prioritize safety, measure twice, and cut once. Whether you opt for a simple pine rack or experiment with more intricate designs, the result will be a charming, practical addition to your home. So grab those tools, pick out your favorite wood, and start building a spice rack that’s uniquely yours. Happy building!