A finish nailer is your secret weapon for smooth, professional-looking interior woodworking projects. It drives thin nails precisely, leaving minimal holes that are easy to hide. This guide will show you how to choose, use, and maintain one for stunning results, even if you’re a beginner.
Hey there, fellow woodworkers! Jack Shaffer here from Nailerguy. Ever admire a beautifully finished trim job or a perfectly assembled cabinet and wonder how they got those nails to disappear? Well, part of that magic comes from a fantastic tool called a finish nailer. If you’re tackling interior trim, wainscoting, or even building your own custom shelves, a finish nailer can save you tons of time and effort, making your projects look incredibly professional. But sometimes, choosing the right one and using it correctly can feel a bit daunting. Don’t worry! I’m here to walk you through everything you need to know, step by step. By the end of this guide, you’ll be a finish nailer pro, ready to tackle any interior woodworking project with confidence.
Table of Contents
Why a Finish Nailer is a Game-Changer for Interior Woodworking
When you’re working on interior projects, the finish is often just as important as the structure. You want clean lines, snug fits, and a look that’s polished and professional. Hammering in every single nail by hand can be slow, tiring, and it’s super easy to bend nails or damage the delicate wood surface. This is where a finish nailer shines. It fires nails quickly and accurately:
- Speed: Get projects done much faster than with a hammer.
- Precision: Drive nails exactly where you want them, every time.
- Cleanliness: Nails are thin, meaning smaller holes that are easier to fill and hide.
- Reduced Damage: Less risk of marring your beautiful woodwork.
- Consistency: Uniform nail depth for a professional look.
Whether you’re installing baseboards, crown molding, door casings, or even building decorative panels, a finish nailer will be your best friend. It’s an essential tool for anyone serious about making their interior woodworking look its absolute best.
Choosing the Right Finish Nailer: Pneumatic vs. Cordless
This is often the first big decision you’ll face. There are two main types of finish nailers that are popular for interior work: pneumatic (air-powered) and cordless (battery-powered). Both have their pros and cons, and the best choice for you depends on your needs and preferences.
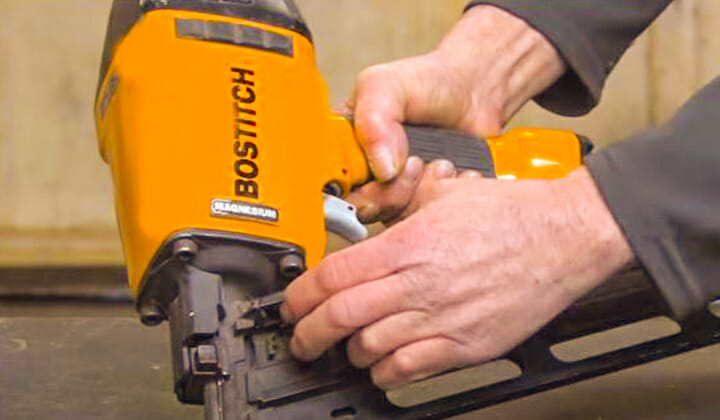
Pneumatic Finish Nailers
These are the traditional workhorses. They run off compressed air from an air compressor and are known for their power, reliability, and lighter weight in hand. They often come at a lower initial cost compared to their cordless counterparts.
Pros of Pneumatic Finish Nailers:
- Powerful and Consistent: Deliver reliable driving power.
- Lighter in Hand: The tool itself is usually lighter since the motor and power source are separate.
- Lower Initial Cost: The nailer itself is often less expensive.
- No Batteries to Charge: Always ready to go as long as your compressor is running.
Cons of Pneumatic Finish Nailers:
- Requires an Air Compressor: An additional, bulky piece of equipment to own and maintain.
- Hose Management: You have to deal with an air hose, which can get tangled or limit your mobility.
- Noise: Air compressors can be quite loud.
- Setup Time: You need to connect the hose and wait for the compressor to build pressure.
Cordless Finish Nailers
Cordless finish nailers have made huge strides in recent years. They use either a battery-powered motor with a pneumatic drive system (often called “gasless” or “airless”) or a combination of battery and a small, high-pressure air reservoir. They offer incredible freedom and portability.
Pros of Cordless Finish Nailers:
- Ultimate Portability: No hoses, no compressors, just grab and go.
- Fast Setup: Ready to use in seconds.
- Convenient for Small Jobs: Perfect for quick repairs or working in tight spaces where an air line is cumbersome.
- Quiet Operation (Generally): Quieter than pneumatic systems, though some can still be a bit noisy.
Cons of Cordless Finish Nailers:
- Heavier in Hand: The battery adds weight to the tool.
- Higher Initial Cost: The nailer and batteries can be more expensive upfront.
- Battery Dependence: You need to keep batteries charged, and they have a limited lifespan.
- Power Output (Historically): Older models sometimes struggled with hardwood or driving nails flush, but modern ones are much improved.
Which One Should You Choose?
For most DIYers starting out with interior woodworking, a cordless finish nailer is often the more convenient and user-friendly option. The freedom from hoses and compressors is a huge benefit for home projects. If you plan on doing extensive trim work or are on a tighter budget and already own an air compressor, a pneumatic nailer is still a fantastic and reliable choice.
Understanding Finish Nailer Specs: Gauge and Angle
Once you’ve decided on pneumatic or cordless, you’ll need to look at the nailer’s specifications, primarily the nail gauge and the angle of the magazine. These determine what size nails it can fire and how it performs in different situations.
Nail Gauge
The “gauge” refers to the thickness of the nail. Think of it like this: a smaller gauge number means a thicker nail, and a larger gauge number means a thinner nail. For most interior woodworking, we’re talking about fine nails perfect for trim and molding.
- 18-Gauge: These are the “brad nails.” They are very thin, leaving a very small hole that’s easy to fill with a touch of wood filler or putty. Ideal for delicate molding, baseboards, and anything where a nearly invisible fastening is desired.
- 16-Gauge: These are “finish nails.” They’re a bit thicker than 18-gauge nails, offering more holding power. They leave a slightly larger hole than 18-gauge but are still easy to hide. A great all-around choice for baseboards, window/door casings, and chair rails.
- 15-Gauge: These are “straight finish nails,” slightly thicker than 16-gauge. They offer excellent holding power and a slightly larger head that can be helpful for securing heavier trim, but the hole is more noticeable.
For most interior woodworking projects, an 18-gauge or 16-gauge finish nailer is what you’ll want. An 18-gauge is generally the go-to for its discreet fastening, while a 16-gauge offers a bit more bite if needed.
Magazine Angle
The magazine is the part of the nailer that holds the nails. It’s angled to feed nails into the firing mechanism. The angle of this magazine affects how the nailer can get into tight corners and tight spaces.
- 0-Degree (Straight): The magazine is parallel to the barrel. This is the most common type and works well for most general applications. However, it can be bulky in very tight corners.
- 15-Degree: The magazine is angled away from the barrel on one side. This allows the nose of the nailer to get closer to an edge or into a tighter corner. You’ll often see 15-degree nailers referred to as “𝕟𝕚𝕔𝕠𝕟” nailers (a popular brand).
- 20-Degree (or Angled): Similar to 15-degree, designed for accessing tight spaces.
For interior trim work, especially around windows and doors, an angled magazine (15 or 20 degrees) can be a lifesaver. It makes it much easier to get the nailer flush against the trim and drive the nail exactly where you need it without your tool getting in the way.
Essential Accessories and Safety Gear
Beyond the nailer itself, there are a few other things you’ll need to have on hand to use it safely and effectively, especially for interior work.
For Pneumatic Nailers:
- Air Compressor: Choose one with at least 2.0 CFM (Cubic Feet per Minute) at 90 PSI for most finish nailers.
- Air Hose: A 25-foot or 50-foot hose is usually sufficient for home projects. Make sure it has standard fittings.
- Air Fitting: A quick-connect fitting makes attaching and detaching the hose easy.
- Air Tool Oil: Essential for lubricating pneumatic tools to keep them running smoothly. (Check your manual; some newer oil-less models don’t require it.)
For Cordless Nailers:
- Batteries and Charger: Ensure you have at least one fully charged battery before you start.
- Spare Batteries (Recommended): Especially for larger projects so you don’t have to stop to charge.
Safety Gear (For ALL Nailers):
This is non-negotiable! Your safety is paramount. Never compromise on this:
- Safety Glasses: Absolutely mandatory. Always wear ANSI-approved safety glasses or goggles. Even with depth control, nails can ricochet.
- Hearing Protection: Nail guns can be loud, and prolonged exposure can cause hearing damage. Earplugs or earmuffs are essential.
- Gloves: Good work gloves protect your hands from splinters and minor bumps.
- Dust Mask: When sanding or cutting wood, a dust mask is important to protect your lungs.
You’ll also need:
- Nails: Make sure you buy the correct gauge and length for your nailer and project.
- Wood Filler/Putty: For filling nail holes.
- Caulk: For filling gaps between trim and walls.
- Measuring Tape and Pencil: For accurate layout.
- Miter Saw: For cutting trim to the correct angles.
- Level: To ensure your trim is straight.
How to Use a Finish Nailer Safely and Effectively (Step-by-Step)
Now that you’ve got your nailer and accessories, let’s get to the fun part: using it! Following these steps will help you achieve great results and stay safe.
Step 1: Read Your Nailer’s Manual
Seriously, don’t skip this. Every nailer is a little different. Your manual will tell you specific details about loading nails, adjusting depth, maintenance, and troubleshooting. It’s your best friend for getting to know your tool.
Step 2: Set Up Your Nailer
- Pneumatic:
- Connect the air hose to your compressor and the nailer using a quick-connect fitting.
- Ensure your air compressor tank has air and that the pressure regulator is set to the manufacturer’s recommended PSI (usually 70-120 PSI). Check your nailer’s manual for the exact range. Too much pressure can damage the tool or drive nails too deep; too little won’t drive them fully.
- Add a few drops of air tool oil into the air inlet if your nailer requires it (check manual).
- Cordless:
- Ensure your battery is fully charged and properly seated in the tool.
- Make sure there are no error lights or indicators.
Step 3: Load the Nails
This process varies slightly by model, but generally involves these steps:
- Make sure the nailer is not powered on or connected to air if pneumatic.
- Locate the magazine latch or release.
- Slide the magazine open.
- Insert a strip of the correct gauge and length nails into the channel. The nails should be facing the correct direction (usually with heads up, but check your manual).
- Slide the magazine shut until it latches securely. Give it a gentle tug to ensure it’s locked.
- On some models, you might need to push the nail pusher forward to engage the nails against the feed mechanism.
Step 4: Test Fire and Adjust Depth
This is crucial for getting that perfect flush finish. You don’t want nails sticking out or sinking too deep into the wood.
- Find a scrap piece of the same wood you’ll be working with.
- Important: Most finish nailers have a safety contact tip (also called a nose or trigger safety). You must press this tip firmly against the wood while squeezing the trigger to fire a nail. This prevents accidental firing when the tool isn’t actually engaged with a surface.
- Hold the nailer perpendicular to the wood surface and press the safety tip firmly down.
- Squeeze the trigger. The nail should drive flush or slightly below the surface.
- If the nail doesn’t go in far enough: Increase the air pressure (pneumatic) or adjust the depth setting on your nailer (most cordless and some pneumatic models have this).
- If the nail sinks too deep and breaks the surface or goes in too far: Decrease the air pressure or adjust the depth setting lower.
- Repeat this test until you achieve the ideal depth.
Step 5: Position and Fire
You’re ready for the real deal. Position your trim piece where you want it.
- Place the nose of the nailer against the trim, where you want to secure it. For baseboards or crown molding, aim to place nails where they will be caught by studs or blocking inside the wall for maximum holding power.
- Press the safety contact tip firmly against the wood.
- Squeeze the trigger smoothly.
- Move to the next spot and repeat.
Step 6: Nail Placement Strategy
Think about where you’re placing your nails:
- Spacing: For baseboards and crown molding, aim for nails about 16-24 inches apart, depending on the flexibility of your trim.
- Corners and Edges: Drive nails close enough to the edge to hold the trim securely, but not so close that you split the wood (especially near ends). Angle nails slightly if needed to avoid splitting.
- Avoid Overlapping Shots: Try not to fire a nail right next to another one, as this can weaken the wood section.
- Into Studs: Whenever possible, try to sink nails into wall studs or solid backing. This provides the strongest hold for things like heavy trim or cabinets. You can locate studs with a stud finder.
Step 7: Finishing Touches
Once all your trim is nailed in place:
- Inspect: Look for any nails that didn’t set perfectly flush. You can often gently tap them in with a nail set and hammer.
- Fill Holes: Use a quality wood filler or putty that matches your wood color (or can be painted/stained). Apply it with a putty knife, pressing it into the nail hole.
- Sand: Once the filler is dry, lightly sand the filled areas smooth. For painted trim, you might caulk the gap between the trim and the wall for a seamless look before painting.
Common Interior Woodworking Projects for Your Finish Nailer
A finish nailer opens up a world of possibilities for upgrading your home’s interior. Here are some popular projects:
Baseboard Installation
Tired of old, plain baseboards? Installing new ones is a fantastic way to improve a room’s appearance. A finish nailer makes it quick and easy to secure them to the wall. Remember to aim for studs!
Door and Window Casing
Wrapping your doors and windows with attractive trim (casing) adds architectural detail. A finish nailer allows you to attach these pieces precisely, creating a neat and finished look around openings. Angled nailers are particularly helpful here for tight corners.
Crown Molding
Adding crown molding to the top of your walls can make a room feel more elegant. It can be a bit tricky, but a finish nailer is essential for holding the molding in place while adhesive dries or for permanent fastening.
Wainscoting and Wall Paneling
Creating textured walls with wainscoting (like beadboard or raised panels) or decorative paneling is a popular DIY project. A finish nailer is indispensable for attaching all those individual pieces securely and cleanly.
Built-in Shelving and Cabinets
If you’re building custom shelves, bookcases, or simple cabinets, a finish nailer is great for assembling the carcases and attaching decorative trim or face frames. Combine it with wood glue for incredibly strong joints.
Picture Frame Molding and Accents
Want to add some decorative flair? Installing picture frame molding on walls or