Table of Contents
Finish Nailer Headpiece Replacement: A Complete Guide

Finish Nailer Headpiece Replacement
Replacing the headpiece of a finish nailer is easier than you might think. This part connects to the gun and helps drive nails smoothly. If your finish nailer struggles or jams, the headpiece may be faulty. Simply remove the old one and install a new one to restore its function. Did you know that a simple replacement can save you from buying a new tool? Keeping your nailer in top shape makes woodworking projects more fun!Understanding Finish Nailers
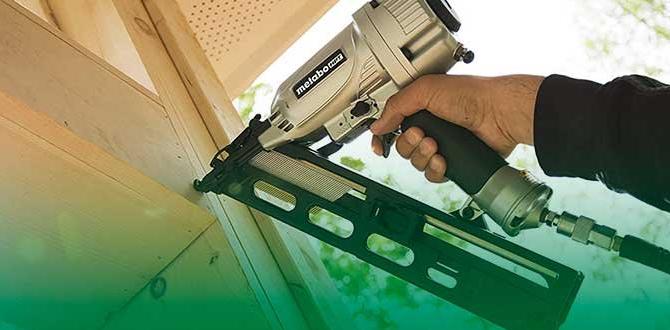
Define what a finish nailer is and its typical uses.. Highlight the importance of the headpiece in a finish nailer..A finish nailer is a handy tool used to drive narrow nails into wood. It helps you create smooth finishes without leaving big holes. You can use it for projects like putting up trim, molding, and furniture assembly. Sounds easy, right? But there’s more! The headpiece is key. Think of it as the superhero cape for your nailer. It determines how well the nail enters the wood. A worn-out headpiece can make a mess! So, keep it in good shape. Your projects will thank you.
| Common Uses | Importance of Headpiece |
|---|---|
| Installing trim | Ensures smooth nail delivery |
| Creating furniture | Reduces the chance of splintering |
| Crafting | Improves overall finish quality |
Signs You Need a Headpiece Replacement
Discuss common symptoms of a failing headpiece.. Explain how to diagnose headpiece issues..When your finish nailer’s headpiece starts to fail, you’ll notice some clear signs. The most obvious might be misfiring, where nails don’t come out as they should. Another sign is uneven nail depth; this means some nails stick out while others sink too deep. Lastly, you might hear strange noises during use. To diagnose these issues:
- Check if the nails are jammed.
- Look for signs of wear or damage.
- Test the tool with scrap wood.
Taking these steps can help you decide if it’s time for a headpiece replacement.
How do I know if my nailer needs repair?
Watch out for missed nails and uneven drives. These are strong signs that your nailer needs attention.
Types of Finish Nailer Headpieces
Describe different types of headpieces available for various finish nailer models.. Discuss the materials used in headpieces and their durability..There are several types of headpieces for finish nailers. Each fits a specific model. They come in different materials, affecting their strength. Some common types include:
- Standard Headpieces: Made from durable steel, good for most projects.
- Angled Headpieces: Great for tight spaces, often made from lightweight materials.
- Flat Headpieces: Designed for surface applications, ensuring a flush finish.
Durability is key. Steel headpieces last longer, while plastic ones are lighter but may wear faster. Choosing wisely can save you time and frustration.
What materials are used in finish nailer headpieces?
Materials vary, but commonly used ones include steel for strength and plastic for weight savings.
Common Headpiece Materials:
- Steel: Very durable and strong.
- Aluminum: Lightweight with good strength.
- Plastic: Lightweight but less durable.
Knowing the right type helps in your finish nailer tasks. Make smart choices and your projects will shine!
How to Replace Your Finish Nailer Headpiece
Provide stepbystep instructions for replacing the headpiece.. Include safety tips and necessary tools for the replacement process..First, gather your tools. You will need a screwdriver, a wrench, and safety goggles. Safety first! Now, unplug your nailer to avoid any surprise nail launches. Next, use the screwdriver to remove the screws on the old headpiece. Be careful; we don’t want flying screws! Once off, simply replace it with the new headpiece. Tighten everything back up, and voilà! You’re ready to nail it again—safely!
| Tools Needed | Safety Tips |
|---|---|
| Screwdriver | Always wear safety goggles. |
| Wrench | Make sure the tool is unplugged. |
Where to Find Replacement Headpieces
List reliable sources for purchasing headpieces (e.g., online retailers, local hardware stores).. Discuss the importance of matching the right headpiece with specific nailer models..Finding the right replacement headpieces is easy. You can check several places:
- Online retailers like Amazon or eBay
- Local hardware stores such as Home Depot or Lowe’s
- Specialty tool shops near you
Matching the correct headpiece with your nailer model is important. A wrong fit can damage your tool or make it work poorly. Always double-check your nail gun’s model first. This will help you pick the right part!
Where can I buy a finish nailer headpiece?
You can buy a finish nailer headpiece from online retailers, local hardware stores, or specialty tool shops.
Maintaining Your Finish Nailer for Longevity
Offer maintenance tips to prevent headpiece wear and prolong the tool’s lifespan.. Discuss periodic checks and cleaning procedures..Taking care of your finish nailer will keep it working like new. Regular checks and cleaning are key. Check the headpiece for wear every month. If you spot issues, don’t wait! Replace it right away to avoid bigger problems. Clean dust and debris after each use so it doesn’t turn into a “fancy nail-er” with extra accessories (that nobody wants). A little maintenance goes a long way—like a good haircut! Here’s a quick table to help:
| Maintenance Task | Frequency |
|---|---|
| Inspect headpiece | Monthly |
| Clean tool | After each use |
| Replace headpiece | As needed |
Remember, a well-maintained finish nailer can last for years, so treat it like your favorite toy, or it might just stay on the shelf! Keep it happy, and it will keep you happy too!
Cost of Headpiece Replacement
Analyze the average cost range for headpiece replacements.. Highlight factors that can influence the price (brand, model, etc.)..Replacing a headpiece can vary in cost. On average, it ranges from $15 to $50. Several things affect the price:
- Brand: Well-known brands may cost more.
- Model: Popular models often have higher prices.
- Material: Durable materials can increase costs.
It’s smart to shop around for the best deal. Always check if the replacement fits your nailer to avoid extra expenses!
How much does it cost to replace a headpiece?
Replacing a headpiece typically costs between $15 and $50, depending on the brand and model.What affects the replacement cost?
- Brand reputation
- Specific model
- Quality of materials
Troubleshooting Common Issues Post-Replacement
Identify common problems that may arise after replacing the headpiece.. Provide solutions and tips for troubleshooting these issues..After changing the headpiece, some problems might show up. Common issues include misfiring and jams. These can make your work harder. Here are some quick fixes:
- Check the air pressure—too low or too high can cause trouble.
- Inspect the nails. Wrong size or type can lead to misfiring.
- Clean the tool regularly to prevent jams.
Following these tips can help you get back to finishing your projects smoothly!
What should I do if my finish nailer jams?
If your finish nailer jams, turn off and unplug the tool. Remove any stuck nails carefully. Cleaning the mechanism can also help avoid future jams.
Conclusion
In conclusion, replacing the headpiece on your finish nailer is an easy task. You save money and keep your tools in great shape. Remember to choose the right part for your model. If you need help, consult your user manual or online tutorials. Now, you’re ready to tackle your next project with confidence! Happy nailing!FAQs
Certainly! Here Are Five Related Questions On The Topic Of Finish Nailer Headpiece Replacement:Sure! A finish nailer is a tool that helps you put small nails into wood. If the headpiece gets worn out, you need to change it. First, you should unplug the nailer for safety. Then, use a screwdriver to remove the old headpiece. After that, attach the new one and make sure it fits tightly. Now you’re ready to nail again!
Sure! I can help with that. Just ask your question, and I’ll give you a simple answer.
What Are The Common Signs That Indicate It’S Time To Replace The Headpiece On A Finish Nailer?You might need to replace the headpiece on your finish nailer if you see dents or cracks on it. If the nails don’t go in straight or get stuck a lot, that’s a sign too. Also, if you hear weird sounds or see air leaking, it’s time for a new headpiece. Keep an eye on how well it works, and if it doesn’t work right, consider replacing it.
How Do You Safely Remove And Replace The Headpiece On A Finish Nailer?First, make sure the finish nailer is unplugged or out of battery. Then, locate the headpiece and find the release button. Press that button to unlock the headpiece. Carefully pull it off. To attach a new headpiece, line it up and push it until it clicks into place.
Are There Specific Headpiece Models Compatible With Different Brands Of Finish Nailers?Yes, different brands of finish nailers need specific headpieces. That means you can’t use any headpiece with just any nailer. You have to check what fits your brand. Always look for parts that say they are compatible with your nailer. This way, you’ll be sure they work together.
What Tools Or Materials Are Required For Replacing The Headpiece On A Finish Nailer?To replace the headpiece on a finish nailer, you need some tools. You will need a screwdriver to remove screws. A replacement headpiece is also important. You might want a pair of pliers to help with tough parts. Remember to wear safety goggles to protect your eyes!
Can A Damaged Headpiece Affect The Performance And Accuracy Of A Finish Nailer?Yes, a damaged headpiece can mess up how well your finish nailer works. If the headpiece is broken, it may not push the nails in properly. This means the nails might go in crooked or not at all. You should fix or replace it to keep everything working right.