DIY woodworking projects for pet furniture allow you to create custom, durable, and stylish pieces for your furry friends. From simple cat shelves to elaborate dog beds, these projects can be surprisingly achievable for beginners with the right guidance. Get ready to build something your pet will love!
Hey there, fellow DIYers and pet lovers! Jack Shaffer here from Nailerguy. Ever looked at your beloved pet and thought, “They deserve a little something special”? I know I have! Whether it’s a cozy spot for your cat to nap in the sun or a sturdy bed for your dog to dream in, store-bought pet furniture can be pricey and sometimes just not quite right.
That’s where the magic of DIY woodworking comes in! Imagine building a beautiful, custom piece of furniture that perfectly fits your space and your pet’s needs. It sounds like a big task, but I promise you, with a little planning and the right approach, you can absolutely do it.
In this guide, we’re going to dive into some genius DIY woodworking projects for pet furniture that are perfect for beginners. We’ll cover everything from choosing the right wood to picking out simple designs and getting them built. Ready to create something amazing for your four-legged family member? Let’s get building!
Table of Contents
Why Build Your Own Pet Furniture?
Let’s be honest, our pets are family. They provide us with endless joy, comfort, and unconditional love. It’s only natural that we want to give them the best – and that includes a comfy, safe, and perhaps even stylish place to call their own within our homes.
Buying specialized pet furniture can add up quickly. And sometimes, even the most expensive options just don’t hit the mark. They might be too small, too flimsy, or just not the right aesthetic for your living space. Plus, there’s a certain satisfaction that comes from creating something with your own two hands, especially when it’s for a loved one – furry or otherwise!
DIY woodworking for pet furniture offers a fantastic middle ground. You get:
- Customization: Design pieces that are the perfect size for your pet and perfectly fit your home’s style.
- Cost Savings: Often, building your own is much more budget-friendly than buying.
- Durability: You control the quality of materials and construction, leading to sturdier, longer-lasting pieces.
- Safety: You can ensure all finishes and materials are pet-safe and free from harmful chemicals.
- Satisfaction: There’s nothing quite like the pride of seeing your pet enjoy something you built!
Getting Started: Your Tool & Material Checklist
Before we jump into the fun projects, let’s talk about getting set up. You don’t need a massive workshop to build most of these DIY pieces, but having the right tools and materials will make the process smoother and safer. Think of this as your starter kit!
Essential Tools for Beginners
Here’s a breakdown of tools that will serve you well for many beginner woodworking projects, including pet furniture. Many of these you might already have, or they are great first investments!
- Measuring Tape: For accurate measurements. Always measure twice, cut once!
- Pencil: To mark your cuts and layouts.
- Safety Glasses: Non-negotiable! Protect your eyes from sawdust and flying debris.
- Work Gloves: To protect your hands from splinters and rough edges.
- Screwdriver Set or Drill/Driver: Essential for driving screws. A cordless drill/driver is a game-changer for efficiency.
- Saw: A basic hand saw is fine for smaller projects, but a circular saw or a miter saw will make cuts much faster and more precise. For beginners, a circular saw is often a versatile first power saw.
- Clamps: Helpful for holding pieces together while glue dries or while you’re fastening them.
- Sandpaper: Various grits (e.g., 80, 120, 220) for smoothing rough edges and surfaces.
- Optional (but highly recommended!):
- Brad Nailer or Finish Nailer: These pneumatic tools make attaching smaller pieces incredibly fast and easy, leaving a cleaner finish than hammering nails. For pet furniture, a 16-gauge finish nailer is very versatile.
- Orbital Sander: Speeds up the sanding process considerably compared to hand sanding.
- Speed Square: Helps make quick, accurate 90-degree marks for cuts.
Wood and Materials
Choosing the right wood is crucial for both the durability and safety of your pet furniture.
- Wood Type:
- Pine: Affordable, widely available, and easy to work with. Great for beginner projects.
- Poplar: Another good hardwood option that’s relatively inexpensive and paints well.
- Plywood: Good for larger panels like the base of a bed or sides of a cabinet. Look for good quality hardwoods like birch plywood.
- Avoid: Pressure-treated wood (contains chemicals harmful to pets) and particle board/MDF unless sealed extremely well, as they can degrade with moisture and are less durable.
- Fasteners: Wood screws are generally preferred for strength. Nails can be used, especially with a nail gun.
- Wood Glue: A strong, non-toxic wood glue will add significant strength to your joints.
- Finishes:
- Pet-Safe Paint: Look for low-VOC or zero-VOC paints.
- Pet-Safe Polyurethane or Sealer: Opt for water-based, non-toxic finishes.
- Natural Oils: Food-grade mineral oil or beeswax can be used for a natural finish on surfaces not prone to heavy wear or moisture.
- Hardware: Hinges, drawer slides, decorative knobs, etc., depending on your project.
Genius DIY Woodworking Projects for Pet Furniture
Let’s get to the good stuff! Here are some fantastic project ideas that are perfect for getting your feet wet in woodworking for your pets. We’ll break down what makes them great and what to consider.
Project 1: The Simple Elevated Dog Bowl Feeder
Elevated feeders are great for dogs, especially larger breeds, as they can help improve digestion and reduce strain on their necks and joints. This project is super straightforward!
Why it’s great for beginners:
- Few pieces, straight cuts.
- Minimal joinery required.
- Highly customizable to your dog’s height.
What you’ll need:
- 1×4 or 1×6 lumber (pine or poplar works well)
- Wood screws (e.g., 1 1/4 inch)
- Wood glue
- Sandpaper
- Pet-safe paint or finish
- Two dog bowls
Basic Steps:
- Measure: Determine the ideal height for your dog. Measure from the floor to their shoulder, then subtract about 4-6 inches. This is your feeder height.
- Cut Sides: Cut two pieces of lumber to your desired feeder height. These will be the side supports.
- Cut Base & Top: Cut two pieces for the width of your feeder. These will form the top and bottom connecting pieces.
- Cut Support Pieces: Cut two smaller pieces to connect the top and bottom. The distance between these will determine how far apart your bowls are.
- Assemble Frame: Using wood glue and screws, attach the top and bottom pieces to the side supports, forming a box or frame.
- Add Bowl Supports: Measure and mark the locations for your bowls on the top piece. You can either cut out circles large enough to set the bowls into (more advanced) or simply attach cleats (small strips of wood) underneath the top piece to hold the bowls in place.
- Sand & Finish: Sand all surfaces smooth. Apply your pet-safe paint or finish.
- Insert Bowls: Place your dog bowls into their supports.
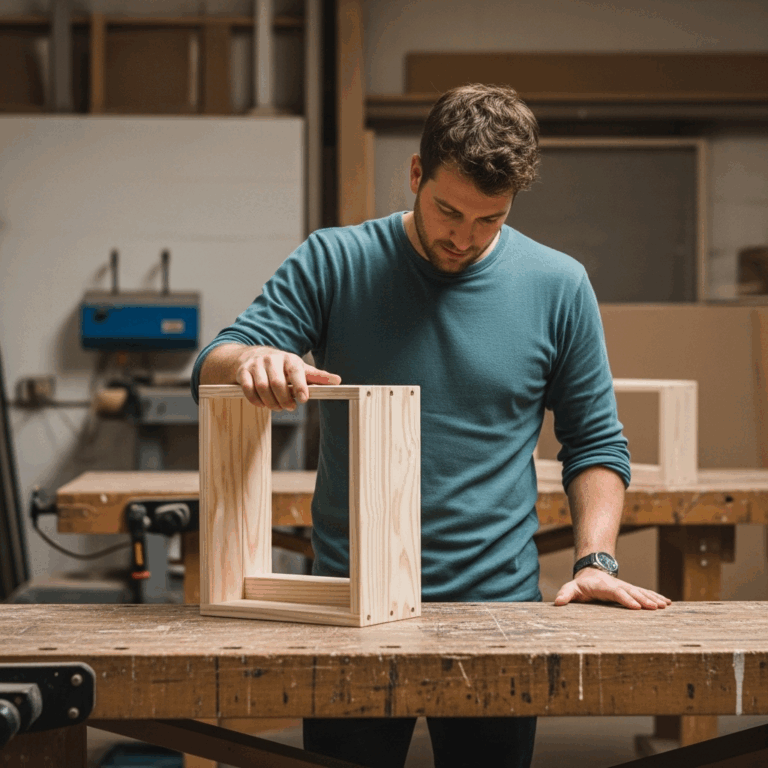
Project 2: The Cozy Wooden Dog Bed Frame
Give your dog’s bed a stylish upgrade with a simple wooden frame. This elevates the mattress and adds a touch of rustic charm to your home.
Why it’s great for beginners:
- Simple box construction.
- Can be made to any size for the mattress.
- Minimal decorative elements needed if you choose.
What you’ll need:
- 1×6 or 1×8 lumber (for sides and legs)
- 1×4 lumber (for internal support)
- Wood screws (e.g., 1 1/2 inch and 2 inch)
- Wood glue
- Sandpaper
- Pet-safe paint or stain
- Dog bed mattress
Basic Steps:
- Measure Mattress: Measure your dog’s existing mattress. Plan your frame to be slightly larger than the mattress, allowing for a snug fit.
- Cut Side Rails: Cut four pieces of 1×6 or 1×8 lumber for the four sides of your frame. Two pieces will be for the longer sides, and two for the shorter sides.
- Cut Legs: Cut four pieces of lumber to your desired height for legs (e.g., 4-6 inches). You can make them simple posts or taper them for a nicer look.
- Assemble Frame Sides: Attach the side rails together using wood glue and screws to form a rectangular frame. Ensure corners are square.
- Attach Legs: Attach the legs to the inside corners of the frame. You can screw them from the inside of the frame into the leg, or use pocket hole joinery for a cleaner look (more advanced).
- Add Mattress Support: Cut four pieces of 1×4 lumber to fit along the inside top edges of your frame. Screw these in place to create a lip for the mattress to rest on. You can also add a few cross braces with 1x4s for extra mattress support if needed.
- Sand & Finish: Sand everything thoroughly. Apply your chosen pet-safe finish.
- Add Mattress: Place the dog bed mattress inside the frame.
Project 3: Simple Cat Shelves or Perches
Cats love to climb and observe their domain from high places! Simple wall-mounted shelves are a fantastic way to give your feline friends their own vertical territory.
Why it’s great for beginners:
- Basic shelf construction.
- Can be arranged in unlimited configurations.
- Requires basic drilling and mounting skills.
What you’ll need:
- Wood planks (e.g., pine boards, 1×6 or 1×8)
- Wood screws (e.g., 1 1/4 inch)
- Wood glue (optional, for added strength)
- Sandpaper
- Pet-safe paint or stain
- Heavy-duty L-brackets or shelf brackets (ensure they are strong enough for a cat!)
- Wall anchors if not mounting into studs
- Optional: Sisal rope for scratching posts, carpet remnants for cushioning.
Basic Steps:
- Design Layout: Plan where you want your shelves on the wall. Consider how your cat will use them – are they just perches, or do they lead to other climbing areas?
- Cut Shelves: Cut your wood planks to the desired lengths. A common size might be 12-24 inches long.
- Sand & Finish: Sand all edges and surfaces smooth. Apply a pet-safe finish. If you want to add carpet, do it now before mounting. If adding sisal rope, wrap sections of the shelf or add small vertical posts.
- Install Brackets: Decide how you’ll mount the shelves. Using sturdy L-brackets is common. Mark your wall stud locations if possible for the most secure mounting. Use a level to ensure shelves are straight.
- Mount Shelves: Attach the brackets to the wall using appropriate screws and anchors. Then, attach the shelves to the brackets, usually from underneath.
- Test Stability: Gently press down on the shelves to ensure they are securely mounted and can hold your cat’s weight.
Project 4: Modular Pet Feeding Station
Keep feeding areas tidy and stylish with a modular feeding station. This can be a simple unit with cutouts for bowls, or it can incorporate storage for food and accessories.
Why it’s great for beginners:
- Builds on basic frame construction skills.
- Can be scaled up or down.
- Provides a designated, tidy space for feeding.
What you’ll need:
- Plywood (3/4 inch is good for structure) or solid wood planks (1×8 or 1×10)
- Wood screws
- Wood glue
- Sandpaper
- Pet-safe paint or finish
- Jigsaw (to cut bowl holes)
- Optional: Hinges, drawer slides, knobs for storage.
Basic Steps (Simple Version):
- Determine Size: Decide on the overall dimensions based on the number of bowls and any desired storage. Measure your pet’s bowls.
- Cut Pieces: Cut pieces for the base, sides, back, and top. If you’re adding a back panel, cut that too.
- Cut Bowl Openings: On the top piece, mark the centers for your bowls. Trace around the bowls, then remove about 1/2 inch from the circumference of each circle. Use a drill to create a starting hole, then use a jigsaw to cut out the circles.
- Assemble Box: Use wood glue and screws to assemble the sides, base, and back to create a box.
- Attach Top: Secure the top piece with the bowl cutouts to the assembled box using glue and screws. Ensure the bowls will sit securely within the openings.
- Sand & Finish: Sand all surfaces thoroughly. Apply a durable, pet-safe finish.
- Add Feet (Optional): You can add small wooden feet to lift the unit off the floor.
Project 5: Indoor Dog Potty Station (for small dogs)
For small dogs or puppies, an indoor potty station can be a lifesaver. Building your own allows for a customized size and a cleaner look than portable plastic options.
Why it’s great for beginners:
- Relatively small project.
- Focuses on creating a contained, easy-to-clean space.
- Can be designed with a removable tray for cleaning.
What you’ll need:
- Plywood (water-resistant like marine-grade or sealed well)
- Wood screws, waterproof wood glue
- Sandpaper
- Pet-safe, waterproof paint or sealant (crucial for easy cleaning)
- Optional: Removable tray (can be made from thin plywood or plastic), drainage grate.
Basic Steps:
- Design: Think about the size of your dog and the type of potty pad or turf you’ll use. A simple box with an open front and a slightly raised back (to keep pads in place) is a good start. Consider a removable tray underneath to catch accidents.
- Cut Pieces: Cut plywood for the base, sides, and back.
- Assemble Box: Use waterproof glue and screws to assemble the main box.
- Create Removable Tray (Optional): Build a shallow box that slides in beneath the main area to catch liquid.
- Seal & Finish: This is the most important step! Sand everything smooth. Apply multiple coats of a high-quality, pet-safe, waterproof sealant or paint. Ensure all edges and joints are completely sealed to prevent leaks and make cleaning easy. The EPA’s Safer Choice program lists products that can help you identify safer options.
- Add Turf/Pad Holder: You can build a simple frame on top to hold artificial turf or potty pads in place.
Project 6: Cat Tree with Shelves and Hiding Spots
This is a bit more ambitious but incredibly rewarding! A DIY cat tree allows you to create a custom vertical playground for your feline friends.
Why it’s great for beginners (with patience):
- Builds on basic shelf and box construction.
- Allows for creativity in design.
- Teaches you about structural stability for multi-level projects.
What you’ll need:
- Plywood for platforms and boxes
- 2×4 or 4×4 lumber for main support posts
- Screws, wood glue
- Sandpaper
- Pet-safe paints/stains (for wood parts)
- Carpet remnants, sisal rope, upholstery fabric
- Heavy-duty brackets or French cleats for wall stabilization (highly recommended!)
- Staple gun (for attaching carpet/fabric)
Basic Steps:
- Design: Sketch out your cat tree. How many levels? What size platforms? Will there be enclosed boxes? Where will the scratching posts go? Consider weight distribution and stability – wider bases and shorter, thicker posts are more stable.
- Build Base: Create a sturdy, wide base from thick plywood (e.g., 3/4 inch or thicker).
- Cut Posts & Platforms: Cut your support posts and platform pieces.
- Assemble Structure: Start attaching platforms to posts using screws and glue. Ensure connections are strong. For larger structures, consider using longer screws or even metal brackets for reinforcement.
- Add Boxes: Build simple plywood boxes and attach them securely to platforms. Cut entrance holes for your cats.
- Wrap Posts: Apply glue to sections of the posts and tightly wrap with sisal rope, securing the ends with staples or small screws.
- Cover Platforms: Cut carpet or fabric to size and attach it to the platforms using a staple gun. Ensure edges are tucked neatly.
- Sand & Finish: Sand any exposed wood edges smooth and apply a pet-safe finish.
- Secure to Wall: Critically important! For safety, especially with taller cat trees, use L-brackets or French cleats to secure the top of the tree to a wall stud. This prevents tipping.
Safety First, Always!
Working with tools and wood can be fun and rewarding, but safety should always be your top priority. Here are some key points to remember:
- Wear Your Safety Gear: Always wear safety glasses when cutting, drilling, or sanding. Gloves are good for handling rough lumber.
- Understand Your Tools: Read the manuals for any power tools you use. Know how they work and their safety features.
- Keep Your Workspace Clean: A cluttered workspace is a dangerous workspace. Keep your area tidy to avoid tripping or knocking things over.
- Secure Your Work: Use clamps to hold pieces firmly in place when cutting or drilling.
- Supervise Pets: Keep pets away from your work area while you are actively building. Sawdust and tools are not safe for them.
- Pet-Safe Materials: As mentioned, always use pet-safe finishes, paints, and glues. Research any product thoroughly. In the US, the Occupational Safety and Health Administration (OSHA) provides guidance on chemical safety which indirectly helps in choosing safer materials.
Finishing Touches & Maintenance
Once your DIY pet furniture is built, a few finishing touches and a plan for maintenance will make it even better!
Sanding is Key
This can’t be stressed enough. Thoroughly sand all surfaces, especially edges and corners, to prevent splinters. Start with a coarser grit (like 80 or 120) to smooth out rough spots, then move to a finer grit (like 220) for a smooth finish. This is vital for your pet’s comfort and safety.
Choosing the Right Finish
For wood that will be painted, a good primer is essential for durability and a smooth finish. For staining, test your stain on a scrap piece of the same wood first. For clear coats, opt for water-based polyurethanes designed for high-traffic areas, ensuring they are labeled non-toxic and pet-safe once cured. Always allow finishes to cure completely – this can take several days to a week or more, depending on the product and humidity – before letting your pet use the furniture. Check the product’s technical data sheet for cure times.
Cleaning and Care
Regular cleaning will keep your DIY pet furniture looking great and hygienic. For most wood finishes, a damp cloth is sufficient. For any accidents, address them immediately. If you used a truly waterproof sealant, a gentle cleaner should work. For fabric or carpeted parts, vacuum regularly and spot clean as needed.
Crafting Comfort for Your Companion
There you have it! From simple elevated feeders to more involved cat trees, these DIY woodworking projects for pet furniture are fantastic ways to show your pets some extra love while honing your own DIY skills. Remember, the most important tools you have are patience and a willingness to learn.
Start with a project that feels manageable. Don’t be afraid to make mistakes – they’re just part of the learning process! Every cut, every screw, every coat of paint brings you closer to creating a unique, functional, and beautiful piece that your furry friend will adore for years to come.
So gather your tools, pick out your lumber, and get ready to build something truly special. Your pet is waiting for their custom-made haven, and you’ve got this!
Frequently Asked Questions
Is woodworking for pet furniture hard for beginners?
Not at all! Many DIY woodworking projects for pet furniture are designed with beginners in mind. Simple designs, clear instructions, and the right tools make it very achievable. Starting with smaller, less complex projects is a great way to build your confidence.
What kind of wood is best for pet furniture?
It’s best to use hardwood or untreated softwood. Avoid pressure-treated wood, as the chemicals can be harmful to pets if ingested. Natural woods like pine, oak, or maple are excellent choices. Always ensure the wood is sanded smooth and finished with pet-safe, non-toxic sealants or paints.
What tools do I absolutely need for a basic pet furniture project?
For basic projects, you’ll likely need a tape measure, a pencil, a saw (a hand saw or a circular saw can work), a drill, screws or nails, sandpaper, and safety gear like safety glasses and gloves. A nailer, like a brad nailer or finish nailer, can speed things up significantly!
How do I ensure my pet furniture is safe for my pet?
Prioritize smooth finishes to prevent splinters, use non-toxic glues and finishes, and ensure there are no small, sharp, or loose parts that your pet could chew off and swallow. Make sure the furniture is stable and won’t tip over.
Can I make pet furniture that looks good and matches my home decor?
Absolutely! The beauty of DIY is customization. You can choose paint colors, stains, and finishes that complement your existing decor. Simple, clean designs often integrate seamlessly into modern or traditional home styles.
Are there any online resources for free DIY pet furniture plans?
Yes, many woodworking blogs, YouTube channels, and DIY websites offer free plans. Searching for “free DIY pet furniture plans” will yield many results. Websites like Ana White, Instructables, and many YouTube woodworking channels are great places to start.