Build your own sturdy, beautiful DIY wooden toy chest with a lid! This beginner-friendly guide provides all the steps, tools, and tips you need to create a functional storage solution that will last for years. Get ready to organize and impress!
Tired of toys scattered all over the house? A wooden toy chest is a classic solution that brings order and charm to any room. But who says you need to buy one? Building your own is not only incredibly rewarding but also surprisingly achievable, even for beginners. Forget complicated plans; we’re breaking down this project into easy-to-follow steps. You’ll gain confidence, learn new skills, and end up with a beautiful piece of furniture you can be proud of. Let’s dive in and build something amazing together!
Table of Contents
Why Build a DIY Wooden Toy Chest?
Building your own toy chest from wood offers a heap of advantages. First off, it’s a fantastic way to save money compared to buying a pre-made one. Plus, you get to choose the exact size, style, and type of wood, ensuring it fits your space and décor perfectly. Think about it: you can customize it with paint, stain, or even a fun decal! For beginners, it’s a rewarding project that teaches fundamental woodworking skills you can use in future builds. And let’s not forget the satisfaction of saying, “I made that!” about a piece that will be used and loved for years.
Benefits at a Glance:
- Cost-effective compared to store-bought options.
- Customizable to your exact needs and style.
- Teaches valuable woodworking skills.
- Provides a sense of accomplishment.
- Creates a durable and long-lasting storage solution.
It’s a win-win-win situation: good for your wallet, good for your home, and great for your DIY journey.
Choosing Your Wood: The Foundation of Your Toy Chest
The type of wood you select will impact the look, durability, and cost of your toy chest. As a beginner, opting for readily available and easy-to-work-with woods is a smart move. For a basic, budget-friendly option, common pine is excellent. It’s lightweight, easy to saw, sand, and finish. If you want something a bit more robust and with a nicer grain, consider poplar or a mid-grade pine. For a truly premium feel and increased durability, hardwoods like oak or maple are fantastic, though they can be more expensive and a little trickier to work with for your first project.
When buying wood, look for boards that are as straight as possible. Warped or twisted boards can make your project much harder. Also, check for excessive knots, especially large ones that might fall out later.
Wood Options for Your Toy Chest:
- Pine: Affordable, lightweight, easy to cut and finish. Great for beginners and painted projects.
- Poplar: Slightly harder than pine, takes paint and stain well, good durability.
- Plywood: Stable and cost-effective, especially for larger panels like the sides and bottom. Look for good-quality options like birch plywood.
- Oak/Maple: Hardwoods, very durable, beautiful grain. More expensive and harder to work with but offer a premium finish.
For this guide, we’ll assume you’re using common pine or a good quality plywood for ease of use and budget friendliness. You can always upgrade materials for your next build!
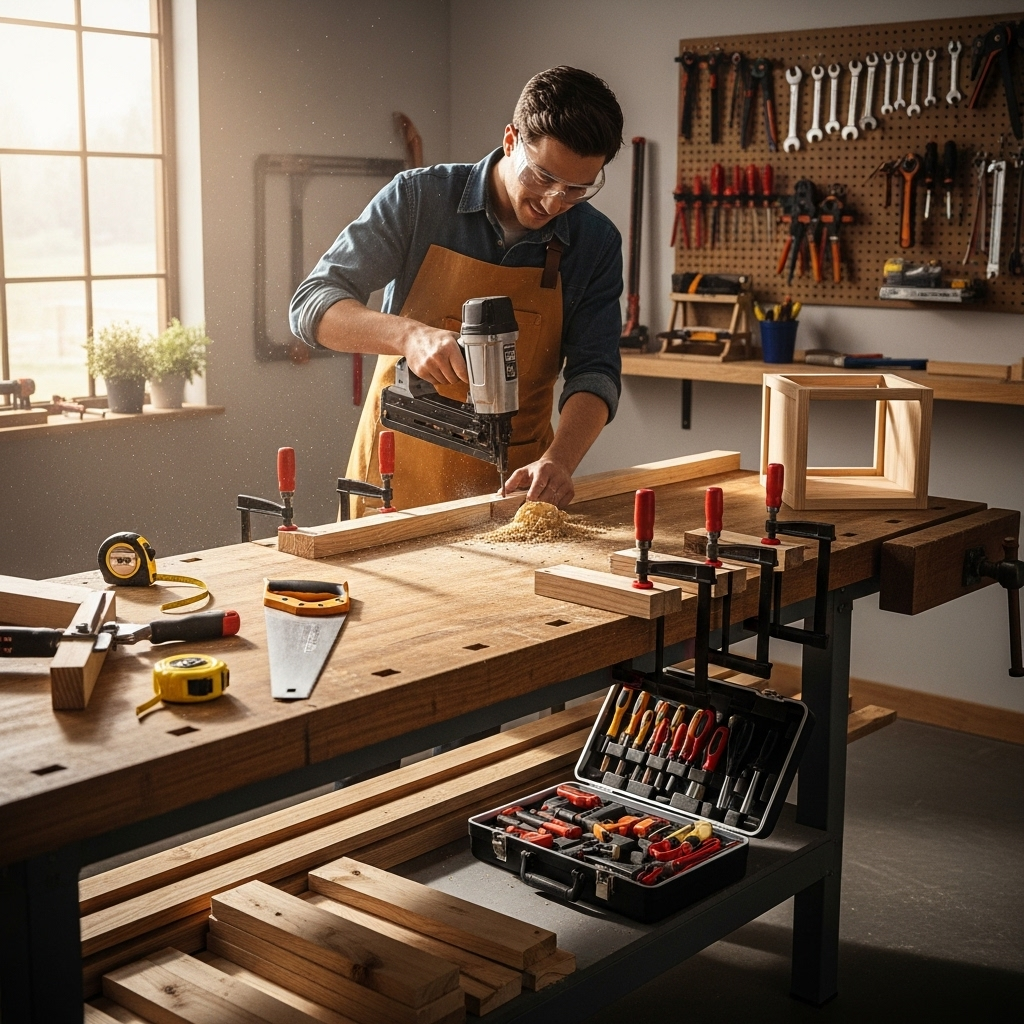
Essential Tools and Materials
Gathering your tools and materials before you start is key to a smooth building process. Don’t worry if you don’t have everything; some can be borrowed, or you can pick up the basics as you go. Investing in a few good tools will serve you well for many DIY projects to come.
Tools You’ll Need:
- Measuring Tape: For accurate measurements.
- Pencil: To mark your cuts.
- Safety Glasses: Absolutely essential for protecting your eyes when cutting or sanding.
- Hearing Protection: Especially if using power saws.
- Dust Mask: Protect your lungs from sawdust.
- Saw: A handsaw is possible but a circular saw or miter saw makes cuts much easier and more accurate. For beginners, a circular saw is a versatile choice.
- Sander: An orbital sander makes smoothing edges quick and easy. Sandpaper (various grits, e.g., 120, 180, 220) is essential.
- Drill/Driver: For pre-drilling holes and driving screws.
- Drill Bits: Various sizes for pilot holes and countersinking.
- Clamps: Helpful for holding pieces together while gluing or screwing.
- Wood Glue: For strong, durable joints.
- Screws: Wood screws, typically 1 ¼” or 1 ½” for 3/4″ thick lumber.
- Hinges: For attaching the lid. Choose a style that suits your needs (e.g., butt hinges, continuous hinge).
- Optional: Lid Support/Safety Hinge: To prevent the lid from slamming shut, which is a great safety feature for children’s toys.
Materials for a Basic Toy Chest (Approx. 36″ L x 18″ W x 20″ H):
These dimensions are a suggestion; adjust them to fit your space and needs! For a chest this size, you’ll likely need about 20-25 feet of 1×10 or 1×12 lumber (actual dimensions are ¾” x 9 ¼” or ¾” x 11 ¼”, respectively), plus a piece of ³⁄₄” plywood for the bottom.
- Side Panels: Two pieces, cut to your desired height (e.g., 20″).
- Front & Back Panels: Two pieces, cut to your desired length minus the thickness of the two side panels (e.g., 36″ – (2 x ³⁄₄”) = 34 ½”).
- Bottom Panel: One piece of ³⁄₄” plywood, cut to fit inside the assembled frame formed by the side, front, and back panels.
- Lid: One or two pieces of wood to create the lid, sized to overlap the box slightly.
It’s always a good idea to buy a little extra wood, just in case of mistakes or the need for replacements.
Step-by-Step: Building Your DIY Wooden Toy Chest
Let’s get building! Remember to measure twice and cut once. Safety first – always wear your safety glasses and use caution with power tools.
Step 1: Cut Your Wood Pieces
Using your measurements and saw, carefully cut all the pieces for your toy chest.
Here’s a breakdown for our example dimensions (adjust as needed):
- Sides: 2 pieces @ 20″ (height)
- Front/Back: 2 pieces @ 34 ½” (length)
- Bottom Support (Optional, for inset bottom): 4 pieces @ approx. 33″ (length) to fit inside the front/back panels.
- Bottom Panel: 1 piece of ³⁄₄” plywood @ 34 ½” x 16 ½” (adjust width based on your side panel thickness). If you’re not making an inset bottom, you’ll cut this to fit the exact outer dimensions.
- Lid: Depends on your design. For a simple lid, cut two pieces @ 36″ long. You can join them with glue and pocket holes, or use shorter pieces to create a lip.
Double-check your measurements before making each cut. Smooth any rough edges with sandpaper.
Step 2: Assemble the Box Frame
This is where your toy chest starts to take shape. We’ll assume you’re using plain butt joints for simplicity, secured with glue and screws.
- Lay one of the side panels flat.
- Apply a bead of wood glue along the edge where the front panel will attach.
- Align the front panel perpendicular to the side panel, ensuring the edges are flush.
- Pre-drill pilot holes through the side panel into the edge of the front panel. Use 2-3 holes evenly spaced.
- Drive wood screws to secure the joint.
- Repeat this process to attach the other side panel to the front panel.
- Now, apply glue to the exposed edges of the side panels and attach the back panel in the same way. You should now have a rectangular box frame.
Using clamps can help hold the pieces tightly together while you drill and screw.
Step 3: Install the Bottom Panel
There are a couple of ways to attach the bottom. For a beginner, the easiest is often to attach it directly to the bottom edges of the assembled frame. A more professional look is to inset it.
Option A: Direct Attachment
- Lay the assembled frame on its back.
- Position the bottom panel onto the bottom edges of the frame.
- Apply glue to the bottom edges of the frame.
- Align the bottom panel.
- Pre-drill pilot holes down through the bottom panel into the frame edges (or up from the frame into the bottom panel if it’s easier access).
- Drive screws to secure the bottom panel.
Option B: Inset Bottom (Requires Bottom Support Pieces)
- Assemble your four bottom support pieces into a rectangle that will fit snugly inside the front and back panels and flush with the bottom edge of the side panels. Glue and screw these together.
- Apply glue to the inside bottom edges of the side, front, and back panels.
- Slide the bottom support frame into place and secure it by driving screws from the outside of the side, front, and back panels into the support pieces.
- Then, place your ³⁄₄” plywood bottom panel on top of this support frame. Glue and screw it down to the support frame.
An inset bottom often provides more structural integrity and a cleaner look. Refer to resourceful construction guides for visual examples if needed.
Step 4: Construct and Attach the Lid
For a simple lid, you can cut two pieces of your chosen wood (e.g., 1×8 pine) to the desired length (e.g., 36″).
- Lay the two pieces side-by-side.
- Apply wood glue along the joining edges.
- Clamp them together securely.
- For added strength, you can use pocket holes on the underside to join them, or once dry, attach a few small wooden battens across the seam on the underside.
- Once assembled, place the lid on top of the chest. Adjust it so it overhangs evenly.
- Mark the position for your hinges on both the lid and the back edge of the chest.
- Attach the hinges according to the manufacturer’s instructions, usually involving pre-drilling and screwing.
Step 5: Add Safety Features (Highly Recommended!)
Child safety is paramount. A heavy lid can pose a hazard. Consider adding:
- Soft-Close Hinges: These prevent the lid from slamming shut.
- Lid Support Struts: These hold the lid open and prevent it from falling closed unexpectedly.
- Ventilation Holes: Drill a few holes in the lid or sides to allow for airflow.
Invest in safety hardware; it’s a small price for peace of mind. You can find excellent child-safe hinge options from major hardware retailers.
Step 6: Sanding and Finishing
This is where your DIY wooden toy chest really starts to shine!
- Start with a medium-grit sandpaper (like 120) to smooth out any rough spots, edges, and joints.
- Progress to a finer grit (e.g., 180 or 220) for a silky-smooth finish. Pay attention to all surfaces, inside and out.
- Wipe away all dust with a clean cloth or tack cloth.
- Apply your chosen finish:
- Paint: Use a good quality primer followed by two coats of your desired color.
- Stain: Apply stain according to the product instructions, wiping off excess. Follow with a clear protective topcoat (polyurethane or varnish).
- Sealer: A clear sealant can protect the wood while letting its natural beauty show.
Allow each coat to dry thoroughly before applying the next. Ensure good ventilation when working with finishes.
Design Variations and Customization
Once you’ve mastered the basic DIY wooden toy chest, the possibilities for customization are endless!
Ideas to Make Your Toy Chest Unique:
- Decorative Molding: Add trim around the top or bottom edges for a more traditional look.
- Cut-out Handles: Instead of separate handles, cut out simple handholds on the front or sides.
- Painted Designs: Get creative with stencils or freehand painting.
- Wheels: Add casters to the bottom for easy mobility.
- Dividers: Install internal dividers to sort different types of toys.
- Slatted Lid: For better airflow and a different aesthetic.
Popular Wood Finishes Explained:
Choosing the right finish enhances both the appearance and longevity of your toy chest.
| Finish Type | Pros | Cons | Best For |
|---|---|---|---|
| Paint | Hides imperfections, wide color choice, durable (with proper prep). | Can chip over time, requires primer. | Budget-friendly wood, achieving specific décor themes. |
| Stain | Enhances wood grain, natural look, variety of colors. | Requires a topcoat for protection, can show imperfections. | Showcasing the beauty of pine or hardwood. |
| Polyurethane/Varnish | Protective, durable, available in matte, satin, or gloss. | Can alter wood color slightly, requires ventilation during application. | Protecting stained or bare wood from wear and moisture. |
| Clear Lacquer | Dries quickly, provides a hard, protective coating. | Can have strong fumes, requires good ventilation; touch-ups can be tricky. | A quick, durable finish for high-traffic items. |
Don’t forget to check out online resources like This Old House for more in-depth finishing techniques.
Frequently Asked Questions (FAQ)
Q1: What type of wood is best for a DIY toy chest?
For beginners, pine or poplar are great choices because they are affordable, easy to cut, and accept finishes well. Plywood is also a good option for larger panels like the sides and bottom, offering stability.
Q2: How do I ensure my toy chest is safe for children?
Always use smooth finishes without splinters, round off sharp corners, and install safety hinges or lid supports to prevent the lid from slamming shut. Ensure there are no small parts that could detach.
Q3: What are the basic dimensions for a toy chest?
A common size might be around 36 inches long, 18 inches wide, and 20 inches high, but you can adjust these based on the available space and the amount of storage needed.
Q4: Do I need special tools to build a toy chest?
While a handsaw and a manual screwdriver can work, a power drill/driver and a circular saw (or miter saw) will make cutting and assembly much faster and more accurate. Safety glasses are mandatory.
Q5: How can I make my toy chest more decorative?
You can paint it, add decorative molding, stencil designs, cut out handles, or attach casters for mobility. The finish you choose also greatly impacts the look.
Q6: How do I attach the lid securely?
Use sturdy hinges designed for the weight of your lid. Butt hinges or a continuous piano hinge are common choices. Ensure they are installed correctly and consider safety features like soft-close mechanisms.
Q7: What kind of screws should I use?
For joining ¾-inch thick lumber, 1 ¼-inch or 1 ½-inch wood screws are generally suitable. Always pre-drill pilot holes to prevent the wood from splitting, especially near the edges.
Conclusion
And there you have it! Building your own DIY wooden toy chest with a lid is totally within reach. You’ve learned about choosing the right materials, gathering your tools, and following step-by-step instructions to