Have you ever tried to use your calculator at a strange angle? It can be frustrating, can’t it? A DIY calculator stand might be just what you need. Imagine having your calculator at the perfect height and angle for easy reading. That’s the magic of creating your own stand!
Not everyone knows that making a stand can be fun and easy. You don’t need fancy tools or skills. With a few simple materials, your calculator can sit proudly and comfortably.
Did you know that a well-placed calculator can help you solve problems faster? A DIY calculator stand not only helps with comfort but can also boost your speed during math homework or in the middle of a tricky exam.
Join us as we explore how to craft your own calculator stand. You’ll find out how easy it is to improve your workspace and make your math tasks more enjoyable!

Table of Contents
Create Your Own Stylish Diy Calculator Stand Today!
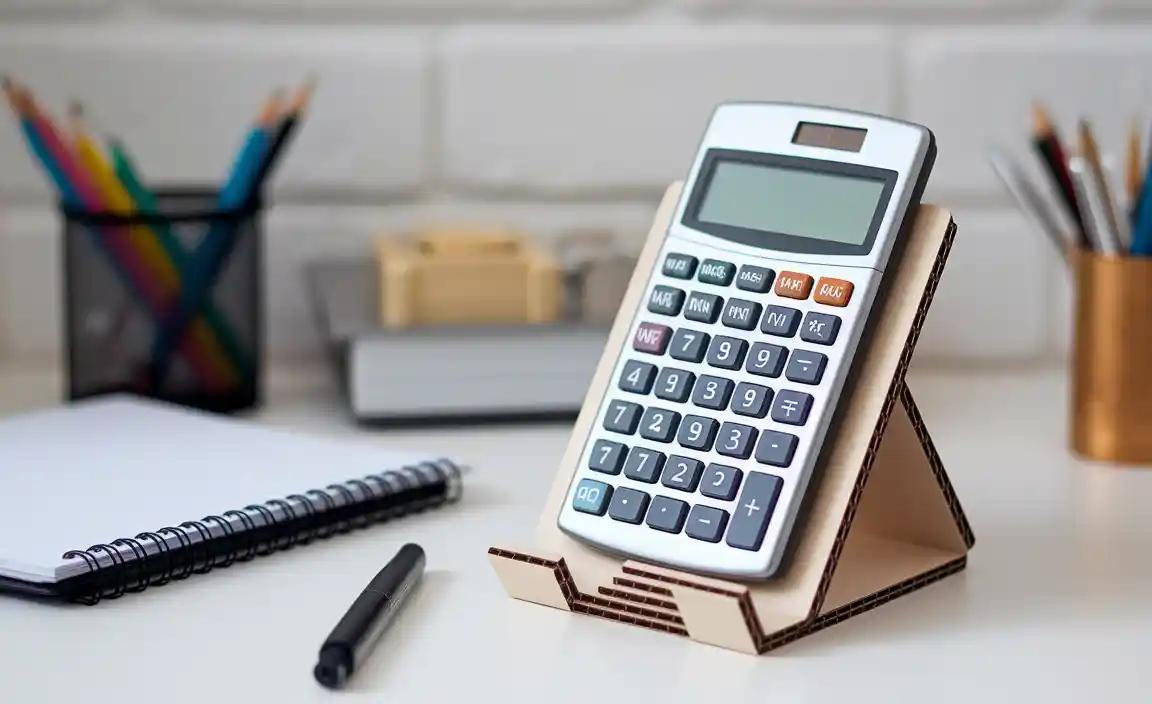
Creating a DIY calculator stand can be a fun and simple project. It helps keep your calculator at the right angle for easy viewing. Imagine never struggling to read those tiny numbers again!

You can craft it from materials like wood, cardboard, or even plastic. Plus, designing your own stand adds a personal touch to your study space. Did you know that having a proper stand can improve your focus and comfort? Build one today and make studying easier!
Benefits of a DIY Calculator Stand
Enhance workspace organization. Improve ergonomics and reduce strain.
Creating a DIY calculator stand can help tidy your space. It keeps your desk organized, so you won’t lose your calculator under a pile of papers. Plus, a raised stand helps you see better and sit comfortably, reducing neck strain. Ergonomics matter! You’ll notice fewer aches during long homework sessions. And let’s face it, your calculator deserves a throne. Remember, it’s not just about math; it’s about math with style!
| Benefit | Description |
|---|---|
| Workspace Organization | Keeps your desk clutter-free |
| Improves Ergonomics | Reduces strain on your neck and back |
Essential Tools for Building Your Calculator Stand
List of necessary tools (saw, drill, etc.). Tips for beginners on tool usage.
Building your own calculator stand can be fun and easy! First, gather some essential tools. You’ll need a saw for cutting, a drill to make holes, and a measuring tape for perfect sizing. Safety glasses are a must—nobody wants splinters in their eyes! Now, if it’s your first project, remember to take your time. Measure twice, cut once, and keep your fingers away from sharp edges. Want to know what tools to grab? Check out this handy table!
| Tool | Use |
|---|---|
| Saw | Cut the wood pieces |
| Drill | Make holes for screws |
| Measuring Tape | Measure lengths |
| Screwdriver | Fasten pieces together |
| Safety Glasses | Protect your eyes |
Step-by-Step Guide to Building Your Calculator Stand
Detailed instructions for measuring and cutting. Assembly tips and techniques. First, gather your materials. You’ll need wood, a ruler, and a saw. Measure your calculator’s width and height. Cut two pieces of wood as base supports. For the back, make a taller piece to hold the calculator at a comfy angle. Don’t forget to wear safety goggles; nobody wants a surprise wood splinter in their eye!
Next, assemble your pieces. Use wood glue for a strong hold. Hold the back piece in place while it dries. You can even sing a song to keep it steady—just don’t get too carried away or you might glue your hands together!
| Materials | Measurements |
|---|---|
| Wood | Width of calculator + 2 inches |
| Ruler | For precise measuring |
| Saw | To cut your pieces |
Finally, check if everything fits. If it wobbles, glue it again. Soon, you’ll have a custom calculator stand ready to impress classmates!
Design Ideas for Your Calculator Stand
Various styles (minimalist, adjustable, etc.). Creative customization options (paint, decals, etc.).
When designing your calculator stand, think of it as your calculator’s personal throne! You can go for a minimalist style—simple and sleek. Or make it adjustable so you can find that perfect angle. Feeling creative? Try adding some paint or fun decals. Your calculator could be decked out in flames, unicorns, or even a favorite superhero! Creativity has no limits!
| Style | Description |
|---|---|
| Minimalist | Simple design, no frills. |
| Adjustable | Works at different angles for comfort. |
| Custom Decorated | Your style, your way—add paint or stickers! |
With these ideas, your calculator stand can be a true work of art. Who knew math tools could look so cool?
Common Mistakes to Avoid
Typical errors in measurement and assembly. Solutions to fix mishaps during construction.
Building a DIY calculator stand can be fun, but mistakes happen even to the best of us! One common error is poor measurements. A cut that’s too short can turn a perfect project into a wobbly nightmare. Use a good tape measure and double-check before cutting. If you find yourself with mismatched pieces, don’t panic! A little wood glue or extra support can work wonders. Remember, it’s just wood, not rocket science. Even the best builders have had wonky projects!
| Mistakes to Avoid | Solutions |
|---|---|
| Incorrect measurements | Double-check measurements before cutting. |
| Poor assembly | Use glue and clamps for better support. |
| Rushing the project | Take your time; good things come to those who wait! |
Maintenance and Care Tips
How to clean and care for your calculator stand. Recommendations for durability and longevity.
Keeping your calculator stand clean and strong is easy. Regular care can help it last a long time. Start by wiping it with a soft, dry cloth to remove dust. For tougher stains, dampen the cloth slightly. Avoid harsh cleaners; they can harm the stand.
Here are some tips for durability:
- Use a protective cover when not in use.
- Store it in a dry, cool place.
- Avoid dropping it to prevent damage.
Taking small steps can help your DIY calculator stand stay in great shape!
How often should I clean my calculator stand?
You should clean your calculator stand once a week to keep it looking new and prevent dust buildup.
Alternative Uses for a DIY Calculator Stand

Multifunctional usages (e.g., tablet stand, phone holder). Ideas for repurposing old calculator stands. Old calculator stands can be real treasure chests! Instead of tossing them away, transform them into useful tools. They can turn into a trusty tablet stand or a handy phone holder. Picture this: a movie on your tablet, comfortably propped up while you snack. It’s like having a mini theater! Also, you can use it for recipes in the kitchen or even as a picture display. Who knew a simple stand could spark so many ideas? Check out the table below for more fun uses!
| Old Calculator Stand Ideas | New Uses |
|---|---|
| Tablet Holder | Watch videos easily! |
| Phone Stand | Perfect for calls or Facetime! |
| Recipe Holder | Cook and read at the same time! |
| Picture Display | Show off your friends and family! |
Conclusion
In conclusion, a DIY calculator stand is an easy and fun project. It helps organize your workspace and can be made from simple materials. You can customize it to fit your style and needs. Why not gather your supplies today and start building? For more tips and ideas, check out our other articles on DIY projects!
FAQs
What Materials Are Best For Making A Sturdy Diy Calculator Stand?
To make a sturdy DIY calculator stand, you can use materials like wood, cardboard, or foam board. Wood is strong and lasts a long time. Cardboard is light and easy to cut. Foam board is also light and can be shaped easily. Choose the material you have at home!
How Can I Customize My Diy Calculator Stand To Fit Different Calculator Sizes?
To customize your DIY calculator stand, first, measure your calculator. Then, adjust the size of the stand based on those measurements. You can use cardboard or wood to create a base that fits well. If your calculator is bigger or smaller, change the height or width of the stand. Test it out to make sure your calculator sits securely!
What Design Features Should I Consider For Improving The Usability Of My Calculator Stand?
To improve your calculator stand, make sure it’s the right height for you. You want to see the screen easily. Use soft materials to make it comfortable to touch. Add non-slip pads on the bottom, so it won’t move when you use it. Finally, choose bright colors or interesting designs to make it fun!
Are There Any Easy Diy Calculator Stand Plans Or Templates Available Online?
Yes, there are many easy DIY calculator stand plans and templates online. You can find step-by-step guides with pictures. Some websites even have free printable templates. Just search for “DIY calculator stand” to see them. Happy crafting!
How Can I Incorporate Additional Storage Or Organization Features Into My Diy Calculator Stand?
You can add extra storage to your DIY calculator stand in a few fun ways. First, use small containers or boxes to hold extra calculator supplies like pens or paper. You could also attach a small shelf or a drawer under the stand for more space. Another idea is to hang a clear bag on the side for easy access to your calculator and other tools. This way, everything stays neat and organized!
Resource:
how to use a tape measure properly: https://www.familyhandyman.com/project/how-to-use-a-tape-measure/
wood glue application tips: https://www.popularwoodworking.com/techniques/understanding-wood-glue/
ergonomics for better study posture: https://www.cdc.gov/niosh/topics/ergonomics/default.html
easy DIY crafts you can try today: https://www.thesprucecrafts.com/simple-diy-projects-4174725