Have you ever thought about adding a unique touch to your bedroom? A DIY birch headboard project could be the perfect solution. Imagine how a beautiful headboard made from birch wood can change the look of your space. It’s simple, stylish, and fun!
Many people love the natural beauty of birch wood. Its light color and smooth texture make it stand out. Plus, DIY projects can be a great way to spend time, especially on weekends. Have you ever built something with your own hands? It can be very rewarding.
As you explore this project, you might discover new skills. Did you know that birch wood is strong but lightweight? This means your headboard will look great without being too heavy. So, are you ready to get started on a fun DIY adventure? Let’s dive into how to create a stunning birch headboard for your bedroom!
Table of Contents
Create A Stunning Diy Birch Headboard Project Today!
Want to add a personal touch to your bedroom? A DIY birch headboard project might be the answer! This fun project allows you to create a beautiful headboard using natural birch wood. You don’t need to be a master carpenter. Just gather some supplies, follow a simple guide, and let your creativity shine! Did you know that birch wood gives a cozy feel and matches various decor styles? Create your own version, and enjoy a unique addition to your space!
Materials Needed for Your DIY Birch Headboard
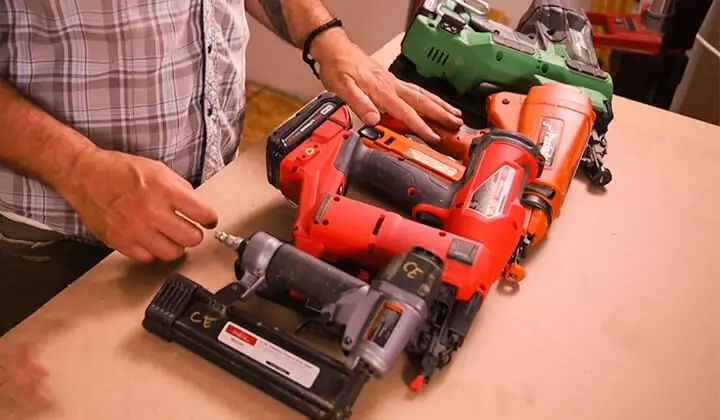
List essential materials such as birch plywood, wood glue, screws, and finish options.. Provide suggestions for tools required like a saw, drill, and sandpaper..
Building a birch headboard is fun and simple! First, you need some birch plywood. It’s smooth and looks great. You will also need wood glue and screws to hold everything together. For tools, grab a saw to cut the wood, a drill to make holes, and some sandpaper to smooth rough edges. We don’t want splinters, right? Here’s a handy table for your shopping list:
| Materials | Tools |
|---|---|
| Birch Plywood | Saw |
| Wood Glue | Drill |
| Screws | Sandpaper |
| Finish Options |
Choosing the Right Birch Plywood
Discuss types of birch plywood and their characteristics.. Offer guidance on thickness and grade selection for durability..
Birch plywood has several types, each with unique qualities. Standard birch plywood is strong and smooth, ideal for furniture. Marine-grade birch plywood is resistant to water, perfect for wet areas. Veneer birch plywood offers a pretty surface for finishing. When selecting plywood for your DIY project, consider the thickness. Thicker plywood provides greater durability, while thinner sheets are lightweight. For a headboard, aim for at least ¾ inch to ensure a sturdy build.
What thickness should I choose for my headboard?
A thickness of ¾ inch or more is recommended for a strong and long-lasting headboard. This thickness supports weight and usage well.
Measuring and Designing Your Headboard
Explain how to measure your bed frame for a perfect fit.. Provide design ideas and tips for personalizing the headboard style..
Start by measuring the width and height of your bed frame. Use a tape measure for accuracy. This helps ensure your headboard fits perfectly. For design ideas, consider these tips:
- Add shelves for books or decor.
- Paint it to match your room colors.
- Try different shapes like rounded or square tops.
Feeling creative? Use stencils for unique patterns. Personalize it with your favorite colors or symbols. This DIY project will reflect your style!
How do I measure for a headboard?
Measure the width of your bed, then add a few inches on each side for overhang. The height depends on your preference, but usually, it should be about 24-48 inches tall.
Preparing the Wood for Assembly
Detail the steps for cutting and sanding the plywood for a smooth finish.. Discuss the importance of wood treatment and sealing options..
First, gather your tools and cut the plywood into the right shapes. Use a saw for clean edges. Then, smooth the surface by sanding the wood. Start with rough sandpaper, then finish with fine sandpaper for a silky touch. This makes the wood feel nice and helps paint stick well.
Treating and sealing the wood is very important. It protects against scratches and water damage. You can use a wood finish or sealant. This helps keep your headboard looking great for years.
Why is wood treatment important?
Wood treatment helps prevent damage and extends the lifespan of your DIY projects. Without it, your wooden pieces may suffer from wear and tear.
Steps for Cutting and Sanding:
- Measure and mark the plywood.
- Cut with a saw for straight lines.
- Sand using rough to fine sandpaper.
- Clean off dust before treating.
Remember, taking your time now pays off later. Happy building!
Step-by-Step Assembly Process
Outline the assembly steps from attaching pieces to adding hardware.. Include tips for ensuring sturdiness and alignment during assembly..
To create your birch headboard, follow these steps carefully. First, attach the side pieces to the main panel using wood glue. Use clamps to hold them in place. Next, secure the top piece by aligning it with the sides. Add screws for strength. Make sure everything is straight and level. Lastly, install any hardware needed for hanging or decoration. Double-check each connection for sturdiness. A sturdy headboard keeps everything secure!
What tools do I need for the assembly?
You will need a drill, wood glue, screws, and clamps. Additionally, a level and measuring tape are helpful to ensure everything fits well.
Finishing Touches: Staining and Sealing
Discuss various staining options to enhance natural wood color.. Provide stepbystep instructions for sealing the headboard..
To make your headboard shine, you need to pick a stain that highlights the pretty grains of the wood. Options like light oak or walnut can really show off the natural beauty. Staining is like giving your wood a spa day! Here’s a quick guide on sealing your creation:
| Step | Instructions |
|---|---|
| 1 | Clean the headboard thoroughly. |
| 2 | Apply a stain evenly and let it dry. |
| 3 | Use a brush to apply sealant for protection. |
| 4 | Let it dry, then enjoy your masterpiece! |
Remember, sealing is like giving your headboard a raincoat—it keeps it safe! Now your DIY birch headboard is ready to shine while you catch those Z’s!
Mounting Your DIY Birch Headboard
Explain different mounting options based on bed frame type.. Offer tips for ensuring the headboard is securely attached..
For your DIY birch headboard, how you mount it really depends on your bed frame. If you have a metal frame, brackets can work wonders. For a wooden frame, screws or lag bolts are your best friends. Need tips? Make sure to use a level before drilling; no one likes a headboard that leans like it’s trying to do the limbo! And don’t forget to check that everything is snug. A wobbly headboard could lead to bedtime shenanigans!
| Bed Frame Type | Mounting Option |
|---|---|
| Metal Frame | Brackets |
| Wood Frame | Screws or Lag Bolts |
Secure it like your cat secures its napping spot! Following these tips can keep your headboard steady and your dreams peaceful.
Maintenance Tips for Longevity
Provide advice on cleaning and maintaining the headboard.. Discuss potential repairs and refinishing options over time..
To keep your headboard looking spiffy over time, regular cleaning is key! Use a soft cloth and a gentle cleaner to wipe away dust and smudges. This will help it shine and keep surprises like scratches at bay. If you spot any nicks, don’t panic! A little sandpaper and finish can work wonders. Remember, a well-loved headboard stays happy! Here’s a little guide to get you started:
| Task | Frequency | Tool |
|---|---|---|
| Dusting | Weekly | Soft Cloth |
| Cleansing | Monthly | Gentle Cleaner |
| Repair nicks | As Needed | Sandpaper, Finish |
If your headboard ever needs a facelift, don’t hesitate! A quick coat of finish can give it a fresh look. Your headboard loves the attention, and you’ll love the new shine!
Common Mistakes to Avoid
Highlight frequent errors DIYers make during the project.. Provide preventive measures to ensure a successful outcome..
Many DIYers face common problems with their projects. Here are some frequent mistakes to watch out for:
- Not measuring correctly: Always double-check your measurements to avoid waste.
- Skipping preparation: Prepare your materials and workspace ahead of time.
- Poor sanding: Smooth surfaces to ensure a clean finish.
- Ignoring safety: Wear goggles and gloves to protect yourself while working.
By avoiding these mistakes, your DIY birch headboard project can turn out great!
What are some tips for a successful DIY project?
To ensure your project goes smoothly, plan ahead, stay organized, and don’t rush. Taking your time will lead to better results and can be a fun experience!
Inspiration: DIY Birch Headboard Variations
Showcase creative variations and designs from other DIY enthusiasts.. Encourage readers to customize their headboards to reflect personal style..
Many DIY lovers have created stunning birch headboards that will leave you inspired. Each design is unique, showcasing different styles and creative touches. From intricate patterns to simple elegance, the options are endless! Want a headboard that matches your personality? Go wild and add your own flair! Feel free to mix colors, shapes, and even add fairy lights for a cozy glow. Check out these fun variations:
| Design Style | Description |
|---|---|
| Rustic Charm | Use weathered wood for a cozy cabin feel. |
| Modern Minimalist | Sleek lines with a simple finish for a stylish look. |
| Whimsical Wonder | Add colorful paint or fun shapes that reflect your hobbies. |
Remember, your headboard is a chance to show who you are. So, grab your tools and let your creativity soar! Who knew a piece of wood could spark so much joy?
Conclusion
In conclusion, a DIY birch headboard project is fun and rewarding. You can customize it to suit your style. By following simple steps, you’ll create a beautiful piece for your bedroom. Remember to gather your materials and start planning today! If you want more tips, check online for guides and inspiration to help you along the way.
FAQs
What Materials Do I Need To Create A Diy Birch Headboard?
To make a DIY birch headboard, you need a few basic materials. First, get some birch wood boards for the main part. You’ll also need wood glue to hold everything together. A saw will help you cut the wood to the right size. Finally, sandpaper will smooth the edges, and paint or stain can add color. Don’t forget screws to attach it to the bed!
How Do I Properly Measure And Cut The Birch Wood For The Headboard?
First, grab a measuring tape. Measure the space where your headboard will go. Mark the wood with a pencil where you want to cut. Use a saw to cut along the pencil lines. Make sure to wear safety glasses while cutting!
What Are Some Design Options Or Styles I Can Choose For My Birch Headboard?
You can choose different styles for your birch headboard. A modern style is sleek and simple. A rustic style has a more natural, cozy look. You might like a painted headboard in bright colors, too. You can also add fun carving or patterns to make it special!
How Do I Finish And Seal The Birch Wood To Ensure Durability And Protection?
To finish and seal birch wood, first, sand it smooth with sandpaper. Then, clean off any dust. Next, you can use a clear wood finish like polyurethane or varnish. Apply the finish with a brush and let it dry completely. Finally, add a second coat for extra protection, then your wood will be ready to use!
What Tools Are Essential For Assembling A Birch Headboard, And Do I Need Any Special Techniques?
To assemble a birch headboard, you will need a screwdriver, a hammer, and some screws. You might also need wood glue for extra strength. It helps if you can measure carefully and follow the instructions step by step. Just take your time, and you’ll do great!