Quick Summary
Choosing between a pneumatic and battery nail gun depends on your project and power source. Pneumatic nailers offer superior power and speed, ideal for professional, heavy-duty tasks, but require an air compressor. Battery nailers provide ultimate portability and ease of use for DIYers and smaller jobs, with no cords or hoses, but may have less power and battery life limitations.
Table of Contents
The Difference Between Pneumatic and Battery Nail Guns: An Essential Guide for DIYers
Hey there, fellow DIYers and woodworking enthusiasts! Jack Shaffer here, your go-to guy for all things nail guns. Ever stood in the tool aisle, staring at rows of shiny nailers, wondering which one is the right fit for your next project? It’s a common puzzle, especially when you’re trying to figure out the nitty-gritty difference between pneumatic and battery nail guns. Don’t sweat it! We’re going to break it all down, simply and clearly, so you can choose the best tool for the job and build with confidence.
This guide will walk you through exactly what makes these two types of nail guns tick, their pros and cons, and when each one truly shines. We’ll cover everything from power and portability to cost and convenience. Get ready to demystify the world of nail guns and equip yourself with knowledge!
What Exactly is a Nail Gun?
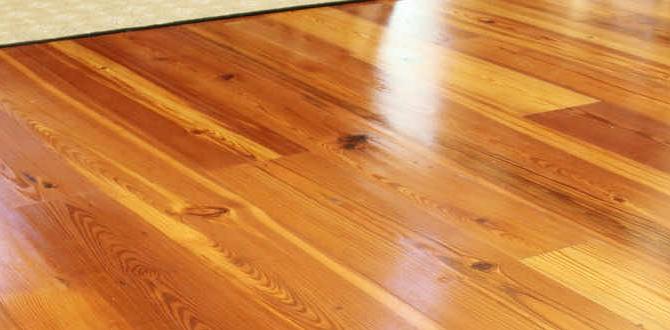
Before we dive into the differences, let’s quickly cover what a nail gun is. Simply put, a nail gun (or nailer) is a power tool designed to drive nails into wood or other materials quickly and efficiently. They replace the old-fashioned hammer for many tasks, saving time and effort, and often providing a more consistent and secure fastening. They come in handy for all sorts of projects, from building a simple bookshelf to framing an entire house.
Understanding Pneumatic Nail Guns
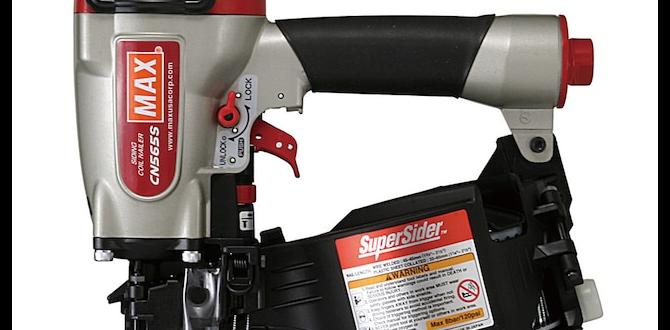
Pneumatic nail guns are the workhorses of the trade. They rely on compressed air to drive the nail. This means you’ll need an air compressor, an air hose, and the nail gun itself. When you pull the trigger, the compressed air from the tank is released, forcing a piston down, which in turn drives the nail.
How Pneumatic Nail Guns Work
The system is pretty straightforward: an air compressor stores pressurized air in a tank. This air is then delivered through a hose to the nail gun. Inside the nail gun, a trigger mechanism releases a burst of this air into a cylinder. This air pushes a plunger or piston down with incredible force. This plunger strikes the head of the nail, driving it precisely into the material you’re working with. The spent air is then typically vented out of the tool.
Pros of Pneumatic Nail Guns
Powerhouse Performance: Pneumatic nailers are incredibly powerful. They can drive longer and thicker nails, making them ideal for framing, decking, and other heavy-duty applications where strong fastening is crucial.
Speed and Consistency: They offer rapid firing rates and drive nails consistently every time. This speed is a huge advantage on large projects.
Lightweight Tools: While you need the air compressor and hose, the nail gun tool itself is often lighter than battery-powered models because the motor and battery weight are absent.
Durability and Longevity: Pneumatic tools are known for their robust construction and long lifespan, often lasting for many years with proper maintenance.
No Battery Worries: You don’t have to worry about batteries dying mid-project or needing to recharge them. As long as the compressor has air, you can keep going.
Cost-Effective for Frequent Use: While the initial investment in a compressor can be high, the nail guns themselves are often less expensive than comparable battery models, and there are no ongoing battery replacement costs.
Cons of Pneumatic Nail Guns
Requires an Air Compressor: This is the biggest drawback. You need a bulky, noisy air compressor and a long air hose, which limits mobility and can be a hassle to set up and take down.
Tethered by a Hose: The air hose can get snagged, tangled, or get in your way, potentially creating a trip hazard.
Noise: Air compressors are generally quite loud, which can be an issue if you’re working in a residential area or need to keep the noise down.
Setup Time: It takes time to set up the compressor, connect the hose, and bleed the tank to the correct pressure.
Maintenance: Air compressors require some maintenance, such as draining the tank and checking oil levels.
When to Choose a Pneumatic Nail Gun
Framing and Structural Work: If you’re building walls, framing a house, or doing any heavy construction, a pneumatic framing nailer is your best bet.
Deck Building and Fences: Driving long deck screws or fence pickets requires the consistent power of a pneumatic tool.
Professional Carpentry: For trim work, cabinetry, and any job where speed and precision are paramount and you’re on a job site, pneumatic is often the standard.
High-Volume Nailing: If you’re going to be driving thousands of nails, the efficiency and lack of battery downtime make pneumatic ideal.
Understanding Battery-Powered Nail Guns
Battery-powered nail guns, also known as cordless or cordless electric nail guns, have revolutionized the DIY world. They run on rechargeable lithium-ion batteries, offering incredible freedom and convenience. There are a few different types of battery-powered nailers, including fuel cell (which uses a small gas canister and a battery) and purely electric models that use the battery to power a motor or drive system. We’ll focus on the common electric and hybrid models here.
How Battery-Powered Nail Guns Work
Battery nailers take a couple of different approaches to drive nails. The most common type uses a combination of a battery and a small motor coupled with a spring-loaded mechanism. When you pull the trigger, the battery powers a motor that compresses a spring. When the spring is fully compressed, it’s released, driving a plunger and thus the nail. Other models, often called “cordless gas” or “fuel cell” nailers, use a small, disposable fuel cell. The battery ignites this fuel, creating a small explosion that drives the nail. For simplicity, we’ll focus on the electric motor/spring type for this comparison as it’s the most direct competitor to pneumatic.
Pros of Battery-Powered Nail Guns
Ultimate Portability: This is the biggest advantage. No air compressor, no hoses! Just grab your nail gun and nails and head wherever the project takes you.
Quick Setup: Simply charge a battery, load nails, and you’re ready to go in seconds.
Ease of Use: They are generally very user-friendly, with intuitive controls and no need to manage air pressure.
Versatility: Great for a wide range of DIY projects, from hanging trim and installing baseboards to building light furniture and craft projects.
Reduced Trip Hazards: No hoses means fewer things to trip over, making your workspace safer.
Less Mess: No oil from compressors to worry about, and generally cleaner operation.
Cons of Battery-Powered Nail Guns
Power Limitations: While they’ve improved significantly, many battery nailers may not have the sheer power of a comparable pneumatic gun for driving very long or hardened nails. This can be an issue for framing or dense hardwoods.
Battery Life: You’re limited by the battery charge. For extended projects, you’ll need spare batteries and downtime to recharge.
Tool Weight: The integrated battery and motor can make the tool itself heavier than its pneumatic counterpart.
Cost: Battery-powered nailers, especially higher-end models, can be more expensive upfront than pneumatic nail guns. Batteries also have a lifespan and will eventually need replacement.
Potential for Jamming: Some users report that certain models can be more prone to jamming or misfires, especially under heavy use or with the wrong type of nails.
Slower Firing Rate: Compared to top-tier pneumatic nailers, battery models might have a slightly slower rate of fire, which can impact efficiency on very large jobs.
When to Choose a Battery-Powered Nail Gun
Trim and Molding Installation: Perfect for installing baseboards, crown molding, window and door trim where portability and a clean finish are key.
Cabinet Installation: Fast and easy for attaching cabinets to walls.
DIY Home Projects: Ideal for smaller renovations, craft projects, furniture building, and DIY repairs around the house.
Working in Tight Spaces: Their cordless nature makes them excellent for attics, crawl spaces, or anywhere hose access would be difficult.
Beginners: The simplicity and ease of use make them a great entry point into power nailing.
Key Differences at a Glance: Pneumatic vs. Battery Nail Guns
Let’s sum up the main distinctions in a clear table. This will help you quickly compare and contrast.
| Feature | Pneumatic Nail Gun | Battery-Powered Nail Gun |
|---|---|---|
| Power Source | Compressed Air (via Air Compressor & Hose) | Rechargeable Lithium-Ion Battery (or Battery + Fuel Cell) |
| Power Output | Generally Higher, better for demanding tasks | Good for most DIY, can be less powerful than pneumatic for very thick nails |
| Portability | Limited by compressor and hose | Excellent, fully mobile |
| Setup Time | Longer (compressor, hose, pressure) | Very Fast (charge battery, load nails) |
| Tool Weight | Nailer itself is often lighter | Nailer itself is often heavier (includes battery/motor) |
| Cost (Initial) | Nailer can be cheaper, but compressor is a significant investment | Nailer can be more expensive, but no separate compressor needed |
| Operating Cost | Electricity for compressor | Electricity for battery charging (minimal), potential battery replacement |
| Noise Level | Compressor is loud; nailer itself is moderate | Nailer is moderately loud; no compressor noise |
| Best For | Framing, heavy-duty construction, professional use, high volume | Trim, molding, DIY projects, portability needs, smaller renovations |
| Maintenance | Compressor requires regular checks (oil, draining) | Battery maintenance (charging) |
Different Types of Nailers Within Each Category
It’s important to remember that both pneumatic and battery nailers come in various types, designed for specific tasks. For example:
Common Pneumatic Nailer Types:
Framing Nailer: Drives large nails (2-3.5 inches) for structural framing.
Finish Nailer: Drives smaller nails (16-gauge or 15-gauge) for trim, molding, and cabinetry.
Brad Nailer: Drives very thin nails (18-gauge) for delicate trim work and crafts.
Pin Nailer: Drives headless pins (23-gauge) for nearly invisible fastening.
Roofing Nailer: Designed specifically for attaching roofing shingles.
Common Battery-Powered Nailer Types:
While battery technology is rapidly evolving, you’ll commonly find:
Cordless Finish Nailer (16-gauge, 18-gauge): Similar to their pneumatic counterparts, offering convenience for trim and molding.
Cordless Brad Nailer (18-gauge): For delicate woodworking and craft projects.
Cordless Framing Nailer: Becoming more powerful, suitable for some framing tasks, though still often outmatched by high-end pneumatics for pure power.
Cordless Roofing Nailer: Offers portability on roofs.
When making your choice, consider not just the power source (pneumatic vs. battery) but also the specific type of nailer you need for your project.
Factors to Consider When Choosing
To help you make the best decision, let’s break down the core factors:
1. Project Scope and Intensity:
Large, demanding projects: Think framing a deck, building a shed, or doing extensive renovation work. These often call for the consistent high power and speed of a pneumatic nailer. A tool like a [high-quality framing nailer] will be invaluable here.
Smaller, DIY projects: If you’re installing trim, building a garden planter, or doing repairs, a battery-powered nailer will likely be more than sufficient and much more convenient.
2. Portability and Workspace:
Limited space or difficult access: Do you need to work in tight attics, crawl spaces, or up on ladders? A battery nailer is the clear winner due to its cord-free and hose-free nature.
Open, accessible workspace: If you have plenty of room and easy access for an air compressor and hose, pneumatic is a strong contender.
3. Budget:
Initial Investment: A decent air compressor can cost $150-$500+, plus the hose and the nailer itself. A good battery nailer can range from $100-$400+. If you already own a compressor, pneumatic nailers are often cheaper per tool. If starting from scratch, battery might be more budget-friendly for just one tool.
Long-term Costs: Consider battery replacement down the line for battery tools and electricity costs for running a compressor.
4. Power Requirements:
Driving Long Nails: For nails 2.5 inches or longer, especially into hardwood or engineered lumber, pneumatic nailers generally offer superior driving force.
Most Trim Work: For brads and finish nails (up to about 2.5 inches), modern battery nailers have enough power for most common applications.
5. Convenience and Ease of Use:
Simplicity: A battery nailer is plug-and-play (or rather, charge-and-go).
Familiarity: If you’ve used pneumatic tools before, you might already be comfortable with them. However, the setup can be a barrier for beginners.
Maintenance Tips for Both Types
Keeping your tools in good shape ensures they perform well and last longer.
Pneumatic Nail Gun Maintenance:
Drain the Air Tank: Regularly drain any water that condenses in the compressor tank to prevent rust.
Lubricate: Most pneumatic nailers require a few drops of specialized pneumatic tool oil in the air inlet before each use. Check your manual!
Clean the Tool: Keep the nose and magazine clean from sawdust and debris.
Check Hoses and Fittings: Inspect for leaks or damage.
Battery-Powered Nail Gun Maintenance:
Charge Batteries Properly: Follow the manufacturer’s instructions for optimal battery life. Avoid extreme temperatures.
Keep the Tool Clean: Wipe down the exterior and ensure the magazine and nose are free of debris.
Store Safely: Store in a dry place, ideally not with a fully depleted or fully charged battery for extended periods if not in use.
Firmware Updates: Some newer tools might have firmware that can be updated; check the manufacturer’s website.
Proper storage is crucial for both. Always store your tools in a clean, dry environment.
Safety First! Always Use Proper Safety Gear
No matter which type of nail gun you choose, safety is paramount.
Eye Protection: Always wear safety glasses or goggles. Nails can ricochet or break, and debris can fly.
Hearing Protection: Nail guns can be loud. Earplugs or earmuffs are recommended, especially for prolonged use.
Read Your Manuals: Understand the specific operation and safety features of your tool.
Never Point at Yourself or Others: Treat all nail guns as if they are loaded.
Sequential vs. Contact Trip: Be aware of your nailer’s firing mode. Sequential trip requires you to press the nose against the material before pulling the trigger, making it safer. Contact trip fires as soon as the trigger is pulled and the nose is pressed, which is faster but less safe if mishandled.
Keep Fingers Away from the Nose:** Always keep your trigger finger off the trigger when not actively firing, and avoid placing your fingers near the nose of the gun.
For more detailed safety guidelines, consult resources like the Occupational Safety and Health Administration (OSHA).
Frequently Asked Questions About Nail Guns
Q1: Which type of nail gun is easier for a beginner?
Battery-powered nail guns are generally easier for beginners. They offer the most straightforward operation with no hoses or compressors to manage, making them very user-friendly.
Q2: Can I use a battery nail gun for framing a wall?
For most standard lumber and smaller framing jobs, a powerful cordless framing nailer can work. However, for heavy-duty construction, professional framing, or dense materials, a pneumatic framing nailer typically offers more consistent power and speed.
Q3: How much air pressure do I need for a pneumatic nail gun?
This varies by nailer type and manufacturer, but most commonly range from 70-120 PSI (pounds per square inch). Always check your nail gun’s manual for the recommended pressure range.
Q4: Do battery nail guns have