Quick Summary: Don’t let a leaky nailer slow you down! Diagnosing nailer leaks involves checking for air escaping from the tool’s body, hose, or compressor. Simple fixes often include tightening connections, replacing O-rings, or checking the trigger valve. With a few basic steps, you can quickly get your nailer back to driving nails like a champ.
Table of Contents
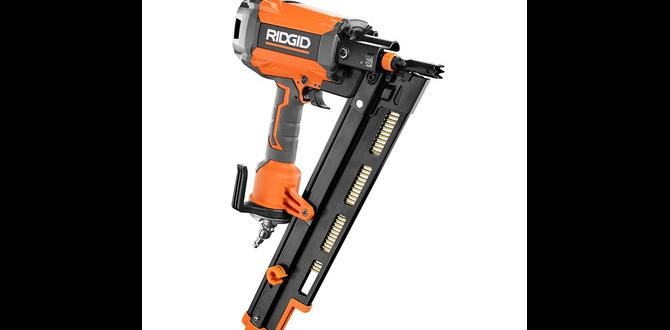
How to Diagnose Nailer Leaks: Proven Fixes
Is your nailer sighing instead of shooting? A leaky air nailer can be incredibly frustrating, especially when you’re right in the middle of a project. You might hear a constant hiss, notice a drop in driving power, or find your compressor running more often than it should. But don’t worry, these leaks are usually pretty simple to find and fix! I’m Jack Shaffer, and as Nailerguy, I’ve seen my fair share of leaky tools. Today, we’ll walk through how to diagnose these common nailer leaks and get your tool working smoothly again, step by step. You’ll be driving nails with confidence in no time!
Why Do Nailers Leak? Common Causes
Before we go hunting for leaks, it’s helpful to understand why they happen. Most air leaks in nail guns stem from a few key areas:
- Loose Connections: Hoses can wiggle loose from the nailer or the compressor.
- Worn Seals and O-Rings: Over time, rubber parts wear out, dry, crack, or get damaged.
- Damaged Housing: Sometimes, the body of the nailer itself can get cracked or dented, creating an escape route for air.
- Trigger Valve Issues: The trigger mechanism is a complex part that can also lose its seal.
- Bad Hose: The air hose itself might have a puncture or a split.
The good news is that most of these issues are fixable with a little patience and the right parts. Let’s get to finding that leak!
Safety First! Preparing to Diagnose
Before you start poking around your nailer, always prioritize safety. Air pressure can be powerful and dangerous if not handled carefully.
- Disconnect the Air Supply: This is the most crucial step. Always disconnect the air hose from the nailer before you do any inspection or repair. You don’t want any unexpected bursts of air or nails!
- Depressurize the Tool: Even after disconnecting the hose, cycle the trigger a few times to release any residual air pressure in the nailer’s internal chamber.
- Wear Safety Glasses: Protect your eyes from any debris or tools you might be using during the diagnosis.
Once you’ve safely disconnected the air and depressurized the tool, you’re ready to start the detective work.
Step-by-Step Guide to Diagnosing Nailer Leaks
Finding a leak often involves a process of elimination. We’ll start with the easiest checks and move to more intricate ones.
1. The Audible Test: Listen Closely
Sometimes, the leak announces itself quite clearly. With the air hose disconnected from the nailer (but connected to the compressor and turned on at a low PSI, say 30-40), listen carefully.
- Bring the Nailer Near Your Ear: Slowly move the nailer around your ear, listening for any hissing sounds. Pay close attention to:
- The air inlet on the nailer (where the hose connects).
- Around the trigger mechanism.
- The exhaust port (usually a small opening near the front or top).
- The main housing of the nailer.
- Check the Hose Connection: Ensure the quick-disconnect fitting on the hose is secure and not leaking.
If you hear a distinct hiss from a specific spot, you’ve likely found the general area of the leak!
2. The Soap and Water Method: Seeing is Believing
This is a classic and highly effective way to pinpoint leaks. If you can’t hear the leak, or you want to be absolutely sure, soap and water will show you where the air is escaping.
What You’ll Need:
- A spray bottle
- Water
- Dish soap (a good squirt works best)
- A rag
Steps:
- Prepare the Solution: Mix a generous amount of dish soap with water in the spray bottle.
- Connect Air (Carefully!): Reconnect the air hose to the nailer. Turn on your air compressor and set it to a moderate pressure (around 70-90 PSI for most framing and finishing nailers). Do NOT set it to maximum.
- Spray the Nailer: Liberally spray the soap and water solution all over the nailer, focusing again on the common leak spots: air inlet, trigger, exhaust, and the main body.
- Look for Bubbles: Watch closely for where the bubbles start to form. Bubbles indicate escaping air. The more vigorous the bubbling, the larger the leak. Spray down the air hose too, as leaks can occur there as well.
- Identify the Source: Once you see bubbles, you’ve found your leak! Clean off the excess soap with a rag.
This method is great for even the smallest leaks that might be hard to hear.
3. Checking the Air Inlet and Coupler
The point where the air hose connects to the nailer is a frequent culprit. Leaks here can be caused by a damaged O-ring on the coupler or the inlet fitting itself.
Steps:
- Inspect the Coupler: Look at the male coupler on your air hose. Is the rubber seal or O-ring intact? If it’s cracked, brittle, or missing, that’s your leak. These are usually inexpensive and easy to replace.
- Inspect the Nailer’s Inlet: Look at the female coupler on the nailer. Is there an O-ring inside? Is it damaged? Sometimes, grit or debris can prevent a proper seal. Clean it gently with a dry cloth.
- Tighten Fittings: If your nailer has a threaded connection for the air inlet (less common on modern tools), ensure it’s snug.
4. Investigating the Trigger Valve
The trigger assembly is where you tell the nailer to fire. It contains seals and O-rings that can wear out, leading to air leaks.
Symptoms:
- Air hissing from around the trigger even when it’s not being pressed.
- The nailer firing intermittently or weakly.
Diagnosis:
- Use the soap and water method specifically around the trigger area.
- If you suspect the trigger valve, it often requires partial disassembly. This might be a good time to consult your nailer’s manual or consider professional help if you’re uncomfortable with taking it apart. Many manufacturers provide detailed schematics online. For example, Hitachi (now HiKOKI) offers extensive support documentation for their tools.
5. Examining the Exhaust Port
The exhaust port releases air after a nail is fired. While it’s designed to let air out in a directed way, a faulty seal here can cause a constant hiss.
Diagnosis:
Spray soap and water around the exhaust port while the tool is under pressure (but disconnected from the hose, in this case, listen for the leak and then check with soap if you hear something). If bubbles appear right at the rim of the exhaust, it usually means an internal seal or baffle is damaged. This is another area that might require disassembly.
6. Inspecting the Main Body and Driver Assembly
Less common, but still possible, are leaks from the main housing of the nailer or around the driver guide.
Diagnosis:
- Visual Inspection: Carefully examine the entire body of the nailer for any cracks, dents, or loose screws.
- Driver Guide: The area where the nail driver (the metal rod that pushes the nail) moves can sometimes have a seal that leaks if it’s worn or damaged. Again, soap and water here can reveal if air is escaping around the driver guide.
If you find damage to the main body, it can sometimes be difficult or impossible to repair, and you may need to consider replacing the tool. However, small leaks around the driver guide can often be fixed by replacing seals.
Common Nailer Leak Fixes
Once you’ve diagnosed the problem, here are the most common fixes. Remember, always disconnect the air and depressurize the tool before attempting repairs.
Fixing Loose Connections
This is the easiest fix. If your leak is at the air inlet:
- Ensure the male coupler on the air hose is fully engaged with the female coupler on the nailer.
- If the coupler on the hose or nailer feels loose or wobbly, it might need to be replaced. Most standard air fittings are readily available at hardware stores.
Replacing O-Rings and Seals
This is the most frequent repair for air leaks in nail guns.
What You’ll Need:
- Replacement O-rings or seal kit specific to your nailer model.
- A small flathead screwdriver or a pick tool.
- Needle-nose pliers (sometimes helpful).
- Lubricating oil (specific for pneumatic tools, like a few drops of 3-in-1 oil or specialized air tool oil).
Steps:
- Identify the Leaking Seal: Based on your diagnosis, determine which O-ring or seal is faulty. Common culprits are the air inlet O-ring, O-rings within the trigger assembly, or seals around the driver guide.
- Disassemble (Carefully!): Consult your nailer’s manual or an online schematic. Most nailers have specific screws or panels that need to be removed to access internal seals. Keep track of parts and their order!
- Remove the Old Seal: Gently pry out the old O-ring or seal using a pick or small screwdriver. Be careful not to scratch the metal surfaces it seals against.
- Clean the Area: Wipe down the area where the seal was with a clean, lint-free cloth.
- Install the New Seal: Lightly lubricate the new O-ring with a drop or two of air tool oil. This helps it seat properly and prevents it from tearing. Carefully place the new O-ring or seal into its groove.
- Reassemble: Put the nailer back together in the reverse order of disassembly, ensuring all parts are seated correctly and screws are tightened appropriately (don’t overtighten plastic parts).
- Test: Reconnect the air and check for leaks using the soap and water method.
Tip: Many tool manufacturers sell repair kits specific to their nailer models. These kits often include all the common O-rings and seals you might need. Searching for “[Your Nailer Brand and Model] repair kit” is a good start.
Repairing the Trigger Valve Assembly
If the leak is from the trigger valve, it often involves replacing one or more internal O-rings or seals. This can be more complex and may require disassembling the trigger mechanism itself. Always refer to your tool’s service manual. For instance, a quick search for “Porter-Cable nailing gun trigger valve rebuild” can yield helpful videos and forums.
Addressing the Exhaust Port
Leaks at the exhaust port usually mean a seal within the main piston or cylinder has failed. This is a more involved repair, often requiring the complete disassembly of the nailer’s upper cylinder and piston assembly.
When to Seek Professional Help
While many nailer leaks are DIY-friendly, there are times when it’s best to call in an expert:
- Major Damage: If the nailer’s body is cracked or severely dented.
- Complex Disassembly: If you’re uncomfortable taking apart intricate components like the trigger valve or piston assembly.
- Persistent Leaks: If you’ve tried the common fixes and the leak persists, there might be an underlying issue.
- Under Warranty: If your nailer is still under warranty, attempting repairs yourself could void it. Contact the manufacturer directly.
A local tool repair shop or the tool manufacturer’s service center can often diagnose and fix more complex issues.
Table: Common Nailer Leak Locations and Potential Fixes
Here’s a quick reference guide to help you diagnose and fix common nailer leaks:
| Leak Location | Symptoms | Likely Cause | Common Fix |
|---|---|---|---|
| Air Inlet/Coupler | Hissing when air is connected (even when trigger is not pulled). Air tool won’t hold pressure consistently. | Loose coupler, damaged O-ring on hose adapter, worn seal on nailer inlet. | Tighten coupler. Replace O-ring on hose adapter. Replace seal on nailer inlet. |
| Trigger Area | Hissing sound when holding the nailer, even without pressing the trigger. Weak driving power. | Worn O-rings or seals within the trigger valve assembly. | Disassemble trigger assembly and replace internal O-rings/seals. |
| Exhaust Port | Hissing from the exhaust vent after firing or even when the tool is idle (requires listening carefully). Reduced driving power. | Failed seal between the piston and cylinder, or damaged valve assembly seals. | Disassemble and reseal the cylinder/piston assembly. |
| Main Body/Housing | Hissing from multiple spots on the tool’s outer shell, or audible leaks from seams. | Cracked housing, loose screws, damaged internal seals allowing air to escape into the body. | Tighten screws. Repair or replace damaged housing (if possible) or internal seals. May require professional repair or replacement of the tool. |
| Air Hose | Hissing along the length of the hose or at the connector to the compressor. | Puncture, cut, or crack in the hose material. Damaged fitting on either end. | Repair minor hose damage (if safe) or replace the entire hose. Ensure compressor fittings are secure. |
Maintaining Your Nailer to Prevent Future Leaks
An ounce of prevention is worth a pound of cure! Regular maintenance can significantly extend the life of your nailer and prevent many common leaks.
Regular Lubrication
Most pneumatic tools require a few drops of air tool oil daily, or before each use. This keeps internal seals pliable and prevents them from drying out and cracking. A good source for understanding pneumatics maintenance is resources like the Occupational Safety and Health Administration (OSHA) guidelines regarding the use of pneumatic power tools, which emphasize manufacturer instructions for maintenance.
Keep it Clean
Dirt and debris can get into the air inlet, trigger mechanism, and exhaust ports, interfering with seals and causing leaks. Wipe down your nailer after each use. Store it in a clean, dry place.
Check Connections
Before each use, give the air hose connection a gentle tug. Ensure it’s secure. Periodically inspect the O-rings on your couplers for wear and tear.
Proper Storage
Store your nailer in a way that protects it from impact damage. Avoid leaving it in harsh conditions like extreme heat or moisture, which can degrade rubber seals.
Frequently Asked Questions About Nailer Leaks
Q1: My nailer is hissing, but it still drives nails. Should I worry?
A1: Yes, even a small leak can worsen over time. It also makes your compressor work harder to maintain pressure, wasting energy and potentially shortening the compressor’s lifespan. It’s best to fix it as soon as you notice it.
Q2: Can I use general-purpose grease instead of air tool oil?
A2: It’s generally not recommended. Air tool oil is specifically formulated to lubricate and condition the rubber seals in pneumatic tools without degrading them. General greases might contain petroleum-based solvents that can damage O-rings.
Q3: How often should I replace the O-rings in my nailer?
A3: There’s no set schedule; it depends on usage and