Keep your heavy-use nail gun running smoothly by following a simple, regular cleaning routine. This guide walks you through the essential steps, tools, and tips to ensure your nailer performs reliably and safely for every project.
Hey there, woodworkers and DIY enthusiasts! Jack Shaffer here, your go-to guy for all things nail guns.
If you’ve ever had a nail gun jam on you mid-project, you know how frustrating that can be. Especially when you’re really in the zone! The good news is, most of these hiccups are totally preventable. It all comes down to keeping your trusty nailer in top shape.
Think of your nail gun like any other hardworking tool. A little bit of care goes a long, long way. Regular cleaning isn’t just about making it look pretty; it’s about making sure it works right, every single time, and keeps you safe while doing it.
In this guide, we’re going to break down exactly how to clean your heavy-use nail gun. No complicated jargon, just straightforward steps that anyone can follow. We’ll cover what you need, how to do it, and why it’s so important. Ready to make your nail gun happy?
Let’s dive in!
Table of Contents
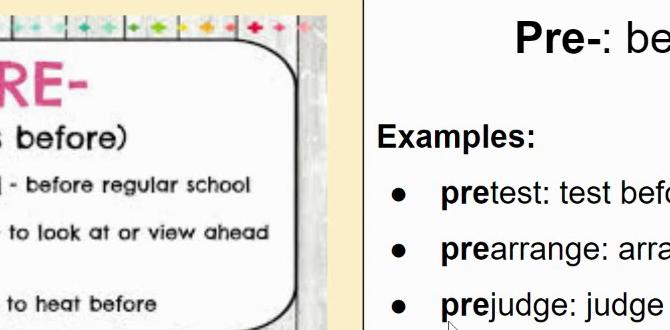
Why Cleaning Your Nail Gun is a Big Deal
So, why bother with cleaning your nail gun? It’s a fair question! When a tool is working, it’s easy to just put it back in the toolbox and forget about it. But for tools that see a lot of action, like nail guns we use for framing, roofing, or even cabinets, a bit of maintenance makes a world of difference.
Dust, wood debris, and even residue from the nails themselves can build up inside the mechanism. This gunk can cause all sorts of problems:
- Jams: This is the most common issue. Debris can obstruct the driver blade or the magazine, leading to misfires or nails getting stuck.
- Reduced Power: A dirty gun might not fire nails with as much force, resulting in nails not sinking fully into the material.
- Safety Hazards: In rare cases, a malfunctioning nail gun due to lack of maintenance could be a safety risk. Proper function is key to safe operation.
- Shorter Lifespan: Like any machine, consistent use without cleaning puts extra wear and tear on the internal components. Regular cleaning helps extend the life of your tool.
- Performance Issues: Beyond jams, you might notice inconsistent nail depth, or the gun might feel sluggish.
Think about it: your nail gun is essentially a high-speed precision instrument. Keeping it free of obstructions and properly lubricated ensures it can do its job efficiently and safely.
Gather Your Cleaning Supplies
Before you start, let’s round up everything you’ll need. You probably have most of these items already around your workshop. If not, they’re easy to find at any hardware or auto store.
Here’s a simple checklist:
- Safety Glasses: Absolutely essential! You don’t want any stray debris or cleaning solution getting into your eyes.
- Gloves: Protect your hands from grime and cleaning solutions.
- Clean, Lint-Free Cloths: Microfiber cloths work great. Avoid old rags that might leave lint behind.
- Cotton Swabs: Perfect for getting into small nooks and crannies.
- Compressed Air: A can of compressed air or an air compressor with a blow nozzle is fantastic for blasting away dust and loose debris.
- Nail Gun Lubricant: Most pneumatic nailers require a few drops of specialized lubricating oil. Check your manual to see if yours does and what type is recommended. Electric and battery models might not need oiling in the same way, but always check your manual.
- Mild Degreaser or All-Purpose Cleaner (Optional): For tougher grime, a little bit of a mild cleaner can help.
- Small Brush: An old toothbrush or a small detailing brush can be useful for scrubbing away stubborn dirt.
- Owner’s Manual: Always have your nail gun’s specific manual handy. It will have model-specific cleaning instructions and lubricant recommendations. You can usually find these online on the manufacturer’s website if you’ve lost yours. For example, DeWalt often provides comprehensive manuals for their power tools online.
Having the right supplies makes the job much easier and more effective. Plus, it ensures you’re cleaning your tool properly, without causing any damage.
Step-by-Step Cleaning Routine for Heavy-Use Nail Guns
This routine is designed to be thorough yet straightforward. We’ll go through it section by section. Remember, safety first!
Step 1: Power Down and Disconnect
This is the most critical step for safety. Never work on a nail gun that is connected to an air hose, battery, or power source.
- Pneumatic Nail Guns: Completely disconnect the air hose from the nail gun’s coupler. Ensure the air compressor is also turned off or disengaged.
- Corded Electric Nail Guns: Unplug the power cord from the wall outlet.
- Cordless Battery Nail Guns: Remove the battery pack from the tool.
Double-check that the tool is completely de-energized before you proceed. This prevents accidental firing while you’re cleaning.
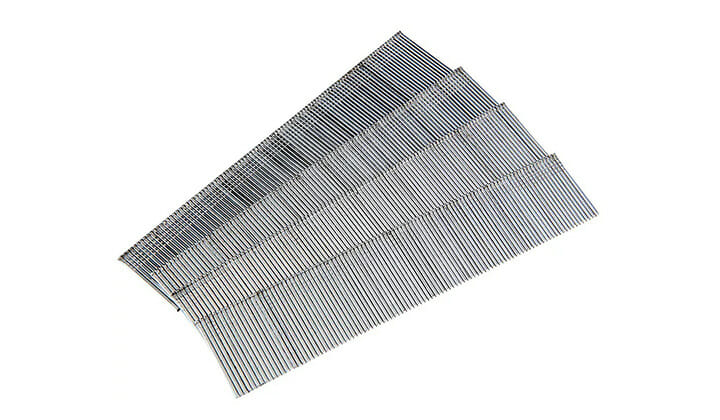
Step 2: Clear the Magazine
The magazine, where the nails are loaded, is a prime spot for debris accumulation.
- Open or release the magazine according to your nail gun’s design. Most have a spring-loaded mechanism.
- Carefully slide out any remaining nails.
- Inspect the inside of the magazine for any wood dust, shavings, or bent nails.
- Use compressed air to blow out any loose debris. If there are stubborn bits, use a cloth or cotton swab to wipe them away.
A clean magazine ensures nails feed smoothly into the firing chamber.
Step 3: Clean the Driver Blade and Nosepiece
The nosepiece is where the magic happens – where the nail is ejected. The driver blade is the part that strikes the nail.
- Invert the nail gun or position it so the nosepiece is accessible.
- Use compressed air to blow away any dust or debris from around the driver blade area.
- Use a dry cloth or cotton swab to wipe down the exterior of the nosepiece and the exposed part of the driver blade.
- If there’s sticky residue or hardened debris, slightly dampen a cloth or swab with a mild degreaser or all-purpose cleaner. Gently wipe the affected areas. Avoid getting excessive liquid inside the tool.
- Ensure the driver blade can move freely up and down without obstruction. If it feels stiff, a tiny drop of lubricant on the visible part of the shaft might help, but check your manual for specific advice on this.
It’s vital that the driver blade can retract and extend easily. This area is critical for proper nail firing.
Step 4: Inspect and Clean the Exhaust Port
The exhaust port releases air after each shot. It can get clogged with oil and dust.
- Locate the exhaust port (usually a small opening on the side or top of the nail gun body).
- Use compressed air to blow any accumulated dust and oil out of the port.
- Wipe the exterior of the port clean with a dry cloth.
A clear exhaust port allows compressed air to escape efficiently.
Step 5: Lubricate (If Applicable)
This step is crucial for pneumatic nail guns. Electric and battery models have different internal mechanisms and may not require user lubrication. Always consult your owner’s manual for specific instructions.
For pneumatic nail guns:
- Locate the oil port, usually a small fill cap near the air inlet.
- Remove the cap.
- Add the recommended number of drops of nail gun lubricant (check your manual!). Most pneumatic nailers need just 2-3 drops. Over-oiling can cause issues and attract more dirt.
- Replace the oil port cap securely.
For electric or battery-powered nail guns, lubrication might be handled internally or not required at all. Your manual is the definitive source here.
Step 6: Reassemble and Test (Carefully!)
Once you’ve cleaned and lubricated, it’s time to gently put things back together and test.
- Ensure all parts are dry and free of debris.
- Load a few nails into the magazine.
- Reattach the battery or reconnect the air hose.
- Important: Before firing into your project, test the nail gun on a scrap piece of wood. This also helps distribute the lubricant throughout the tool.
- Fire a few nails, ensuring they drive in properly and the gun operates smoothly.
If you notice any unusual noises or performance issues, retrace your steps or consult your manual or the manufacturer’s support. For instance, Stanley often provides extensive support documentation for their tools.
Frequency: How Often Should You Clean Your Nail Gun?
The “how often” really depends on how much you use your nail gun and the types of materials you’re working with.
General Guideline:
- Light Use (Occasional projects, weekend warrior): A quick clean-out (steps 1-3, maybe 6) after each major project or every few months is usually sufficient.
- Moderate Use (Several projects a year, some DIY renovations): A more thorough cleaning every month or two, or after using for extended periods.
- Heavy Use (Daily or weekly use, professional or serious hobbyist): Daily or weekly quick cleanings (focus on magazine and nosepiece) are recommended, with a full clean-out and lubrication monthly.
Factors to Consider:
- Wood Type: Softer woods tend to produce less dust than hardwoods. Plywood and composite materials can sometimes create stickier residues.
- Environment: If you’re working in a dusty or dirty environment (like framing a new house outdoors), you’ll need to clean more frequently.
- Nail Quality: Sometimes, lower-quality nails can have more manufacturing debris or coatings that attract dirt.
It’s always better to clean a little too often than not enough. A bit of preventative maintenance saves you from bigger headaches down the road.
Choosing the Right Nail Gun Lubricant (for Pneumatic Models)
If you have a pneumatic nail gun, using the correct lubricant is key. Using the wrong type or no lubricant at all can damage the tool.
What to Look For:
- Manufacturer Recommended Oil: This is always the best bet. Your nail gun manual will specify exactly what type of oil or lubricant to use. Brands like Senco, Bostitch, and Paslode often sell their own branded lubricants that are specifically formulated for their tools.
- Pneumatic Tool Oil: If your manual doesn’t specify a brand, look for a general-purpose pneumatic tool oil. These are typically thin, clean oils that resist gumming up.
- Avoid WD-40 or Household Oils: These are NOT good substitutes. WD-40 is a solvent and water displacer, not a lubricant, and can actually dry out seals over time. Household oils can attract too much dust and thicken, potentially gumming up the internal mechanisms.
How Much to Use:
Less is more! Over-oiling is a common mistake. Too much oil can attract dirt, degrade rubber seals, and even cause the tool to spray oil with each shot. Stick to the 2-3 drops recommended by the manufacturer.
For example, Senco provides detailed information on maintenance, including lubrication, for all their tools on their support pages.
Troubleshooting Common Nail Gun Issues
Even with regular cleaning, you might encounter minor issues. Here are a few common problems and quick fixes:
| Problem | Possible Cause | Solution |
|---|---|---|
| Nail Gun Jams | Debris in magazine or driver path | Clean magazine and driver blade area. Ensure nails are loaded correctly. |
| Bent nail in magazine | Remove and replace bent nails. | |
| Low air pressure (pneumatic) | Increase compressor pressure, check for air leaks in the hose. | |
| Nails Not Sinking Fully | Low air pressure (pneumatic) | Increase compressor pressure. |
| Depth adjustment set too shallow | Adjust depth setting on the nail gun. | |
| Driver blade sticking | Clean and lubricate driver blade area. | |
| Nail Gun Leaks Air | Loose hose connection (pneumatic) | Ensure air hose is securely connected. |
| Damaged “O” rings or seals | May require professional repair or replacement of seals. Refer to manual. | |
| Tool Fires Randomly (Extremely Rare and Dangerous!) | Internal malfunction | Immediately stop use, disconnect power/air, and seek professional repair. Do NOT attempt to fix yourself. |
For more in-depth troubleshooting, resources like Family Handyman’s power tool repair guides can offer additional insights, though always prioritize your tool’s manual.
When to Call a Professional
While most cleaning and basic maintenance can be done by you, there are times when it’s best to seek professional help.
- Persistent Issues: If cleaning doesn’t resolve jamming or power problems, there might be internal damage.
- Damaged Components: If you notice cracks, bent parts, or significant wear on the driver blade or other critical components.
- Complex Repairs: Some repairs, especially those involving internal seal replacements or intricate mechanisms, are best left to trained technicians.
- Safety Concerns: If your nail gun is behaving erratically or you suspect a safety issue, stop using it immediately.
Many tool repair shops specialize in pneumatic and power tools. Your local tool dealer or the manufacturer’s service center can be good places to start.
FAQ: Nail Gun Cleaning Essentials
Q1: Do all nail guns need oiling?
A1: Primarily, pneumatic (air-powered) nail guns require periodic lubrication with specialized pneumatic tool oil. Electric and battery-powered nail guns typically have sealed mechanisms and may not require user lubrication. Always check your owner’s manual for specific instructions.
Q2: Can I use WD-40 to clean my nail gun?
A2: No, it’s not recommended. WD-40 is a solvent and water displacer, not a long-term lubricant. It can actually dry out rubber seals in pneumatic tools and attract more dust over time. Use only specific nail gun lubricant or pneumatic tool oil.
Q3: How do I know if I’m using too much lubricant?
A3: If your nail gun is spraying excess oil with each shot, or if you notice a significant build-up of oily grime around the nosepiece or exhaust port, you’re likely using too much. Stick to the 2-3 drops recommended in your manual.
Q4: My nail gun is jamming frequently. What else could be wrong besides dirt?
A4: Besides dirt, frequent jamming could be caused by bent or damaged nails, low air pressure (for pneumatic models), a worn driver blade, or internal component issues. Ensure you’re using the correct size and type of nails for your tool.
Q5: How do I store my nail gun to keep it clean?
A5: Store your nail gun in a clean, dry place. A dedicated tool case or toolbox is ideal. Ensure the magazine is empty and the power source (battery or air hose) is disconnected. If storing for an extended period, a light wipe-down can prevent dust accumulation.
Q6: Can I wash my nail gun with water?
A6: Never submerge or pour water directly onto your nail gun. Water can get into the internal mechanisms, cause rust, and damage electrical components. Use a damp cloth for cleaning surfaces, and