Choose the right nail gun by matching its type to your project needs and power source. Consider Brad Nailers for trim, Finish Nailers for heavier trim, and Framing Nailers for structural work. Understand power types (electric, battery, pneumatic) to find a tool that fits your skill level and workshop.
Hey there, fellow DIYers! Jack Shaffer here, your go-to guy for all things tools and woodworking. Ever stare at a wall of nail guns, feeling a little overwhelmed? You’re not alone! Picking the right nail gun can seem like a puzzle, but with a little guidance, you’ll be confidently choosing the perfect one for your projects in no time. Forget the frustration; we’ll break it down so you can tackle that trim, build that deck, or craft that furniture with ease. Let’s make sure you’ve got the right tool for the job to bring your DIY dreams to life!
This guide will walk you through everything you need to know, from the different types of nail guns and their uses to how to power them up. We’ll demystify the specs and help you make a smart choice that saves you time and effort. Stick around, and you’ll be a nail gun expert before you know it!
Table of Contents
Why a Nail Gun Beats a Hammer (Almost Always!)
Let’s be honest, using a hammer for everything can be a real workout for your arm and your patience. While hammers are fantastic for certain tasks, a nail gun offers incredible speed, precision, and consistency that a hammer just can’t match for repetitive nailing. Imagine installing a whole room of baseboards without getting tired or dealing with bent nails. That’s the magic of a nail gun!
For DIY homeowners and hobbyists, a nail gun can dramatically speed up projects like building shelves, installing trim, framing small structures, or even repairing furniture. It’s about working smarter, not harder, and achieving professional-looking results that make you proud of your handiwork. Plus, it can make those weekend projects much more enjoyable!
Understanding the Different Types of Nail Guns
The world of nail guns is diverse, with each type designed for specific tasks. Choosing the right one is the most crucial step. Let’s break down the most common types you’ll encounter:
1. Brad Nailers
Brad nailers are your best friends for delicate trim work. They shoot thin, short nails (brads) that leave behind a very small hole, making them ideal for projects where a clean finish is paramount.
- Best for: Installing moldings, window casings, door jambs, delicate furniture trim, and other fine woodworking details.
- Nail sizes: Typically use 18-gauge brad nails, ranging from ¾ inch to 2 inches long.
- Pros: Leaves small holes for minimal filling, lightweight and easy to maneuver, great for detailed work.
- Cons: Not strong enough for structural applications or thicker wood.
2. Finish Nailers
A step up from brad nailers, finish nailers use slightly thicker nails that provide more holding power. They are perfect for slightly more substantial trim work where you need a bit more strength but still want a relatively clean finish.
- Best for: Installing baseboards, crown molding, chair rails, thicker door and window trim, and general carpentry tasks.
- Nail sizes: Usually 15-gauge or 16-gauge nails, from 1 ¼ inch to 2 ½ inches long.
- Pros: Offers better holding power than brad nailers, still leaves relatively small holes that are easy to conceal, versatile for many trim jobs.
- Cons: Larger nail holes than brad nailers, not suitable for heavy framing.
3. Brad vs. Finish Nailer: What’s the Real Difference?
The main difference lies in the gauge (thickness) of the nails they fire. An 18-gauge nailer (brad nailer) fires thinner nails than a 16-gauge or 15-gauge nailer (finish nailer). This means a brad nailer will leave a smaller, less noticeable hole, perfect for delicate moldings where you want the nail head to disappear. A finish nailer, with its slightly thicker nail, offers more holding power and is better for heavier trim like baseboards or crown molding, where you might need to fill the nail hole anyway.
4. Framing Nailers
When you’re getting into larger construction or framing projects, a framing nailer is essential. These powerful tools drive larger, stronger nails to join structural lumber together quickly and efficiently. They are built for durability and power.
- Best for: Building decks, framing walls, constructing fences, building sheds, and other heavy-duty construction.
- Nail sizes: Use larger nails, typically 8-gauge to 12-gauge, often collated at a slight or straight angle (e.g., 21-degree or 30-degree framing nails).
- Pros: Extremely powerful, drives large nails for strong joints, very fast for repetitive nailing.
- Cons: Heavy, overkill for trim work, leaves significant holes that require filling, can be intimidating for beginners.
5. Roofing Nailers
These specialized nailers are designed specifically to attach shingles to a roof deck. They have a large depth adjustment and a specific nail head size to ensure shingles are secured correctly without damaging them.
- Best for: Re-roofing or new roof installations.
- Nail sizes: Typically use 1-inch to 1 ¾-inch roofing nails with a wide, flat head.
- Pros: Built for the harsh conditions of roofing, has features like a nail-driving depth adjustment for shingles.
- Cons: Very specialized; not useful for any other DIY project.
6. Siding Nailers
Similar to roofing nailers but designed for installing wood or vinyl siding. They often drive nails flush with the siding material without overdriving, which can cause damage or prevent proper expansion and contraction.
- Best for: Installing exterior siding.
- Nail sizes: Often use 15-gauge nails.
- Pros: Designed to drive nails correctly for siding applications, preventing aesthetic or structural issues.
- Cons: Another specialized tool, limited application outside of siding.
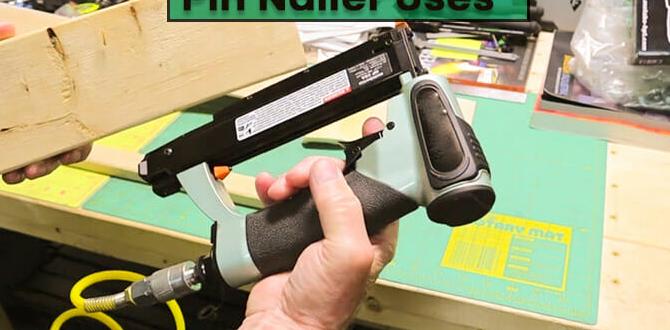
7. Pin Nailers
The smallest and most delicate of the bunch, pin nailers use extremely thin headless or minimal-head pins. They’re perfect for holding small, delicate pieces in place while glue dries or for very fine decorative work where absolutely no visible mark is desired.
- Best for: Attaching very small trim, holding delicate parts of craft projects, or securing tiny decorative elements.
- Nail sizes: Use headless or minimal-head pins, typically 23-gauge.
- Pros: Virtually invisible fastening, ideal for delicate materials and jobs where you can’t see where the fastener went.
- Cons: Very little holding power; primarily used for positioning or very light-duty tasks.
Powering Your Nail Gun: Choosing the Right Source
Once you know the type of nail gun you need, the next big decision is how it’s powered. This choice often depends on your existing tools, your workshop setup, and how portable you need your nailer to be.
1. Pneumatic (Air-Powered) Nail Guns
These are the workhorses of the nail gun world. They run off compressed air supplied by an air compressor.
- How they work: An air compressor stores pressurized air. When you pull the trigger, the air is released rapidly to drive the nail. You’ll need an air hose to connect the gun to the compressor.
- Pros:
- Most powerful and fastest firing.
- Lightest tool weight (as the motor/compressor is separate).
- Generally the most durable option for heavy use.
- Wide variety of models available for almost any task.
- Cons:
- Requires an air compressor, which can be bulky, noisy, and expensive.
- Tethered by an air hose, limiting mobility and creating a tripping hazard.
- Requires regular compressor maintenance and proper air pressure settings.
- Best for: Professional contractors, frequent DIYers, workshops where an air compressor is already present, or for heavy-duty jobs.
2. Electric Nail Guns (Corded)
These nail guns plug into a standard electrical outlet, providing power without the need for an air compressor.
- How they work: They use an electric motor to drive a piston that fires the nail.
- Pros:
- No need for an air compressor, saving space and cost.
- Simple to use, just plug and play.
- Great for indoor use where compressor noise is a concern.
- Cons:
- Can be heavier than pneumatic counterparts due to the internal motor.
- Power can sometimes be less than pneumatic for heavier tasks.
- Limited by the length of the power cord; may require extension cords.
- Best for: Smaller DIY projects, indoor trim work, occasional use where portability isn’t a major issue and a compressor isn’t available.
3. Cordless/Battery-Powered Nail Guns
These are the most convenient for DIYers. They run on rechargeable battery packs, offering complete freedom from cords and compressors.
- How they work: There are two main types:
- Integrated-Pneumatic (or Gas Cartridge): Use a small, built-in air cylinder that’s recharged by a motor/fan or a small gas cartridge. These offer excellent nail driving power and a familiar feel. They are typically more expensive.
- Motor-Driven Piston: Use a motor to drive a plunger, similar to corded electric guns, but powered by a battery. These are often more affordable but might have less power for dense woods.
- Pros:
- Ultimate portability – no cords, no hoses, no compressor.
- Fast setup and takedown.
- Great for anywhere access to power is difficult (e.g., decks, fences, remote areas).
- Many brands offer battery systems that work across multiple tools.
- Cons:
- Typically the most expensive option upfront.
- Battery life can be a limitation for very long or high-volume jobs.
- Can be heavier due to the battery pack.
- The power can sometimes be less than pneumatic for very hard woods or large fasteners.
- Best for: Most DIYers, especially those working on projects away from a power source, those who value convenience, or those invested in a particular tool brand’s battery platform.
Key Features to Consider When Choosing
Beyond the type and power source, a few other features can make a big difference in your nail gun experience:
1. Depth Adjustment
This is a must-have feature for most nail guns. Depth adjustment allows you to control how deep the nail is driven into the wood. You’ll want to sink nails slightly below the surface for trim and casing so you can fill them with putty. For framing, you might want them driven just flush.
- Tool-free adjustment: Look for dials or levers that allow you to change the depth without needing another tool. This is super convenient out in the field.
- Adjusting depth: Test on scrap wood first! Even with an adjustment, the hardness of the wood can affect how deep the nail goes.
2. Firing Modes (Sequential vs. Contact)
Nail guns can typically fire in two modes:
- Sequential (or Single-Shot): You must press the Safety Contact Tip against the wood AND pull the trigger for each nail. This offers the most control and safety and is ideal for precise placement, like when installing delicate trim.
- Contact (or Bump-Fire): You can fire nails by simply pressing the Safety Contact Tip against the wood, as long as the trigger is held down. This allows for very rapid nailing and is excellent for framing or when speed is critical.
Many modern nailers feature a switch that lets you choose between these modes, giving you the best of both worlds.
3. Magazine Capacity
This refers to how many nails the gun can hold at once. A higher capacity means fewer reloads, which speeds up your work, especially on larger projects. For trim work, 100-150 brads or finish nails is usually sufficient. For framing, you’ll want even more.
4. Nail Collation Type
Nails are held together in a strip, or “collation,” by plastic, paper, or wire. The angle or type of collation matters for accessing tight spots.
- Straight (0-degree) collation: Nails are in a perfectly straight strip. Good for general use.
- Angled collation (e.g., 21-degree, 25-degree, 30-degree): Nails are angled. These guns are great for reaching into corners or tight spaces where a straight magazine won’t fit.
- Plastic vs. Paper vs. Wire: Plastic collation tends to shatter less and is great for finish work. Paper is common for framing. Wire collation is also used for framing. Sometimes the collation material can leave small debris, so consider what’s easiest to clean up.
5. Weight and Ergonomics
You’ll be holding this tool for extended periods, so comfort is key. A lighter tool is better for overhead work or long sessions. Look for comfortable grips and a well-balanced design.
6. Jam Clearing Mechanism
Nails can sometimes jam. A tool with easy, tool-free jam clearing will save you a lot of frustration and keep your project moving.
Nail Gun Power Source Comparison Table
Here’s a quick visual to help you compare the power sources:
| Feature | Pneumatic | Electric (Corded) | Cordless (Battery) |
|---|---|---|---|
| Power Source | Air Compressor | Wall Outlet | Rechargeable Battery |
| Portability | Limited by hose length | Limited by cord length | High; completely mobile |
| Power Output | Generally highest | Moderate | Moderate to High (varies by model) |
| Setup Time | Moderate (connect compressor, hose) | Fast (plug in) | Fastest (insert battery) | Moderate to High (plus compressor cost) | Low to Moderate | High (tool + battery + charger) |
| Maintenance | Compressor and hose, oiling tool | Minimal | Battery care, occasional tool cleaning |
| Noise Level | High (compressor operation) | Moderate | Moderate |
Choosing a Nail Gun for Small DIY Projects
If your DIY aspirations are focused on smaller tasks around the house, like installing baseboards, hanging crown molding, or building simple shelves, you likely don’t need a heavy-duty framing nailer.
For these kinds of projects, a cordless brad nailer (18-gauge) or a cordless finish nailer (15- or 16-gauge) is often the perfect choice. They offer enough power for trim work, are easy to handle, and the cordless convenience means you can grab them and get to work without fussing with air compressors or cords.
If you’re on a tighter budget and these projects are infrequent, a corded electric finish nailer could also be a good option. They are less expensive than cordless models and still provide the necessary power for trim. Just be mindful of the cord.
A pin nailer might even be useful for very delicate trim or craft projects where completely hidden