Choosing the right finish nailer PSI is crucial for successful projects. Aim for a PSI between 70-120 PSI, adjusting based on your nailer model, nail size, and the material you’re fastening into. Too low can lead to weak fastening, while too high risks damaging the wood. This guide will help you find that sweet spot.
Hey there, fellow DIYers! Jack Shaffer here from Nailerguy. Ever found yourself staring at your new finish nailer, wondering about that little dial or gauge – the PSI setting? If you’re like me when I first started, it can feel a bit mysterious. You want your nails to sink in just right – not stick out, but also not punch all the way through your beautiful workpiece.
Figuring out the perfect air pressure, or PSI (Pounds per Square Inch), for your finish nailer is key to getting professional-looking results. It’s a common stumbling block, but don’t worry! We’re going to break it down, easy peasy. We’ll walk through exactly how to choose the right PSI so your projects turn out fantastic every single time.
Table of Contents
What Exactly Is PSI and Why Does It Matter for Finish Nailers?
Think of PSI as the “oomph” or the force behind the nail that your air compressor pushes out. On a finish nailer, this pressure determines how hard the piston drives the nail into your material. It’s like dialing up or down the strength of a hammer swing, but with much more control!
Getting the PSI right is important because:
- Proper Nail Depth: The main goal is to have your finish nails sit perfectly flush with the surface of the wood. Too little PSI, and the nail head might pop out, which looks sloppy and requires extra work to fix.
- Preventing Damage: Too much PSI can be just as bad. It can drive the nail too deep, creating a noticeable hole or even splitting delicate wood. This is especially true for softer woods or thin trim.
- Nailer Longevity: Running your nailer at consistently incorrect pressures can put unnecessary stress on its internal components, potentially shortening its lifespan.
- Consistent Results: A correctly set PSI ensures every nail you fire goes in with the same force, leading to a uniform and professional finish across your entire project.
So, understanding and setting the right PSI isn’t just about making things look good; it’s about making your tools last and your projects reliable.
The Sweet Spot: What PSI Range Should You Aim For?
For most finish nailers, especially the common 15-gauge and 16-gauge types, you’ll find that the sweet spot for PSI typically ranges from 70 to 120 PSI. This range is generally recommended by manufacturers for a good balance of power and control.
However, this is not a one-size-fits-all number. The ideal PSI for your specific job will depend on a few factors we’ll dive into, but keeping this 70-120 PSI window in mind is a great starting point.
It’s always best to consult your specific nailer’s manual. Manufacturers provide detailed operating instructions, and they usually specify the recommended PSI range. You can often find these manuals online on the manufacturer’s website if you’ve misplaced yours.
Key Factors Influencing Your Finish Nailer PSI Choice
As I mentioned, that 70-120 PSI range is a guideline. To truly nail (pun intended!) the perfect setting, you need to consider these crucial elements:
1. Your Finish Nailer Model and Manufacturer Recommendations
Every nailer is designed a little differently. Some might have a wider operating range, while others perform best within a narrower band. Always check your nailer’s manual first.
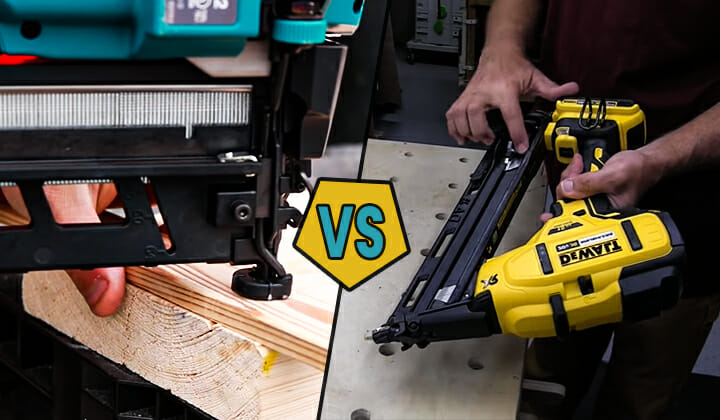
For example, a heavy-duty framing nailer will often require higher PSI than a delicate brad nailer. While we’re focusing on finish nailers (typically 15-gauge and 16-gauge), even within these categories, there can be slight variations. Some high-end models might be more efficient at lower PSI, while others might need a bit more to seat nails properly.
2. The Type and Size of Nails You’re Using
The length and gauge (thickness) of the nails play a significant role. Longer and thicker nails generally require more force to be driven to the correct depth.
- 18-Gauge Brad Nails: These are thinner and shorter, often used for delicate trim and moldings. They usually function well at the lower end of the PSI range, sometimes even below 70 PSI for very soft woods, but generally in the 70-100 PSI range.
- 16-Gauge Finish Nails: These are a bit more robust. For most applications with oak, maple, or other hardwoods, you’ll likely be in the 90-110 PSI range. For softer woods like pine, you might get away with 80-100 PSI.
- 15-Gauge (Guerilla Nail) Finish Nails: These are the thickest of the “finish” nails. They offer superior holding power and are ideal for heavier trim or situations where a nail might be more visible and needs to be driven firmly. You’ll often need to set these in the higher PSI range, typically 90-120 PSI, especially in harder woods.
A good rule of thumb: start with a lower setting and gradually increase it until the nail drives correctly without damaging the wood.
3. The Type of Material You’re Fastening Into
This is arguably one of the most critical factors. Different wood species have vastly different densities and hardness.
- Softwoods (e.g., Pine, Fir, Cedar): These woods are more forgiving. Too much PSI can easily cause the nail to sink too deep, split the wood, or blow out the back. You’ll want to use a lower PSI setting, often starting around 70-90 PSI.
- Hardwoods (e.g., Oak, Maple, Cherry, Walnut): These dense woods require more force to drive nails effectively. If your PSI is too low, the nail head will likely stick out. You’ll typically need a higher PSI, in the 90-110 PSI range, sometimes even up to 120 PSI for the hardest woods or longest nails.
- Composite Materials or MDF: These can be tricky. MDF can crumble if the PSI is too high. Composite materials can vary. For these, precise testing is essential. Start low and increase slowly. The rule of thumb is often to treat them closer to hardwoods in terms of needing a bit more power, but watch for signs of crushing.
Think about it like this: you wouldn’t use the same force to hammer a thumbtack into a corkboard as you would to drive a railroad spike!
4. The Actual Air Pressure from Your Compressor
The pressure gauge on your air compressor is your best friend here. While your tool might be rated for a certain PSI, the pressure delivered can fluctuate. Ensure your compressor is set to deliver the pressure your nailer needs, and always check the gauge at the compressor and the regulator on your air line (if you have one).
It’s also worth noting that air hoses can cause a slight pressure drop over long distances or if they are a smaller diameter. For optimal performance, use the shortest, widest diameter hose your setup allows and ensure it’s in good condition. A gauge at the nailer itself can be very helpful for immediate feedback, though many finish nailers don’t have this built-in.
How to Test and Dial In Your Finish Nailer PSI
Testing is not optional; it’s essential! Don’t just guess or plug in a number. You need to see how your nailer behaves with your specific setup and materials. Here’s a step-by-step process for finding that perfect PSI:
Step 1: Prep Your Workspace and Materials
Find a scrap piece of the exact same material you’ll be working with. If you’re installing oak trim, grab a scrap piece of oak. If it’s pine, use a pine scrap. This is crucial because different woods react differently.
Ensure your air compressor is filled and ready, and you have your chosen nails loaded into your finish nailer.
Step 2: Connect Your Tools and Set the Base PSI
Connect your finish nailer to your air source. Most modern compressors have a regulator that allows you to set the output PSI. If you have an inline regulator closer to the tool, use that.
For your first test, set your regulator to a conservative middle-ground PSI. If you’re working with 16-gauge nails in oak, start around 90 PSI. If it’s pine, try 80 PSI. If you’re unsure, start at the lower end of the general recommended range for your nail type.
Step 3: Fire the First Nail
Hold the nailer firmly against your scrap material. Aim for a spot where you don’t mind a test hole. Squeeze the trigger and drive a nail. Pay close attention to the sound and feel of the nailer.
Step 4: Inspect the Nail Depth
Look closely at the nail you just fired. Here’s what to check for:
- Is the nail head sticking out? If yes, the PSI is too low.
- Is the nail head sitting slightly proud, but not fully out? This is often a sign you need a slight increase in PSI, or perhaps a longer nail.
- Is the nail head driven perfectly flush with the surface? Congratulations, you might be in the right zone!
- Did the nail sink too deep, creating a large hole or dimple? The PSI is too high.
- Did the wood split or a chunk blow out around the nail? The PSI is definitely too high, or you might be too close to an edge.
Step 5: Adjust and Repeat
Based on your inspection, make small adjustments to the PSI. Increase it by 5 PSI increments if the nail isn’t sinking enough. Decrease it by 5 PSI if it’s going too deep or causing damage.
Fire another nail after each adjustment and repeat the inspection process. Continue this cycle until you consistently achieve nails that are driven flush without any excessive damage to the wood.
Step 6: Test with Different Fastening Angles and Locations
Once you find a good PSI on a flat surface, try nailing at different angles, especially if you’ll be working with trim that needs to be angled into place. Also, test near edges and corners, as these areas can be more prone to splitting or blow-out.
If you’re fastening into different materials on the same project (e.g., trim into drywall anchors, then into wood studs), you might need to make slight PSI adjustments for each scenario. For fastening into drywall anchors or plaster, be cautious – it’s often better to err on the side of lower PSI to prevent damage.
Understanding Your Air Compressor Regulator
Your air compressor’s regulator is a vital tool in setting the correct PSI. It acts like a valve that controls the amount of air pressure being sent to your tools, ensuring consistent and safe operation. Most regulators have a dial or knob that you turn to set the desired output pressure.
Here’s a quick rundown on how they typically work:
- The Gauge: This displays the current air pressure output from the regulator.
- The Adjustment Knob: Turning this knob usually increases or decreases the pressure displayed on the gauge.
- Relief Valve: Some regulators have a button or knob that, when pressed or pulled, vents excess pressure. This is useful for safely lowering the pressure if you’ve set it too high.
Important Note: The pressure reading on your compressor’s main tank gauge shows how much air is stored. The regulator gauge shows the pressure being delivered to your hose and tool. Always use the regulator gauge to set your tool’s operating pressure.
You can learn more about air compressors and their components from resources like Energy.gov’s Industrial Technologies Office, which offers insights into optimizing compressed air systems for efficiency and safety.
Troubleshooting Common Finish Nailer PSI Issues
Even with the best intentions, you might run into a few snags. Here are some common problems and how to solve them related to PSI:
Problem: Nails are not firing at all.
Possible Causes & Solutions:
- PSI is too low: Increase the PSI. Ensure your compressor tank has enough air pressure.
- Air leak: Check all connections (hose to compressor, hose to nailer, couplers) for leaks. A hissing sound is a dead giveaway.
- Nailer is jammed: Clear any jammed nails according to your nailer’s manual.
- Dry firing lockout: Some nailers have a lockout mechanism to prevent firing when empty. Load more nails.
Problem: Nails are sticking out of the wood.
Possible Causes & Solutions:
- PSI is too low: Increase the PSI gradually.
- Incorrect nail length for material: You might need longer nails if the wood is very dense.
- Dull or bent driver blade (internal to nailer): This is less common but possible. Might require professional servicing.
Problem: Nails are sinking too deep or blowing out the wood.
Possible Causes & Solutions:
- PSI is too high: Decrease the PSI gradually.
- Nailing too close to an edge or end of the workpiece: This is common. Try a lower PSI or be more mindful of placement.
- Using too much force when pressing the nailer to the surface: Let the tool do the work. Don’t over-penetrate by pushing too hard yourself.
- Working with very soft wood: Always use lower PSI for softwoods.
Problem: Nailer is inconsistently driving nails.
Possible Causes & Solutions:
- Fluctuating air pressure: Ensure your compressor is running and maintaining pressure. Check the regulator for consistency.
- Long or kinked air hose: This can cause pressure drops. Use a shorter, wider hose if possible.
- Nail strip not feeding correctly: Ensure nails are loaded properly and the magazine is clean.
Finish Nailer PSI by Nail Gauge and Material: A Quick Reference Table
To make things even easier, here’s a table summarizing the typical PSI ranges you might need. Remember, this is a starting point, and actual testing is always recommended!
| Nail Gauge | Example Material | Typical PSI Range (Start Here) | Notes |
|---|---|---|---|
| 18-Gauge (Brad Nailer) | Softwood (Pine, Cedar) | 70 – 90 PSI | Excellent for delicate trim, trim molding, paneling. |
| Hardwood (Oak, Maple) | 80 – 100 PSI | Can be used for trim, but may require more care. | |
| E.g., Picture Frame Gluing Assist | 60 – 80 PSI | Very gentle setting to avoid damaging thin wood. | |
| 16-Gauge (Finish Nailer) | Softwood (Pine, Fir) | 80 – 100 PSI | Ideal for baseboards, casings, door frames. |
| Hardwood (Oak, Maple, Cherry) | 90 – 110 PSI | Provides good holding power for sturdier trim. | |
| MDF / Composite | 85 – 105 PSI | Test carefully to avoid crushing. | |
| 15-Gauge (Finer Finish Nailer / Guerilla Nail) | Softwood (Pine, Fir) | 90 – 110 PSI | Good for heavier trim, where more holding power is needed. |
| Hardwood (Oak, Maple) | 100 – 120 PSI | Necessary for securely seating thicker nails in dense wood. |
This table provides a solid baseline. For instance, if you’re working with 16-gauge nails and painting-grade poplar (a softwood), starting around 85 PSI would be a smart initial step