Choose between pneumatic and battery nailers based on your project needs, power source availability, portability requirements, and budget. Pneumatic offers consistent power for heavy jobs with an air compressor, while battery nailers provide ultimate freedom and convenience for smaller tasks and remote locations, with modern battery tech rivaling air power.
Choosing the right nailer can make a huge difference in your DIY projects. It can be the difference between a smooth, satisfying build and a frustrating struggle. Many beginners get stuck at the fork in the road: pneumatic or battery? Both have their strengths, and the best choice really depends on what you’ll be doing most often. Don’t worry, though! We’re going to walk through everything you need to know, simple as can be. By the end of this guide, you’ll feel confident picking the perfect nailer for your workbench.
Let’s dive in and make sure you get the right tool for the job!
Table of Contents
Pneumatic vs. Battery Nailers: What’s the Big Deal?
So, you’re ready to add a nailer to your toolkit, but you’ve encountered the classic dilemma: pneumatic or battery-powered? It’s a common question, and for good reason! These two types of nailers work in fundamentally different ways, and understanding that difference is key to making the right choice for your projects.
Think of it like this: A pneumatic nailer is like a trusty workhorse, relying on compressed air to drive nails. A battery nailer, on the other hand, is your go-anywhere, do-anything sidekick, powered by modern rechargeable batteries. Each has its own set of advantages that make it shine in certain situations.
We’ll break down what makes each type tick, who they’re best for, and help you see which one aligns with your DIY dreams. Ready to get a clear picture?
Understanding Pneumatic Nailers
Pneumatic nailers, also known as air nailers, have been the go-to choice for professionals and serious DIYers for decades. Their secret weapon? Compressed air.
How Do They Work?
A pneumatic nailer connects to an air compressor via a hose. When you pull the trigger, a burst of compressed air forces a piston downward, which in turn drives a nail into your material. The air compressor is the powerhouse, constantly supplying the air needed for each nail shot.
This system provides a consistent and powerful strike every time, which is crucial for driving nails cleanly and effectively, especially into harder woods or for tougher applications.
What You’ll Need: The Air Compressor Setup
The biggest consideration with a pneumatic nailer is that you need an air compressor. This machine takes air from your surroundings, compresses it, and stores it in a tank. You’ll also need:
- Air Hose: A flexible hose to connect the compressor to the nailer.
- Fittings and Couplers: To securely connect the hose to both the compressor and the nailer.
- Air Regulator: To control the air pressure going to the nailer, which is important for nail depth.
While this might seem like a bit of extra gear, a good air compressor can power far more than just your nailer. It’s a versatile tool for many workshop tasks.
Pros of Pneumatic Nailers
Consistent Power: They deliver a strong, reliable nail drive every single time. This means fewer misfires and cleaner finishes.
Lightweight Tool: The nailer itself is usually lighter because the motor and power source (the compressor) are separate.
Durability: Generally very robust and built to last through tough jobs.
No Waiting for Batteries: As long as the compressor has air, you can keep working without downtime for charging.
Cost-Effective (for the tool): The initial cost of a pneumatic nailer can be lower than a comparable battery model, though you must factor in the compressor cost.
Excellent for Framing and Heavy-Duty Work: Their power makes them ideal for structural projects.
Cons of Pneumatic Nailers
Tethered by a Hose: The air hose limits your freedom of movement and can get in the way, especially in tight spaces or on large job sites.
Requires an Air Compressor: This is a significant upfront cost and takes up space. Compressors can also be noisy.
Setup Time: You need to set up the compressor, connect the hose, and wait for the tank to pressurize before you can start.
Less Portable: Moving the compressor around can be a hassle.
Who Are Pneumatic Nailers Best For?
Pneumatic nailers are a fantastic choice for:
- Anyone who already owns an air compressor.
- Woodworkers who spend a lot of time in their workshop and don’t need to move around.
- Professionals or serious DIYers tackling large projects like framing houses, building decks, or installing countless trim pieces.
- Those who prioritize consistent, high power above all for demanding work.
Understanding Battery Nailers (Cordless Nailers)
Battery-powered nailers, often called cordless nailers, have exploded in popularity thanks to advancements in battery technology. They offer a liberating alternative to their pneumatic cousins.
How Do They Work?
Battery nailers use powerful rechargeable lithium-ion batteries to power a motor. This motor then drives a mechanism – either a small air cylinder (for “gasless” models) or a spring-loaded plunger – to fire the nail. The most common type you’ll find for DIY and intermediate users is the “gasless” or “airless” model, which uses a motor and a flywheel system to generate the necessary force.
This means no air compressor, no air hose, just pure cordless freedom.
What You’ll Need: The Battery System
The core of a battery nailer is its battery. You’ll typically need:
- Rechargeable Lithium-Ion Battery: These come in different voltage (e.g., 18V, 20V) and amp-hour (e.g., 2.0Ah, 4.0Ah) ratings. Higher voltage generally means more power, and higher amp-hours mean longer runtimes.
- Battery Charger: To recharge your batteries.
- Nails: You’ll still need to load it with nails, but often they use a standard collation type.
If you’re already invested in a particular brand’s cordless tool line (like DeWalt, Makita, Milwaukee, Ryobi, etc.), you might be able to use their existing batteries and chargers, which can save you money.
Pros of Battery Nailers
Ultimate Portability: No hoses means you can go anywhere – up a ladder, around a large material, or to a remote site without an outlet.
Quick Setup: Just pop in a charged battery, load nails, and you’re ready to go.
Clean and Tidy: No air hoses to trip over or manage.
Great for Smaller/Medium Projects: Perfect for trim work, cabinetry, DIY furniture, and general repairs around the house.
Versatile Batteries: If you own other tools from the same brand, batteries are often interchangeable.
Improving Power: Modern battery nailers are incredibly powerful and can often rival pneumatic tools for many applications, especially for finish and brad nailing.
Cons of Battery Nailers
Battery Dependent: You need charged batteries. If a battery dies mid-project, you might have to wait for it to recharge or swap it out for a spare.
Heavier Tool: The battery adds weight to the nailer itself.
Potentially More Expensive: The initial cost, especially for a good quality kit with batteries and a charger, can be higher.
Can Be Slower for Rapid Fire: Some battery models might not have the same rapid-fire capability as high-end pneumatic framers.
Maintenance: While generally low-maintenance, battery health and charger functionality are things to consider.
Who Are Battery Nailers Best For?
Battery nailers are an excellent choice for:
- DIY homeowners tackling projects around the house, from crown molding to fence repairs.
- Woodworkers who value freedom of movement and a clean workspace.
- Anyone who needs to work in areas without easy access to power outlets or air compressors.
- Builders doing trim work, cabinetry, or smaller renovations where maneuverability is key.
- Hobbyists looking for convenience and versatility.
For a great overview of tool maintenance, including battery care, the U.S. Consumer Product Safety Commission (CPSC) offers valuable safety tips and resources.
Key Features to Consider for Both Types
When you’re deciding between pneumatic and battery, or even comparing models within a type, keep these essential features in mind:
1. Nail Size and Type
This is paramount! What kind of nails will you be driving?
Framing Nails: Large, thick nails for structural work (e.g., 2x4s). These are typically driven by framing nailers.
Common Nails: Still large but a bit smaller than framing nails.
Finish Nails: Medium-sized nails (e.g., 1.5 to 2.5 inches) used for trim, molding, and paneling. They leave a smaller hole.
Brad Nails: Small, thin nails (e.g., 0.75 to 1.25 inches) for delicate trim, baseboards, and where a minimal hole is desired.
Pin Nails: Extremely thin, headless nails for very fine work.
Staples: Some tools drive staples instead of nails.
Make sure the nailer you choose can handle the gauge and length of nails required for your specific project. You can find detailed nail size charts from reputable hardware suppliers.
2. Power and Performance
Pneumatic: Power is generally dictated by the compressor’s PSI (pounds per square inch) and CFM (cubic feet per minute) rating, and the nailer’s air requirements. Higher PSI/CFM means more power.
Battery: Power is related to the battery’s voltage (V) and the tool’s motor design. Modern high-voltage battery tools are very potent.
Depth Adjustment: The ability to easily control how deep the nail is driven is crucial so you don’t drive nails too far (damaging wood surface) or not far enough (leaving them sticking out).
3. Magazine Capacity
How many nails does the tool hold at once? A larger capacity means fewer reloads, which speeds up your work.
4. Firing Modes
Sequential Mode: You must bump the nose of the nailer against the surface (contact actuation) and then pull the trigger for each nail. This is safer for precise placement.
Contact (or Bump) Fire Mode: You hold the trigger down and bump the nailer against the surface to fire nails continuously. Faster, but requires more care.
Selectable Mode Switch: Many modern nailers allow you to switch between these modes with a button.
5. Ergonomics and Weight
How does it feel in your hand? Is it comfortable to hold for extended periods? Battery tools tend to be heavier due to the battery pack.
6. Noise Level
Pneumatic nailers are generally loud, especially when the compressor kicks on or exhausts air. Battery nailers are quieter, though still produce noise.
Pneumatic vs. Battery Nailers: A Comparative Table
To help crystallize the differences, let’s look at a side-by-side comparison.
| Feature | Pneumatic Nailer | Battery Nailer (Cordless) |
|---|---|---|
| Power Source | Air Compressor & Hose | Rechargeable Battery |
| Portability | Limited by hose; compressor must be moved. | High; no hoses or cords. |
| Setup Time | Moderate: Air compressor, hose, connect, pressurize. | Fast: Insert battery, load nails. |
| Tool Weight | Lighter nailer itself. | Heavier due to battery. |
| Consistent Power | Excellent. | Very Good; modern tools are powerful. |
| Noise Level | High (air exhaust, compressor). | Moderate. |
| Cost (Initial) | Nailer potentially cheaper, but compressor is a big add-on cost. | Tool kit with battery/charger can be higher upfront. |
| Runtime | Continuous, limited by compressor capacity. | Limited by battery charge; requires spares or charging. |
| Best For | Workshop use, framing, heavy-duty, long continuous jobs. | Trim, finish work, mobility, DIY, around-the-house repairs. |
When to Choose Pneumatic: Scenarios You’ll Love It
Let’s paint a clearer picture of when a pneumatic nailer truly shines.
- You Already Own an Air Compressor: If you’ve got a compressor for other tools (like impact wrenches or sprayers) and it’s rated for nailer use, adding a pneumatic nailer is a cost-effective and powerful move.
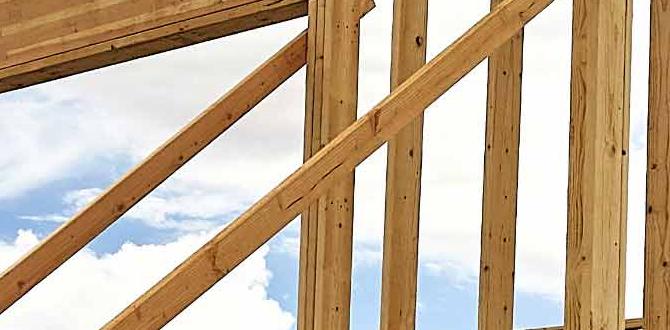
- You’re Building a House or a Large Deck: For framing walls, sheathing, or large decks where you’ll be driving hundreds or thousands of nails into dense lumber, the consistent power and rapid fire of pneumatics are hard to beat. Check out resources from the International Code Council (ICC) for building best practices that might influence your nail choices.
- Your Workshop is Your Domain: If you have a dedicated workshop space and don’t need to move your tools around much, the presence of a hose is less of an issue.
- Budget is Tight for the Nailer Itself: While you need the compressor, individual pneumatic nailers (especially basic models) can be less expensive than their battery counterparts.
- You Need Maximum Nail Driving Power: For very hard woods or driving large nails, pneumatics still often hold the edge in raw power delivery.
Think of the framing gun in action on a busy construction site – that’s the power of pneumatics.
When to Choose Battery: Scenarios Where It’s Your Champion
Now, let’s look at the situations where a battery nailer will likely be your best friend.
- No Air Compressor, and Don’t Want One: This is the biggest reason! Battery nailers offer freedom without the noise, hassle, and expense of a compressor setup.
- For Trim Work and Cabinetry: Driving brad nails or finish nails into delicate trim, baseboards, or cabinet frames where precision, minimal damage, and a clean look are essential. The fine control and clean nail heads are superb.
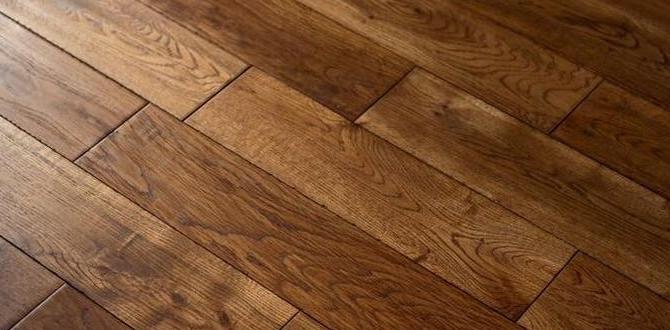
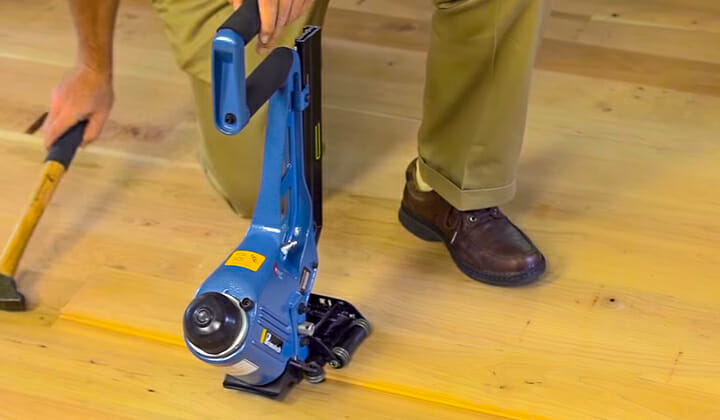
- DIY Home Projects and Repairs: Installing crown molding, wainscoting, laying down a laminate floor, fixing a fence, or assembling furniture. The convenience for these varied tasks is unmatched.
- Working in Tight or Awkward Spaces: No hose to snag on furniture, stairs, or scaffolding makes maneuvering much easier and safer.
- Wanting Maximum Mobility: If you need to move around your property, go up and down ladders, or work in remote areas without power, a battery nailer is your solution.
- You’re Already in a Brand’s Ecosystem: If you have other tools from DeWalt, Ryobi, Makita, etc., you can leverage your existing batteries. This is a huge cost-saver and convenience factor.
Picture yourself installing crown molding in a room – the ability to move freely without a hose to manage is a game-changer.
Beyond the Basics: Other Nailer Types
While pneumatic and battery are the main power sources, remember there are also different types* of nailers based on their function. You can find both pneumatic and battery versions of these:
- Framing Nailer: For structural work, driving nails from 2″ to 3.5″.
- Finish Nailer: For installing trim, molding, and baseboards, using nails from 1.5″ to 2.5″.
- Brad Nailer: For delicate trim, paneling, and crafts, using thin nails from 0.75″ to 1.25″.
- Pin Nailer: For very fine woodworking, crafting, and holding pieces while glue dries, using headless pins.