Quick Summary: Is your nail gun trigger giving you trouble? This guide helps beginners troubleshoot common nail gun trigger issues, offering straightforward fixes for sticky, unsafe, or non-firing triggers. Learn to diagnose and repair your tool safely and effectively to get back to your projects quickly.
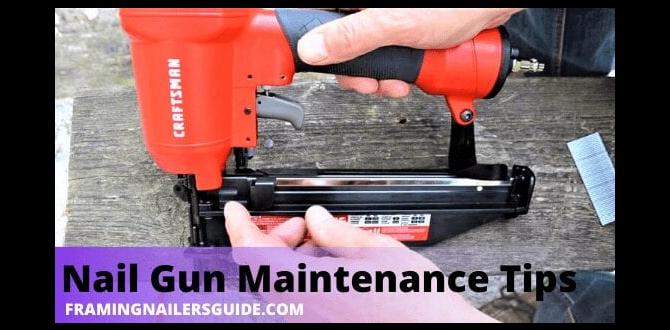
Hey there, fellow DIYers and woodworking pals! Jack Shaffer here, your friendly guide from Nailerguy. Today, we’re diving into a headache many of us have faced: a nail gun trigger that’s just not cooperating. It’s super frustrating when you’re all set to build that shelf, fix that fence, or finish that craft project, and your trusty nailer decides to take a siesta. A sticky, unresponsive, or otherwise grumpy trigger can bring your workflow to a grinding halt. But don’t you worry! We’re going to walk through this together, step-by-step. We’ll get to the bottom of what’s causing your nail gun’s trigger troubles and, more importantly, how to fix them. Get ready to bring your nailer back to life!
Table of Contents
Why Your Nail Gun Trigger Might Be Acting Up
Nail gun triggers are designed to be pretty reliable, but like any tool that gets a lot of use, they can sometimes develop quirks. The good news? Most trigger issues are quite common and usually have straightforward solutions that don’t require a master technician. Think of it like a sensitive part of your car that just needs a little tune-up.
The main culprits behind a malfunctioning nail gun trigger usually fall into a few common categories:
- Debris and Gunk: Over time, dust, wood shavings, and especially sticky residues from lubricants or other materials can build up in the trigger mechanism. This gunk can prevent the trigger from moving freely.
- Lubrication Issues: Nailers need proper lubrication to keep moving parts gliding smoothly. If it’s running dry, parts can stick. Conversely, too much lubricant, especially if it’s the wrong type, can also attract dirt and gum up the works.
- Damaged Springs or Parts: Internal components, like springs or plungers, can wear out or break with heavy use or after an accidental drop.
- Air Leaks (for pneumatic nailers): If your pneumatic nailer has an air leak, it might not have enough power to operate the trigger mechanism correctly, leading to a weak or non-existent firing action.
- Safety Mechanism Problems: Most nail guns have safety features, like a contact trip or a trigger safety, that prevent accidental firing. If these are stuck or misaligned, they can also stop the trigger from engaging properly.
Safety First: Preparing to Check Your Nail Gun Trigger
Before we start tinkering, safety has to be our top priority. A nail gun is a powerful tool, and a malfunctioning trigger can be dangerous. So, let’s get our ducks in a row.
Always, always, always do the following before you attempt any inspection or repair on your nail gun:
- Disconnect the Power Source:
- For Pneumatic Nailers: Disconnect the air hose. Make sure the air compressor is turned off and air is bled from the line.
- For Cordless (Battery) Nailers: Remove the battery pack.
- For Corded (Electric) Nailers: Unplug the power cord from the outlet.
- Remove Any Nails: Ensure there are no nails left in the magazine or the firing chamber.
- Wear Safety Gear: Even when the nailer is disabled, it’s good practice to wear safety glasses.
- Work in a Well-Lit Area: You need to see what you’re doing clearly.
Seriously, don’t skip these steps. It’s better to be safe than sorry when dealing with tools that can shoot fasteners with serious force.
Troubleshooting Steps: How to Check Nail Gun Trigger Issues
Now that we’ve got safety covered, let’s get down to business and figure out what’s going on with that trigger.
Step 1: Visual Inspection from the Outside
This is where we start simple. Often, the problem is right there on the surface, visible with a quick look.
- Check the Trigger Itself: Is the trigger bent, cracked, or obviously damaged? Is it stuck in a depressed or extended position? Try to gently wiggle it. Does it feel loose, too stiff, or completely jammed?
- Inspect the Trigger Guard: Make sure nothing is wedged into the trigger guard that could be preventing the trigger from moving.
- Look for External Debris: Check around the trigger assembly for any visible packing material, dirt, wood chips, or anything else that might be obstructing its movement.
If you see something obvious like a piece of packing foam stuck in the trigger, carefully remove it. If the trigger looks physically damaged or bent, it might require replacement parts.
Step 2: Gentle Wiggling and Testing (with Power Source Disconnected!)
With the power source confirmed disconnected, give the trigger a bit of gentle persuasion.
- Try to Depress: Gently push the trigger in. Does it move at all? Is it stiff? Does it snap back?
- Try to Pull: If it’s a style of trigger that can be pulled backward slightly before depressing, check that too.
Sometimes, a trigger can feel jammed simply because it’s a bit stiff. A slight movement might dislodge a tiny piece of debris or break a temporary seal.
Step 3: Cleaning the Trigger Mechanism
This is one of the most common fixes. Debris is the enemy of smooth operation!
What you’ll need:
- Compressed air (if you have an air compressor)
- A soft brush (like an old toothbrush or a paintbrush)
- A mild cleaning solvent (like WD-40 sparingly, or a dedicated tool cleaner – avoid anything too harsh that could damage plastic parts)
- Clean, lint-free cloths
The process:
- Blow Out Loose Debris: Use a blast of compressed air to try and dislodge any loose dust or shavings from around and within the trigger assembly. Hold the nozzle a safe distance away so you don’t force debris further in.
- Brush Away Stubborn Grime: Use your soft brush to gently scrub away any caked-on dirt or residue from the trigger and the surrounding area.
- Apply Cleaner (if needed): If brushing and air don’t work, you might need a cleaner. Lightly spray a small amount of your chosen cleaner onto a cloth, NOT directly onto the trigger mechanism.
- Work the Trigger: While applying the cleaner to the cloth, gently work the trigger (remember, no power source connected!). This helps the cleaner penetrate and loosen any gunk.
- Wipe Clean: Use a clean cloth to wipe away any dissolved grime and excess cleaner.
- Dry Thoroughly: Ensure the area is completely dry before proceeding. Any remaining moisture can cause issues.
- Lubricate (Lightly!): After cleaning and ensuring it’s dry, a very small amount of the recommended lubricant for your specific tool can help. Again, apply sparingly to a cloth. A tiny bit worked into the trigger pivot points is all that’s needed. Over-lubrication is a common mistake that leads to more dirt attraction. Refer to your nail gun’s manual for specific lubrication recommendations.
After cleaning, try depressing the trigger again. It should feel much smoother.
Step 4: Checking the Contact Trip/Nail Proximity Sensor
Many modern nail guns use a “contact trip” mechanism. This is the part that your work surface or material touches, which signals the gun to be ready to fire. If this part is stuck, the trigger won’t engage.
- Locate the Contact Trip: This is usually a nose piece or a small lever at the very front of the nail gun’s barrel.
- Inspect for Damage: Look for any cracks, bends, or debris lodged around it.
- Test its Movement: Gently press the contact trip against a firm surface (like a piece of scrap wood). It should depress smoothly and then spring back freely when you lift it.
- Clean the Contact Trip: Use compressed air and a brush to clean this area thoroughly, just as you did with the trigger. Sometimes, sawdust can get caught around the plunger of the contact trip.
- Check for Sticking: If the contact trip is slow to retract or seems stuck, a tiny drop of lubricant (again, following your tool’s manual!) might help, but be careful not to get it into the firing mechanism if you can avoid it.
If the contact trip is physically damaged, it will likely need to be replaced. You can often find replacement parts for popular models.
Step 5: Inspecting Internal Components (Requires Disassembly – Proceed with Caution!)
If the external checks and cleaning haven’t solved the problem, it’s time to look inside. This step requires a bit more mechanical aptitude and the right tools. If you’re not comfortable with disassembly, it might be time to seek professional help or consult your tool’s manual for specific disassembly diagrams.
Tools you might need:
- Screwdrivers (Phillips and/or flathead, appropriate sizes)
- Allen wrenches
- Pliers (needle-nose might be helpful)
- A small container to keep screws organized
- Your nail gun’s service manual (highly recommended!)
General Disassembly Steps (will vary greatly by model):
- Consult Your Manual: Seriously, find the manual. It’s your best friend here for understanding how to safely take your specific model apart without causing further damage. Websites like HomeTools.com or the manufacturer’s website often host downloadable manuals.
- Remove the Handle/Grip Assembly: Most nail guns will have screws that hold the main body together, often accessed from the sides or bottom of the handle. Carefully remove these screws. Keep them organized!
- Separate the Body Halves: Gently pull the handle assembly away from the main body. You might need to gently pry it with a non-marring tool if it’s sealed with grime.
- Locate the Trigger and Plunger Mechanism: Inside, you’ll usually find the trigger lever, which actuates a plunger or a spring-loaded assembly.
- Inspect the Trigger Lever and Spring: Look for the trigger lever itself. It pivots on a pin or shaft. Is the pin in place? Is the lever cracked? Is the spring that helps it return to its resting position intact and properly seated?
- Inspect the Plunger/Actuator: The trigger lever usually pushes against a plunger that, in pneumatic tools, often engages a valve. Is this plunger sticking? Is it bent or broken? Is the spring associated with it functional?
- Check for Broken Parts: Look for any small plastic or metal pieces that might have broken off.
- Clean Internally: Use compressed air and a brush to clean out this internal area. Pay special attention to the plunger’s path and where the trigger lever makes contact.
- Reassemble Carefully: Once you’ve identified and (hopefully) fixed any issues, carefully reassemble in reverse order. Ensure all springs are seated, levers are aligned, and screws are tightened appropriately.
Common Internal Issues and Fixes:
- Stuck Plunger: If the main firing plunger is stuck, it’s often due to lack of lubrication or grit. Clean its housing and the plunger itself. A tiny bit of specialized tool lubricant might be needed.
- Broken Trigger/Return Spring: If the trigger doesn’t snap back, the spring is likely the culprit. These can sometimes be replaced, but it depends on the model.
- Misaligned Parts: Dropping the nailer can cause internal components to shift out of alignment, affecting trigger function. Careful reassembly can sometimes fix this.
Step 6: Addressing Air Leaks (Pneumatic Nailers)
If you have a pneumatic nailer and suspect air leaks, it can affect the trigger’s responsiveness and overall power.
- Listen for Hissing: With the air hose connected (but compressor off), listen for any noticeable air leaks when you try to squeeze the trigger or when the gun is “armed.”
- Check Seals and O-Rings: Internal seals and O-rings can degrade over time. If you’ve disassembled the tool, inspect these parts for cracks or wear. Replacement is often necessary. Common sources for tool parts include manufacturers’ websites or specialized repair shops.
- Hose and Coupler Inspection: While less common to affect the trigger directly, ensure your air hose and coupler are in good condition and not leaking air.
A healthy air system is crucial for pneumatic tools. For more on pneumatic tool maintenance, the NIOSH guide on pneumatically-powered tools offers some great general safety and maintenance insights.
Step 7: Checking the Safety Mechanism / Depth Adjustment
Some nail guns have safety mechanisms integrated into or near the trigger assembly or depth adjustment wheels. While not always the trigger itself, these can interfere.
- Depth Adjustment Dial: If your nailer has a depth adjustment dial (often near the nose), ensure it’s not jammed or misaligned in a way that’s interfering with the trigger or firing mechanism. Try rotating it through its full range.
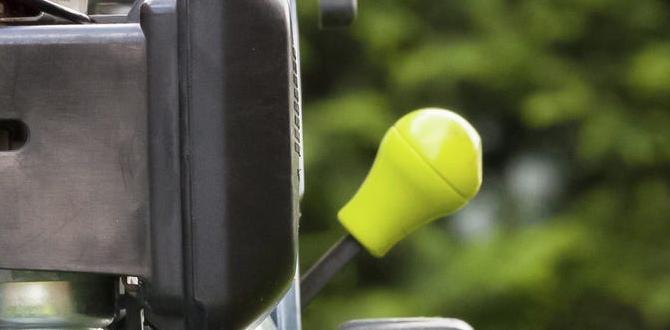
- Trigger Safety Lock: Some nailers have a small lever or button to lock the trigger. Make sure this isn’t stuck in the “locked” position or partially engaged.
When to Call in the Pros or Consider Replacement
Sometimes, despite your best efforts, a nail gun trigger issue might be beyond a simple fix. Here are a few signs it’s time to hang up your DIY hat for this particular problem:
- Extensive Physical Damage: If the casing is cracked around the trigger, or the trigger mechanism itself is visibly mangled, it’s likely not a repairable issue without specialized parts and skills.
- Internal Component Failure: If you’ve disassembled the tool and found a critical internal part broken (like a main valve body, a complex spring assembly, or engine components in gas-powered nailers) that can’t be easily sourced or replaced.
- Repeated Failures: If you fix one issue, and another pops up soon after, the tool might be at the end of its lifespan.
- Lack of Confidence: If you’re simply not comfortable with the disassembly or repair process, it’s always better to take it to a professional tool repair shop or consider investing in a new tool. Your safety is paramount.
For pneumatic nailers, you can often find replacement parts diagrams and order parts directly from the manufacturer’s website (e.g., Dewalt, Paslode, Bostitch). For less common or older models, specialized tool repair shops might still carry parts or be able to repair them.
Table: Common Nail Gun Trigger Issues and Quick Fixes
Here’s a handy reference table to quickly diagnose and address common trigger problems:
| Symptom | Possible Cause | Quick Fix / Action | When to Seek Help |
|---|---|---|---|
| Trigger is stiff or hard to pull | Debris buildup, lack of lubrication | Clean trigger area with air/brush, light lubrication (if needed) | If stiffness persists after cleaning/lubrication, or if it’s mechanically jammed. |
| Trigger won’t depress at all | Jammed debris, safety mechanism engaged/stuck, internal part blocked | Thorough cleaning, check for stuck safety lock, ensure contact trip is clear | If internal blockage is suspected, or safety lock is not functional. |
| Trigger feels loose or wobbly | Loose pin or screw, worn pivot point | Check for and tighten any loose screws/pins connecting trigger. | If the trigger itself is cracked or the pivot point is excessively worn/broken. |
| Trigger doesn’t snap back | Stuck return spring, debris jamming mechanism, broken spring | Clean thoroughly. If spring is visible and accessible, check seating. | If the spring is broken or the mechanism re-jams after cleaning. |
| Nailer doesn’t fire when trigger is pulled (but some air is heard/felt) | Stuck firing plunger, air leak in valve system, internal blockage |