Nail gun misfires happen when a nail isn’t driven properly, or the gun fires without a nail. This can be frustrating, but usually, it’s a simple fix! Most misfires are caused by common issues like air pressure, jams, or tool settings. This guide will help you identify the problem and get your nailer working smoothly again. We’ll cover everything from basic maintenance to troubleshooting tricky jams, so you can finish your projects without interruption.
Hey everyone, Jack Shaffer here with Nailerguy! We’ve all been there. You’re deep into a project, feeling good, and then… click. Nothing. Or worse, two nails shoot out when you only wanted one. Nail gun misfires and double fires can bring your woodworking to a grinding halt, and honestly, they can be a bit unsettling, especially when you’re just starting out. But don’t worry! These issues are usually pretty straightforward to solve with a little know-how. My goal is to make understanding and fixing your nailer as easy as pie. We’ll walk through the most common culprits step-by-step, so you can get back to building with confidence. Ready to banish those misfires? Let’s dive in!
Table of Contents
Understanding Your Nail Gun: The Basics
Before we tackle misfires, it’s helpful to understand how your nail gun works fundamentally. Most nail guns, especially pneumatic ones, rely on compressed air to drive a piston that in turn drives the nail. Electric and cordless models use motor-driven mechanisms, but the core concept of driving a fastener remains the same. When things don’t go according to plan, it’s often because something in this driven process is interrupted or malfunctioning.
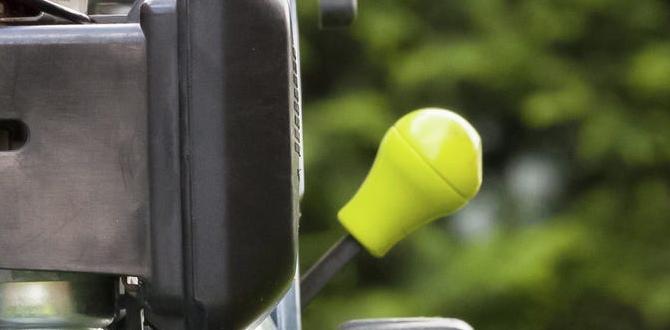
Knowing the basic parts can also be a huge help. You’ve got your magazine (where the nails are loaded), the nose or tip (where the nail comes out), the trigger, and the safety contact tip (often called the “nosepiece” or “teeth”). The safety contact tip is crucial; it has to be pressed against the material you’re nailing for the gun to fire. This is a built-in safety feature to prevent accidental nailings.
Why Misfires and Double Fires Happen
When a nail gun misfires, it means the nail didn’t drive into the material, or the gun fired without driving a nail at all. A double fire is when two nails come out when only one was intended. These frustrating events are usually symptoms of a mechanical issue, a setting problem, or a lack of proper maintenance. Ignoring them can lead to more serious damage or, more importantly, safety risks. Let’s break down the most common causes.
Common Causes of Nail Gun Misfires
Misfires can be caused by a variety of factors, ranging from simple user error to more complex mechanical problems. Here are the most frequent offenders:
1. Improper Air Pressure (Pneumatic Nailers)
This is a big one for air-powered nail guns. Too little air pressure, and the piston won’t have enough force to drive the nail completely. Too much air pressure can sometimes cause issues too, though it’s less common for simple misfires (it’s more likely to ‘over-drive’ a nail, sinking it too deep). Your nail gun’s manual will specify the ideal PSI (pounds per square inch) range.
What to look for:
- Nails are consistently sinking only partially into the material.
- The nail gun sounds weak or sluggish when firing.
- You’ve recently changed to a different compressor or hose setup.
2. Jams in the Nail Feed System
Nail jams are probably the most common culprit. This happens when a nail gets bent, misaligned, or stuck somewhere between the magazine and the firing mechanism. It’s like a traffic jam for your nails, and it prevents the gun from properly positioning the next nail for firing.
What to look for:
- You hear a clicking sound but no nail fires.
- You can see a bent or crooked nail in the magazine or near the nosepiece.
- The last few nails in a strip seem to feed poorly.
3. Safety Contact Tip Not Engaged Properly
As mentioned, the safety contact tip is a critical safety feature. It’s designed to prevent the nailer from firing unless it’s pressed firmly against your workpiece. If it’s not fully engaged, or if it’s malfunctioning, the gun won’t fire.
What to look for:
- The nail gun simply doesn’t fire when you pull the trigger, even with proper air pressure (if pneumatic).
- You have to press down very hard or at a specific angle for it to fire.
- The tip appears damaged, dirty, or clogged.
4. Dry Firing
This is when the nail gun fires when there are no nails left in the magazine. Many modern nailers have a mechanism to prevent this, as it can cause damage to the driver blade and the exhaust valve. However, older models or those with a malfunctioning anti-dry-fire mechanism might do this, leading to a “misfire” because no nail was actually fired.
What to look for:
- The gun fires with a distinct “empty” sound.
- This happens immediately after you thought you loaded a full strip of nails.
5. Worn or Damaged Driver Blade
The driver blade is the part that actually strikes and drives the nail. Over time, or after a particularly bad jam or dry fire, this blade can become worn, bent, or chipped. If it’s not sharp and straight, it can fail to drive the nail properly, leading to a misfire or a partially driven nail.
What to look for:
- Nails are consistently driven inconsistently, even with proper air.
- You’ve experienced several severe jams or dry fires recently.
- Upon inspection (after safely disconnecting power/air), the tip of the driver blade looks damaged.
6. Incorrect Nail Size or Type
Nail guns are designed to work with specific sizes and types of nails. Using nails that are too long, too short, too thick, or too thin for your particular model can cause feeding issues and misfires. Always check your manual to confirm the correct fastener specifications.
What to look for:
- Nails are sometimes bent or just don’t feed smoothly.
- You’re using nails from a different brand or a slightly different specification.
- The nails don’t sit correctly in the magazine channel.
7. Dirty or Clogged Internal Components
Wood dust, debris, and even oil residue can build up inside a nail gun over time. This gunk can interfere with the movement of the piston, driver blade, or other internal mechanisms, leading to misfires or inconsistent performance.
What to look for:
- Performance has degraded gradually over time.
- The trigger feels stiff or sluggish.
- The gun hasn’t been cleaned or lubricated in a long time.
8. Problems with the Actuation Mechanism
Some nail guns offer different firing modes (e.g., sequential fire, contact fire, full sequential). If the selector switch for these modes is faulty, dirty, or not set correctly, it can lead to misfires or double fires. In contact fire mode, you might get a double fire if the contact tip bounces too much. In sequential fire, it might not fire at all if the safety tip isn’t reset properly after the trigger is released.
What to look for:
- The gun fires when you don’t expect it to, or doesn’t fire when you do.
- The mode selector switch feels loose or “off.”
- Double fires occur predominantly when firing rapidly in contact mode.
-
Check and Adjust Air Pressure (Pneumatic Nailers)
This is often the easiest fix. Locate the regulator on your air compressor. Your nailer’s manual will tell you the recommended PSI range. For most framing nailers, this is around 70-120 PSI. For finishing or brad nailers, it’s typically lower. Connect your air hose, set the regulator to the lower end of the recommended range, and test the gun. If nails are still not fully driving, gradually increase the pressure, testing after each small adjustment, until they perform correctly. Be careful not to exceed the maximum recommended PSI, as this can damage the tool or your workpiece.
Tip: Ensure you’re using an adequate air hose (at least 3/8 inch diameter for most pneumatic tools) and that there are no leaks in the hose connections, as this can also reduce the actual PSI reaching the tool.
For more on air compressors and fittings, check out resources from trusted industry partners like Grainger’s Air Compressor Guide.
-
Clearing Nail Gun Jams
This is a critical skill. When you suspect a jam:
- Disconnect Power/Air: Crucial safety step!
- Locate the Jam: Look at the nosepiece and the magazine. Sometimes you can see a bent nail protruding.
- Open the Magazine: Most nail guns have a way to release or slide open the magazine cover. This often exposes the nail track.
- Use Pliers (Carefully): If you can see a bent nail, try to gently pull it out with needle-nose pliers. Wiggle it carefully to free it without damaging the gun’s internals.
- Clear the Driver Channel: Sometimes the jam is higher up, where the driver blade operates. You might need to carefully push or pry out the obstructions without forcing anything. Some nailers have a secondary access point for this.
- Inspect Nails: Ensure the nails you are using are straight and correctly loaded. Sometimes a single bent nail can cause subsequent nails to jam.
- Re-test: Once you believe the jam is cleared, reassemble the magazine, reconnect power/air, and test fire into scrap material.
Important: Never force components. If you can’t easily clear a jam, it might be time to consult the manual or seek professional help, especially if you’re uncomfortable.
-
Ensuring Proper Safety Contact Tip Engagement
First, visually inspect the contact tip for any damage, debris, or obstruction. Clean it thoroughly with a soft cloth. If it looks damaged, it might need replacement. When operating the nailer, make sure you are pressing the nose of the gun firmly and squarely against the workpiece. Some nailers require a bit of a sideways “push” to ensure the tip is fully engaged. Experiment with the angle and pressure while testing on scrap material. If the tip mechanism feels loose or damaged, it may require repair.
Tip: If your nailer has a selectable trigger/actuation mode, ensure it’s set to the desired mode (e.g., contact actuation for rapid nailing, sequential for precision). A faulty switch here can mimic a safety tip issue.
-
Lubrication and Maintenance
Regular maintenance is key to preventing misfires caused by dirty or dry internals. For pneumatic nailers, most manufacturers recommend adding a few drops of specialized pneumatic tool oil (e.g., DeWalt Pneumatic Tool Oil) into the air inlet after each use or daily. Run the tool briefly to distribute the oil. For electric or cordless models, follow the manufacturer’s instructions for cleaning and lubrication. This usually involves keeping the tool clean and perhaps lubricating specific moving parts periodically.
A regular cleaning schedule for both the exterior and accessible internal parts (like the magazine) can prevent dust and debris buildup. Check your manual for specific cleaning instructions.
-
Inspect and Replace Driver Blade (If Necessary)
This is a more advanced fix, often involving disassembling part of the nail gun. If you’ve tried everything else and nails are still not driving correctly, or if you notice visible damage to the driver blade after clearing a severe jam or multiple dry fires, it might be time to replace it. Consult your nail gun’s manual for instructions on how to access and replace the driver blade assembly. If this sounds daunting, it’s always best to take it to a tool repair shop.
-
Using the Correct Fasteners
Double-check that you are using the exact type and size of nails recommended for your nail gun. Even slight variations can cause feeding problems. Nails should be of the correct collation angle, head size, and shank diameter. For example, a framing nailer used for 2-inch framing nails will not work with 1-inch brads. Ensure the nails are free from defects and that the strip is not damaged.
Nail Gun Compatibility Table:
Nailer Type Common Nail Gauge (Staples may apply) Common Nail Length Typical Applications Framing Nailer .113″ – .162″ (e.g., 8d, 10d common) 1-1/2″ to 3-1/2″ Framing walls, roofs, subflooring Finishing Nailer .079″ – .099″ (e.g., 14-gauge, 16-gauge) 1-1/4″ to 2-1/2″ Trim, molding, baseboards, window/door casings Brad Nailer .031″ – .047″ (e.g., 18-gauge) 5/8″ to 2″ Small trim, delicate molding, craft projects Pin Nailer .018″ – .021″ (virtually headless) 1/2″ to 1-1/4″ Invisible fastening, delicate trim, models Stapler (e.g., Crown Stapler) Up to 3/4″ crown width, various gauges 1/2″ to 2″ Sheathing, upholstery, fencing Note: Specific gauges and lengths can vary significantly by manufacturer. Always consult your tool’s manual for precise specifications.
-
Addressing Double Fires
Double fires are often related to the actuation mode and the sequential trip mechanism. If your nailer has a selectable trigger (sequential vs. contact fire), ensure it’s set to sequential if you want single shots. If you’re using contact fire and getting double fires, it could be due to rapid recoil or bounce. Try firing with less force or ensuring the safety contact tip is completely released between shots. For pneumatic tools, inconsistent air pressure can sometimes contribute to odd firing behavior. If the problem persists, the trigger mechanism or the associated valve might be faulty and require service.
-
Troubleshooting Specific Firing Modes
Understanding your nailer’s firing modes is key. Most pneumatic nailers offer two modes, selectable via a switch or by replacing a part:
- Sequential Fire (or “Touch-Trip”): You must pull the trigger and press the safety contact tip against the workpiece to drive each nail. This is for accuracy and safety. Misfires here usually mean the contact tip isn’t engaging, or the trigger isn’t being held when the tip is pressed.
- Contact Fire (or “Bump Fire”): You can hold the trigger down and “bump” the safety contact tip against the workpiece to fire nails repeatedly. This is fast but less precise. Double fires in this mode can occur if the contact tip bounces aggressively, re-engaging the trigger mechanism before the first nail is fully driven.
If your nailer has a “Full Sequential” mode (common on newer professional models), it requires a specific sequence: trigger pull first, then contact tip engagement; release contact tip, then release trigger. If this sequence is
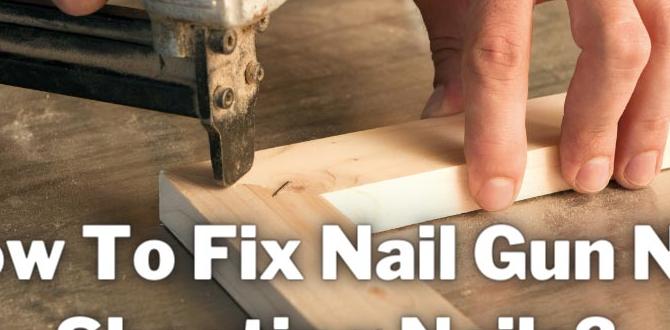
Essential Fixes for Nail Gun Misfires
Now that we know what causes the problems, let’s get to the solutions! Remember, safety first: always disconnect the air hose (for pneumatic) or battery/power source (for electric/cordless) before performing any maintenance or clearing jams.