Quick Summary: Always carry nail guns neutrally, muzzle pointed down and away from people. Keep your finger off the trigger and engage the safety lock if available. Store them securely when not in use to prevent accidental firing.
Hey there, fellow DIYers and woodworkers! Jack Shaffer here, your go-to guy for all things nail guns. Ever felt a little uneasy about how to handle that powerful tool when you’re moving from one spot to another? You’re not alone! It’s a common question, and for good reason. Nail guns are amazing for speeding up projects, but they pack a serious punch. Getting them from point A to point B safely is super important to avoid any oopsies. Let’s dive into how to carry your nail gun like a pro, keeping yourself and everyone around you safe and sound. We’ll cover everything from the workbench to the job site!
Table of Contents
Why Safe Nail Gun Handling Matters
Nail guns are incredible tools that can drastically cut down the time you spend on woodworking and construction projects. From framing walls for your new shed to adding intricate trim in your home, they make driving nails a breeze. However, their power and speed mean they demand respect. An accidental discharge can cause serious injury, making safe handling not just a good idea, but an absolute necessity.
Think of it this way: a nail gun is designed to propel a sharp object at high speed. If that happens when you don’t intend it to, the results can be devastating. This is especially true on busy job sites where multiple people are working. Even in your home workshop, safety precautions are paramount to protect yourself, family members, or anyone else who might be nearby.
The Risks of Improper Handling
- Accidental Discharge: The most obvious risk. If the trigger is accidentally squeezed while the nail gun is being moved, it can fire a nail into a person or valuable material.
- Nail Ricochet: Nails can sometimes bounce off hard surfaces, creating a projectile hazard.
- Tool Damage: Dropping a nail gun can damage internal components, leading to malfunctions and potentially unsafe operation later on.
- Tripping Hazards: Loose hoses or power cords attached to the nail gun can become trip hazards when moving the tool.
By understanding these risks and implementing simple, effective handling procedures, you can confidently use your nail gun for all your DIY adventures. We’re going to break down the best practices step-by-step, so you can carry, store, and use your nailer with peace of mind.
Understanding Your Nail Gun’s Safety Features
Before we even talk about carrying your nail gun, it’s key to know how it’s designed to keep you safe during operation. Most modern nail guns come with built-in safety mechanisms. Understanding these will help you appreciate why certain carrying methods are recommended.
The Contact Trip / Safety Nose
This is the most crucial safety feature for preventing accidental firing. It’s usually a spring-loaded metal piece at the tip of the nail gun, often called the “safety nose” or “contact trip.” For the nail gun to fire, two things need to happen simultaneously:
- You must be pressing the trigger.
- The safety nose must be pressed firmly against the material you are nailing.
This design prevents the gun from firing if you just bump it or if the trigger is accidentally engaged without being pressed against a surface. However, it’s not foolproof! You can still accidentally fire it if your finger is on the trigger and the nose accidentally contacts something, even if it’s not the intended material.
Trigger Lock-Offs
Many nail guns also feature a trigger lock-off. This is typically a small lever or switch that physically blocks the trigger from being squeezed. Always engage this when you’re not actively firing nails. Some tools have an automatic lock-off that engages after a period of inactivity, but manual engagement is always the safest bet.
Tip: Always consult your nail gun’s owner’s manual for specific information about its safety features. Different brands and models might have slightly different designs and operation procedures.
The Golden Rules of Carrying a Nail Gun
These are the core principles you should follow every single time you move your nail gun, whether it’s across the room or across the job site. They are simple, effective, and designed to prevent the vast majority of accidents.
- Keep your finger OFF the trigger: This is the number one rule. Your finger should never be on the trigger when you are moving the nail gun.
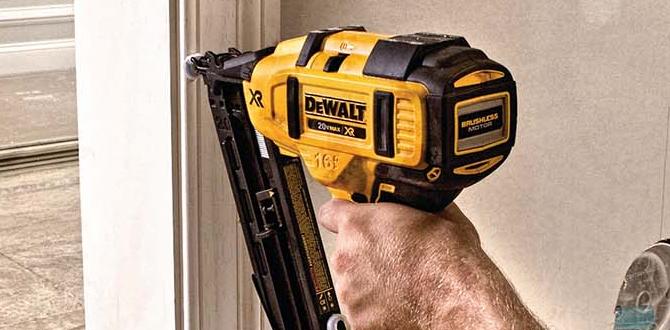
- Point the muzzle in a safe direction: Always ensure the tip of the nail gun (where the nails come out) is pointing downwards or away from yourself and others.
- Engage the safety lock: If your nail gun has a trigger lock-off, use it!
- Depress the safety nose ONLY when ready to fire: Don’t let the safety nose rest against surfaces unnecessarily, especially if your finger is near the trigger.
These rules are simple, but consistently applying them makes a massive difference in workplace safety. Let’s break down exactly how to carry it in different situations.
How To Carry Nail Guns Safely: Step-by-Step Guide
Now, let’s get practical. How do you actually pick up and move that nail gun without putting anyone at risk?
Method 1: The Standard Carry (When Moving Short Distances)
This is for when you’re moving the nail gun from your workbench to your project, or to another spot a few feet away.
-
Turn Off and Disconnect:
- Cordless: Remove the battery pack.
- Pneumatic (Air): Disconnect the air hose. Even a small amount of residual air pressure can pose a risk.
- Electric: Unplug the power cord.
-
Disengage Safety Features:
- Ensure the trigger lock-off is engaged.
- Visually confirm your finger is nowhere near the trigger.
-
Grip the Nail Gun:
- Grip the main body or handle of the nail gun firmly. Avoid gripping the trigger area.
-
Position the Muzzle:
- Point the muzzle (the tip where nails exit) DOWNWARDS. This is critical. If it discharges accidentally, the nail will go into the floor, not a person or object.
- Ensure the muzzle is also pointing away from your body and anyone nearby.
-
Walk Carefully:
- Move deliberately and with awareness of your surroundings. Don’t rush.
Method 2: The Belt Hook / holster Carry (For Hands-Free Mobility)
Many nail guns come with a belt hook, or you can purchase a holster. This is fantastic for keeping your hands free while working on a ladder or moving around a large job site.
-
Power Down and Disconnect: Follow Step 1 from Method 1 (Turn Off and Disconnect).
-
Engage Safety Lock: Ensure trigger lock-off is engaged. Visually confirm no finger near the trigger.
-
Position the Muzzle: This is still paramount! Even on a belt hook, the muzzle must point DOWNWARDS and AWAY from your body and others.
- Tip: If the nail gun’s design makes pointing the muzzle down difficult when hung from a belt, consider a specialized holster that ensures this orientation.
-
Secure to Belt/Holster:
- Use the built-in belt hook to hang the nailer securely from your tool belt.
- Alternatively, place it firmly into a dedicated nail gun holster. Make sure it’s snug so it won’t fall out.
-
Maintain Awareness: Be mindful of the nail gun swinging or snagging on objects as you move.
Method 3: Using a Carrying Case or Bag
For transport or longer-term storage, a dedicated case or bag is ideal.
-
Power Down and Disconnect: Follow Step 1 from Method 1.
-
Engage Safety Lock: Ensure trigger lock-off is engaged.
-
Place in Case:
- Gently place the nail gun into its designated case or bag.
- Ensure the muzzle is not pointing towards any opening or part of the case that could be easily bumped. Some cases have specific compartments to secure the tool head.
-
Secure the Case: Close and latch/zip the case securely. This prevents accidental contact with the trigger or muzzle by anyone who might handle the case.
Carrying Nail Guns on Site: Specific Considerations
Job sites can be dynamic and sometimes chaotic environments. Carrying nail guns safely here requires extra vigilance.
1. When Moving Between Workstations
Imagine you’re framing a wall and need to grab another nailer or move to a different section.
- Always disconnect power/air before moving the tool. Don’t assume residual pressure is gone.
- Engage the trigger lock immediately.
- Point the muzzle downwards and away from any other workers. Even a short walk can be 100% safe if this rule is followed.
- Clear your path if possible, or ensure you’re not carrying it precariously. A belt hook is excellent here if you need both hands free for other materials.
2. When Working at Heights (Ladders, Scaffolding)
This is where the risks are amplified. Gravity is not your friend!
- Use a belt hook or holster whenever possible. This keeps your hands free to maintain balance.
- Ensure the nail gun is securely attached to your belt or holster. A fall from height could dislodge an improperly secured tool.
- Point the muzzle DOWNWARD at all times. This is non-negotiable. If it falls, it needs to be pointing away from you and anyone below.
- Consider tethering the nail gun to your belt or harness, especially on very high jobs. Many professional tool manufacturers offer tethering solutions. Check out resources from OSHA for working at heights.
- Never carry a nail gun in your mouth or under your arm when climbing or moving at heights.
3. When Loading and Unloading Vehicles
Transporting nail guns requires extra care.
- Place them in a sturdy case or bag whenever possible. This protects them and prevents accidental firing.
- Don’t stack heavy items on top of them.
- Secure them in the vehicle so they don’t slide around during transit.
- Always disconnect power/air and engage safety locks before putting them away for transport.
The Occupational Safety and Health Administration (OSHA) provides extensive guidelines for tool safety in general, which you can review on their official website. While they may not have a specific page solely on “carrying nail guns,” their principles for safe tool handling apply directly.
Storing Your Nail Gun Safely
Safe carrying isn’t just about moving the tool; it’s also about ensuring it’s put away responsibly when not in use.
Short-Term Storage (During Breaks)
If you’re taking a short break, don’t just leave the nail gun lying around.
- Disconnect power/air.
- Engage the trigger lock.
- Point the muzzle down on a stable surface, away from walkways.
- If available, use a holster or hang it from a hook where it won’t be easily bumped.
Long-Term Storage (End of Day/Project)
When the work is done for the day or the project is complete:
- Clean your nail gun: Remove any dust or debris, especially around the safety nose and air exhaust (if pneumatic).
- Store in its original case or a dedicated hard-shell case. This is the safest option.
- If no case is available, find a secure spot on a shelf or in a toolbox where it won’t be knocked over. Ensure the muzzle is pointed down and forwards, away from any common user paths.
- Keep it out of reach of children or untrained individuals.
- For pneumatic nailers, consider draining any residual air pressure from the line and the tool.
Types of Nail Guns and Carrying Nuances
While the core safety principles remain the same, the type of nail gun you’re using might have slight differences in how you manage power and air.
Pneumatic (Air) Nail Guns
These rely on compressed air from a compressor. The main concern here is managing the air hose.
- Always disconnect the air hose when moving the tool. Ensure the compressor is turned off and the hose is bled of pressure.
- A dangling air hose can be a significant tripping hazard. Coil it neatly or secure it when moving the gun.
- Some larger framing nailers are quite heavy, making a belt hook or two-handed carry essential.
| Pneumatic Nail Gun – Key Carrying Points | Action |
|---|---|
| Power Source Management | Disconnect air hose from compressor; Ensure compressor is off and hose is depressurized. |
| Hose Tripping Hazard | Coil or secure the air hose when moving the nail gun to prevent trips. |
| Weight Consideration | Be mindful of the tool’s weight, especially framing nailers. Use belt hooks or two-handed grips. |
| Muzzle Direction | Always point muzzle DOWN and AWAY when carrying/moving. |
| Trigger Safety | Finger OFF trigger; Engage trigger lock if available. |
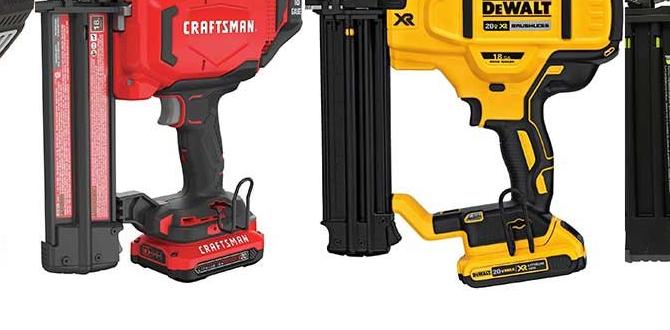
Cordless (Battery-Powered) Nail Guns
These offer great portability but require battery management.
- Remove the battery pack when not in use or when moving casually. This completely de-powers the tool.
- Be aware of the battery’s charge level. A nailer dying mid-job is frustrating, but a dead battery means one less step for safety.
- These are often lighter than pneumatic counterparts, making belt hooks a convenient option.
| Cordless Nail Gun – Key Carrying Points | Action |
|---|---|
| Power Source Management | Remove the battery pack when moving the tool. |
| Portability | Generally lighter; Belt hooks are often very effective. |
| Battery Management | Ensure battery is charged for extended use, but remove for transport/storage. |
| Muzzle Direction | Always point muzzle DOWN and AWAY when carrying/moving. |
| Trigger Safety | Finger OFF trigger; Engage trigger lock if available. |
Electric (Corded) Nail Guns
These are directly powered by mains electricity.
- Always unplug the power cord before moving the nail gun. Ensure the cord doesn’t snag on anything.
- Keep the cord organized to avoid creating a trip hazard.
- These can be heavier due to the motor and cord, so careful handling is key.
| Electric Nail Gun – Key Carrying Points | Action |
|---|---|
| Power Source Management | Unplug the power cord from the outlet. |
| Cord Management | Keep the cord tidy to avoid snags and trips. |
| Weight | Can be heavier; handle with care. |