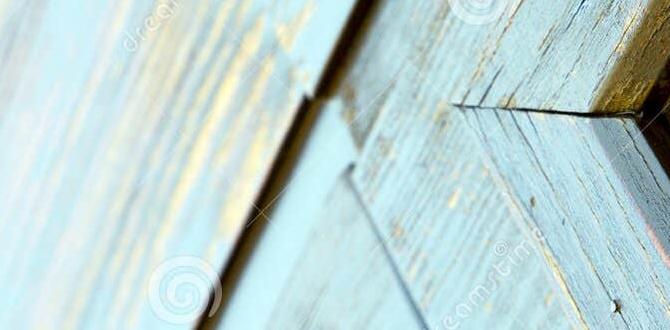
Have you ever looked at your caulk and thought it could use a splash of color? Many people wonder, “Can you stain caulk?” It’s a great question. Most of us see caulk as a boring part of home repair. But staining it can bring life to dull spaces.
Imagine walking into a room where the caulk blends perfectly with the walls. It looks neat and polished! This simple change can make a big difference. With the right tips and techniques, you can transform your caulk from plain to stunning.
Some might think staining caulk is impossible. Yet, experts say it’s easier than it seems. In this article, we’ll share expert tips and techniques to help you achieve this fun project at home. Get ready to explore the world of stained caulk!
Table of Contents
Can You Stain Caulk: Expert Tips And Techniques Revealed
Many wonder if they can stain caulk to match their projects better. The good news is, you can! To achieve great results, choose the right type of caulk. Oil-based stains work better than water-based ones. Start by applying a primer before staining. This ensures a smooth finish and even color. Did you know that stained caulk can add a polished look to your home? Follow these tips for a beautiful outcome.
Understanding Caulk and Its Uses
Definition of caulk and its common applications. Different types of caulk available in the market.
Caulk is a sticky material used to seal gaps and cracks. It helps keep your home safe from air and water leaks, making it super important. People often use caulk in bathrooms, kitchens, and around windows. There are many types of caulk, each with its special job. Some are made for indoor use, while others are tough enough for the outdoors. Choosing the right caulk is key to getting the job done right!
| Type of Caulk | Common Uses |
|---|---|
| Latex Caulk | Indoor projects, easy to paint |
| Silicone Caulk | Waterproofing in bathrooms and kitchens |
| Polyurethane Caulk | Outdoor use, great for sealing joints |
Choosing the right type is like picking the right ice cream flavor—everyone has their favorite!
Why Staining Caulk Might Be Necessary
Aesthetic reasons for staining caulk. Practical benefits of stained caulk in home improvement.
Sometimes, stains on caulk can feel like a fashion faux pas in your home. A fresh coat can make a huge difference! Painting caulk not only looks good, but it can also protect it from dirt and grime. Plus, stained caulk can hide wear and tear, adding a polished touch to your project. With the right color, it blends perfectly and creates a seamless look. After all, who wants to see a boring, white line when you can have a stylish one?
| Aesthetic Benefits | Practical Benefits |
|---|---|
| Enhances overall appearance | Protects against stains |
| Matches your home decor | Extends lifespan of caulk |
| Can make rooms feel larger | Reduces cleaning time |
Choosing the Right Caulk for Staining
Key characteristics to look for in stainable caulk. Recommended caulk brands and types for staining purposes.
When picking caulk for staining, look for some key traits. First, choose caulk that is paintable. This means it can hold color well. Next, check for flexibility. Flexible caulk moves with surfaces without cracking. Lastly, ensure it is durable. You want it to last over time.
- Recommended Brands: DAP, GE, and Osmo.
- Types to Consider: Latex, Acrylic latex, and Silicone.
These brands and types work great with stains. They help achieve the best results for your projects!
What characteristics do you need in stainable caulk?
Look for caulk that is paintable, flexible, and durable. These features help the caulk blend well with your surface and last a long time.
Preparation Before Staining Caulk
Cleaning and priming caulk before application. Tools and materials needed for effective staining.
Before you dive into staining your caulk, clean it up like your room before a surprise visit! Use soap and water to scrub away dirt and grime. Once the caulk is sparkly clean, apply a primer. This helps the stain stick better, just like glue sticks to paper! You’ll need some essential tools: a clean cloth, primer, and the stain of your choice. Don’t forget the brush or sponge to spread the stain evenly. Here’s a handy table with the materials:
| Tools and Materials | Purpose |
|---|---|
| Soap and Water | Cleaning the caulk |
| Primer | Helping the stain stick |
| Stain | Coloring the caulk |
| Brush or Sponge | Applying the stain evenly |
With these steps, your caulk will look great in no time. Who knew caulk could be so fancy?
Step-by-Step Guide to Staining Caulk
Detailed process of applying stain to caulk. Techniques for even application and color matching.
Staining caulk can be a fun project! First, clean the caulk surface with a damp cloth. This helps the stain stick better. Next, pick a stain that matches your surface. Use a small brush for even application. Start at one end and work your way to the other. To avoid drips, don’t overload your brush. Allow it to dry as per the instructions. A second coat might be needed if it looks too light. Remember, patience is key—like waiting for pizza to bake!
| Technique | Description |
|---|---|
| Clean Surface | Ensure caulk is free of dust and moisture. |
| Pick Stain | Choose a shade that complements your decor. |
| Brush Application | Use a small brush for better control. |
| Avoid Drips | Don’t overload the brush for a neat finish. |
Using these steps, you can achieve a color-matched caulk that blends perfectly into your home. Remember, a little laugh goes a long way—just don’t stain your cat while you’re at it!
Common Mistakes to Avoid When Staining Caulk
Typical errors and how to prevent them. Tips for troubleshooting staining issues.
Staining caulk can be tricky if you’re not careful. One common error is applying too much stain. Remember, caulk is like a sponge—it drinks up color! Don’t forget to test on a small area first. Sanding the caulk too hard can also leave it rough. Always use fine-grit sandpaper. If you notice uneven color, it’s often due to dirt. Keep your surfaces clean! Mistakes happen, but laugh them off and try again!
| Common Mistakes | How to Prevent Them |
|---|---|
| Too much stain | Apply thin layers |
| Sanding too rough | Use fine-grit sandpaper |
| Dirty surface | Always clean before staining |
Maintenance and Longevity of Stained Caulk
Tips for maintaining the appearance of stained caulk. Signs that indicate it’s time to restain or replace caulk.
To keep stained caulk looking new, follow these tips. First, clean it gently to remove dirt. Use a soft cloth and mild soap. Second, avoid harsh chemicals that can damage it. Protect it from water and moisture by ensuring proper sealing.
Watch for these signs to know when to restain or replace your caulk:
- Cracks or gaps appear in the caulk material.
- Peeling or flaking paint on the caulk.
- Stains that won’t come out even after cleaning.
- Mold or mildew growth is visible.
Regular checks can help maintain your caulk’s appearance and ensure it lasts longer. A little care goes a long way!
Can you stain caulk?
Yes, caulk can be stained with the right materials and techniques. Ensure the caulk is fully cured before staining.
Expert Tips and Tricks for Successful Staining
Insider advice from professionals on staining caulk. Innovative techniques to enhance results.
Getting the best results when staining caulk is like baking a cake: a pinch of expert tips makes all the difference. First, always start with clean, dry caulk—no one wants soggy cake! Professionals suggest using a paintable caulk for easier staining. Use a small brush for precision, and don’t rush. Patience is key. You can even blend colors to match your decor. Here’s a helpful table for your caulk-staining adventure:
| Tip | Description |
|---|---|
| Choose the Right Caulk | Opt for paintable caulk for better results. |
| Prep the Surface | Ensure your caulk is clean and dry. |
| Use a Small Brush | For precise application and neat edges. |
Experts remind us: “If stained caulk doesn’t enhance your home, you might want to rethink your strategy.” Who knew staining could be this fun?
Conclusion
In conclusion, you can stain caulk, but it requires careful preparation. Clean the surface well and choose the right stain. Test it first to ensure a good match. For the best results, follow expert tips and stay patient during the process. You can create beautiful finishes! For more detailed techniques, keep exploring and enjoy your project.
FAQs
What Types Of Caulk Are Suitable For Staining Or Painting, And Which Ones Should Be Avoided?
For staining or painting, use latex caulk. It accepts paint well and dries quickly. You can also use acrylic caulk, which works just as good. Avoid using silicone caulk because paint won’t stick to it. If you want to paint, choose the right caulk!
How Should I Prepare Caulk For Staining To Ensure The Best Results?
To prepare caulk for staining, start by cleaning it. Wipe off any dust or dirt. You can use a damp cloth to help. Next, let it dry completely. After that, lightly sand it to make it smooth. This helps the stain stick better. Finally, apply the stain evenly. Enjoy your work!
Are There Specific Types Of Stain Or Paint That Work Better On Caulk Surfaces?
Yes, some paints work better on caulk. You should use a paint designed for flexible surfaces. Look for water-based or acrylic paints. These can stick well and won’t crack. Always let the caulk dry before painting it.
How Long Should I Wait After Applying Caulk Before Attempting To Stain Or Paint It?
You should wait about 24 hours after putting on caulk before you stain or paint it. This waiting time helps the caulk dry well. If you paint too soon, the paint might not stick right. Always check the caulk package for exact drying times too!
What Techniques Can I Use To Achieve An Even And Consistent Stain Application On Caulk?
To get a nice and even stain on caulk, start with clean, dry caulk. Use a soft brush or cloth to apply the stain. Move in one direction to avoid streaks. You can also wipe off extra stain with a clean cloth. Let it dry completely before touching it!