Quick Summary
Calibrating depth settings on your nailer ensures nails are driven consistently to the perfect depth. This prevents overdriving (sinking nails too deep) or underdriving (leaving nails proud). Following a few simple steps, like testing on scrap wood and making small adjustments, guarantees professional-looking results for any DIY project.
Hey there, DIYers and woodworking pals! Jack Shaffer here from Nailerguy. Ever found yourself wrestling with a project, only to have your nails pop out too far or vanish completely into the wood? It’s a common frustration, and it usually comes down to one thing: depth settings. Getting this right can make the difference between a project that looks professionally done and one that screams “first attempt.” Don’t worry, though! Adjusting your nailer’s depth is simpler than you might think. We’re going to walk through it together, step-by-step, so you can nail your projects with confidence every single time. Let’s get those nails set just right!
Table of Contents
Why Your Nailer’s Depth Setting Matters
When you’re working on anything from building a bookshelf to installing trim, the way your nails sit in the wood is crucial. Too deep, and you’ve mangled the wood. Too shallow, and the nail head sticks out, looking messy and potentially snagging things.
Getting the depth setting correct is all about control. It allows you to:
- Achieve a clean finish: Perfectly seated nails create a smooth surface that’s ready for paint or stain.
- Prevent damage: Avoid splitting wood or leaving unsightly dimples.
- Ensure structural integrity: Make sure your fasteners are securely holding pieces together.
- Boost efficiency: Spend less time fixing mistakes and more time building.
Think of your nailer’s depth adjustment like tuning a musical instrument; a little tweak can make all the difference in the final sound – or in our case, the final look and feel of your project!
Understanding Your Nailer’s Depth Adjustment Mechanism
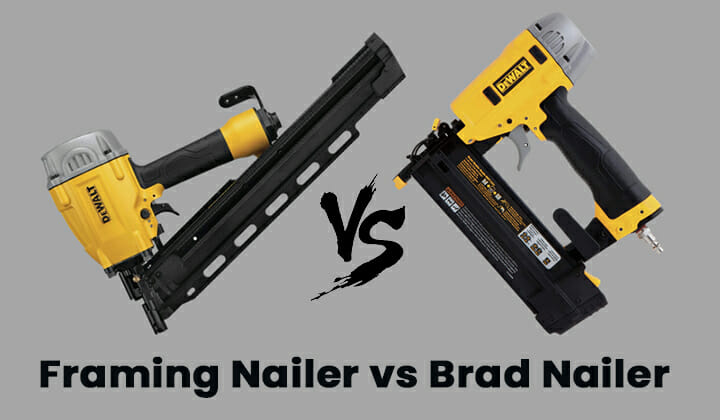
Most modern nail guns have an easy-to-use depth adjustment feature. While the exact location and design can vary between brands and types of nailers (finish nailers, brad nailers, framing nailers), the principle is the same. You’re essentially controlling how far the drive blade pushes the nail into the material.
Typically, you’ll find this adjustment near the nose of the nail gun, where the nails are ejected. It often looks like a dial, a wheel, or a lever that you can turn or slide.
- Dials/Wheels: These usually have markings like “+” and “-” or “In” and “Out.” Turning towards “+” or “In” typically drives the nail deeper, while turning towards “-” or “Out” sets it shallower.
- Levers: Some nailers use a lever that you push forward or pull back, often with notches to indicate different depths.
If you’re unsure where to find this on your specific tool, your best bet is to grab your nailer’s user manual. Most manuals have clear diagrams showing all the parts, including the depth adjustment. For an online resource, websites like Tooling.com offer glossaries that can help you identify different parts of a nail gun.
Tools and Materials You’ll Need
Calibrating your nailer doesn’t require a ton of specialized equipment. You likely have most of what you need already:
- Your Nail Gun: Of course! Make sure it’s loaded with the correct nails for your project.
- Safety Glasses: This is non-negotiable. Always protect your eyes when using power tools.
- Scrap Wood: You’ll need a few pieces of the same type of wood you’ll be using for your actual project. This is your testing ground!
- Measuring Tool (Optional but Recommended): A ruler or tape measure can help you precisely check how deep the nails are driven.
- Your Nailer’s Manual (if unsure): As mentioned, this is your go-to for specific instructions.
Step-by-Step Guide: How to Calibrate Depth Settings
Alright, let’s get down to business! Calibrating your nailer’s depth setting is a straightforward process. The key is testing and making small adjustments until you hit that sweet spot.
Step 1: Safety First!
Before you do anything else, ensure your nail gun is disconnected from its power source (air hose for pneumatic, battery removed for cordless). Point the nailer in a safe direction and engage the safety lock if it has one. Put on your safety glasses. We want to be safe and sound!
Step 2: Find Your Test Material
Grab a few pieces of scrap wood. It’s best if this wood is the same type and thickness as the material you’ll be working on for your project. If you’re installing quarter-inch trim on half-inch plywood, use that for testing. This ensures your depth setting will be accurate for the actual job.
Step 3: Set Your Initial Depth
Locate the depth adjustment dial or lever on your nail gun. For your first attempt, set it to a middle-of-the-road position. If it’s a dial with markings, a good starting point is often the center. If there are no clear markings, just experiment with it not being at its extreme ends.
Step 4: Make Your First Test Shot
Connect your nailer to its power source (hook up the air hose, insert the battery). Place the nose of the nailer against your scrap wood. It’s important to hold the nailer flat against the surface – don’t angle it. Squeeze the trigger to drive a single nail. Try to hold the gun firmly but without excessive pressure that could alter the depth.
Step 5: Inspect the Nail Depth
Examine the nail you just drove. Is the head sitting slightly below the surface of the wood, creating a small, clean countersink? Or is it sticking out? Or did it sink so deep it created a large divot?
If you have a measuring tool, you can get precise. A common goal for finish nails is to have the nail head sink about 1/16th of an inch (about 1.5 mm) below the surface. For structural work, you might want it completely flush or even slightly deeper.
Step 6: Adjust and Repeat
Based on your inspection, adjust the depth setting.
- Nail is too proud (sticking out): You need to drive the nail deeper. Adjust your depth setting towards the “deeper” or “+” setting.
- Nail is sunk too deep (creating a large hole): You need to drive the nail shallower. Adjust your depth setting towards the “shallower” or “-” setting.
Make a small adjustment at a time. Then, drive another test nail in a different spot on your scrap wood. Inspect again. You’ll likely find that you’re getting closer with each adjustment.
Step 7: Fine-Tune for Perfection
Continue to make small adjustments and test shots until you consistently achieve the desired nail depth. Ideally, you want a setting where the nail head is just slightly below the surface, so it’s hidden but doesn’t break through the wood’s veneer or create a noticeable divot. This is often referred to as “setting the nail sink.”
Once you’re happy with the depth, make a note or mental mark of your setting. You’ve now calibrated your nailer for this specific material!
Depth Calibration for Different Wood Types and Hardnesses
It’s important to remember that your depth setting might need slight adjustments depending on the wood you’re using. Softer woods (like pine) will allow nails to sink in more easily, while hardwood (like oak) will resist differently.
Softwoods vs. Hardwoods
When working with softwoods, you might find that you need a shallower depth setting than you would for hardwoods. This is because the nail can penetrate the softer fibers more readily. If you set it too deep on softwood, you risk blowing through the other side or creating an oversized hole.
For hardwoods, you might need to set your depth slightly deeper to ensure proper seating. However, always be mindful not to force the nail so deep that it splits the wood, especially near the edges.
Engineered Woods and Plywoods
Materials like MDF, particle board, and plywood can also behave differently. MDF is quite uniform and can sometimes require a deeper setting. Plywood, with its layered construction, can sometimes delaminate if a nail is driven too aggressively, so a moderate depth is usually best.
The principle remains the same: always test on scrap pieces of the exact material you’re using for your project to dial in the perfect depth.
Common Depth Setting Problems and How to Fix Them
Even with calibration, you might run into a few snags. Here are some common issues and their solutions:
| Problem | Cause | Solution |
|---|---|---|
| Nails are consistently too shallow. | Depth adjustment set too shallow. | Adjust depth setting to drive nails deeper (+ setting). |
| Nails are consistently too deep (oversunk). | Depth adjustment set too deep. | Adjust depth setting to drive nails shallower (- setting). |
| Nails are inconsistent in depth. |
|
|
| Wood is splitting around the nail head. | Nail driven too deep or too close to the edge; wrong nail size for material. |
|
| Nail heads leave a large divot. | Nail driven too deep. | Set depth shallower. |
Tips for Achieving Professional Results
Beyond just setting the depth, a few extra tips can elevate your woodworking projects:
- Use the Right Nails: Always match the nail gauge and length to your project and the wood thickness. A finish nailer typically uses nails of different sizes, like 16-gauge or 18-gauge.
- Maintain Tool Condition: Keep your nailer clean and lubricated as per the manufacturer’s instructions. A well-maintained tool performs better.
- Practice Your Stance: Hold the nail gun firmly and square to the surface. Avoid canting or angling the tool, as this can affect the nail’s drive.
- Control Your Pressure: Don’t lean too hard into the gun. Let the tool do the work. Excessive pressure can push the wood onto the driver blade, leading to inconsistent depth.
- Consider a Micro-Adjuster: Some high-end nailers have micro-adjustments for super fine-tuning. If you do a lot of detailed finish work, this might be worth considering down the line.
- Fill Nail Holes: For a seamless finish, use wood filler or putty to fill nail holes before painting or staining. Choose a color that matches your wood or a paintable filler.
- Know When to Use Trim Head Nails: For very delicate trim or where you want the smallest possible mark, consider trim head nails on your finish nailer. Their heads are smaller, making them easier to conceal.
When to Check and Recalibrate
You don’t need to calibrate your nailer every single time you pick it up, but it’s a good idea to check periodically. Here are some times when you should definitely re-calibrate:
- When switching material types: Moving from pine to oak? It’s probably time for a test shot.
- When switching material thickness: If you’re going from a 3/4″ board to a 1/2″ board, adjust.
- After prolonged use: Sometimes, tools can shift slightly with heavy use. A quick check proves it’s still on track.
- If you notice inconsistent results: If your nails suddenly start behaving differently, it’s the first thing to check.
- After maintenance or repair: If your nailer has been serviced, it’s wise to test its settings.
Making this a routine habit will save you time and frustration in the long run. It’s like checking your tire pressure; a simple, quick task that ensures everything runs smoothly.
Frequently Asked Questions (FAQ)
Q1: Do I need a special tool to adjust the depth on my nail gun?
A: Most nail guns have a built-in adjustment mechanism, usually a dial or lever, that you can operate by hand. Some older or very specific models might require a small wrench, but this is less common for typical DIY nailers. Always consult your tool’s manual if you’re unsure.
Q2: How do I know if my nailer needs recalibration?
A: If you notice nails sticking out too far, sinking too deep, or if the depth seems inconsistent from shot to shot, it’s time to recalibrate. Also, recalibrate when you switch to a different type or thickness of wood.
Q3: What’s the ideal depth for finish nails?
A: Generally, the head of a finish nail should sit just slightly below the surface of the wood (about 1/16th of an inch or 1.5 mm). This allows for easy filling with wood putty or filler, creating a smooth, finished look. For structural applications, it might need to be flush or slightly deeper.
Q4: Can I use my framing nailer for fine trim work?
A: It’s generally not recommended. Framing nailers are powerful and designed for larger nails and thicker materials, meaning they’ll likely create oversized holes and damage delicate trim. Stick to finish nailers or brad nailers for trim work, and calibrate their depth settings carefully.
Q5: What does it mean if my nail gun is sinking nails too deep and splitting the wood?
A: This means your depth setting is likely too aggressive. You need to adjust your nail gun to drive shallower. Also, ensure you are not too close to the edge of the wood, as this increases the likelihood of splitting, especially with harder woods.
Q6: My nailer is pneumatic. Does air pressure affect depth?
A: Yes, absolutely! Air pressure is a critical factor. If your air pressure is too low, nails may not drive as deep as intended. If it’s too high, they might drive too deep or even split the wood. Always use the air pressure recommended in your nail gun’s manual for optimal performance and nail depth control. You can regulate air pressure with an air compressor regulator.
Conclusion
And there you have it! Calibrating your nail gun’s depth setting is a fundamental skill that will transform your woodworking projects from good to great. By taking a few moments to test and adjust on scrap wood, you ensure every nail is driven perfectly, leading to cleaner finishes, stronger joints, and a much more enjoyable building experience. Remember that practice, patience, and paying attention to the material you’re working with are your best allies. So, next time you grab your nailer, take a moment to dial in that depth setting – your projects will thank you for it. Happy building!