Build a sturdy wooden bar with a footrest easily! This guide provides straightforward steps, tool recommendations, and safety tips for a beginner-friendly DIY project, ensuring you create a functional and stylish home bar you’ll be proud of.
Hey there, fellow DIYers! Jack Shaffer here from Nailerguy. Ever looked at a cool home bar and thought, “I could totally build that!”? You’re probably right! Building your own wooden bar with a footrest is a fantastic project. It’s a great way to add personality to your home and get more comfortable with your tools.
Sometimes, the idea of building something like a bar can feel a bit daunting. Where do you even start? What measurements do you need? And what about that footrest – how does that all come together? Don’t worry, I’ve got your back! We’re going to break this down into super simple, manageable steps.
This guide is designed precisely for you, whether you’re picking up a hammer for the first time or you’ve got a few projects under your belt. We’ll cover everything from choosing your wood to getting that footrest solid and ready for action. Stick around, and by the end, you’ll have the confidence and know-how to build a wooden bar that’ll be the envy of your friends. Let’s get building!
Table of Contents
Why Build Your Own Wooden Bar With Footrest?
So, why go through the process of building a wooden bar with a footrest yourself? There are some great reasons!
- Customization: You get to choose the exact size, style, and wood that fits your space and taste perfectly.
- Cost Savings: Often, building it yourself is more budget-friendly than buying a pre-made bar, especially if you already have some tools.
- Satisfaction: There’s an amazing feeling of accomplishment that comes with creating something useful and beautiful with your own hands.
- Unique Features: You can add specific touches, like a built-in cooler spot or a custom-height footrest, that you can’t find in stores.
- Skill Building: It’s a rewarding project to learn new woodworking techniques and get more comfortable with your tools.
A footrest adds a touch of comfort and polish that really completes the bar experience. It’s not just for looks; it makes the bar more functional and inviting for guests to gather around.
Planning Your Wooden Bar Project
Before we grab our tools and wood, a little planning goes a long way. This is where we map out our vision and make sure everything fits.
1. Measure Your Space
First things first, measure the area where your bar will live. Think about:
- Length: How wide can it be without blocking walkways?
- Depth: How far out can it extend into the room?
- Height: What’s a comfortable bar height for your space? Standard bar height is usually around 42 inches from the floor to the countertop.
Don’t forget to consider the space for stools and for people to walk around comfortably. A good rule of thumb is to allow at least 30-36 inches of clearance for walkways.
2. Sketch Your Design
Grab a piece of paper or open a simple design app and sketch out what you want your bar to look like. This doesn’t need to be a professional blueprint, just a clear drawing. Think about:
- Shape: Straight bar, L-shaped, or U-shaped? For a first project, a straight bar is often the easiest.
- Countertop: Will it be a single piece? Or perhaps a thicker, layered look?
- Footrest Placement: Where will the footrest be? Usually, it’s a horizontal piece attached to the front legs, about 6-10 inches from the floor.
- Shelving/Storage: Do you need any shelves or cabinets? Keep it simple for your first build!
3. Choose Your Materials
The type of wood you choose will affect the look, durability, and cost of your bar. Here are some beginner-friendly options:
- Pine: Affordable, lightweight, and easy to work with. It’s great for a classic look, but it can be softer and more prone to dents. You’ll want to seal it well.
- Plywood: A stable and strong option, especially for larger panels like tabletops or sides. Fir or birch plywood are good choices. You can cover the edges with wood trim for a finished look.
- Poplar: A bit harder than pine and paints beautifully. If you’re planning to paint your bar, poplar is an excellent choice.
- Oak or Maple: These hardwoods are very durable and beautiful but are more expensive and harder to cut and work with. Might be a good choice for your second bar project!
For fasteners, you’ll want wood screws and potentially some wood glue. For the countertop, you might consider butcher block or laminated plywood for a smooth, durable surface.
Builder’s Tip: Always buy a little more wood than you think you’ll need. It’s better to have extra for mistakes or future projects than to run out mid-build.
4. Create a Cut List
Based on your sketch and measurements, make a detailed list of all the pieces of wood you need and their exact dimensions. This will save you time at the lumberyard and at the saw. For a simple bar, you’ll likely need pieces for:
- Legs
- Apron (the framing under the countertop)
- Countertop
- Footrest
- Optional: Back panels or shelves
Essential Tools for Building Your Bar
Having the right tools makes the job so much easier and safer. Here’s a basic set for building a wooden bar:
| Tool | Why You Need It | Beginner Tip |
|---|---|---|
| Tape Measure | For all your measuring and layout. | Get a good quality one that locks securely. |
| Pencil | To mark your cut lines and placement. | Keep a few handy! |
| Safety Glasses | Essential for protecting your eyes from sawdust and debris. | Always wear them when cutting or drilling. Always. |
| Hearing Protection | Power tools can be loud. Protect your hearing! | Earplugs or earmuffs work. |
| Circular Saw or Miter Saw | For making straight, accurate cuts. A miter saw is fantastic for precise angles and repeat cuts. | A circular saw is versatile for larger cuts if you’re on a tighter budget. Practice cuts on scrap wood first. Learn more about choosing the right saw at Popular Mechanics. |
| Drill/Driver | For drilling pilot holes and driving screws. Make sure it has a good clutch setting to avoid stripping screws. | A cordless drill/driver is a DIY essential. |
| Clamps | To hold pieces together while you glue or screw them. Essential for accurate assembly. | Bar clamps, pipe clamps, or even simple spring clamps for smaller pieces. |
| Sander (Orbital or Belt) | To smooth out rough edges and surfaces. | Start with a medium grit sandpaper (like 120) and move to finer grits (like 220). |
| Level | To ensure your bar is plumb and level. Crucial for a professional finish. | A small torpedo level is good for checking shorter sections. |
| Optional: Kreg Jig (Pocket Hole Jig) | Makes strong, hidden joints for a cleaner look. | A bit of an investment, but makes complex joints much simpler for beginners. |
Don’t forget your personal protective equipment (PPE)! Safety first, always. That means safety glasses, hearing protection, and sturdy work gloves are a must.
Step-by-Step: Building Your Wooden Bar With Footrest
Alright, let’s get our hands dirty and build this bar! We’ll focus on a simple, sturdy design that’s perfect for beginners.
Step 1: Cut Your Wood
Using your cut list and your chosen saw (circular or miter), carefully cut all your wood pieces to the exact dimensions. Measure twice, cut once!
- Legs: Cut four identical pieces for your legs.
- Apron: Cut pieces for the front, back, and sides that will form the frame directly under the countertop.
- Footrest: Cut the piece(s) for your footrest.
- Countertop: Cut your countertop material to size. If using plywood, you might want to add a thicker edge banding made from solid wood for a more finished and durable look.
If you’re using a Kreg Jig, now is a good time to drill your pocket holes in the apron pieces and the footrest where they will attach to the legs.
Step 2: Assemble the Leg and Apron Frame
This is the main structural part of your bar. We’ll build two identical side frames and then connect them.
- Attach apron to legs: Take two legs and two apron pieces (one for the front/back and one for the side). Use wood glue and screws (with pilot holes or pocket holes) to attach the apron pieces to the inside of the legs, creating an ‘L’ shape for each side. Ensure the apron pieces are flush with the tops of the legs. A square and clamps are your best friends here to keep everything perfectly at 90 degrees.
- Connect side frames: Once you have two identical side frames, stand them up and connect them using the remaining apron pieces (front and back). Again, wood glue and screws. This creates a basic rectangular frame. Use your level to make sure it’s sitting straight.
For extra sturdiness, you might add a back apron piece for stability, especially if your bar will stand against a wall.
Step 3: Install the Footrest
This is where your bar starts to look like a bar! The footrest typically attaches to the front legs.
- Position the footrest: Decide on the height for your footrest (traditionally 6-10 inches from the floor). Mark this height on the inside of the two front legs.
- Attach the footrest: Apply wood glue to the ends of your footrest piece. Align it with your marks on the front legs. If you used a Kreg Jig, drive screws from the inside of the legs into the footrest. If not, you’ll need to pre-drill pilot holes from the outside of the legs into the footrest and drive screws, or consider using L-brackets on the inside for a cleaner look. Clamp it securely while you fasten.
Ensure the footrest is perfectly level. A wobbly footrest isn’t comfortable or safe. You could also add a second footrest piece to the back legs for a more finished look or if your bar is accessible from both sides.
For a more robust footrest, especially on a longer bar, you might add a central support from the floor to the footrest, or a cross-brace connecting the front and back legs for added rigidity.
Step 4: Install the Countertop
This is the crowning glory of your bar!
- Attach from underneath: The easiest way for beginners is usually to attach the countertop from underneath. You can do this by screwing up through the apron into the countertop. Pre-drill pilot holes in the apron to prevent splitting. If your apron is wide, you can also add a few small wood blocks on the inside of the apron corners and screw them into the countertop from above.
- Use L-brackets: Another common method is to use L-brackets. Place these on the apron’s top edge and screw them into the underside of the countertop.
- For butcher block or solid wood: If you’re using heavy material like butcher block, you might need more support. Consider adding a few more cross braces within the frame that the countertop can rest on and be screwed into.
Make sure your countertop overhangs slightly on the front and sides for a professional finish. A 1-2 inch overhang is common. Ensure it’s perfectly level before securing.
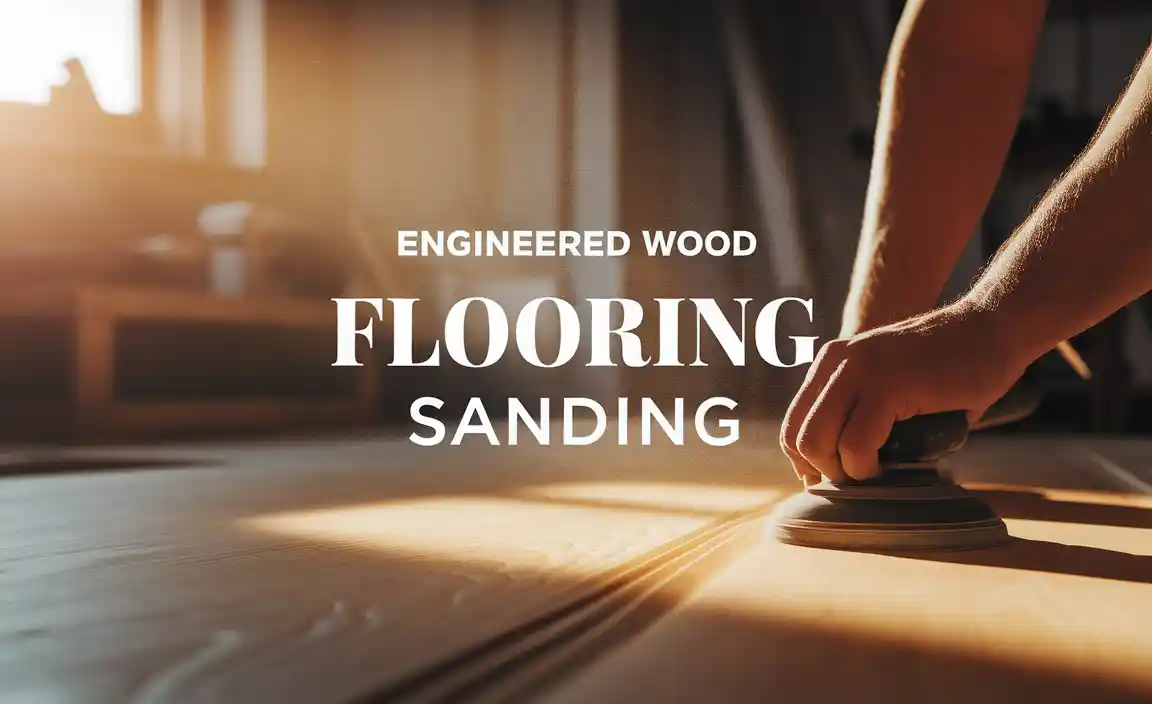
Step 5: Sanding and Finishing
This is where you transform your raw wood into a smooth, beautiful piece of furniture.
- Sand everything: Start with a medium-grit sandpaper (around 120-grit) to remove any rough spots, fill any minor gaps with wood filler if needed, and create a smooth surface. Work your way up to finer grits (180 or 220-grit) for a really smooth finish. Be sure to sand with the grain of the wood.
- Clean off dust: Use a tack cloth or a damp rag to wipe away all sawdust.
- Apply finish: Now for the fun part – protecting and beautifying your bar! You can paint, stain, or seal your bar, or a combination.
- Stain: If you want to enhance the natural wood grain, apply wood stain according to the product instructions.
- Paint: If you want a solid color, use a good quality primer followed by your chosen paint.
- Sealer/Topcoat: For a durable bar top that will resist spills and wear, a polyurethane or a clear coat is essential. For the bar top, a more durable, water-based polyurethane or an epoxy finish is recommended. For the rest of the structure, a standard interior poly or varnish will work well.
- Multiple Coats: Apply multiple thin coats of your finish, allowing proper drying time between each coat as recommended by the manufacturer. Lightly sand with very fine grit sandpaper (220+) between coats for an ultra-smooth finish.
For inspiration on wood finishes, check out these tips from This Old House.
Step 6: Add Final Touches (Optional)
Once your finish is completely dry, you can add any final decorative touches. This could include:
- Installing a decorative metal foot rail for extra style and comfort.
- Adding a backsplash.
- Attaching decorative trim.
- Installing lighting.
Safety First When Building
I can’t stress this enough: safety is paramount in any DIY project, especially when working with power tools. Here are the key things to remember:
- Read Tool Manuals: Before using any tool, especially power tools, read the manufacturer’s instructions. Understand what it does and how to operate it safely.
- Wear PPE: Always wear safety glasses and hearing protection. Gloves are great for handling wood, but be careful they don’t get caught in moving parts of power tools.
- Secure Your Work: Use clamps to hold your workpiece firmly in place before cutting or drilling. Never try to hold a small piece by hand while cutting.
- Keep Work Area Clean: A cluttered workspace is a dangerous workspace. Keep your area tidy, free of tripping hazards, and well-lit.
- Unplug Tools: Unplug tools when you are changing blades, bits, or making adjustments.
- Know Your Limits: If a task feels too dangerous or beyond your skill level, don’t hesitate to ask for help or find a safer way to do it.
The Occupational Safety and Health Administration (OSHA) provides excellent guidelines on general safety practices that are applicable to DIY projects.
Common Beginner Questions About Building a Bar
Let’s tackle some questions you might be having as you embark on this project.
Q1: What’s the easiest wood to work with for a beginner bar?
Pine is generally considered the easiest for beginners because it’s soft, lightweight, and cuts easily. Plywood is also very accessible and stable, especially for large surfaces like countertops.