Imagine transforming a room with just a few easy steps. How can you do this? Wainscoting. It makes walls pop. But there’s a tool that makes this job a breeze. It’s the brad nailer. Have you ever wished for steadier hands, especially when nailing those tricky corners? Meet the brad nailer, your new best friend for wainscoting projects.
Once upon a time, a dad decided to fix up his son’s bedroom. He wanted it to look smart, like a room from a magazine. He picked wainscoting panels. But soon, he faced a snag. Hammering nails was hard work. This is where the brad nailer came to the rescue. This nifty tool saved time and effort.
Did you know a brad nailer makes little holes in wood? This means you won’t see ugly marks on your lovely wainscoting. It’s a fun fact that surprises many DIY fans. So, why pick up a brad nailer? It’s like magic for your home projects.
Table of Contents
Choosing The Right Brad Nailer For Wainscoting Projects

Mastering Wainscoting with a Brad Nailer
Ever wondered how to get those neat wainscoting panels at home? A brad nailer can be your secret weapon! This handy tool drives small nails into wood quickly, ensuring your panels fit perfectly. Its size makes it easy to handle, even in tight spaces. Imagine transforming your plain walls into elegant designs with ease. Plus, using a brad nailer means less hammering and more time to enjoy your beautiful new room. Intrigued to try it yourself?
Understanding Wainscoting
Definition and purpose of wainscoting. Types of wainscoting and common materials.
Wainscoting is a decorative wall paneling. It covers the lower part of the wall. This adds a nice touch to rooms. Its main job is to protect walls from damage. Wainscoting comes in many styles and materials. You might see raised panels or flat ones.
- Beadboard: It has a lined pattern, often made of wood.
- Shiplap: Overlapping boards, usually made of wood.
- Board and Batten: Vertical wood boards with strips in between.
- Materials: Common choices include wood, PVC, and MDF.
Can I use a brad nailer for wainscoting?
Yes! A brad nailer is perfect for wainscoting. It holds panels well with small nails. This keeps walls neat and tidy. Use it to attach the panels securely. It makes the job quicker, too!
What is the history of wainscoting?
Wainscoting started in the 1500s in Europe. It was to protect walls from chairs and feet. Over time, it became a decorative feature. Today, it’s used to add charm and elegance to home interiors.
What is a Brad Nailer?
Explanation of a brad nailer and its functions. Differences between a brad nailer and other nailers.
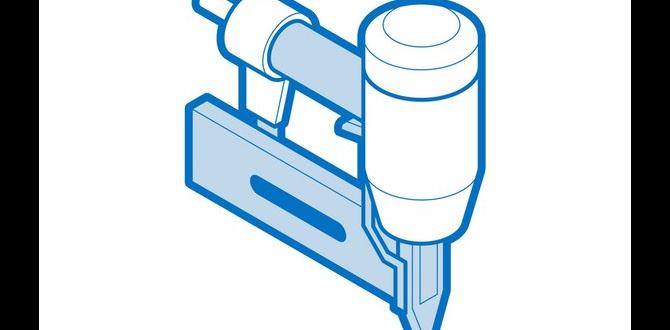
A brad nailer is a handy tool for attaching thin pieces of wood. Think of it as a stapler for wood! It uses thin and short nails, called brads, to hold things in place without splitting wood. What makes it special compared to other nailers?
- Lighter and easier to handle.
- Perfect for delicate tasks like wainscoting.
Other nailers use thicker nails which might damage fragile wood. A brad nailer is a great choice for adding small details to your home.
What is the primary function of a brad nailer?
Brad nailers secure delicate woodwork with thin nails. They work well for tasks like adding trim or molding. It’s like using a fine brush for detailed art.
Why choose a brad nailer for home projects?
Brad nailers are light and safe. Their size makes them perfect for indoor tasks. They won’t split wood, keeping your project looking neat.
Benefits of Using a Brad Nailer for Wainscoting
Precision and clean finish. Efficiency and reduction of manual effort.
Using a brad nailer for wainscoting is like giving your wall a magic touch. It offers precision and a clean finish, ensuring each panel looks like a piece of art. You’ll feel like a pro carpenter! This tool makes the job faster, reducing manual effort. No more lengthy hours with a hammer and nails. In fact, studies show that using a nail gun can cut work time by over half! Imagine more time for snacks and breaks. So why not nail it the easy way?
| Advantages | Impact |
|---|---|
| Precision | Flawless finish |
| Efficiency | Reduced effort |
Features to Look For in a Brad Nailer
Power source options: pneumatic vs. electric. Important features: depth adjustment, nail capacity, and jam clearing.
Choosing a brad nailer for wainscoting can be exciting! First, think about the power source. Do you want a pneumatic nailer, which uses air, or an electric one, which plugs in? Both have their perks. Next, look for key features:
- Depth Adjustment: This allows you to control how deep the nails go.
- Nail Capacity: Make sure it can hold enough nails so you’re not stopping all the time.
- Jam Clearing: A tool that clears nail jams quickly is a lifesaver.
What power source is better, pneumatic or electric?
Pneumatic nailers are strong and last longer, but they need an air compressor. Electric models are easier to use and ideal for small jobs.
Remember, these features make your job smoother. Research shows, using the right tools can save time and improve work quality. As one craft enthusiast said, “A good tool makes any DIY easy!”
How to Choose the Right Brad Nailer for Your Project
Assessing the size and scope of your wainscoting project. Budget considerations and value for money.
Picking the best tool for wainscoting is key. First, think about your project’s size. Is it a small room or a big one? This helps in choosing a tool that can handle the workload. Next, consider your budget. You want value for the best brad nailer. Here’s a tip:
- For small tasks, go for a light, easy-to-use nailer.
- For bigger jobs, find one with more power.
Now, let’s look at what experts say. “Many small jobs need a small nailer,” says an expert in home projects. Costs can range from $50 to $200. A good choice means happy results.
What size brad nailer do you need for wainscoting?
A smaller 18-gauge brad nailer is often ideal. It’s best for thin, light materials. This size helps avoid splitting the wood, ensuring a clean and neat finish.
Don’t forget about features. Some nailers come with added perks. LED lights or easy-load magazines can make the job easier. Ensure it’s easy to handle and not too heavy for long use. Remember, a good choice will help your project look great!
Step-by-Step Guide to Installing Wainscoting with a Brad Nailer
Preparing your workspace and safety measures. Stepbystep instructions for using a brad nailer effectively.
Creating a safe work area is key for wainscoting. First, be sure the floor is clean. Wear goggles to shield your eyes. Protect your ears with earplugs.
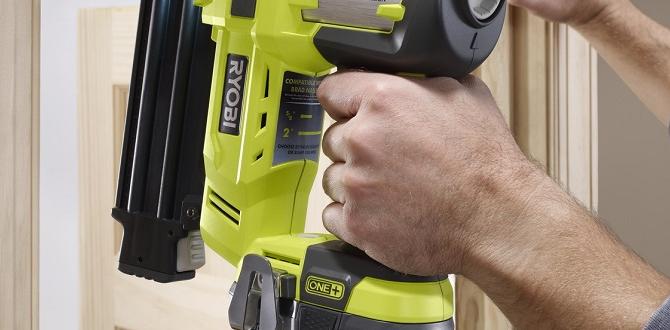
Now, let’s get ready to install using a brad nailer:
- Check your tool. It should be in good shape.
- Load the nails correctly. Double-check this step.
- Hold the nailer tight. Aim it right where you want the nail.
- Squeeze the trigger gently. This secures the panel.
Keep your fingers out of the way. This process helps attach wainscoting smoothly!
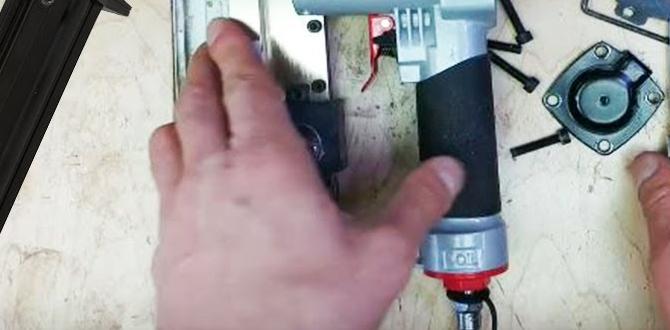
What is the best way to hold a brad nailer?
Use both hands when holding a brad nailer. Grip the handle firmly with your dominant hand. Your other hand should guide the tool. This gives control and stops slips.
Why is prepping the workspace important?
Preparing your workspace keeps you safe. It stops accidents and mistakes. A tidy area lets you focus on the task. This leads to better results with your nailer.
Maintenance and Care Tips for Your Brad Nailer
Routine maintenance practices for longevity. Troubleshooting common problems.
To keep your brad nailer working well, regular care is needed. Clean it after each use.
- Make sure to oil it weekly to prevent rust.
- Fix any air leaks you notice right away.
- Check nails often. Sometimes, they can get stuck.
If the nailer jams, look for bits of wood or paper. Also, if it stops working, ensure the air compressor is on. Keep these tips in mind, and your brad nailer will last long and work well.
Why is regular maintenance important for your brad nailer?
Regular maintenance prevents issues. It also helps the tool last longer. Neglecting care can lead to bigger problems.
Frequently Asked Questions About Brad Nailers and Wainscoting
Addressing beginner concerns and common inquiries. Expert tips for better results.
What does a brad nailer do in wainscoting?
A brad nailer helps attach panels securely. It uses thin nails that keep the surface smooth. This makes the process easy and clean.
Do I need special skills to use a brad nailer?
No special skills are needed. It’s beginner-friendly and easy to handle. Follow safety guidelines and practice on a scrap piece first.
How can I improve my wainscoting project results?
Here are some expert tips for better results:
- Measure Twice: Always double-check your measurements before nailing.
- Use a Level: Keep everything straight and even with a handy level tool.
- Test Fit: Dry fit panels first to check alignment and fit.
Brad nailers make wainscoting projects simple and efficient. Many homeowners find success with these tools. It’s also fun to see the final product transform your space!
Conclusion
A brad nailer makes wainscoting projects easier. It’s lightweight, reduces errors, and saves time. You get neat, professional results. Make sure to choose the right size for your job. Practice using it safely and explore more tips online to improve your skills. Ready to start your wainscoting project? Give a brad nailer a try!
FAQs
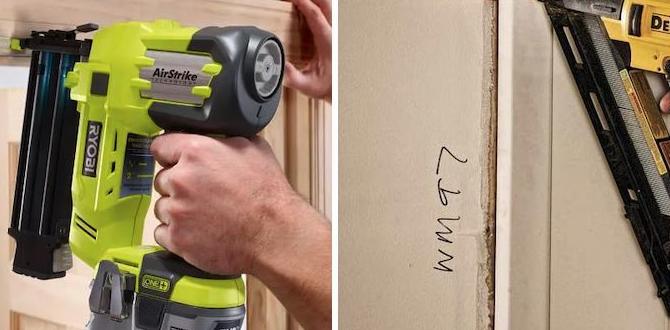
What Size Brad Nails Are Recommended For Installing Wainscoting On Walls?
When installing wainscoting on walls, use 1 1/2-inch brad nails. These nails are small and help keep the panels in place without showing too much. Make sure you press gently when you nail them in. This will help the wall look smooth and clean.
Can You Use A Brad Nailer For All Types Of Wainscoting Materials, Such As Mdf Or Hardwood?
Yes, you can use a brad nailer for most wainscoting materials. It works well on MDF (Medium-Density Fiberboard). You can also use it for hardwood. Just make sure to use the right size of brad nails.
How Do You Adjust The Depth Setting On A Brad Nailer For Properly Securing Wainscoting Panels Without Damaging Them?
To adjust the depth on a brad nailer, first, find the depth knob or switch. Turn it to change how deep the nails go. Test on scrap wood to see if it’s too deep or shallow. Keep adjusting until the nail is just right. This helps hold the panels without breaking them.
What Are The Safety Precautions To Consider When Using A Brad Nailer For A Wainscoting Project?
When you use a brad nailer, which is a tool for putting in small nails, always wear safety glasses to protect your eyes. Keep your fingers away from where the nails come out. Hold the nailer firmly so it doesn’t slip or jump. Make sure the area around you is clear, so nobody accidentally gets hurt. When you’re not using the nailer, turn it off and unplug it.
How Does A Brad Nailer Compare To Other Types Of Nailers, Like Finish Nailers, When Installing Wainscoting?
A brad nailer is like a smaller hammer that shoots tiny nails, called brads, for wainscoting. It’s great because it doesn’t leave big holes, keeping the wood nice and smooth. A finish nailer uses bigger nails, which are stronger, but they can leave more visible marks. For wainscoting, a brad nailer often does a neat and tidy job.
{“@context”:”https://schema.org”,”@type”: “FAQPage”,”mainEntity”:[{“@type”: “Question”,”name”: “What Size Brad Nails Are Recommended For Installing Wainscoting On Walls?”,”acceptedAnswer”: {“@type”: “Answer”,”text”: “When installing wainscoting on walls, use 1 1/2-inch brad nails. These nails are small and help keep the panels in place without showing too much. Make sure you press gently when you nail them in. This will help the wall look smooth and clean.”}},{“@type”: “Question”,”name”: “Can You Use A Brad Nailer For All Types Of Wainscoting Materials, Such As Mdf Or Hardwood?”,”acceptedAnswer”: {“@type”: “Answer”,”text”: “Yes, you can use a brad nailer for most wainscoting materials. It works well on MDF (Medium-Density Fiberboard). You can also use it for hardwood. Just make sure to use the right size of brad nails.”}},{“@type”: “Question”,”name”: “How Do You Adjust The Depth Setting On A Brad Nailer For Properly Securing Wainscoting Panels Without Damaging Them?”,”acceptedAnswer”: {“@type”: “Answer”,”text”: “To adjust the depth on a brad nailer, first, find the depth knob or switch. Turn it to change how deep the nails go. Test on scrap wood to see if it’s too deep or shallow. Keep adjusting until the nail is just right. This helps hold the panels without breaking them.”}},{“@type”: “Question”,”name”: “What Are The Safety Precautions To Consider When Using A Brad Nailer For A Wainscoting Project?”,”acceptedAnswer”: {“@type”: “Answer”,”text”: “When you use a brad nailer, which is a tool for putting in small nails, always wear safety glasses to protect your eyes. Keep your fingers away from where the nails come out. Hold the nailer firmly so it doesn’t slip or jump. Make sure the area around you is clear, so nobody accidentally gets hurt. When you’re not using the nailer, turn it off and unplug it.”}},{“@type”: “Question”,”name”: “How Does A Brad Nailer Compare To Other Types Of Nailers, Like Finish Nailers, When Installing Wainscoting?”,”acceptedAnswer”: {“@type”: “Answer”,”text”: “A brad nailer is like a smaller hammer that shoots tiny nails, called brads, for wainscoting. It’s great because it doesn’t leave big holes, keeping the wood nice and smooth. A finish nailer uses bigger nails, which are stronger, but they can leave more visible marks. For wainscoting, a brad nailer often does a neat and tidy job.”}}]}