Have you ever tried to make a perfect wood project? It can be tricky when the nails don’t go in right. That’s where a brad nailer comes in handy! But how do you know if your brad nailer is set to the right depth?
Many people struggle with finding the best depth for their nails. Using the wrong depth can lead to mistakes. Imagine spending time on a nice table, only to see the nails pop out later. That’s frustrating!
Here’s a fun fact: Did you know that checking the depth of your nails can improve your projects? A simple test can save you time and effort. In this article, we will explain the brad nailer depth test method. You’ll learn how to ensure your nails are just right. So, let’s dive in and make your projects better!
Table of Contents
Brad Nailer Depth Test Method: Ensuring Perfect Fastener Depth

Brad Nailer Depth Test Method
To achieve perfect results with a brad nailer, testing the depth is vital. This method helps ensure nails sit flush with the surface, allowing for sleek finishes. Ever struggled with visible nail heads? By following the depth test method, you can avoid this issue. It involves adjusting the nailer’s settings and checking how deep nails drive into the material. A well-set brad nailer can change your woodworking game, making your projects look professional and polished.Understanding Brad Nailers
Definition and common uses of brad nailers. Importance of nail depth in woodworking projects.Brad nailers are handy tools for fastening wood pieces together. They use thin nails, known as brads, that leave tiny holes. This makes them great for delicate work like trim or molding. Knowing the right nail depth is crucial. Too deep, and you might split the wood; too shallow, and the pieces can come apart. Remember, it’s about finding that sweet spot—like Goldilocks, if Goldilocks were nailing wood instead of porridge!
| Usage | Example |
|---|---|
| Trim work | Attaching baseboards |
| Craft projects | Building furniture |
In woodworking, using the correct nail depth can prevent mishaps. An improper depth can lead to unsightly finishes or projects falling apart. So, keep your brad nailer in check and work smart!
Why Depth Testing is Essential
Impact of incorrect nail depth on project quality. Benefits of performing depth tests for consistency.Incorrect nail depth can ruin any project. If nails are too deep, they can damage the material. If they’re too shallow, they might not hold well. This leads to weak structures. By performing depth tests, you ensure nail consistency. This keeps your work neat and strong. Every nail will fit perfectly. Your projects will look professional. Remember, quality counts!
Why perform depth tests?
Depth tests provide several benefits:
- Ensure nails are set correctly
- Prevent damage to surfaces
- Increase durability of the project
- Maintain a clean finish
Tools Required for Depth Testing
List of necessary tools and materials for testing. Importance of using accurate measuring devices.To test the depth of a brad nailer, you’ll need a few essential tools. First, grab a depth gauge to measure how deep the nails go. A sharp pencil will help mark your test spots accurately. You should also have a measuring tape by your side, just in case that wall looks taller today. Finally, don’t forget a safety goggles for eye protection; depth testing can sometimes get a bit “nail-biting!”
| Tools | Purpose |
|---|---|
| Depth Gauge | Measures nail depth |
| Sharp Pencil | Marks test points |
| Measuring Tape | Checks the height |
| Safety Goggles | Protects your eyes |
Using accurate measuring devices is crucial. It ensures your nails go in just the right amount. If not, you might end up making a hole too deep or too shallow! Remember, “measure twice, nail once!”
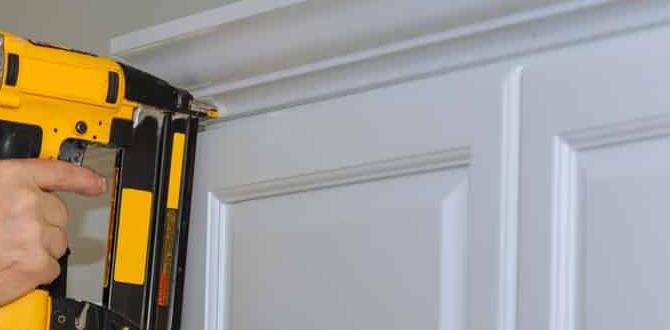
Step-by-Step Depth Test Method
Detailed instructions on how to perform a depth test. Tips for achieving accurate results during the test.To start the depth test with your brad nailer, follow these steps:
- Choose a scrap piece of wood for testing.
- Set the brad nailer to the desired depth.
- Firmly hold the wood and fire a nail.
- Examine how deep the nail goes into the wood.
For accurate results, aim for these tips:
- Keep your hand steady while nailing.
- Check the wood type; softer wood might give different results.
- Adjust the depth setting if needed after each test.
Testing helps ensure your brad nailer’s performance matches your project needs.
How can I ensure accuracy in a depth test?
To ensure accuracy, test on the same type of wood you will use for your project. Keep the nailer at a consistent angle and pressure. This helps achieve precise results every time!
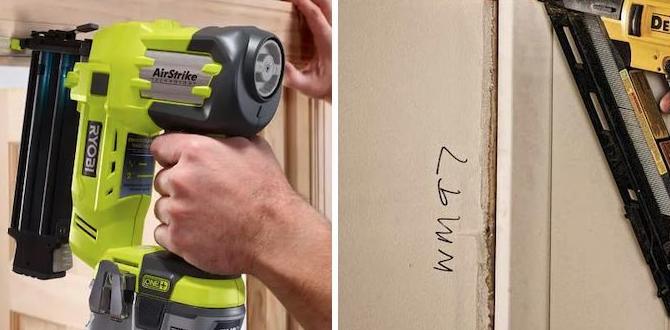
Interpreting Depth Test Results
How to assess the results of your depth test. Common issues and what they indicate about your brad nailer settings.Understanding your depth test results is essential for getting the best performance from your brad nailer. Look for these common issues:
- Nails too deep: This may mean your pressure is too high.
- Nails not deep enough: You might need to increase the pressure.
- Nails sticking out: Check if the nailer is set correctly.
By fixing these problems, you can ensure the job is done right. Keep testing until you find the perfect setting for your needs!
How do I know if my brad nailer is set correctly?
You can tell if your brad nailer works well by checking how deep the nails go. If they don’t stay in place or go too deep, adjust the settings. Always aim for perfectly flush nails.
Troubleshooting Common Depth Issues
Addressing problems related to overdriving or underdriving nails. Solutions for adjusting nail depth settings effectively.Sometimes, nails can be too deep or not deep enough. This can ruin your projects. Overdriving means the nail goes in too far. Underdriving means it doesn’t go in far enough. Here are quick fixes:
- Check the depth setting. Adjust it based on your material.
- Use different settings for different surfaces, like softwood or hardwood.
- Make sure the tool is clean and well-maintained.
- Test on scrap wood before starting your main project.
These tips help you nail it right every time!
How do you fix overdriving nails?
To fix overdriving, lower the nail depth setting on your brad nailer. Test on some wood before continuing your project to ensure accuracy.
How can I stop underdriving nails?
For underdriving, increase the depth setting. Also, check your tool’s pressure. If it’s too low, it might not drive the nail in enough.
Best Practices for Maintaining Nail Depth Consistency
Regular maintenance tips for your brad nailer. Importance of routine depth tests for ongoing projects.To keep your brad nailer in top shape, follow these simple maintenance tips. First, clean it regularly. Dust and debris can cause problems. Next, check the air pressure. If it’s too high or low, the nail depth will change. Finally, inspect your tool for wear. Replace any worn parts.
Routine depth tests are also important. They help ensure your nails go in just right, especially for ongoing projects. Consistency leads to better results and fewer mistakes.
Why Should You Test Depth Regularly?
Regular depth tests ensure your nails are set correctly, which prevents damage to your materials.
Maintenance Tips:
- Clean your brad nailer after each use.
- Check air pressure before starting a project.
- Look for any signs of wear and replace parts as needed.
Comparative Analysis of Depth Testing Methods
Review of various depth testing approaches. Pros and cons of each method for different types of projects.Different depth testing methods for brad nailers offer unique benefits and drawbacks. First, we have the depth gauge. It’s simple and quick, but it might not work well on thick materials. Then there’s the test board method, perfect for accuracy, though it requires extra time and setup. Finally, the digital tester gives precise readings, but it can be a bit pricey. Always choose based on your project needs and your wallet!
| Method | Pros | Cons |
|---|---|---|
| Depth Gauge | Quick and easy | Not ideal for thick materials |
| Test Board | Highly accurate | Time-consuming setup |
| Digital Tester | Precise measurements | Can be expensive |
Conclusion
In summary, the brad nailer depth test method helps you ensure nails are driven correctly. You want to adjust your tool for perfect results. Testing helps avoid over- or under-driving nails. Remember to practice this method before important projects. To learn more, explore tutorials online or read about different nailers. Your woodworking skills will improve with these simple steps!FAQs
Sure! Here Are Five Related Questions On The Topic Of Brad Nailer Depth Test Method:A brad nailer is a tool that helps you attach thin pieces of wood together. To test how deep it pushes brad nails into wood, you begin by nailing a scrap piece of wood. Then, you measure how much of the nail is sticking out. If it’s too deep or not deep enough, adjust the nailer settings. This way, you can make sure your nails go in just right!
Sure! Just give me the question you need help with, and I’ll write a short answer for you.
What Are The Key Factors To Consider When Performing A Depth Test With A Brad Nailer?When you do a depth test with a brad nailer, check a few important things. First, make sure the tool is set to the right depth. You want the nail to go in just right, not too deep or too shallow. Second, always wear safety glasses to protect your eyes. Finally, practice on a scrap piece of wood before working on your main project. This helps you get it just right!
How Do You Determine The Ideal Depth Setting For Different Materials When Using A Brad Nailer?To find the right depth setting for a brad nailer, you should try a few samples first. Use scrap pieces of the same material you plan to nail. Start with a shallow setting and go deeper until the nail sits just right, not too deep or too high. Check the nails after each try and adjust as needed. This will help you know the best setting for each kind of material.
What Tools Or Materials Are Needed To Conduct A Proper Depth Test With A Brad Nailer?To do a depth test with a brad nailer, you need a brad nailer, of course! You’ll also need some brad nails. Grab a piece of scrap wood to practice on. A measuring tool, like a ruler, can help too. Finally, make sure to wear safety goggles to protect your eyes.
How Can You Troubleshoot And Adjust The Brad Nailer If The Nails Are Not Driving To The Correct Depth?If your brad nailer isn’t driving nails deep enough, first check the air pressure. Make sure it’s set right for your tool. Then, look at the nail size you’re using. Make sure it’s what the nailer is made for. Lastly, clean the tool; dirt can block it and cause problems.
Are There Specific Techniques For Testing The Depth Of Brad Nails In Various Types Of Wood Or Composite Materials?Yes, there are easy ways to check how deep brad nails go into different woods. You can gently pull on the nail to see if it comes out easily. You can also look at the wood and see if the nail is sticking out too much. If you have sandpaper, you can rub it around the nail to check how far it has gone in. Each wood type may need a different way, so you could practice with a few kinds.