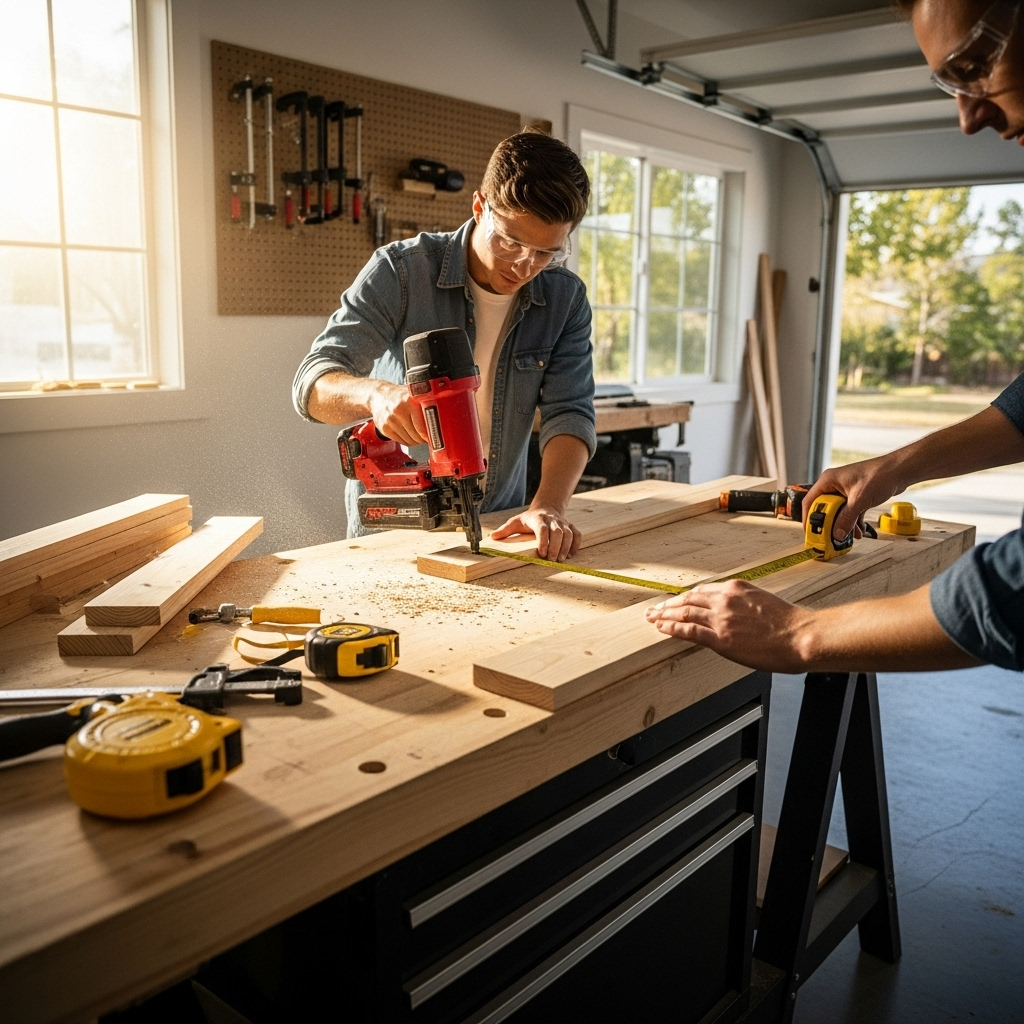
The best nailer for upholstery and fabric work is typically a brad nailer or a narrow-crown stapler (also called a construction stapler). These tools fire thin, short fasteners that are ideal for attaching fabric to furniture frames without causing damage or being too visible.
Table of Contents
Best Nailer for Upholstery and Fabric Work: Effortless Fabric Attachment
Tackling an upholstery project, whether it’s reviving an old armchair or building a custom headboard, can feel a bit daunting when it comes to attaching the fabric. You want those clean, smooth lines, but the thought of manually hammering tiny tacks can be tedious and frustrating. The good news is, the right tool can make this process incredibly simple and satisfying. You don’t need a heavy-duty nailer; the best nailer for upholstery focuses on precision and a gentle touch.
Choosing the correct nailer means less time wrestling with fabric and more time admiring your handiwork. We’ll guide you through the options and help you find the perfect tool to make your fabric projects a breeze. Let’s get your furniture looking fabulous!
Why the Right Nailer Matters for Upholstery
When you’re working with fabric and furniture frames, the goal is a smooth, secure finish without damaging the material or making the fasteners overly obvious. Traditional hammers and small tacks can be slow, inconsistent, and often lead to bent nails or torn fabric. A specialized nailer or stapler designed for upholstery offers several key advantages:
Speed and Efficiency: These tools drive fasteners much faster than manual methods, saving you significant time, especially on larger projects.
Consistency: Each fastener is driven to the same depth, ensuring a uniform and professional look across your project.
Less Fabric Damage: The fasteners used are typically thin and short, minimizing the risk of tearing delicate upholstery fabrics.
Comfort: They reduce the physical strain of repetitive hammering, making the job more enjoyable.
Professional Finish: Achieving a clean, tight fabric wrap becomes much easier, giving your projects a polished, custom appearance.
Imagine effortlessly securing a fabric panel with just a squeeze of a trigger – that’s the power of the right tool!
Understanding Nailer Types for Upholstery
Not all nailers are created equal, and for upholstery, we’re looking for tools that handle finesse rather than brute force. The two most popular choices are brad nailers and narrow-crown staplers. Let’s break them down.
Brad Nailers
Brad nailers fire thin, slender nails with very small heads. These are fantastic for upholstery because the nails are less visible and create minimal damage.
Nail Size: Typically uses nails ranging from 16 to 18 gauge. The gauge refers to the thickness of the nail; a higher gauge means a thinner nail.
Head Size: The heads are very small, designed to be almost invisible once driven into the wood.
Best Use: Ideal for lighter upholstery tasks, securing fabric to frames, attaching trim, or detailed work where fastener visibility is a concern.
Narrow-Crown Staplers (Construction Staplers)
These tools fire narrow staples, which have a wider surface area than brad nails, offering a stronger hold. The “crown” of the staple is the flat top part that sits on the surface. A narrow crown means this top part is about half as wide as a standard staple, making them suitable for upholstery without being overly obtrusive.
Staple Size: Common sizes include 1/4-inch to 7/16-inch crown width and various leg lengths (the part that goes into the wood).
Holding Power: Staples generally offer superior holding power compared to brad nails due to their wider grip.
Best Use: Excellent for projects requiring a more robust hold, like attaching fabric to couches, chairs, or outdoor furniture where durability is key. They are often considered the workhorse for many upholstery jobs.
Other Nailer Types (And Why They’re Usually Not Ideal)
Finish Nailers: These use nails that are thicker than brad nails and have larger heads. They’re great for trim work and attaching baseboards, but the nail heads can be too prominent for most upholstery applications.
Framing Nailers: These are heavy-duty tools designed for construction framing. They fire large, thick nails and are completely overkill – and too destructive – for fabric work.
Pin Nailers: These fire almost invisible headless pins. While great for very delicate tasks and tiny trim, they don’t offer enough holding power for most furniture upholstery.
Key Features to Look For in an Upholstery Nailer
When you start shopping, keep these features in mind to ensure you get a tool that’s perfect for your fabric projects.
Power Source
Corded Electric: Plugs into a wall outlet. Offers consistent power without worrying about battery life. Great for stationary work or when you have easy access to power.
Pros: Unlimited run time, consistent power, often more affordable.
Cons: Limited by cord length, need an extension cord for larger areas.
Cordless Electric (Battery-Powered): Uses rechargeable batteries. Offers excellent portability and freedom of movement. Modern battery technology provides great power and run time.
Pros: Highly portable, no cords to manage, convenient for on-the-go projects.
Cons: Battery life is finite, can be heavier, batteries and chargers add to the cost.
Pneumatic (Air-Powered): Requires an air compressor. These are the lightest and most powerful options, often used by professionals.
Pros: Lightweight tool, powerful, reliable, durable.
Cons: Requires an air compressor (additional cost and setup), airline hose can be restrictive.
For most DIYers, a cordless electric brad nailer or narrow-crown stapler offers the best balance of performance, convenience, and portability.
Nail/Staple Size Capacity
Ensure the nailer can accommodate the fastener sizes you’ll need. For upholstery, look for brad nailers that take 18-gauge nails, typically 1/2 inch to 1-1/2 inches long. For staplers, consider those that accept narrow-crown staples with a crown width of around 1/4 inch to 3/8 inch, and leg lengths from 1/2 inch to 1 inch.
Depth Adjustment
This is crucial! A depth adjustment feature lets you control how deep the nail or staple is driven into the wood. You want it deep enough to be secure but not so deep that it tears the fabric or leaves a large, unsightly hole. Look for tools with an easy-to-use, tool-free depth adjustment.
Magazine Capacity
This is the part of the tool that holds the nails or staples. A higher capacity means you won’t have to reload as often, keeping your workflow smooth. For upholstery, a capacity of 100 fasteners is usually sufficient.
Safety Features
Contact Trip/Nail Lockout: This prevents the tool from firing unless the nose is pressed against the work surface. It’s a critical safety feature to avoid accidental firings.
No-Mar Tip: Some nailers come with a rubber or plastic tip on the nose. This helps protect delicate fabrics from marring or scratching as you work.
Weight and Ergonomics
Since you might be holding the tool overhead or in awkward positions, its weight and how it feels in your hand are important. A lighter tool and a comfortable grip can prevent fatigue during longer projects.
Top Nailer/Stapler Recommendations for Upholstery
Based on the features above, here are some highly-regarded options for upholstery work. These are just examples, and specific models may vary year to year. Always check recent reviews!
Best Overall: Ryobi ONE+ Cordless 1.5 Ah 18-Volt Compact Lithium-Ion Brad Nailer Kit
Ryobi offers a great balance of performance and affordability for the DIYer. Their cordless brad nailer is lightweight, easy to use, and powerful enough for most upholstery tasks. It fires 18-gauge brad nails and has an effective depth adjustment.
Best Value: Stanley TRE550 Heavy Duty Electric Staple Gun
While technically a heavy-duty staple gun, this electric model from Stanley works wonderfully for lighter upholstery. It’s affordable, reliable, and can drive staples deep enough for many fabric applications. It uses standard T50 type staples. For narrower crowns and more professional upholstery, look for a dedicated narrow-crown stapler from brands like Arrow or Kreg, though these might lean towards pneumatic.
Professional Choice (Pneumatic): DeWalt DWFP71621 2-1/8″ Narrow Crown Stapler
If you’re investing in a compressor or already have one, a pneumatic narrow-crown stapler like this DeWalt model is a fantastic choice. It offers excellent power, precision, and durability for demanding upholstery jobs. It drives staples with a 1/4-inch crown and various leg lengths.
Table: Comparing Upholstery Nailer/Stapler Types
| Feature | Brad Nailer | Narrow-Crown Stapler | Pin Nailer |
| :————— | :—————————————— | :——————————————— | :——————————————— |
| Fastener | Thin nails (18 ga common) | Narrow staples (e.g., 1/4″ crown) | Tiny pins (headless) |
| Holding Power| Moderate | Good to Excellent | Minimal |
| Visibility | Minimal head, discreet | Crown can be slightly more visible than brads | Virtually invisible |
| Fabric Risk | Low risk of tearing | Low risk with correct depth | Very low risk |
| Best For | Securing fabric, trim, decorative elements | General upholstery, furniture frames, cushions | Very delicate fabric work, tiny decorative trim |
| DIY Friendliness | High | High | Moderate (limited holding power for upholstery) |
How to Choose the Right Fastener Size
The fasteners (nails or staples) are just as important as the tool itself. Using the wrong size can cause problems.
Brad Nailer Fasteners:
Gauge: 18-gauge brad nails are the standard for upholstery. They are thin and leave small holes.
Length:
1/2 inch to 3/4 inch: Good for thinner fabrics or attaching fabric onto already upholstered surfaces or thin backing materials.
1 inch to 1-1/4 inches: The most common length for securing fabric to standard furniture frames (like pine or plywood).
1-1/2 inches: For thicker woods or when extra holding power is needed.
Narrow-Crown Stapler Fasteners:
Crown Width: Look for fasteners with a crown width of 1/4 inch to 3/8 inch. This is narrow enough to be discreet on most upholstery.
Leg Length:
1/2 inch to 3/4 inch: Suitable for attaching fabric to the interior frames of chairs or ottomans made of softer woods or composites.
7/8 inch to 1 inch: Ideal for securing fabric to sturdier furniture frames made from hardwoods or thicker plywood, providing excellent grip.
Always test your fasteners on a scrap piece of wood and fabric first! This allows you to set the right depth and ensure the fastener isn’t too long or too short.
Step-by-Step: Using Your Upholstery Nailer/Stapler
Once you have your tool and fasteners, it’s time to get to work! Safety first, always.
Step 1: Ensure Safety First
Read Your Tool’s Manual: Familiarize yourself with your specific nailer or stapler.
Wear Safety Glasses: This is non-negotiable. Small metal fragments can fly.
Check for Power Source: Make sure batteries are charged, or your compressor and air hose are set up correctly.
Disable Tool When Not in Use: Disconnect from power or remove batteries when loading fasteners or walking away.
Step 2: Prepare Your Workpiece
Clean the Frame: Ensure the furniture frame is free from dust, debris, or old staples.
Fit the Fabric: Drape and pull your upholstery fabric smoothly over the frame. You might want to temporarily secure it with upholstery clips or pins before nailing.
Step 3: Load Fasteners
Consult Your Manual: Refer to your tool’s instructions for proper loading.
Insert Correctly: Make sure nails or staples are loaded in the correct direction and orientation. Ensure you’re using the right size and type of fastener for your tool.
Step 4: Set Up Depth Adjustment
Use Scrap Material: Grab a piece of scrap wood similar to your furniture frame and a scrap of your upholstery fabric.
Test Fire: Place the fabric over the wood. Press the nose of the nailer firmly against the fabric and trigger a test shot.
Adjust Depth:
If the nail/staple is too deep (tears fabric, sinks too far), reduce the depth setting.
If it’s not deep enough (sticking out, not secure), increase the depth setting.
Repeat until you achieve a flush, secure set without damaging the fabric.
Step 5: Start Nailing/Stapling
Position the Tool: Place the nose of the nailer firmly against the wood frame, ensuring the fabric is taut underneath.
Fire: Squeeze the trigger while maintaining firm pressure.
Maintain Tension: As you work around the frame, keep consistent tension on the fabric to prevent wrinkles.
Incremental Nailing: Don’t nail all the way around one edge at once. Work in small sections, pulling the fabric taut as you go. For example, nail a few fasteners on one side, then move to an opposing side, pulling the fabric evenly.
Spacing: Space fasteners about 1 to 2 inches apart, depending on the project and fabric type. For high-stress areas, you might place them closer.
Step 6: Finishing Touches
Check for Gaps or Wrinkles: Smooth out any imperfections.
Trim Excess Fabric: Once you’re satisfied with the fabric tension and fastening, carefully trim away any excess fabric with sharp scissors or a rotary cutter.
Add Decorative Trim (Optional): If you’re adding banding or decorative trim, you can often use the same nailer or a smaller one to attach it.
Tips for a Professional Upholstery Finish
Pull, Don’t Push: Always pull the fabric taut towards you as you place and fire the nailer. This ensures a smooth, wrinkle-free finish.
Strategic Nailing: Start in the middle of each side or curve and work your way outwards. This helps distribute the fabric evenly.
Hide Your Fasteners: Whenever possible, try to place fasteners where they will be hidden by seams, welting, or under cushioning.
Use a No-Mar Tip: If your tool has one, use it! It’s a lifesaver for delicate fabrics.
Consider Staples for Strength: For seating that will see heavy use, narrow-crown staples often provide better long-term holding power than brads.
Don’t Overcrowd: Too many fasteners can actually weaken the fabric or make it look puckered. Find the right spacing for a secure yet clean finish.
Practice Makes Perfect: Your first project might not be flawless, but with each attempt, you’ll gain confidence and skill.
Tools and Materials You’ll Need
Beyond the nailer, here’s a quick checklist for your upholstery project:
Your Chosen Nailer/Stapler: (Brad Nailer or Narrow-Crown Stapler)
Appropriate Fasteners: (18-gauge brads or 1/4″ crown staples in the correct length)
Upholstery Fabric: Enough to cover your piece with some overlap.
Safety Glasses: Essential!
Work Gloves: For better grip and hand protection.
Measuring Tape: For accurate fabric cutting.
Sharp Scissors or Rotary Cutter: For trimming fabric.
Upholstery Needles and Heavy-Duty Thread: For any necessary repairs or reinforcing.
Pliers or Staple Remover Tool: To pull out any mistakes.
Stuffing/Padding (if needed): Foam, batting, etc.
Upholstery Clips or Clamps (optional): To temporarily hold fabric in place.
* Scrap Wood and Fabric:** For testing depth settings.
For a deeper dive into upholstery techniques and best practices, resources from organizations like the Upholstery Fabric Manufacturers Association (UFAC) or educational material from reputable woodworking and craft sites can offer valuable insights.