Best Nailer for MDF and Plywood Sheets: Absolutely! For attaching MDF and plywood sheets, a brad nailer or a finish nailer with the right nail size is your go-to. Aim for 2-inch brad or finish nails. Electric or cordless models offer great power and portability for projects.
Working with MDF and plywood sheets can sometimes feel like a puzzle, especially when it comes to joining them together. You want strong, clean connections without damaging the material. It’s a common challenge for DIYers and woodworkers alike! But don’t worry, finding the right nailer makes all the difference. With the correct tool and a few simple tips, attaching MDF and plywood sheets will become a smooth and satisfying part of your project. We’ll walk you through everything you need to know to nail it perfectly.
Table of Contents
Why Choosing the Right Nailer Matters for MDF and Plywood
When you’re working with sheet goods like MDF (Medium-Density Fiberboard) and plywood, the right nailer isn’t just a convenience; it’s crucial for a professional finish and the structural integrity of your project. These materials, while versatile, can be a bit delicate compared to solid wood. Using the wrong tool or fastener can lead to unsightly splits, blowouts, or nails that don’t penetrate deeply enough, leaving your joints weak.
MDF, in particular, is denser and more brittle than plywood. It doesn’t have the natural grain structure that can help guide a nail. This means you need a nailer that delivers consistent power without excessive force, and fasteners that are appropriately sized to avoid cracking the material. Plywood, while more forgiving, still benefits greatly from a nailer that provides precise placement and sufficient holding power.
Understanding Nailer Types for Sheet Goods
Not all nailers are created equal, and the “best” nailer for MDF and plywood sheets depends on your project’s needs and your personal preferences. Here’s a breakdown of the most suitable types:
Brad Nailers
Brad nailers are fantastic for attaching thinner materials and trim. They shoot thin, headless nails (brads) that leave very small holes, making them ideal for projects where appearance is key and you want minimal damage to the material’s surface.
Pros:
Minimal damage to MDF and plywood surfaces.
Small nail holes are easy to conceal.
Great for attaching trim or thinner sheet goods.
Lightweight and easy to maneuver.
Cons:
Less holding power compared to finish nailers.
May struggle with thicker materials without pre-drilling.
Brads can sometimes bend in very dense MDF.
Finish Nailers
Finish nailers are a step up in power and size from brad nailers. They use slightly wider and longer nails, offering more holding power. They are excellent for structural joints and securing thicker sheet materials.
Pros:
Stronger holding power for more robust connections.
Handles thicker MDF and plywood more effectively.
Good for attaching larger panels or where more strength is needed.
Nail holes are still relatively small and easy to fill.
Cons:
Slightly larger nail holes than brad nailers.
Can still cause splitting in MDF if not careful, especially near edges.
Can be heavier than brad nailers.
Pin Nailers
While not typically the primary tool for attaching full sheets of MDF or plywood, pin nailers can be useful for very fine work, like attaching decorative trim onto a sheet of MDF. They shoot even smaller nails than brad nailers, leaving almost invisible holes.
Pros:
Virtually invisible nail marks.
Excellent for delicate tasks and securing small trim pieces.
Cons:
Absolutely no holding power for structural applications.
Not suitable for attaching the main sheets of MDF or plywood.
Choosing Between Electric, Pneumatic, and Cordless
The power source of your nailer is another important consideration:
Pneumatic (Air-Powered) Nailers: These require an air compressor and hose. They are generally more powerful, lighter, and less expensive upfront than cordless models. However, you’re tethered by the hose and need to manage the compressor.
Electric Nailers (Corded): These plug into a standard outlet. They offer consistent power without the need for a compressor, but you are limited by the cord’s length and proximity to a power source.
Cordless Nailers (Battery-Powered): These are the most convenient, offering freedom of movement. They use rechargeable batteries and often have comparable power to pneumatic nailers these days. The main drawback can be the higher initial cost and the weight of the battery. For working with large sheets of MDF and plywood, cordless models offer superb maneuverability.
Key Features to Look For in a Nailer for MDF and Plywood
When you’re shopping for the best nailer for MDF and plywood sheets, keep these features in mind to ensure you get a tool that works efficiently and safely.
Adjustable Depth Control
This is arguably the most critical feature. You need to be able to dial in the exact depth at which the nail penetrates the material. Too deep, and you risk blowouts or driving the nail too far, which is unsightly. Too shallow, and the joint won’t be secure. Adjustable depth control allows you to fine-tune this for different thicknesses of MDF and plywood and the density you’re working with.
Nail Jam Release Mechanism
Nails can jam, and it’s a frustrating but common occurrence. A tool with an easy-access or tool-free jam release mechanism will save you a lot of time and aggravation when a nail gets stuck. You can clear the jam quickly and get back to work.
No-Mar or Rubber Tip
Many nailers come with or have an optional rubber or plastic tip. This is essential for protecting the surface of your MDF and plywood from accidental dents or scratches when the tool is pressed against the material.
Sequential vs. Sequential/Contact Firing Modes
Sequential Firing: Requires you to press the safety contact tip against the wood AND pull the trigger for each nail. This is the safest mode and ensures precise nail placement. It’s generally recommended for woodworking where accuracy is paramount.
Contact Firing: Allows you to fire a nail by simply pressing the safety contact tip against the wood while the trigger is held down. This is faster for repetitive tasks but carries a higher risk of accidental firing.
For attaching sheet goods, sequential firing is usually preferred for control, especially when you’re trying to ensure nails are placed exactly where you want them to avoid splits.
Ergonomics and Weight
You’ll likely be holding the nailer for extended periods, especially when working with large sheets. A comfortable grip, good balance, and a manageable weight are important for reducing fatigue and maintaining control.
Selecting the Right Nails for MDF and Plywood
The nail itself is just as important as the nailer. Using the wrong type or size of nail can negate the benefits of even the best nailer.
Nail Gauge and Size
Gauge: Refers to the thickness of the nail. Lower gauge numbers mean thicker nails. For MDF and plywood, you typically want thinner nails to minimize damage.
Length: Should be sufficient to go through the material you’re joining and penetrate adequately into the base material for strong holding, but not so long that it pokes through the other side.
Here’s a general guideline for selecting nails:
| Material Thickness | Recommended Nail Type | Recommended Nail Length |
| :——————— | :——————– | :———————- |
| 1/4 inch MDF/Plywood | 18-gauge brad | 1 inch to 1 1/4 inch |
| 1/2 inch MDF/Plywood | 18-gauge brad | 1 1/4 inch to 1 1/2 inch |
| 3/4 inch MDF/Plywood | 16-gauge finish | 1 1/2 inch to 2 inch |
Important Note: Always consider overlap or if you’re fastening to another piece of material. For example, if you are attaching a 3/4 inch sheet to a 2×4, a 2-inch nail is generally appropriate. If you are attaching two 3/4 inch sheets together, a 1 1/2 inch nail might be sufficient to go through one and into the other without excessive penetration.
Nail Material and Coating
Nails are typically made of steel. Some come with coatings (like galvanized or adhesive) that can improve holding power or prevent corrosion, though corrosion is less of a concern for interior projects. For MDF, consider nails with a slight adhesive coating if available, as this can enhance grip.
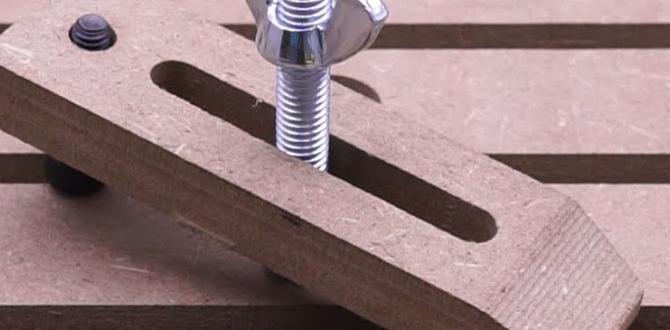
Step-by-Step Guide: How to Nail MDF and Plywood Sheets Effortlessly
Ready to get started? This guide will walk you through the process of attaching MDF and plywood sheets using your nailer. We’ll prioritize safety and a great result.
Step 1: Prepare Your Workspace and Materials
Clear the area: Ensure you have enough space to move around the sheet goods comfortably and safely. Remove any tripping hazards.
Gather your tools: Have your chosen nailer, appropriate nails, safety glasses, hearing protection, and a tape measure ready.
Inspect your materials: Check your MDF or plywood sheets for any damage, warps, or defects. Make sure they are clean and free of dust.
Mark your lines: Use a pencil and a straight edge or chalk line to mark where your fasteners will go. For structural joints, spacing nails every 6-8 inches is a good starting point. For face nailing, you might space them closer, around 4-6 inches apart. Always follow any plans or specifications.
Step 2: Set Up Your Nailer
Read the manual: Familiarize yourself with your specific nailer’s operation, safety features, and maintenance requirements.
Load the nails: Insert the correct type and size of nails into the magazine according to the manufacturer’s instructions. Ensure they are seated correctly.
Adjust Depth Setting:
Start with scrap pieces of MDF or plywood of the same thickness you’ll be working with.
Set your depth control to a medium setting.
Fire a nail into the scrap material.
Too deep: The nail head sinks significantly below the surface. Adjust the depth control to a shallower setting (less depth).
Too shallow: The nail head is proud (sticks out) or barely embedded. Adjust the depth control to a deeper setting (more depth).
Just right: The nail head is slightly countersunk below the surface, meaning it’s below the material level but not so deep that it damages the core or blows out the back. This allows for easy filling.
Select Firing Mode: For accuracy, ensure your nailer is set to sequential firing mode.
Step 3: Ensure Safety First!
Wear safety glasses: Always protect your eyes from flying debris or ricocheting nails.
Consider hearing protection: Nailers can be loud, especially pneumatic ones. Earplugs or muffs are a good idea.
Keep clear: Ensure no one is standing behind the material you are nailing, as nails can sometimes pass through thinner materials or blowouts can occur.
Point away: Never point the nailer at yourself or others.
Step 4: Nailing the Sheets
Position the nailer: Place the nose of the nailer firmly against the surface of the material where you want to drive a nail. Ensure the safety contact tip is fully engaged.
Fire the nail:
For sequential firing: Press the contact tip firmly against the surface, then pull the trigger. The nail will fire.
For contact firing: Hold the trigger down, then press the contact tip against the surface. The nail will fire each time the tip is pressed. (Use with extreme caution).
Maintain consistent pressure: Apply consistent pressure against the material as you fire to ensure proper depth.
Follow your lines: Drive nails along your marked lines, spacing them appropriately for the strength and finish required.
Be cautious near edges: MDF and plywood can split if nails are driven too close to the edge. Leave at least 1/2 inch to 3/4 inch clearance from edges and corners. If you must nail closer, consider using a smaller gauge nail or pre-drilling a small pilot hole.
Step 5: Finishing Touches
Inspect joints: Once all nails are driven, check that all nail heads are properly countersunk and the joints are secure.
Fill nail holes: Use wood filler, putty, or a spackle compound to fill any visible nail holes. Once dry, sand smooth and paint or finish as desired.
Clean up: Tidy your workspace and store your tools safely.
Tips for Success with MDF and Plywood
MDF and plywood can present unique challenges. Here are some expert tips to help you achieve flawless results:
Pre-drilling for edges: If you need to place nails very close to the edge of MDF or plywood, especially in thicker pieces, consider pre-drilling a pilot hole slightly smaller than the nail diameter. This significantly reduces the risk of splitting.
Using the right adhesive: For the strongest joints, always use wood glue in conjunction with your nailing. Apply an even bead of glue along edges before bringing pieces together and nailing. Wipe away any excess glue that squeezes out immediately with a damp cloth.
Test on scrap: Before you start on your project, always test your nailer and depth settings on scrap pieces of the same material. This is the best way to ensure you have the depth dialed in perfectly and to get a feel for the tool.
Don’t overuse nails: While you want secure joints, over-nailing can weaken the material or create too many holes to fill, which can be time-consuming and visually distracting. Space nails strategically for optimal holding power.
Angle your nails if needed: For some joints, angling nails slightly can improve holding power, especially if you’re fastening into a thinner piece or at an angle. This requires practice, so test it on scraps first.
Consider the environment: High humidity can affect MDF and plywood, causing slight swelling. While nailers are generally less affected, ensuring good ventilation and dry working conditions is always best practice in woodworking. For more information on wood properties, check out resources from the Forest Products Laboratory.
Common Problems and How to Solve Them
Even with the best tools, you might encounter a few hiccups. Here’s how to troubleshoot:
Problem: Nails not penetrating fully.
Solution: Adjust your depth setting to a deeper penetration. Ensure your nailer has enough air pressure (if pneumatic) or battery power (if cordless). Use the correct nail length and gauge for the material thickness.
Problem: Nails driving too deep or causing blowouts.
Solution: Adjust your depth setting to a shallower penetration. Ensure you are not pressing too hard against the material. If blowouts persist, especially in MDF edges, consider pre-drilling or using a slightly smaller nail gauge.
Problem: Nail jams.
Solution: Release the air pressure (if pneumatic) or remove the battery (if cordless). Use the tool-free jam release mechanism or, if necessary, carefully remove the jammed nail with pliers. Consult your nailer’s manual for specific instructions.
Problem: Surface damage (dents, scratches).
Solution: Ensure the no-mar tip is attached and in good condition. Apply consistent, firm pressure without excessive force when firing. Be careful when positioning and removing the nailer.
Problem: Split MDF or plywood.
* Solution: This is often due to nailing too close to the edge. Move your nail placement further in. If you must nail close to an edge, pre-drill a pilot hole slightly smaller than the nail; this is a crucial step for MDF.
Frequently Asked Questions
Q1: What is the best type of nailer for attaching MDF sheets?
A1: For MDF, an 18-gauge brad nailer or a 16-gauge finish nailer is often best. The key is using the correct length (typically 1 1/4″ to 1 1/2″) and adjusting the depth setting precisely to avoid splitting the material.
Q2: Do I need an air compressor for a nailer to work with plywood?
A2: Not necessarily. While pneumatic nailers require an air compressor, modern cordless (battery-powered) nailers are very powerful and efficient and are a great option for working with plywood without a compressor. Electric corded nailers are also an option.
Q3: What size nails should I use for 3/4 inch plywood?
A3: For 3/4 inch plywood, a 1 1/2 inch to 2 inch finish nail (16-gauge) is usually appropriate. This allows enough penetration for a strong hold without going all the way through and back out, assuming you’re joining two pieces or fastening to a stud/base.
Q4: Can I use a framing nailer for MDF and plywood sheets?
A4: No, framing nailers are designed for much larger, heavier-duty nails and are far too powerful for MDF and plywood sheets. They will almost certainly split the material and cause significant damage.
Q5: How close can I nail to the edge of MDF without it splitting?
A5: It’s best to keep nails at least 1/2 to 3/4 inch away from the edge. If you must nail closer, pre-drilling a pilot hole that is slightly smaller than your nail is highly recommended to prevent splitting.
Q6: How do I avoid dents on my MDF and plywood surfaces when nailing?
A6