Have you ever tried to add window casings to your home? It can be a fun project! But choosing the right tools is key. Imagine finishing that beautiful window trim only to find it looks uneven. What a letdown!
Many people wonder which tools to use. One popular option is a nailer. But what is the best nailer for window casing? With so many choices, it can feel overwhelming.
Surprising fact: the right nailer can save you time and effort. It can make your projects smoother and more enjoyable. A nailer not only speeds up your work but also improves the final look.
In this article, we will explore the best nailer for window casing. We will help you make the right choice. Get ready to impress your friends and family with your amazing skills!
Table of Contents
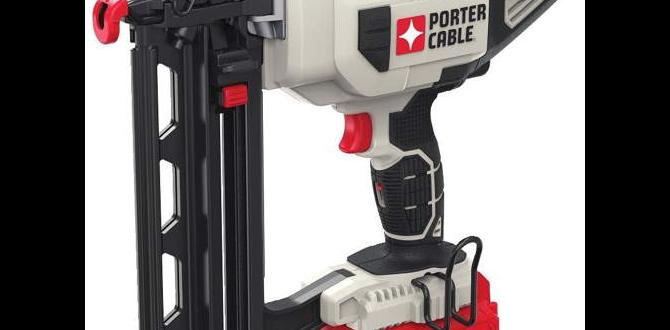
Best Nailer For Window Casing: Top Tools Reviewed
Choosing the best nailer for window casing can make your DIY projects easier. A good nailer saves time and ensures precise results. Air nailers work well for heavy-duty tasks. Battery-powered options offer more mobility. Consider weight, price, and ease of use. Are you tired of sore hands from hammering? A quality nailer can change your experience. Plus, learning about different types will help you pick the perfect tool for your project.
Understanding Window Casing
Definition and purpose of window casing. Importance of using the right tools for window casing projects.
Window casing is the trim around a window, acting like a cozy sweater for your glass panes. It protects the edges and gives a polished look to your home. Without it, windows can feel naked, and nobody wants that! Using the right tools, like a nailer, makes this job easier and faster. Pulling out your trusty nailer can turn a daunting task into a fun afternoon project. Remember, right tools equal happy hands!
| Tool | Purpose |
|---|---|
| Nailer | Saves time and makes nailing a snap! |
| Hammer | For those who like the classic touch—but watch your fingers! |
Key Features to Look For
Power source options: pneumatic vs. electric nailers. Nail size compatibility and magazine capacity. Ease of use and ergonomics for prolonged use.
Choosing the right nailer for window casing is important. Consider these key features:
- Power Source: There are two main types: pneumatic and electric. Pneumatic nailers use air compressors while electric ones rely on batteries or outlets.
- Nail Size Compatibility: The nailer should fit different nail sizes. Check if it can handle both small and large nails.
- Magazine Capacity: A larger magazine holds more nails. This means fewer refills during work.
- Ease of Use: Look for a nailer that feels comfortable. Ergonomic designs make it easy to use for long periods.
These features will help you work better and faster!
What is better: pneumatic or electric nailers?
Pneumatic nailers often provide more power, while electric nailers are easier to use anywhere without a compressor.
How to choose nail size for different projects?
- Select smaller nails for thin trim.
- Use larger nails for thicker materials like casings.
Why does magazine capacity matter?
A larger magazine means you spend less time reloading. This helps keep your project moving smoothly.
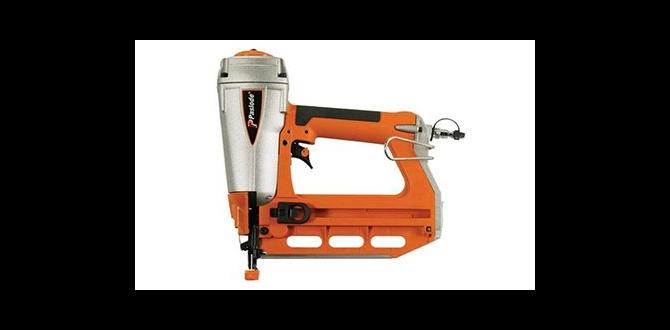
Top Nailers on the Market
Review of leading nailer brands and models. Comparison of features, prices, and user reviews.
Several nailers stand out for window casing projects. They are known for their features and performance. Here are some top choices:
- DeWalt DCN680D1: This cordless nailer is easy to use. It helps save battery life and has good speed.
- Bostitch BTFP72155: This nailer works well with different nails. It also has a low price, making it popular.
- Hitachi NT65MA4: Lightweight and durable, this choice has a strong user review score.
These models offer various features. They also come at different prices. Users love their reliability and ease of use.
What should I consider when choosing a nailer for window casing?
Focus on power, ease of use, and price. Check user reviews for more insight. Aim for a nailer that fits your needs and skills.
Safety Tips When Using Nailers
Importance of safety gear. Common hazards and how to avoid them.
Using a nailer can be fun, but safety should always come first. Wear protective gear like goggles and gloves. This keeps your eyes safe from flying debris and your hands safe from sharp nails. Don’t be a superhero! Common hazards include nail gun misfires and slipping on uneven surfaces. Keep the area tidy to avoid accidents. Always check your tools before use. A well-checked tool is your best friend on the job!
| Safety Gear | Purpose |
|---|---|
| Goggles | Protect your eyes |
| Gloves | Protect your hands |
| Ear Protection | Reduce noise |
| Steel-toed Boots | Protect your feet |
Maintenance and Care for Nailers
Regular maintenance practices to prolong nailer life. Troubleshooting common issues with nailers.
To keep your nailer happy and healthy, regular maintenance is key. Start by cleaning it often to remove dust and debris. Check for air leaks, which can be as pesky as a fly at a picnic. Pressurized air can cause misfires, so fix any leaks right away. If your nailer struggles to shoot, it’s time to inspect the nails. Use the right size—imagine trying to fit a giraffe into a clown car! Regular oiling also helps. Just a few drops can keep it moving smoothly.
| Maintenance Task | Tips |
|---|---|
| Cleaning | Remove dust and debris after each use. |
| Check for Leaks | Look for air leaks; fix them promptly. |
| Nail Size | Ensure you’re using the right size nails. |
| Oiling | A few drops of oil keep it running well. |
If you run into issues, check the nail jams first—they can be sneakier than a cat trying to catch a toy mouse. Always consult the manual for troubleshooting. Keeping your nailer in good shape means more time for your projects and less time chasing down problems!
DIY vs. Hiring a Professional
When to consider doing it yourself. Benefits of hiring a professional for window casing projects.
When tackling a window casing project, think about your skills first. If you’re handy and have time, doing it yourself can save money and give you a sense of pride. Plus, nothing beats the feeling of nailing it perfectly—just like a skilled carpenter! But if you’re not sure what to do, hiring a professional may be wise. They have experience and tools that make the job quicker and easier. Remember, sometimes it’s better to leave it to the experts, especially if you want it done right.
| Aspect | Diy | Hiring a Pro |
|---|---|---|
| Cost | Usually cheaper | More expensive |
| Time | May take longer | Quick completion |
| Quality | Depends on skill | High-quality results |
Common Mistakes to Avoid
Mistakes during nailer selection and usage. Tips to ensure a successful window casing installation.
Choosing the right nailer can feel like picking the perfect ice cream flavor. So many options! A common mistake is selecting tools that are too heavy or complex. This can lead to sore arms and confused faces. Another blunder is not reading the instructions. Always check the manual to avoid mishaps. Remember to wear safety gear—no one wants a nail in the foot. Here are some tips:
| Mistake | Tip |
|---|---|
| Choosing the wrong nail size | Use the recommended nail length for window casing. |
| Ignoring safety | Always wear glasses and gloves! |
| Not practicing | Test on scrap wood before the real deal. |
Applying these simple tips can turn you from a nailer novice into a window casing pro. Happy nailing!
Conclusion
In conclusion, the best nailer for window casing combines power, precision, and ease of use. Look for a tool that suits your needs and fits your budget. Remember to consider nail size and depth adjustments. Try using a pneumatic or brad nailer for better results. For more tips, explore other resources or ask friends who have experience. Happy DIYing!
FAQs
What Type Of Nailer Is Most Suitable For Installing Window Casing: A Brad Nailer, Finish Nailer, Or Pneumatic Nailer?
The best tool for putting up window casing is a finish nailer. A finish nailer uses bigger nails than a brad nailer. This helps hold the casing more securely. It’s easy to use and makes the job look neat. So, grab a finish nailer for your window casing project!
How Do I Determine The Appropriate Gauge Of Nails To Use With A Nailer For Window Casing Installation?
To choose the right nail gauge for your nailer, you first need to look at the window casing material. If it’s thicker or heavier, use a lower gauge number, like 16 or 18. Thinner casing works better with a higher gauge, like 21 or 23. Make sure the nails are long enough to hold the casing tightly without sticking out. Always check your nailer’s instructions for the best gauge recommendations.
What Are The Key Features To Look For In A Nailer Specifically Designed For Trim Work Like Window Casing?
When choosing a nailer for trim work like window casing, look for these key features. First, get a nailer that uses 18-gauge nails. These are thin and help prevent damage. Second, choose a lighter nailer to make it easy to hold. Third, look for one with adjustable depth settings. This helps you control how far the nail goes in. Finally, make sure it has a quick-release feature for easy clean-up.
Is It Better To Use A Cordless Or Corded Nailer For Window Casing Projects, And What Are The Advantages Of Each?
For window casing projects, both cordless and corded nailers have their good points. A cordless nailer is easy to move around because it doesn’t have a cord. You can use it anywhere without worrying about plugging it in. A corded nailer, on the other hand, usually has more power and doesn’t need batteries. We can choose either one based on what feels best for our project!
What Safety Precautions Should I Take When Using A Nailer For Installing Window Casing?
When using a nailer, always wear safety glasses. They protect your eyes from flying pieces. Keep your fingers away from the nail area. Always point the nailer away from yourself and others. Lastly, make sure the area is clear of people and pets before you start.