Have you ever looked at a framing project and thought it looked too hard? You’re not alone! Many beginners feel the same way. But what if I told you that choosing the best nailer for framing could make your job a lot easier? Imagine building your own shed or fixing a fence without a sweat.
Using the right nailer can save time and effort. It can help you create strong frames that last. In fact, the right tool can turn a challenging job into an enjoyable one. Did you know that even a beginner can master framing nailers with a little practice? It’s true!
This article will guide you through the best nailers for framing, perfect for those just starting. We’ll share tips, features to look for, and how to pick the right one for you. Let’s take the first step into the world of framing together!
Table of Contents
Best Nailer For Framing For Beginners: A Comprehensive Guide When It Comes To Starting A Framing Project, Selecting The Right Nailer Can Make All The Difference, Especially For Beginners. Understanding The Best Nailer For Framing For Beginners Involves Considering Various Types Of Nailers, Such As Pneumatic, Electric, And Cordless Options, Along With Crucial Features Like Depth Adjustment, Ease Of Use, And Safety Mechanisms. Types Of Nailers For Framing 1. **Pneumatic Nailers**: These Nailers Are Powered By Air Compressors, Making Them Lightweight And Easy To Handle. However, Beginners Must Factor In The Need For An Air Supply And Hoses. 2. **Electric Nailers**: Great For Those Who Want A Straightforward Setup Without The Hassles Of Air Hoses. Electric Nailers Are Generally User-Friendly And Easy To Maintain. 3. **Cordless Nailers**: These Nailers Offer The Ultimate Convenience, Allowing For Mobility Without Cords Or Hoses. However, They Can Be Heavier Due To The Battery, Which Is Something Beginners Might Need To Consider When Choosing The Best Nailer For Framing. Key Features To Look For 1. **Depth Adjustment**: This Feature Allows Users To Control How Deep The Nails Go, Providing Versatility For Various Materials. 2. **Weight**: A Lighter Nailer Is Easier For Beginners To Handle, Reducing Fatigue During Long Projects. 3. **Jam Clearing Mechanism**: A Quick-Release Mechanism Can Save Time And Frustration When Dealing With Nail Jams. 4. **Safety Features**: Look For Nailers That Come With Safety Locks Or Sequential Trigger Modes To Prevent Accidental Firing. Recommendations For Beginners Some Of The Best Nailers For Framing For Beginners Include: – **Bostitch F21Pl**: A Versatile Pneumatic Nailer That Handles Both Framing And Metal Connector Nails. – **Dewalt Dwf83Pl**: Known For Its Powerful Performance And Durability, Offering Both Pneumatic And Battery-Powered Options. – **Ryobi P320**: A Cordless Nailer That’S User-Friendly, Lightweight, And Provides A Good Balance Of Power And Convenience. Conclusion Choosing The Best Nailer For Framing For Beginners Is A Crucial Step That Can Enhance Productivity And Ensure Safety On The Job Site. By Considering Types Of Nailers, Key Features, And Popular Models, Beginners Can Find The Right Tool To Help Them Succeed In Their Framing Projects.

Best Nailer for Framing for Beginners
Finding the best nailer for framing can seem tricky. Are you a beginner eager to dive into DIY projects? Look for a lightweight model that fits comfortably in your hand. Cordless nailers offer freedom of movement, making them a popular choice. Many beginners enjoy battery-operated options for ease. Remember, safety features are key! A good nailer can make your first framing job fun and easy. With the right tool, you’ll finish your projects like a pro!Understanding Framing Nailers
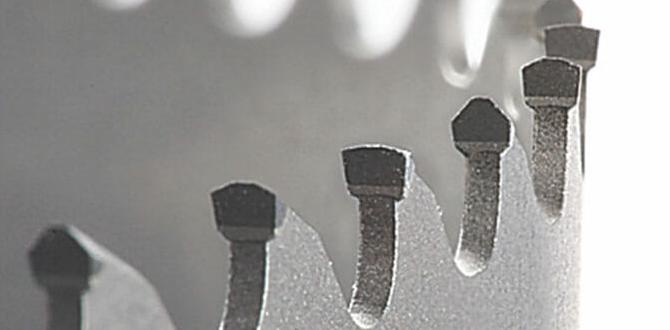
Definition and purpose of framing nailers in construction. Types of framing nailers: pneumatic vs. cordless.Framing nailers are your trusty sidekicks for construction projects. They help you attach pieces of wood quickly and easily. Imagine hammering nails with lightning speed—no more sore hands! There are two main types: pneumatic and cordless. Pneumatic nailers need air compressors, which means more gear. Cordless ones are like superheroes, running on batteries. You can take them anywhere without worrying about cords!
| Type | Pros | Cons |
|---|---|---|
| Pneumatic | Powerful and quick | Needs air compressor |
| Cordless | Portable and easy to use | Battery runs out |
Choose wisely, and always remember: a nailer in hand saves you from a sore wrist! Time to build something amazing!
Key Features to Look For
Power source: battery vs. air compressor. Nail size compatibility and capacity. Weight and ergonomics for ease of use.Looking for a nailer? Here are some important features to consider. First, think about the power source. Battery-operated nailers are portable. They work anywhere. Air compressors need a power source and can be heavy. Next, check the nail size compatibility. You want a tool that fits the nails you plan to use. Finally, consider the weight and ergonomics. A lighter nailer is easier to handle. Good grip means less strain on your hands.
What should beginners know about choosing a nailer?
Beginners should look for tools that are easy to use and lightweight. This makes building projects fun and safe!
Key points to consider:
- Power Source: Battery or air compressor
- Nail Size Compatibility
- Weight and Ergonomics
Comparative Analysis of Popular Models
Indepth comparison of toprated nailers for beginners. Highlighting strengths and weaknesses of each model.Finding the right nailer for beginners can be tricky. Each model has its own perks and quirks. For example, the Bostitch N80CB-1 is lightweight and easy to control but can jam like a bad radio. Meanwhile, the Hitachi NR90AES1 offers a powerful punch yet feels like lifting a brick! The Ryobi P325 is great for portability and is perfect for kids’ art projects, but lacks some power for heavy jobs. Here’s a quick look:
| Model | Strengths | Weaknesses |
|---|---|---|
| Bostitch N80CB-1 | Lightweight, easy to control | Can jam easily |
| Hitachi NR90AES1 | Powerful, good for tough jobs | Heavier to carry |
| Ryobi P325 | Portable, easy for beginners | Lacks power for big projects |
Choose wisely and remember, the right nailer can make your projects fly—and keep your fingers safe!
Safety Tips for Using Framing Nailers
Essential safety gear and precautions. Common mistakes to avoid while operating a nailer.Before diving into the exciting world of framing nailers, let’s gear up! Wearing safety glasses protects your eyes from flying debris, and ear protection saves your ears from loud noise. Always keep your fingers away from the tip to avoid accidental pinches—ouch! A common mistake is forgetting to check if the nailer is loaded. Yikes! Ensure you use the right nails for your project, or you might end up with a bumpy ride! Here’s a quick safety gear guide:
| Safety Gear | Purpose |
|---|---|
| Safety Glasses | Protects your eyes |
| Ear Protection | Reduces loud noise |
| Gloves | Prevents hand injuries |
| Closed-Toe Shoes | Protects your feet |
Remember, safety first and fun second. You’re building, not battling dragons!
Maintenance and Care for Your Nailer
Regular maintenance tips for longevity. Troubleshooting common issues.Keeping your nailer in good shape is easy! Regular maintenance helps it last longer. Here are some tips:
- Clean it after each use.
- Check for loose parts.
- Store it in a dry place.
- Lubricate moving parts regularly.
If problems arise, don’t worry! Here are some common issues:
- If it jams, turn it off and check for nails stuck inside.
- If it won’t fire, check the air pressure or battery.
Taking care of your nailer helps you work better!
How do I maintain a nailer?
To maintain a nailer, clean it often and check for wear. Use the right nails and lubricate it. A little care goes a long way.
Where to Buy and Price Range
Best retailers and online platforms. Budget considerations and valueformoney options.Finding the right place to buy a nailer is important. Look for popular stores like Home Depot or Lowe’s for quality options. Online retailers such as Amazon also have great choices. Prices can vary. A budget-friendly nailer may cost around $100, while a high-end model could reach $400 or more. Always check for sales to get the best deal.
Where can I find good deals on nailers?
Many stores offer great deals. You can find specials in home improvement stores or online. Joining store newsletters helps catch sales early.
Tips for saving money:
- Shop during holiday sales.
- Look for manufacturer discounts.
- Consider refurbished models.
Beginner Projects to Practice with a Framing Nailer
Simple projects for novices to develop skills. Tips for improving technique on framing tasks.Starting with simple projects helps beginners use a framing nailer effectively. Building a small shed, making a garden bed, or creating a simple wooden bench are great choices. They build confidence and skills. Here are tips to improve your technique:
- Practice nailing at different angles.
- Keep your hands steady and eyes on the target.
- Always wear safety gear.
These projects not only help you learn but also let you create something you can use or show off!
What small projects are good for beginners?
Simple projects include building birdhouses, picture frames, or shelving units. These tasks are manageable and fun!
Conclusion
In conclusion, the best nailer for framing for beginners should be light, easy to handle, and reliable. Look for features like depth adjustment and safety mechanisms. These tools make your projects easier and more fun. Remember to practice safe handling. Ready to tackle your next project? Check out more guides and tips to help you get started!FAQs
What Features Should I Look For In A Framing Nailer As A Beginner?When you pick a framing nailer, look for these features. First, choose one that is easy to handle. It should be lightweight so you can use it without getting tired. Next, check for a safety feature that stops it from firing accidentally. Finally, make sure it uses standard nails that you can find easily. These features will help you work safely and smoothly.
Should I Choose A Pneumatic Or Cordless Framing Nailer For My First Project?You should choose a cordless framing nailer for your first project. It’s easier to use and you won’t need an air compressor. You can move around freely without worrying about cords. Plus, it’s safer for beginners. Have fun building!
What Nail Sizes Are Typically Used With Framing Nailers, And How Do I Choose The Right Ones?Framing nailers usually use nail sizes from 2 inches to 3.5 inches. These nails are thick and strong. To choose the right ones, look at your project. If you’re building something big like a wall, use longer nails. For smaller projects, shorter nails work best. Always check your nailer’s instructions too!
How Do I Maintain And Troubleshoot A Framing Nailer For Optimal Performance?To keep your framing nailer working well, you should clean it regularly. Check the air filter and remove any dust. Make sure to oil the tool a little bit to keep it running smoothly. If it jams, turn it off and gently remove the nail. If the tool doesn’t shoot, make sure it’s plugged in or the air supply is on. Always follow safety rules when using it!
Are There Any Specific Brands Or Models Of Framing Nailers That Are Recommended For Beginners?Yes, some framing nailers are great for beginners. You might like the BOSTITCH F21PL or the DEWALT D51855. These are easy to use and not too heavy. They also work well for many projects. Always remember to follow safety rules when using them!