Have you ever tried to build something cool but felt frustrated with the tools? You’re not alone! Many people want to make their own furniture or complete small projects at home. But what if there was a simple way to get that job done?
Enter the affordable finish nailer tool. This handy gadget can make your projects easier and faster. Imagine putting together a nice-looking picture frame or a birdhouse without the hassle of using a hammer. Sounds great, right?
In this user guide, we will explore the benefits of this powerful tool. We’ll share tips on how to choose the right one for your needs and how to use it safely. By the end, you will feel confident to tackle your next DIY adventure!
Get ready to discover how a finish nailer can change your work style and help you create amazing things!
Table of Contents
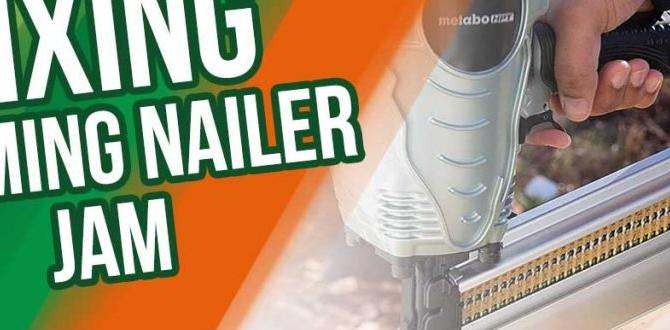
Affordable Finish Nailer Tool User Guide: Essential Tips

Affordable Finish Nailer Tool User Guide Summary
Discover the essential features of an affordable finish nailer tool in this handy guide. Learn how this tool can save you time and money on home projects. Understand how to choose the right model and use it effectively. Did you know that finish nailers drive nails much faster than a hammer? With safety tips and maintenance advice, readers can confidently tackle DIY tasks and create beautiful finishes. Get ready to transform your workspace!Understanding Finish Nailers
Definition and purpose of finish nailers. Types of finish nailers available in the market.Finish nailers are handy tools that help you join wood pieces together. They shoot small, thin nails called finish nails. This makes your projects look neat and professional. There are several types of finish nailers on the market, including pneumatic, electric, and battery-powered options. Each type has its own strengths, depending on the task. Whether you’re crafting a picture frame or building furniture, your finish nailer is here to save the day!
| Type of Finish Nailer | Power Source | Best For |
|---|---|---|
| Pneumatic | Air compressor | Heavy-duty work |
| Electric | Plug-in | Home projects |
| Battery-Powered | Rechargeable battery | Portability |
Benefits of Using an Affordable Finish Nailer
Costeffectiveness compared to higherpriced models. Suitability for DIY projects and home renovations.Using an affordable finish nailer can save you money while giving your projects a professional touch. These tools cost much less than fancy models, making them perfect for DIY lovers. Want to remodel your home without breaking the bank? This nailer is your best friend! It’s lightweight, easy to use, and fits right in your toolbox. Plus, no one has to know you spent less. Just smile and nail it!
| Benefits | Affordable Finish Nailer | Higher-Priced Models |
|---|---|---|
| Cost | Low | High |
| Ease of Use | Beginner Friendly | Complex |
| Best for DIY | Yes | No |
Key Features to Look for in an Affordable Finish Nailer
Firing mechanism (batterypowered vs. pneumatic). Nail size compatibility and capacity. Weight and ergonomics for ease of use.When buying a finish nailer, it’s important to check a few key features. First, consider the firing mechanism. Battery-powered tools are easier to move but may need charging. Pneumatic models use air but can be bulkier. Next, look at the nail size compatibility. Ensure the tool works with the sizes you need for your projects. Lastly, the weight matters. A lighter nailer is easier to handle. Proper ergonomics help reduce strain during use. Choose wisely!
What is the best firing mechanism for a finish nailer?
The best firing mechanism depends on your needs. Battery-powered nailers offer freedom and ease. Pneumatic nailers provide consistent power but require an air compressor.
Key Features
- Firing mechanism: battery vs. pneumatic
- Nail size and capacity
- Weight and ergonomics
Essential Safety Tips for Using Finish Nailers
Personal protective equipment (PPE) recommendations. Safe handling and operational practices.Using a finish nailer can be fun and helpful, but safety is key. First, wear proper personal protective equipment (PPE). Good choices are:
- Safety goggles to protect your eyes
- Ear protection to guard your hearing
- Work gloves to keep your hands safe (“
Next, follow safe handling rules. Always:
- Keep your fingers away from the nail path
- Point the tool away from yourself and others
- Check for jams before use
- Never aim at people or pets
Remember, being careful helps everyone stay safe while working!
What should I wear when using a finish nailer?
You should wear safety goggles, ear protection, and gloves for safety.
Maintenance Tips for Longevity
Routine cleaning and care guidelines. Identifying signs of wear and how to address them.Taking care of your finish nailer tool can be fun and easy! Start by cleaning the tool after each use. A quick wipe will keep dust away. Check for any loose screws or parts; they can wear out fast. You want your tool to feel like new. If you notice it making strange sounds, it might need a little help. And remember, even superheroes need a bit of maintenance to keep saving the day!
| Task | Frequency |
|---|---|
| Clean the nailer | After each use |
| Check for wear | Every month |
| Tighten screws | Every quarter |
Common Problems and Troubleshooting
Frequent issues users encounter with affordable finish nailers. Stepbystep troubleshooting tips.Using an affordable finish nailer can be fun, but it often presents some challenges. Common problems include:
- Nails not driving in
- Jams
- Loss of power
- Air leaks
If you face these issues, troubleshooting can help. Here are simple steps to fix them:
- Check your air supply and make sure it’s sufficient.
- Inspect the tool for any jams and clear them.
- Verify that the nails are the right type for your nailer.
- Look for any loose connections or leaks.
Fixing these problems can make your projects smooth again!
What are the frequent issues with finish nailers?
Common issues with finish nailers include nails that don’t fire, frequent jams, and air leaks. Solving these problems can make every job easier.
Project Ideas Using a Finish Nailer
Creative home improvement projects suitable for finish nailers. Tips on applying finishes and trims effectively.Finish nailers are great tools for fun home projects. Try building a picture frame or adding crown molding to a room. They help put pieces together quickly. Here are some tips:
- Measure carefully before cutting.
- Use wood glue for extra strength.
- Sand edges for a smooth finish.
These projects can boost your home’s look. Plus, applying trims with a finish nailer saves time. Enjoy getting creative!
What projects can I do with a finish nailer?
You can make frames, shelves, and benches. You can also refinish cabinets or add new trim. The options are endless!
Resources for Further Learning
Recommended books, videos, and online forums. Community resources for finishing projects and support.If you’re eager to learn more about finish nailers, many resources can help. Check out recommended books that offer tips and tricks. YouTube holds a treasure trove of videos, giving real-life demonstrations. Join online forums where you can swap stories and advice with fellow enthusiasts. Community centers often host workshops, making it even easier to master your skills. Remember, it’s more fun to learn with friends, so grab your crew and start nailing it!
| Type | Resource |
|---|---|
| Book | “Nail It Right” by John Smith |
| Video | YouTube – Finish Nail DIY Tutorials |
| Online Forum | FinishNailingForums.com |
| Community Resource | Local Maker Space Workshops |
Conclusion
In summary, an affordable finish nailer tool is great for your projects. It helps you create strong, clean finishes quickly. Always read your user guide for tips and safety instructions. Remember to practice using it before starting your main work. For more details, explore guides and videos online. Happy nailing!FAQs
What Are The Key Features To Look For In An Affordable Finish Nailer?When choosing an affordable finish nailer, look for a lightweight design. You want something easy to hold. Check if it has adjustable depth control. This helps you set how deep the nails go. Finally, make sure it works with different nail sizes for more projects.
How Do I Choose The Right Gauge Of Nails For My Finish Nailer?To pick the right gauge of nails for your finish nailer, start by checking your nailer’s instructions. Most finish nailers use 15 or 16-gauge nails. Thicker gauges mean stronger nails, but they might leave bigger holes. For small projects, try the thinner 18-gauge nails. Always match the nail size to your project’s needs!
What Safety Precautions Should I Take When Using A Finish Nailer?When using a finish nailer, wear safety glasses to protect your eyes. Keep your fingers away from the front of the tool. Make sure the area is clear of people before you start. Always point the nailer away from yourself and others. Finally, check that the nailer is not jammed before using it.
How Do I Properly Maintain And Troubleshoot My Finish Nailer?To take care of your finish nailer, you should clean it regularly. Make sure there’s no dust or old nails stuck in it. Check the air hose for leaks and keep the tool lubricated with oil. If it’s not working, make sure the nails are loaded correctly. You can also check if the air compressor is working.
What Types Of Projects Are Best Suited For Using A Finish Nailer?Finish nailers are great for projects where you need to attach thin pieces of wood. You can use them for trim work, like putting up baseboards or crown molding. They help you add details without leaving big holes. You can also use finish nailers for building furniture or cabinets. They’re perfect for when you want your work to look neat and smooth.