Quick Summary:
If your nail gun isn’t firing, it’s likely a simple issue like an air leak, jam, or safety trigger problem. Most fixes involve checking air pressure, clearing jams, or ensuring proper contact, which you can usually resolve yourself with a few basic steps.
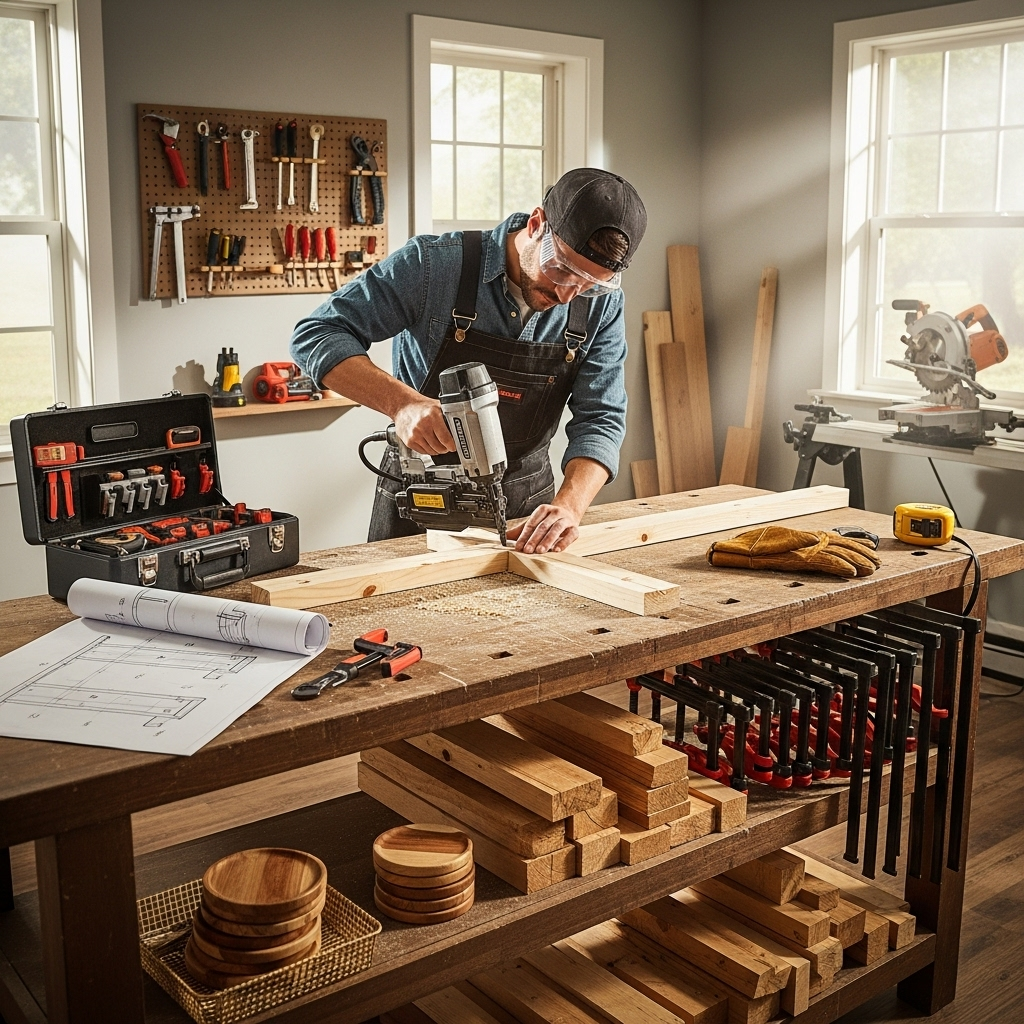
Hey there, DIYers and woodworking enthusiasts! Jack Shaffer, your go-to nailer guy, here. It’s incredibly frustrating when you’re mid-project, ready to drive a nail home, and your trusty nail gun just… won’t cooperate. That sudden silence can halt your progress and send your stress levels soaring. But don’t worry! Most of the time, a nail gun refusing to fire is a fixable problem, and often, it’s something you can handle without calling in a pro. We’ll walk through the common culprits step-by-step, helping you get back to building with confidence.
We’ve all been there, right? You’ve got the wood prepped, the measurements are perfect, and you pull the trigger with anticipation… only to hear a hiss or a click, but no nail. It can be disheartening, especially when you’re excited to see your project come to life. But the good news is that these issues are usually easy to diagnose and fix. Together, we’ll demystify why your nail gun isn’t firing and equip you with the simple solutions you need. Let’s get those nails flying again!
Table of Contents
Common Reasons Your Nail Gun Isn’t Firing
Before we dive into the fixes, let’s understand the most frequent reasons why your nail gun might be playing silent. Knowing these will help you pinpoint the issue faster.
1. Low Air Pressure (For Pneumatic Nailers)
This is the granddaddy of nail gun problems for pneumatic models. If your air compressor isn’t providing enough power, the nail gun simply doesn’t have the oomph to drive a nail. It’s like trying to start a car with a dead battery – it just won’t go.
2. Jammed Nails
Nails can get stuck in the firing mechanism, preventing the driver blade from moving freely. This is a super common issue, especially if you’re using the wrong size nails or fire the gun too hard into a difficult surface.
3. Safety Contact Tip Problems
Most nail guns have a safety mechanism that requires the tip to be pressed against the material you’re nailing. If this tip isn’t making good contact, or if the mechanism itself is faulty, the gun won’t fire.
4. Air Leaks
Anywhere that air can escape—a loose hose connection, worn O-rings, or a damaged cylinder—will reduce the pressure the gun receives, preventing it from firing effectively.
5. Dry Firing
Some nailers have a safety feature that prevents firing when the magazine is empty. This is a good thing to prevent damage, but it can be mistaken for a malfunction.
6. Internal Mechanism Issues
While less common for beginners to diagnose, sometimes the internal parts, like the driver blade or spring, can be damaged or misaligned.
Troubleshooting Your Nail Gun: A Step-by-Step Guide
Okay, let’s roll up our sleeves and get your nail gun back in working order. We’ll start with the easiest fixes and move our way up.
Step 1: Check the Air Pressure (Pneumatic Nailers)
This is the first thing to check for any pneumatic nail gun. You need adequate air pressure for the gun to fire correctly. Many compressors have a regulator that you can adjust.
- Check Your Compressor Gauge: Look at the pressure gauge on your air compressor.
- Consult Your Nail Gun Manual: Different nail guns require different PSI (pounds per square inch). Your nail gun’s manual will tell you the recommended operating pressure. A good starting point for many framing and common finishing nailers is between 70-120 PSI.
- Adjust the Regulator: If the pressure is too low, adjust the regulator on your compressor to the recommended setting.
- Inspect the Air Hose: Make sure the air hose is securely connected to both the compressor and the nail gun. Kinks or damage in the hose can also restrict airflow.
A common mistake is having the compressor running but not having the regulator set high enough, or the hose disconnected. Ensure everything is snug and at the correct PSI.
For more on air compressor basics and maintenance, check out this guide from OSHA on Compressed Air Safety, which touches on proper pressure and connection protocols.
Step 2: Inspect for Jammed Nails
A jammed nail is one of the most frequent culprits. When this happens, the driver blade gets stuck, and the gun can’t cycle properly.
- Disconnect Air Supply: Crucially, disconnect the air hose from your nail gun first. Safety first, always!
- Remove the Nail Magazine: Many nail guns have a magazine that can be opened or detached. Refer to your manual if you’re unsure.
- Look for the Obstruction: Peer into the nose of the nail gun. You should be able to see where the nails feed. Look for any nails that are bent, broken, or out of place.
- Carefully Remove the Jam:
- Using Pliers: If you can see the offending nail, try to carefully grab it with a pair of pliers and pull it straight out.
- Using a Screwdriver (Carefully!): Sometimes, a small, flathead screwdriver can be used to gently nudge a bent nail out of the track. Be very careful not to damage the driver blade or the internal parts.
- Tap the Gun: Occasionally, a light tap on the side of the nail gun (while disconnected from air!) can dislodge a stubborn nail.
- Test if Clear: Once you believe the jam is cleared, reassemble the magazine, reconnect the air, and try firing it into scrap wood (or trigger it safely while holding it away from any surface).
It’s often helpful to have a small toolkit handy when working with nail guns. A set of needle-nose pliers and a small flathead screwdriver are invaluable for clearing jams.
Step 3: Verify the Safety Contact Tip
The safety contact tip, also called the “nosepiece” or “trigger safety,” is a crucial safety feature. It must be pressed against the surface you’re nailing for the gun to fire. If it’s not working, the gun won’t fire.
- Press Firmly: Ensure you are pressing the nosepiece firmly against your workpiece. Sometimes, you need a bit of force.
- Check for Obstructions: Make sure nothing is blocking the movement of the contact tip or its internal firing pin mechanism. Clean it gently with a brush if it looks dirty.
- Inspect for Damage: Look for any signs of damage to the contact tip itself. If it’s bent, cracked, or broken, it may need replacement.
- Test the Mechanism: While holding the gun away from anything, try to depress the safety tip with a sturdy object (like the handle of your screwdriver). You should feel it move inwards. Then, try pulling the trigger. If it fires or clicks, the mechanism is likely okay. Always do this with the air disconnected first if possible, or be extremely cautious.
Sometimes, the spring-loaded plunger within the nose can get stuck. A little wiggle or a gentle spray of lubricant (like WD-40, but check your manual for recommended lubricants) can sometimes free it up.
Step 4: Search for Air Leaks
Air leaks are notorious for reducing the power and functionality of pneumatic nail guns. Even a small leak can significantly impact performance.
- Listen for Hissing: With the air connected and the regulator set, carefully listen around the entire nail gun. Do you hear any persistent hissing sounds?
- Check Connections:
- Hose to Compressor: Ensure the air hose connector is screwed on tightly to the compressor outlet.
- Hose to Nail Gun: Check the quick-connect fitting on the nail gun end. Wiggle it slightly to see if air escapes.
- Around Moving Parts: Listen near the trigger mechanism and where the air hose connects to the gun.
- Inspect O-Rings and Seals: Over time, rubber O-rings and seals can wear out or get damaged, causing leaks. This is common at the point where the air hose connects to the gun, or around the cylinder housing.
- Use Soapy Water (Optional): For hard-to-find leaks, you can lightly spray soapy water on suspected areas. Bubbles will form where air is escaping.
If you find a leak at a connection, try tightening it. If it’s a damaged O-ring or seal, it will likely need to be replaced. You can often find replacement kits for specific nail gun models. Proper maintenance, including keeping your tools clean and lubricated, can preemptively address many seal issues.
Step 5: Check for Dry Firing Prevention
Many modern nail guns have a safety feature that prevents them from firing if the nail magazine is empty. This prevents internal damage and saves wear and tear. It’s not a malfunction, but it can be mistaken for one.
- Reload the Magazine: Ensure the magazine is fully loaded with the correct type and size of nails.
- Check Nail Feed: Make sure the nails are properly seated and aligned in the magazine. Sometimes, a slightly misaligned nail can prevent the mechanism from feeding properly.
- Ensure Magazine Closure: If your magazine has a closing latch or mechanism, ensure it’s fully secured.
This is a simple check, but often overlooked when frustration sets in. Double-check that your nail supply isn’t the issue.
Step 6: Examine the Driver Blade and Internal Mechanism
If the above steps haven’t solved the problem, there might be an issue with the internal workings of your nail gun, such as the driver blade or the related spring mechanism.
- Disconnect Air: Always start by disconnecting the air supply.
- Access the Driver Blade: Depending on your nail gun model, you might need to remove a cap or a section of the housing to get a clear view of the driver blade. Consult your owner’s manual for instructions specific to your model.
- Check for Damage or Obstructions: Look at the driver blade. Is it bent, chipped, or broken? Is it stuck in the “down” position? Is there any debris preventing its free movement?
- Inspect the Spring: Many nail guns have a powerful spring that drives the blade. Ensure this spring is intact and properly seated.
- Attempt Gentle Movement: If the blade seems stuck, you can try to gently move it up and down using a wooden dowel or a non-marring tool. Be careful not to force it.
Issues with the driver blade assembly are less common for beginners and might require more advanced repair or professional service. If you suspect damage here, it’s wise to consult the manufacturer or a qualified repair technician.
Troubleshooting Common Nail Gun Types
While the general principles apply across most nail guns, there are slight differences based on power source and type.
Pneumatic Nail Guns
These rely on compressed air. The most common issues are related to air pressure, leaks, and jams, as detailed above. Ensuring your compressor is functioning correctly and hoses are in good condition is paramount.
Electric Nail Guns (Corded)
These use a motor to drive a ram or piston. If an electric nail gun isn’t firing:
- Check Power: Make sure it’s plugged in securely and the outlet is working (test with another device).
- Inspect Cord: Look for any damage to the power cord.
- Listen for Motor: Do you hear the motor trying to engage when you pull the trigger (even if no nail fires)? If not, it could be an electrical issue or a safety interlock.
- Clear Jams: Jams can still occur. Follow the jam-clearing steps above.
Battery-Powered (Cordless) Nail Guns
Cordless nail guns are versatile but have their own potential issues:
- Check Battery Charge: The most obvious—is the battery fully charged and properly seated? Low charge can lead to weak or no firing.
- Battery Health: Older batteries may not hold a charge as well or deliver sufficient power.
- Safety Lockouts: Many battery-powered models have specific safety lockouts that need to be disengaged.
- Internal Mechanism: Like electric models, jams or internal component issues can arise.
What to Do If Your Nail Gun Still Isn’t Firing
If you’ve gone through all the troubleshooting steps and your nail gun remains stubbornly silent, it’s time to consider other options.
Consult Your Owner’s Manual
I can’t stress this enough: your nail gun’s manual is your best friend. It will have specific troubleshooting tips tailored to your exact model. Even if you think you’ve looked at it, give it another read-through for any missed details.
Contact the Manufacturer
If your nail gun is still under warranty, or even if it’s not, the manufacturer’s customer support can be invaluable. They can offer more specific advice or guide you through service options. You can often find contact information on their website.
Seek Professional Repair
For complex internal issues, particularly with driver blades or main seals, a professional tool repair service might be your best bet. They have the specialized knowledge and parts to fix even tricky problems.
Consider Replacement
Sometimes, the cost and hassle of repairing an older or heavily used nail gun can outweigh the cost of a new one, especially for more budget-friendly models. This is a last resort, but a valid consideration if repairs become too frequent or expensive.
Preventative Maintenance for Your Nail Gun
The best way to avoid the frustration of a nail gun that won’t fire is to keep it in good working order. A little preventative maintenance goes a long way.
- Keep it Clean: After each use, wipe down your nail gun, especially the nosepiece and magazine, to remove sawdust and debris.
- Lubricate Regularly: For pneumatic nailers, use specialized air tool oil to lubricate the tool at the end of each day or before prolonged storage. This keeps internal parts moving smoothly and seals from drying out. Follow your manual’s recommendations for oil type and frequency.
- Check O-Rings and Seals: Periodically inspect O-rings and seals for wear or damage. Replace them if they look cracked or flattened.
- Store Properly: Store your nail gun in a clean, dry place. Avoid extreme temperatures. For pneumatic tools, consider draining some air from the tool or using a tool storage oil if recommended by the manufacturer.
- Use the Right Nails: Always use the correct size, gauge, and type of nails specifically designed for your nail gun model.
- Avoid Over-Frequiring: Firing the nail gun rapidly without giving it time to reset can sometimes overwhelm the mechanism.
Regular maintenance not only prevents issues like your nail gun not firing but also extends the life of your tool and ensures safer operation. Resources like Family Handyman’s guide on nail gun maintenance offer practical tips for keeping your tools sharp and functional.
Frequently Asked Questions (FAQ)
Q1: My electric nail gun is making a noise but not firing. What should I do?
A1: If your electric nail gun hums or makes noise but doesn’t fire, it likely means the motor is working, but the firing mechanism is obstructed or damaged. First, disconnect from power and check for jams in the nosepiece. If no jam is found, there might be an internal issue with the driver blade or related parts.
Q2: Can I use WD-40 on my pneumatic nail gun?
A2: While WD-40 can sometimes help free up a stuck part, it’s generally not recommended as a regular lubricant for pneumatic tools. Use a dedicated air tool oil as specified in your nail gun’s manual. Regular use of WD-40 can sometimes wash away essential lubricants or damage rubber seals over time.
Q3: My nail gun fires sometimes, but not others. What’s wrong?
A3: Intermittent firing often points to an inconsistent air supply (ensure your compressor maintains pressure), a partial jam that clears itself sometimes, or a faulty trigger or safety mechanism. Check for air leaks, ensure the contact tip is