Woodworking projects that sell are often simple, functional, and beautifully crafted items that appeal to a wide audience. Focus on quality materials, good design, and efficient building techniques. Popular choices include home decor, custom gifts, and practical organizers.
Hey there, fellow makers! Jack Shaffer here, your go-to guy for all things woodworking and nailing. Ever stare at a pile of lumber and wonder, “What can I build that people will actually want to buy?” It’s a common question, especially when you’re just starting out. You’ve got the tools, you’ve got the passion, but translating that into projects that sell can feel like cracking a secret code. Don’t worry, we’re going to break it down together. We’ll explore some fantastic woodworking projects that have a proven track record of success, turning your workshop into a potential storefront. Get ready to discover some genius buys—both in terms of what to build and what tools to use!
Table of Contents
Frequently Asked Questions
What are the easiest woodworking projects for beginners to sell?
Simple, functional items are best. Think wooden coasters, small serving trays, simple picture frames, or wooden signs with stencils. These don’t require complex joinery and can be made fairly quickly, allowing you to focus on a clean finish and quality materials.
What kind of woodworking projects are most popular on Etsy?
Buyers on Etsy often look for personalized gifts, home decor items, and practical organizers. Custom name signs, farmhouse-style tiered trays, beautiful charcuterie boards, and wall-mounted shelves are consistently popular. The key is offering unique designs or customization options.
What’s a good profit margin for DIY woodworking projects?
A good profit margin can vary, but aiming for at least a 50-100% markup on your material and labor costs is a solid starting point. For example, if your materials and time cost $20, selling it for $40-$50 would be a healthy margin. This doesn’t include potential platform fees if you’re selling online.
What woodworking tools are essential for someone starting a small business?
For beginners aiming to sell, a good circular saw or miter saw is crucial for accurate cuts. A random orbit sander speeds up finishing. Of course, a reliable nail gun (like a brad nailer or finish nailer) can dramatically improve efficiency and the professional look of your projects. Safety gear like safety glasses and ear protection is non-negotiable!
How can I make my woodworking projects stand out from the competition?
Focus on a few key areas: exceptional craftsmanship, unique designs, quality materials, and excellent customer service. Offer personalization options, use beautiful wood species, and pay attention to the details like sanding and finishing. High-quality photos in your listings are also vital!
What are “genius buys” in the context of woodworking projects that sell?
“Genius buys” refer to projects that offer a high return on investment in terms of both material cost and your time. They typically involve readily available, affordable materials, straightforward building processes, and have a broad appeal that allows for a good selling price. Think of pieces like custom signs, charcuterie boards, or simple shelving units.
Why Certain Woodworking Projects Just Sell
It’s a question many DIYers grapple with: “What should I make that people will actually buy?” You pour your heart and soul into a project, but if it doesn’t resonate with potential customers, it can be disheartening. The secret to woodworking projects that sell isn’t necessarily building the most complex or intricate pieces. It’s about understanding what appeals to buyers, what fills a need, and what offers good value.
Think about your own shopping habits. What catches your eye? Often, it’s items that are:
- Functional: Things people can use every day.
- Decorative: Items that enhance their living space.
- Personalized: Gifts that feel special and unique.
- Well-Crafted: Pieces that look like they were made with care and quality.
- Affordably Priced: Good value for the money.
These principles are the bedrock of successful woodworking businesses, especially for those selling on platforms like Etsy. People are looking for more than just wood; they’re looking for a story, a solution, or a piece of art that adds warmth and character to their lives.
The “Genius Buy” Philosophy
When I talk about “genius buys,” I mean projects that hit a sweet spot. They are:
- Material-Efficient: They don’t require vast amounts of expensive lumber. Often, you can use common woods like pine, poplar, or even high-quality plywood efficiently.
- Time-Efficient: The build process is straightforward, allowing you to produce more items in less time. This is where the right tools, like a reliable nail gun, can be a game-changer.
- High Perceived Value: Despite the relatively low material and time cost, the finished product looks impressive and commands a good selling price. This often comes down to design, finish, and customization.
- Broad Appeal: They aren’t niche items. These are gifts or home decor pieces that many people would consider buying.
My goal is to help you identify and build these types of projects. We’ll focus on accessibility for beginners, discuss the tools that make them easier, and highlight why they are smart choices for anyone looking to sell their woodworking creations. We’re going to turn that pile of wood into something that not only looks great but also brings in a little income!
Top Woodworking Projects That Sell (Your Genius Buys!)
Let’s dive into specific projects that consistently do well. These are the types of items I see flying off virtual shelves, and for good reason. They offer a fantastic balance of creativity, skill, and marketability.
1. Charcuterie and Serving Boards
Charcuterie boards are incredibly popular right now. People love entertaining, and a beautiful wooden board is the centerpiece of any gathering. They make fantastic gifts too!
- Why they sell: They are functional art. People are willing to spend for something that looks good and serves a purpose. They are also highly giftable and can be personalized.
- “Genius Buy” Status: You can use beautiful hardwoods like walnut, maple, or cherry, but even a carefully finished pine board can look fantastic. Edge-grain or end-grain designs can add visual appeal. Minimalistic designs are often the most sought-after. A simple rectangular or oval shape with nice rounded edges is a classic.
- Tools You’ll Need: A table saw or circular saw for cutting blanks, a router for shaping edges (a simple roundover bit is perfect), a random orbit sander for a silky-smooth finish, and mineral oil or a food-safe finish.
- Pro-Tip: Consider adding small details like a handle cutout or a chamfered edge. For an extra touch, you can even engrave names or monograms.
2. Custom Wooden Signs
From farmhouse-style last name signs to seasonal decor and inspirational quotes, wooden signs are a staple in home decor. The ability to customize them makes them incredibly appealing.
- Why they sell: Personalization is key here. Customers love seeing their name, a meaningful quote, or a design tailored to their style. They add personality to walls and entryways.
- “Genius Buy” Status: These are often made from plywood or standard lumber like pine or reclaimed wood. The main cost is in the design and finishing. CNC machines are popular for intricate designs, but for beginners, stencils combined with careful painting or wood burning offer great results.
- Tools You’ll Need: A miter saw or circular saw for cutting panels, a sander, paint, brushes, stencils (or a stencil cutting machine if you get advanced), and possibly a small router for adding a shadow box effect or chamfered edges.
- Pro-Tip: Offer a range of popular phrases and customization options for names and dates. A well-done distressed finish can add a lot of charm. For hanging, simple picture-hanging hardware or a routed-out keyhole on the back works well.
3. Farmhouse Tiered Trays
These rustic, multi-level displays are perfect for kitchen counters, coffee bars, or as centerpieces. They’re incredibly versatile for seasonal decorating.
- Why they sell: They are highly decorative and functional, allowing people to display various items. They fit perfectly with the popular farmhouse and rustic decor trends.
- “Genius Buy” Status: Typically made from common lumber like pine or poplar, often with small wooden bowls or candle holders as the tiers. The construction is usually quite simple, involving basic joinery or even just screws and glue.
- Tools You’ll Need: A miter saw or table saw for cutting pieces, a drill, screws, wood glue, a sander, and a finish (paint or stain). If you’re building the “legs” or supports, a lathe can be used for turned spindles, but simple wooden dowels or stacking blocks work too.
- Pro-Tip: Offering different stain colors or two-tone paint finishes (e.g., distressed white with a stained top) can increase appeal. Ensure the proportions are pleasing and stable.
4. Monogram Home Decor
Personalized monograms, whether cut from wood or incorporated into larger pieces, are always a hit for weddings, housewarmings, or just personal flair.
- Why they sell: Highly personal and sentimental. They make excellent, customized gifts.
- “Genius Buy” Status: Can be as simple as a cut-out letter from plywood or MDF (which can be finished to look like solid wood) or as elaborate as inlaid wood pieces. The key is offering various fonts and finishes.
- Tools You’ll Need: A scroll saw or jigsaw is ideal for cutting the letters. For larger, cleaner cuts, a CNC router is fantastic, but not essential for beginners. You’ll also need a good sander and paint or stain.
- Pro-Tip: Offer different sizes and finishes. You can also integrate monograms into other projects, like wooden signs or wall shelves.
5. Simple Shelving Units
Floating shelves, small wall-mounted shelves, or simple bookcase designs are always in demand for storage and display.
- Why they sell: Everyone needs more storage and display space! Well-designed shelves can be both practical and aesthetically pleasing.
- “Genius Buy” Status: Easy to build with basic tools. You can use affordable lumber like pine or poplar, or even sturdy plywood for a modern look. The beauty is in clean lines and a professional finish.
- Tools You’ll Need: A miter saw or circular saw for cutting boards, a drill, screws, wood glue, and a sander. For floating shelves, you’ll need a way to create hidden bracket systems.
- Pro-Tip: Offer different depths, lengths, and finishes. Rustic, industrial, or modern styles can all find buyers. For wall-mounted shelves, clear instructions for installation are crucial. A strong, hidden mounting system is a must for safety and appeal. For many simple shelf designs, a good finish nailer can be incredibly useful for attaching decorative trim or support pieces without visible screws.
6. Wooden Planters and Stands
Bring a touch of nature indoors (or outdoors!) with stylish wooden planters and their accompanying stands. They are perfect for plant lovers.
- Why they sell: Plants are hugely popular, and stylish planters are a natural extension of home greenery. They add warmth and texture to any room.
- “Genius Buy” Status: Can be made from common lumber. Simple box constructions are easy to assemble. For stands, basic joinery or even pocket holes can create sturdy designs. Waterproofing the interiors is key.
- Tools You’ll Need: Saws for cutting, a drill, screws, wood glue, a sander. A router can add decorative edges to the planters or stand legs. You’ll also need a good quality outdoor sealant or waterproof liner for the inside of the planters.
- Pro-Tip: Offer various sizes and wood finishes. Consider designs that accommodate common nursery pot sizes.
7. Desktop Organizers and Accessories
In our increasingly digital world, tangible organizers for pens, phones, tablets, and mail are surprisingly popular. They help declutter workspaces.
- Why they sell: They solve a problem – clutter. They appeal to home office users, students, and anyone looking to tidy up their desk.
- “Genius Buy” Status: Often made from smaller pieces of wood, offcuts, or plywood. The designs can be simple yet clever, incorporating slots, compartments, and even charging cable management.
- Tools You’ll Need: A table saw or miter saw for precise cuts, a drill, and a sander. A small router can be used for cable management slots or decorative edges. Precision is key here.
- Pro-Tip: Focus on smart design that maximizes utility in a small footprint. Consider integrating charging capabilities or multi-functional slots.
Choosing Your Materials Wisely
When you’re aiming for “genius buys,” smart material selection is paramount. You want materials that are readily available, affordable, and easy to work with, but that also yield a high-quality, attractive finish.
- Pine and Poplar: These are fantastic starter woods. They are relatively inexpensive, lightweight, and easy to cut and sand. They take paint and stain well, making them versatile for many project types, especially signs, trays, and basic shelves. A smooth finish requires good sanding, and priming before painting can help achieve a professional look.
- Plywood (Birch, Baltic Birch): High-quality plywoods, especially birch or Baltic birch, offer incredible stability and a clean, modern look. The layered edges can be a design feature or can be routed or planed to be less visible. Plywood is excellent for organizers, modern shelving, and even minimalist trays.
- Hardwoods (Walnut, Maple, Cherry): While more expensive, these woods offer a premium look and feel. They are ideal for charcuterie boards, cutting boards, and decorative items where the natural beauty of the wood is the star. You don’t need large quantities for smaller projects, making them economically viable. Sanding these to a super-fine grit and using a quality oil or urethane will make them shine. Check out resources from organizations like the Wood Database for detailed properties.
- Reclaimed Wood: Offers a rustic, unique character that many buyers love. However, it requires careful inspection for nails, rot, and warping, and sometimes special handling for finishing. It can be a great way to add a story to your pieces.
Always consider the finish. A good sanding regimen, followed by a quality stain, paint, or protective clear coat (like polyurethane or an oil finish), can elevate even the simplest wood project.
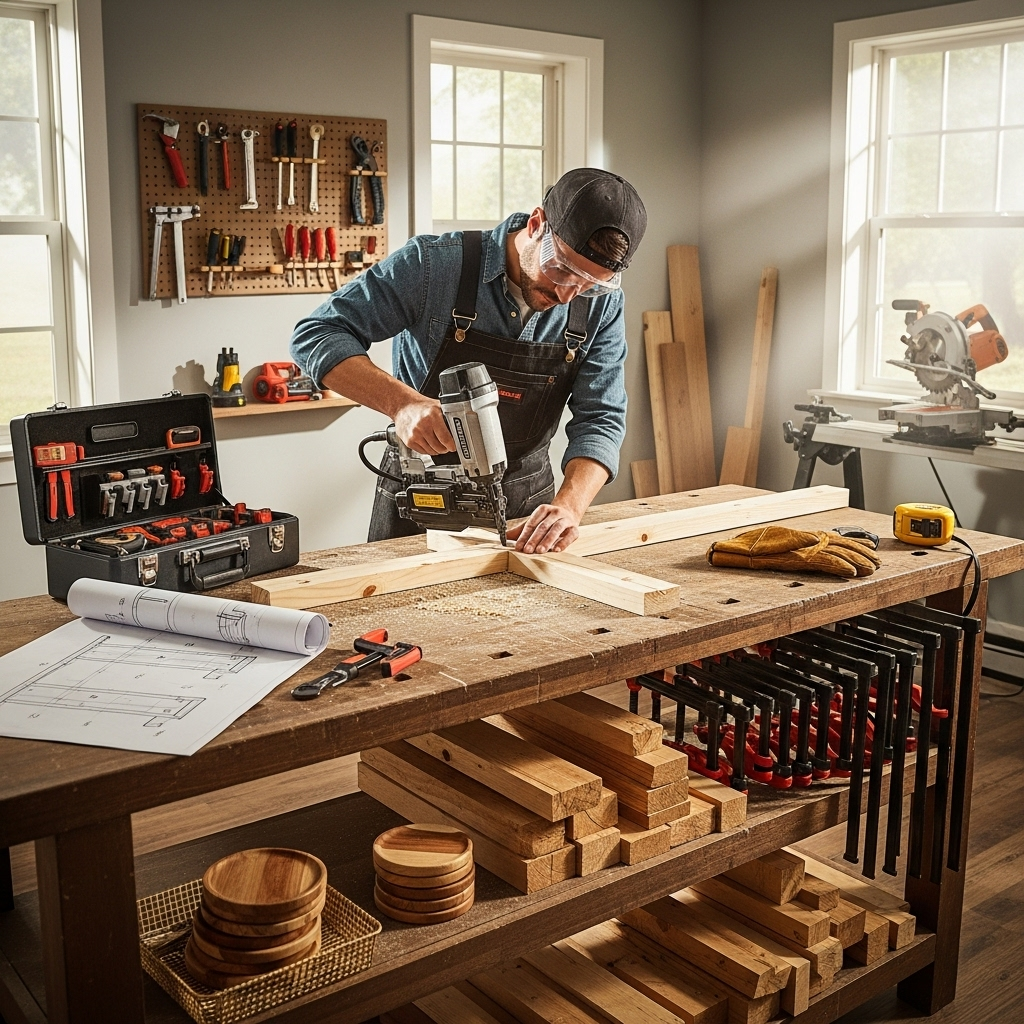
Essential Tools for Efficient Selling
As Jack Shaffer of Nailerguy, I can’t stress enough how important the right tools are for not just efficiency, but also for the quality and professional finish that buyers expect. For projects that sell, speed and precision matter.
Here’s a breakdown of some key tools, focusing on those that offer the biggest bang for your buck for someone starting out focusing on sellable projects:
| Tool | Why It’s Great for Sellable Projects | Beginner-Friendly Features | Key Considerations |
|---|---|---|---|
| Miter Saw (Compound Recommended) | Precise crosscuts and angled cuts for frames, boxes, shelves. Significantly speeds up repetitive cuts. | Electric models are easy to use. Look for good bevel and miter capacity (e.g., 0-45 degrees). Many brands offer excellent entry-level models. | Blade size (10″ or 12″), dust collection, smooth operation. Ensure it’s calibrated correctly. |
| Random Orbit Sander | Achieves a smooth, swirl-free finish essential for professional-looking pieces (especially important for charcuterie boards and signs). Much faster than hand sanding. | Plug-and-play operation. Look for variable speed control. Uses readily available sandpaper discs. | Orbit diameter (e.g., 5/64″ or 3/32″ for finer finishes), dust collection port. |
| Brad Nailer (18-Gauge) | Rapidly attaches trim, mouldings, and thin panels with minimal fuss. Leaves small holes that are easy to fill for a clean look. Essential for quick assembly of signs, boxes, and decorative elements. | Cordless (battery-powered) models offer the most freedom. Lightweight and easy to handle. Look for brands like Ryobi, Dewalt, or Paslode. | Magazine capacity, depth adjustment, type of power (battery, pneumatic, gas). |
| Finish Nailer (15 or 16-Gauge) | Similar to a brad nailer but drives slightly larger nails, providing more holding power for frames, cabinet parts (if you advance to that), and sturdy boxes. | Again, cordless options are user-friendly. Look for good power to drive nails into hardwoods without ‘nailing blind’. | Gauge difference (15 vs 16), power source, and jam clearance. |
| Router (Fixed Base with Plunge Capability) | Versatile for creating decorative edges (roundovers, chamfers), cutting dados and grooves, and adding details like a shadow box effect on signs. Significantly enhances project aesthetics. | A fixed-base router with a variable speed dial is a great starting point. Look for models that can accept common ¼” and ½” shank bits. | Horsepower, variable speed, ease of bit changes, dust collection shroud. A good starter bit set is crucial. |
| Jigsaw or Scroll Saw | Ideal for intricate shapes, curves, and detailed cutouts, especially for monograms or custom sign elements. | Jigsaws are more versatile for straight and curved cuts in larger pieces. Scroll saws offer more precision for very fine detail work. Battery-powered options are convenient. | Blade types, cutting capacity, bevel adjustment (for jigsaws), and dust blower (for scroll saws). |
Remember, safety first! Always wear your safety glasses, and use hearing protection, especially with power saws and nail guns. For more in-depth information on tool selection and safety, check out resources like the Occupational Safety and Health Administration’s woodworking standards.
Pricing Your Work for Profit
This is where “genius buys” truly pay off. You want your pricing to reflect the value you provide while ensuring you make a profit. A common formula for DIY businesses is:
Material Cost + (Your Hourly Rate x Time Spent) + Overhead + Profit = Selling Price
- Material Cost: Sum up the cost of all lumber, screws, glue, finishes, sandpaper, etc., used for the project. Be precise!
- Your Hourly Rate: This is crucial. Don’t undervalue your time! Consider what a skilled tradesperson earns in your area. For beginners, even $15-$25 per hour is a good starting point. Remember, this is your wage.
- Time Spent: Accurately track how long each step takes – cutting, sanding, assembly, finishing, packaging. Be realistic!
- Overhead: This includes tools, electricity, workshop space, marketing, platform fees (like Etsy’s listing fees or transaction fees), and packaging supplies. A small percentage (e.g., 10-20%) of your material and labor cost is a good estimate.
- Profit: This is your reward for taking the risk, investing your time, and developing your skills. Aim for a profit margin that allows your business to grow. A common target is to have your final selling price be at least double your material and labor costs.
Pricing Example: Simple Pine Serving Tray
| Item | Cost | Notes |
|---|---|---|
| Pine Board (1x6x6′) | $8.00 | Enough for a 12″x18″ tray with sides. |
| Screws & Wood Glue | $1.50 | Estimated for this project. |
| Sandpaper & Finish (Oil) | $2.00 | Consider cost per project for consumables. |
| Subtotal Material Cost | $11.50 | |
| Your Hourly Rate | $20.00/hour | |
| Time Spent (1.5 hours) | $30.00 | Cutting, assembly, sanding, finishing. |
| Subtotal Labor Cost | $30.00 | |
| Total Cost (Materials + Labor) | $41.50 | |
| Overhead (15%) | $6.23 | ($41.50 * 0.15) |
| Total Cost with Overhead | $47.73 | This is your break-even point. |
| Desired Profit (Aim for selling price 2x cost) | $47.73 | (To make it $95.46) |
| Suggested Selling Price | $75.00 – $95.00 | A competitive range depending on finish quality and marketplace. Adjust based on similar items. |
Don’t be afraid to charge what your work is worth! If your items are well-made and attractive, people will pay for them. Research what similar items are selling for on Etsy and other platforms to get a feel for the market.
Finishing Touches That Sell
The difference between a handmade item and a professionally sold item often comes down to the finishing touches. These details elevate your project from “just wood” to a desirable piece.
- Sanding is King: Seriously. Go through your grits! Start with 80 or 100, move to 150, then 220. For surfaces that will be touched a lot (like charcuterie boards), consider going up to 320 or even 400. A smooth surface makes a huge difference.
- Quality Finishes: Use appropriate finishes. For food-contact items, use food-grade mineral oil or a beeswax/oil blend. For decorative items, a good quality polyurethane, lacquer, or even a wipe-on varnish provides protection and a beautiful sheen.
- Clean Assembly: Minimize visible screws if possible, or ensure they are countersunk and neatly filled. Use wood glue for strong joints. A nail gun is great for holding pieces while glue dries or for attaching trim where a few small nails won’t be too noticeable.
- Packaging Matters: How you present your item when it ships (or when it’s picked up) is part of the experience. Clean wrapping, perhaps a branded sticker, and a thank-you note can leave a lasting positive impression.
- High-Quality Photos: If you’re selling online, this is non-negotiable. Use good lighting (natural light is best), a clean background, and show your item from multiple angles. Show it in context (e.g., a serving board with some cheese on it, a shelf with decorative items).
Bringing it All Together: From Workshop to Wonderful Buys
So, there you have it! You’ve got a roadmap to identifying and creating woodworking projects that don’t just look great in your workshop, but have real potential to sell. The “genius buy” philosophy is all about smart choices: choosing projects with broad appeal, using materials efficiently, employing straightforward building techniques, and valuing your craft through proper pricing and finishing.
Remember, consistency and quality are your best friends. Start with one or two project types that excite you, dial in your process, and focus on delivering excellent craftsmanship. As you gain confidence and experience, you can expand your offerings. Don’t be afraid to experiment with different finishes, explore new design ideas, and listen to what your customers are looking for. The woodworking community is incredibly supportive, and platforms like Etsy are fantastic places to test the waters. Keep practicing, keep creating, and most importantly, keep enjoying the process. Happy building, and happy selling!