Woodworking Projects: Genius Flip Furniture
Transforming old furniture into valuable new pieces is a smart woodworking project. With clever designs, you can build “flip furniture” that offers multiple functions, saving space and adding unique style to any home. Learn how to tackle these rewarding projects and boost your DIY skills!
Hey there, fellow woodworkers and DIY enthusiasts! Jack Shaffer here, your guide from Nailerguy. Ever look at a piece of furniture and think, “There has to be a better way this could work?” That’s where the magic of flip furniture comes in! It’s all about clever design that takes a single piece and makes it do double or even triple duty.
Think about it: a coffee table that becomes a dining table, or a bench that hides away tons of storage. These aren’t just functional; they’re brilliant woodworking projects that can add serious value to a home, whether it’s yours or a client’s.
Many beginners feel a bit daunted by complex furniture builds, but the truth is, many flip furniture designs are surprisingly straightforward. They’re perfect for honing your skills and building confidence. We’ll break down some fantastic ideas and show you how to approach them step-by-step.
Ready to get inspired and build something amazing? Let’s dive into the world of genius flip furniture projects!
Table of Contents
Frequently Asked Questions About Flip Furniture
What exactly is “flip furniture”?
Flip furniture refers to pieces that change their function or configuration, often by “flipping” a part of them. For example, a coffee table might flip up to become a desk or dining surface. It’s all about clever engineering to maximize utility and save space.
Is flip furniture difficult for beginners to build?
Not necessarily! While some designs can be complex, many beginner-friendly flip furniture projects exist. These often involve simpler mechanisms and focus on fundamental woodworking techniques. Starting with a basic flip-top table or a storage bench is a great way to gain experience.
What essential tools do I need for flip furniture projects?
For most flip furniture projects, you’ll want a good circular saw or miter saw for cutting, a drill/driver for assembly, measuring tape, a level, safety glasses, and of course, your favorite nailer (like a Brad nailer for trim or a finish nailer for stronger joints). Sandpaper and finishing supplies are also crucial.
What makes a flip furniture project a good “flip” (meaning, profitable to sell)?
A good flip furniture project, whether for resale or personal enjoyment, offers a significant improvement in function and aesthetics. Look for pieces that solve common problems like lack of space, hidden storage needs, or dual-purpose requirements. High-quality craftsmanship and stylish finishes also increase value.
Where can I find plans or inspiration for flip furniture projects?
You can find excellent plans and inspiration online on woodworking blogs, DIY websites, Pinterest, and YouTube. Many furniture companies also offer plans for their popular designs. Look for resources that provide detailed cut lists, assembly diagrams, and material suggestions.
How do I ensure the flip mechanism on my furniture is sturdy and reliable?
Sturdiness comes from using the right hardware and ensuring precise construction. For lifting or rotating parts, consider using heavy-duty hinges, gas struts, or specialized flip-top hardware kits. Always measure twice, cut once, and use strong joinery methods and appropriate fasteners to support the moving parts.
What kind of wood is best for flip furniture?
For durability and a good finish, hardwoods like oak, maple, or cherry are excellent choices, though they can be pricier. Plywood, especially cabinet-grade plywood, is a versatile and cost-effective option for many flip furniture pieces, particularly for larger panels and structural components. Softwoods like pine are good for simpler projects or painting.
What Exactly is Flip Furniture?
Flip furniture is all about smart design that maximizes utility. Think of it as furniture with a secret identity or a hidden talent! These pieces can transform their shape or function with a simple movement, like a flip, a slide, or a fold. It’s the perfect solution for smaller living spaces or for anyone who loves efficiency and clever design.
The core idea is to get more bang for your buck, space-wise. A small footprint furniture piece can suddenly offer the functionality of a much larger item. This makes these woodworking projects incredibly popular for apartments, studios, or even just for creating multi-functional zones in larger homes.
Why Build Flip Furniture: The Benefits
Building your own flip furniture offers a fantastic blend of practical problem-solving and creative woodworking. It’s a skill-builder that yields highly functional and attractive results. Let’s look at why these projects are so rewarding:
1. Master of Space-Saving
This is the number one reason people love flip furniture. In a world where living space is often at a premium, these pieces are gold. A coffee table that transforms into a desk, or a storage bench that neatly tucks away clutter, means you can enjoy more functionality without sacrificing precious square footage.
2. Dual (or Triple!) Purpose
Why have one piece of furniture when you can have two or three in one? Flip furniture excels at combining roles. Imagine a dining table that’s also a coffee table, or a nightstand that doubles as a workspace. This versatility makes your home more adaptable to different needs throughout the day.
3. Excellent Skill-Building Opportunity
These projects are perfect for intermediate woodworkers or ambitious beginners. They challenge you to think about mechanics, joinery, and hardware in new ways. Successfully building a functional flip mechanism is incredibly satisfying and boosts your confidence for more complex builds.
4. Unique and Custom Style
Forget mass-produced items. When you build flip furniture, you get to choose the wood, the finish, and the exact style. This allows you to create unique pieces that perfectly match your personal aesthetic and existing decor. You can also incorporate personalized touches that make the piece truly yours.
5. Potential for Profit (The “Flip” Aspect)
The term “flip furniture” often implies building with the intent to sell. Well-designed, expertly crafted flip furniture is highly desirable. It solves common living problems, making it a sought-after item for those looking for smart, stylish solutions. High-quality woodworking projects like these can command a good price.
Genius Flip Furniture Project Ideas for Beginners
Ready to get your hands dirty? Here are some fantastic flip furniture project ideas that are achievable for beginners and offer huge functional rewards. These projects will help you learn about hinges, pivots, and clever construction.
1. The Flip-Top Coffee Table to Desk
This is a classic for a reason! A coffee table that can be raised and locked into place to form a comfortable desk or dining surface is incredibly practical, especially for small spaces. It’s great for working from home, crafting, or enjoying a meal while watching TV.
How it Works: A hinged mechanism allows the top section to lift and pivot forward, revealing a larger work surface. Sometimes, there’s a secondary support that flips out.
Key Skills: Precise measuring, cutting, hinge installation, creating a stable lifting mechanism.
2. Storage Bench with Lift-Top
A storage bench is always useful, but one with a lift-top that reveals ample storage space inside is even better. This is perfect for entryways, living rooms, or bedrooms to stash blankets, toys, shoes, or seasonal items. It’s also a great place to sit!
How it Works: The entire top of the bench is hinged, allowing it to be lifted up for access to the storage compartment below. Gas struts or strong hinges are often used to hold the lid open safely and prevent it from slamming shut.
Key Skills: Building a sturdy box, accurate hinge placement, potentially installing gas struts for smooth operation. You can find some great resources on hinge types over at Rockler, a reputable supplier for woodworkers.
3. Wall-Mounted Folding Table
This is a fantastic space-saver. The table folds up flush against the wall when not in use, practically disappearing. It can be used as a small dining table, a potting bench, a craft station, or an extra prep surface in the kitchen.
How it Works: The table is attached to the wall with sturdy hinges. Cleverly designed legs or brackets fold out to support the table when it’s in use, and fold away neatly when it’s down.
Key Skills: Securely mounting to wall studs, hinge and bracket mechanics, ensuring stability for the folded-out configuration.
4. Sofa Table with Folding Leaf
This slim table sits behind a sofa but can extend to provide extra surface space for drinks, snacks, or lamps. It’s a great way to add functionality without taking up floor space in front of the furniture.
How it Works: One or two leaves fold down from the main surface. These leaves are supported by fold-out legs or a clever cleat system when extended.
Key Skills: Precise joinery, creating a stable folding support mechanism for the leaves.
5. Ladder Shelf that Converts to a Desk
This is a truly innovative space-saver, combining shelving with a workspace. When in the shelf configuration, it looks like a stylish ladder-style bookshelf. With a few adjustments, a section of the shelving converts into a functional desk.
How it Works: A hinged section of the shelving unit can be folded down, often with supporting legs that swing out, to create a desk surface. The remaining shelves provide storage above.
Key Skills: Strong joinery, pivot points, ensuring the locking mechanism for the desk surface is secure. The Popular Mechanics often has excellent guides on robust construction, principles that apply here too.
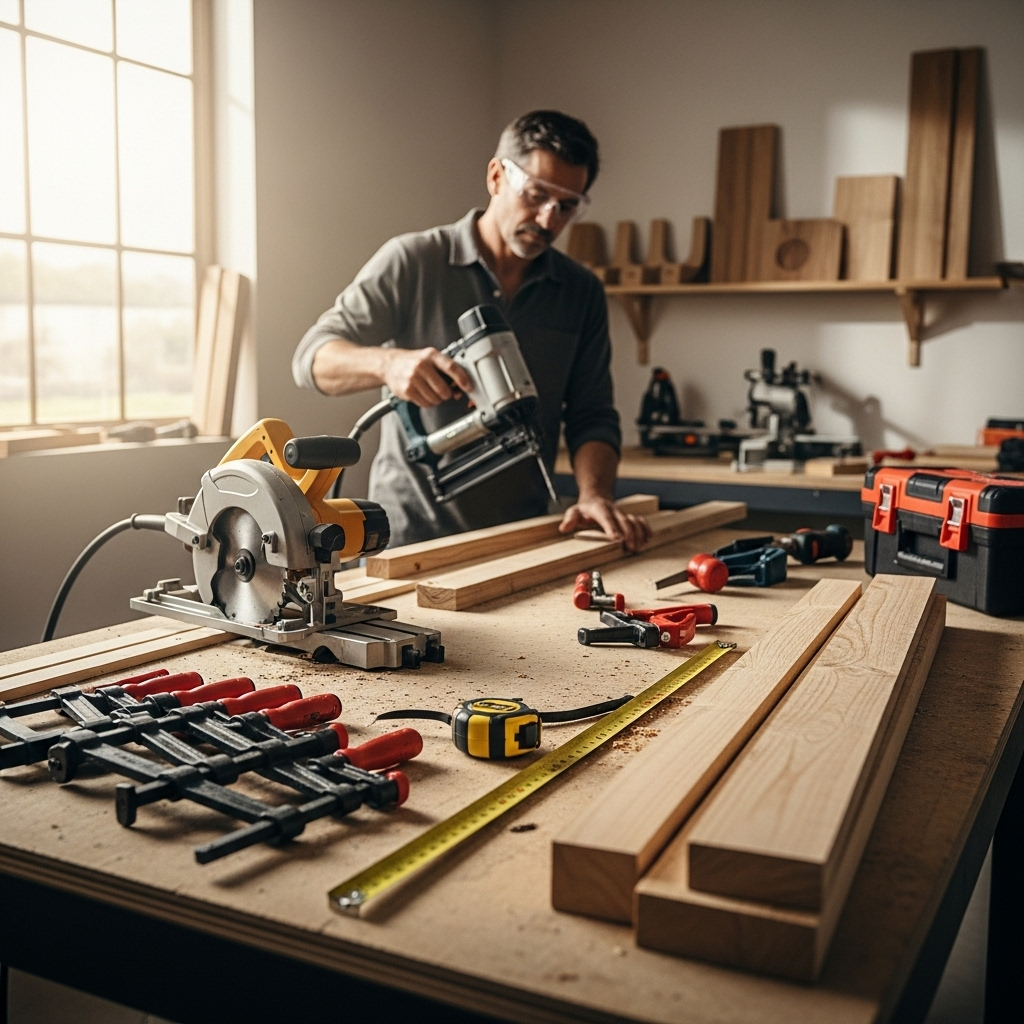
Essential Tools and Materials for Flip Furniture Projects
To tackle these ingenious woodworking projects, having the right tools and materials on hand will make your job much smoother and safer. Don’t worry if you don’t have everything; many can be borrowed or acquired gradually.
Safety Gear is Non-Negotiable
Before we even talk about tools, let’s cover safety. You absolutely need:
- Safety Glasses: Protect your eyes from dust and debris.
- Hearing Protection: Essential when using loud power tools.
- Dust Mask: Keep those lungs clear!
- Work Gloves: For grip and protection (but be careful they don’t get caught in tools).
Cutting Tools
Accurate cuts are the foundation of any good project. For flip furniture, you’ll likely use:
- Circular Saw: Great for breaking down sheet goods like plywood and making straight cuts.
- Miter Saw (Chop Saw): Perfect for precise angled cuts, especially for legs or framing.
- Jigsaw: Useful for curved cuts or cutting out shapes.
- Hand Saw: For smaller adjustments or when power isn’t practical.
Measuring and Marking Tools
Measure twice, cut once is more than just a saying; it’s a woodworking commandment!
- Tape Measure: A reliable 25-foot measure is standard.
- Pencil: For marking cut lines.
- Combination Square or Speed Square: For marking straight 90-degree and 45-degree lines.
- Level: Crucial for ensuring your furniture sits true and components are aligned.
Assembly Tools
Putting it all together smoothly:
- Drill/Driver: Your workhorse for drilling pilot holes and driving screws. Cordless ones are incredibly convenient.
- Nail Gun (Brad or Finish Nailer): Essential for quickly and cleanly attaching trim, panels, or securing joints before screwing. A good brad nailer can truly speed up your assembly and give a professional finish.
- Hammer: Still handy for occasional persuasion or tasks the nailer can’t handle.
- Clamps: Various sizes are invaluable for holding pieces together while glue dries or while you fasten them.
Sanding and Finishing Tools
To give your piece that professional, polished look:
- Orbital Sander: Makes sanding large surfaces much faster and smoother than by hand.
- Sanding Blocks: For detail work and along edges.
- Paintbrushes, Rollers, Rags: For applying stains, paints, or clear coats.
Hardware and Materials for Flip Mechanisms
This is where the “flip” happens! You’ll need:
- Hinges: Various types (butt hinges, continuous hinges, concealed hinges) depending on the design. Heavy-duty hinges are key for moving parts.
- Gas Struts/Lid Supports: Great for smoothly lifting and holding open lids like on storage benches.
- Specialty Hardware: Some specific flip mechanisms might require pivot hardware or specific brackets.
- Wood Screws and Wood Glue: For strong, durable joints. Always use glue along with screws or nails.
- Wood: Plywood (cabinet-grade is best for finished surfaces), solid pine, poplar, or hardwoods like oak. Your choice will depend on your budget and desired finish.
Planning Your Flip Furniture Project
Before you even pick up a saw, a little planning goes a long way in ensuring your flip furniture project is a success. This is where you avoid frustrating mistakes and ensure your build actually works as intended!
1. Choose Your Project and Design
Select a project that matches your current skill level and your needs. If you’re new to flip furniture, start simple, like a storage bench or a basic flip-top table. Research different designs online. Look for plans that include detailed diagrams, cut lists, and material suggestions. Resources like Woodsmith Plans offer professional drawings.
2. Gather Plans and Create a Cut List
Once you have a design, print out the plans. Make a detailed list of all the lumber, hardware, and fasteners you’ll need. Double-check the measurements in the plans against the materials you can easily find at your local lumber yard or hardware store.
3. Understand the Flip Mechanism
This is the heart of your flip furniture. Study how the hinges, pivots, or supports work. Visualize the movement. Does it need to lock in place? How much weight will it need to support? Ensure you have the correct hardware for the intended function and load.
4. Layout Your Cuts
Using your tape measure, pencil, and square, carefully mark all your cut lines on the lumber. For sheet goods like plywood, plan your cuts to minimize waste. This is where measuring twice really counts!
5. Prepare Your Workspace
Clear a large, flat area for cutting and assembly. Ensure good lighting and ventilation. Make sure all your tools are in good working order and easily accessible, along with your safety gear.
Step-by-Step Building Guide: Example Flip-Top Coffee Table to Desk
Let’s walk through building a common but brilliant piece: the flip-top coffee table that converts into a desk. This example uses basic joinery and hardware, making it accessible for beginners. Always refer to specific plans for exact dimensions and hardware types.
Step 1: Cut Your Wood
Using your chosen plans and safe operating procedures for your saws, cut all the pieces for the table base and the two halves of the table/desk top. Ensure accuracy, as this directly impacts how well the mechanism will function.
A common setup might include:
- A base frame (e.g., two long sides, two short sides).
- Support pieces for the top halves.
- The two halves of your top surface (one will be the fixed bottom part, the other will be the lifting top).
Step 2: Assemble the Base
Construct the base frame for your table. This usually involves joining four boards to form a rectangle or square. Use wood glue and screws or nails. Ensure the frame is square before the glue sets. This is a great place to practice your joinery, perhaps using pocket holes for extra strength and a clean look.
Step 3: Prepare the Top Halves
Take your two top pieces. One will remain stationary, acting as the lower portion of the desk. The other will be the “flip-up” portion. Depending on your design, you might need to add internal framing or support structures to these pieces.
Step 4: Install the Hinges
This is a critical step. Attach robust hinges where the two top halves will meet. Ensure the hinges are set perfectly flush with the surface so the top can flip open smoothly. Measure and mark your hinge placement precisely. Use the correct screws for your hinge type and wood.
Step 5: Create the Lifting Mechanism
There are several ways to achieve the lift. A simple method involves adding support legs or wooden braces that swing out from the underside of the flipping top, providing stability when it’s in the desk position. For a more automated lift, you might use gas struts, which require careful placement and drilling into both the lifting top and the base.
Tip: If using gas struts, remember they need to be able to compress when the top is closed and extend to support it when open. The mounting points are crucial for proper function. You can find guides on strut installation on hardware supplier sites like Hafele.
Step 6: Attach the Top to the Base
Now, you’ll connect the assembled top sections to your base. This might involve attaching the stationary half of the top directly to the base frame, or it might involve attaching reinforcing cleats to the underside of the stationary top that then fasten to the base. Again, ensure everything is square and sits level.
Step 7: Test the Mechanism
Carefully open and close the top. Does it move smoothly? Does it lock into the desk position securely? Does it close evenly? Make any necessary adjustments to the hinges or supports. This is your chance to fine-tune everything before moving to finishing.
Step 8: Sand and Finish
Once you’re happy with the mechanism, sand all surfaces smooth, starting with a coarser grit and moving to finer grits. Fill any holes or gaps with wood filler. Apply your chosen finish – stain, paint, or a clear protective coat. This step truly elevates your woodworking project from a raw build to a finished piece of furniture.
Tips for Success and Troubleshooting
Even with the best plans, woodworking can present challenges. Here are some tips to help you navigate them and ensure your flip furniture projects turn out fantastic:
Measure Accurately
We can’t stress this enough. Every measurement matters, especially for moving parts. Use a sharp pencil and a reliable tape measure. Mark your lines clearly and precisely.
Use Pilot Holes
Always drill pilot holes before driving screws, especially in hardwood or near the edges of boards. This prevents the wood from splitting and makes driving screws much easier.
Quality Hardware Matters
Don’t skimp on hinges, gas struts, or other moving parts. Investing in good quality hardware will ensure your flip furniture functions smoothly and lasts for years. Cheap hardware can lead to wobbly mechanisms and frustration.
Check for Square and Level Regularly
As you build, use your square and level frequently. An out-of-square base or a non-level top can throw off the entire mechanism. Take the time to adjust pieces before permanently fastening them.
Trial and Error with Mechanisms
If your flip mechanism isn’t working perfectly, don’t get discouraged! Disassemble and re-measure, or consult online tutorials specific to your hardware. Sometimes, a slight adjustment in hinge placement or support angle can make all the difference. The U.S. Consumer Product Safety Commission (CPSC) has some excellent guidelines on furniture stability and safety, which can be informative for ensuring your mechanisms are safe and well-integrated: CPSC Furniture Safety.
Test the Weight Capacity
If your piece is meant to hold weight (like a desk surface or a bench seat), test it with a reasonable load before relying on it. This applies especially to mechanisms like folding desk supports.
Don’t Rush the Finish
Sanding and finishing are what make your project look professional. Take your time with sanding, and apply finishes in thin, even coats according to the manufacturer’s instructions. Good preparation leads to a beautiful and durable finish.
Consider Locking Mechanisms
For pieces that lift or pivot, especially tables that become desks, a reliable locking mechanism is essential for safety and usability. This could be a simple wooden cleat that drops into place, a bolt, or a more sophisticated bracket system.
Conclusion
There you have it! Flip furniture projects are an exciting and practical avenue for any woodworker, especially those looking to build functional, space-saving, and stylish pieces. From the ultimate coffee table-to-desk to versatile storage benches, these designs offer incredible value and are incredibly rewarding to build.
Remember to prioritize safety, plan your cuts meticulously, and choose quality hardware for your mechanisms. Start with a simpler project if you’re new to this type of build, and don’t be afraid to learn as you go. Each project you complete will build your confidence and skill, opening the door to even more ambitious and ingenious furniture designs.
So, gather your tools, grab some lumber, and get ready to transform ordinary furniture into extraordinary, multi-functional pieces. Happy building from Nailerguy!