Imagine walking on a beautiful wood floor. The warmth and charm it brings to a room can make anyone feel at home. But what happens when you spot little cracks or holes in that lovely wood? It can be a real downer, right? This is where wood flooring wood filler comes to the rescue!
Wood filler is like magic for your floors. It helps fix those tiny issues and keeps your floors looking new. Did you know that with the right wood filler, you can save your favorite hardwood from serious damage? It’s true! Using wood filler is an easy way to keep your floors shining.
In this article, we will explore how wood flooring wood filler works. We’ll also share tips on choosing the best one for your needs. So, whether you’re fixing an old floor or keeping a new one looking fresh, you’re in the right place. Let’s dive in and discover the wonders of wood filler together!
Table of Contents
Wood Flooring Wood Filler: Essential Guide To Perfecting Your Floors

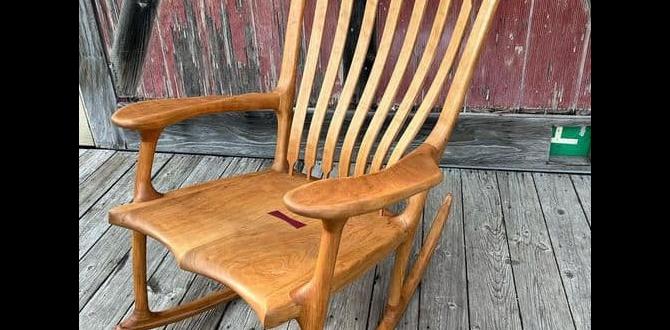
Wood Flooring Wood Filler
Wood flooring wood filler is essential for fixing small gaps and cracks. It helps your floors look smooth and well-kept. Did you know that using a good wood filler can extend your floor’s life? The right filler can blend with your wood’s color, making repairs nearly invisible. Choosing a high-quality product can save time and money in the long run. Ready to bring back the beauty of your floors?Understanding Wood Flooring Wood Filler
Definition and purpose of wood filler in flooring applications. Types of wood fillers available on the market.Wood filler is a special substance used to fix small gaps and holes in wood floors. Think of it as a superhero that helps your floors look smooth and new! It comes in two main types: water-based and solvent-based. Water-based fillers are easy to clean and dry fast, while solvent-based ones are tough and great for larger repairs. So whether you’re a DIY wizard or just want to make your floor shine, wood filler has your back!
| Type | Features |
|---|---|
| Water-based | Easy to clean and quick drying |
| Solvent-based | Durable and ideal for bigger repairs |
When to Use Wood Filler on Wood Flooring
Identifying common issues that require wood filler (cracks, gaps, holes). Signs that indicate wood filler application is necessary.Wood filler fixes small problems in wood flooring. You might need it for common issues like:
- Cracks: Gaps in the wood can form due to age.
- Holes: Missing pieces can happen from wear and tear.
- Gaps: Spaces between boards can create a bumpy walk.
If you see these signs, it’s time for wood filler! It helps make your floor look smooth and new again.
How do I know when to use wood filler?
Look for these signs:
- Visible gaps or cracks between the wood.
- Holes from nails or damage.
- Loose boards that wiggle underfoot.
Choosing the Right Wood Filler
Factors to consider: wood type, color matching, and finish compatibility. Comparison of waterbased vs. solventbased fillers.Choosing the right wood filler is important for getting the best look for your wood flooring. First, consider the wood type. Different woods absorb filler differently. Next, think about color matching. You want the filler to blend with your wood. Lastly, look at finish compatibility. Some fillers work better with certain finishes.
When choosing between types of fillers, you may wonder about water-based and solvent-based options. Water-based fillers dry quickly, are easy to clean, and create less odor. However, solvent-based fillers may offer stronger bonding and better use in high-moisture areas.
- Water-based fillers: Fast drying, low odor
- Solvent-based fillers: Stronger bond, moisture-resistant
What are the benefits of water-based vs. solvent-based fillers?
Water-based fillers are user-friendly and eco-friendly. Solvent-based fillers are tough and resistant, making them suitable for hard-wearing surfaces.
Preparing Your Wood Flooring for Filler Application
Steps to properly clean and sand the flooring. Importance of ensuring moisture levels are appropriate.Before applying wood filler, it’s vital to tidy up your wood flooring. Start by sweeping and vacuuming to remove dirt and dust. Next, grab some sandpaper to smooth out any rough areas. Sanding is like giving your floor a little spa day! Make sure you check the moisture levels too; a floor that’s too wet won’t hold the filler well. Aim for a moisture level of around 6-8%. Here’s a quick cheat sheet:
| Task | Details |
|---|---|
| Clean | Sweep and vacuum all dirt |
| Sanding | Use sandpaper for smoothness |
| Moisture Check | Ensure levels are at 6-8% |
These steps help the filler stick better, making your floor look fantastic, and preventing any wood drama later on!
Application Techniques for Wood Filler
Tools and materials needed for application. Stepbystep instructions for a seamless application process.To apply wood filler efficiently, you need a few tools and materials. Gather these essentials: a putty knife, wood filler, sandpaper, and a damp cloth. Follow these steps for a smooth finish:
- Clean the area where you will apply the filler.
- Use the putty knife to scoop out the filler.
- Press the filler into the gaps firmly.
- Wipe away any excess with a damp cloth.
- Once dry, sand the filled area until smooth.
By following these steps, you’ll achieve a seamless look for your wood floors.
What tools do I need for wood filler application?
The main tools needed are a putty knife, wood filler, sandpaper, and a damp cloth.
Finishing Touches: Staining and Sealing
How to select the right stain to match your wood flooring. Tips for sealing the filled areas for longevity.Choosing the right stain is key to enhancing your wood flooring. Look for stains that compliment your wood’s natural color. Test samples on small areas before committing. For sealing filled areas, it’s important to pick a suitable sealant. This protects against wear and tear.
- Select a stain that matches the grain of your wood.
- Test several shades to find the perfect match.
- Choose a sealant that is durable and water-resistant.
How do I pick the best stain for my wood floor?
Test different shades on your wood to see how they look. Consider your room’s style as well.
Tips for sealing filled areas?
Use a high-quality sealant to make the floor last longer. Apply evenly to avoid bubbles.
Maintenance of Wood Floors with Filler
Best practices for cleaning and caring for filled wood floors. Signs of wear that may require reapplication of wood filler.Keeping wood floors looking great is easy with a bit of care. Regular cleaning helps maintain the filled areas. Use a soft broom or a damp mop for the best results. Avoid harsh chemicals that can damage the wood. Check for signs of wear like cracks or gaps. If you notice these issues, it might be time to reapply wood filler. Protect your floors, and they will shine for years!
How can I maintain filled wood floors?
To maintain filled wood floors, clean regularly and check for wear.
Best Practices for Care:
- Use a soft broom for dust.
- Mop with a damp cloth.
- Avoid strong cleaners.
- Check for cracks or gaps.
Common Mistakes to Avoid When Using Wood Filler
Missteps that can lead to ineffective repairs. Tips for troubleshooting and resolving issues during application.Using wood filler can be tricky, especially if you don’t keep a few things in mind. One common mistake is applying too much filler at once. It can shrink as it dries, leaving gaps. Another issue is not sanding properly before applying. If you skip this step, your repair might stand out like a sore thumb. Always remember to smooth it out and allow it to dry fully. Here’s a quick table to help:
| Mistake | Tip |
|---|---|
| Applying too much filler | Use thin layers and build up |
| Skipping sandpaper | Sand before applying filler |
| Not waiting to dry | Patience is key! |
Following these tips will save you from repairs that flop. And remember, even the best wood filler needs a little TLC!
Frequently Asked Questions About Wood Flooring Wood Filler
Addressing common queries related to usage, effectiveness, and durability. Expert tips and insights for maximizing results with wood filler.Many folks wonder about using wood filler for their floors. First, they ask if it’s effective. The answer? Oh yes! Wood filler can make those pesky gaps disappear, helping to keep your floor looking great. Durability is another common question. Well, with proper care, it can last for years. To maximize results, sand the area down before applying the filler. Here’s a quick tip: if you’re feeling artsy, you can even match the color of your wood! Remember, a little humor goes a long way. Just like that time I tried to fill a hole with chocolate… not a great idea!
| Question | Answer |
|---|---|
| Is wood filler strong? | Yes, it’s tough when applied correctly! |
| Can I paint over it? | Absolutely! It takes paint like a champ! |
| Does it smell? | Some do, so ventilate! |
Conclusion
In conclusion, wood flooring and wood filler work together to create a smooth surface. Wood filler helps fix dents and cracks, making your floors look new. When choosing filler, match the wood color for the best results. Now that you know, consider trying it out! For more tips, keep reading and enhance your flooring skills.FAQs
What Types Of Wood Fillers Are Best Suited For Filling Gaps In Hardwood Flooring?The best types of wood fillers for hardwood floors are latex-based and epoxy fillers. Latex fillers are easy to use and clean up. Epoxy fillers are strong and great for big gaps. Make sure to pick a color that matches your floor. Always read the instructions before you start!
How Do I Choose The Right Color Of Wood Filler To Match My Wood Flooring?To choose the right color of wood filler, first look at your wood flooring closely. You can pick a color that is very similar to your wood. Sometimes, it helps to hold the filler next to the wood to see if they match. If you’re not sure, select a light color; you can always darken it later. Don’t forget that wood can change color with light, so check in different lights too!
What Is The Best Application Method For Using Wood Filler On Hardwood Floors?The best way to use wood filler on hardwood floors is to clean the area first. Then, take a putty knife and scoop some wood filler. Press the filler into any cracks or holes, making sure it fills them completely. After it dries, you can sand it smooth and then finish with a coat of wood stain or sealant. This helps make your floor look nice again!
How Can I Properly Prepare The Surface Before Applying Wood Filler To Ensure A Smooth Finish?To get ready for wood filler, start by cleaning the surface well. Use a brush or cloth to remove dust and dirt. If there are any old pieces of wood or paint, carefully scrape them off. You can lightly sand the area to make it smooth. After that, wipe away any dust before adding the wood filler.
Are There Any Specific Maintenance Tips To Follow After Using Wood Filler On Wood Flooring?After using wood filler on your floor, wait for it to dry completely. This usually takes a few hours. Once it’s dry, you can gently sand it to make it smooth. Then, clean the area with a damp cloth. To keep your floor looking nice, avoid heavy furniture on filled spots for a few days.