Have you ever walked into a room and noticed the beautiful shine of wood floors? It’s hard not to admire their warm, natural look. But did you know that wood flooring sanding can make a big difference? Over time, floors can get scratched and dull. Sanding them can bring back their fresh, original beauty.
Imagine playing on a smooth, shiny floor. It feels nice, right? Sanding helps to remove all those hidden scratches. It also prepares the wood for a new finish. This process might sound tricky, but it’s like giving your floors a spa day!
Here’s a fun fact: Many people don’t realize how often floors should be sanded. Experts recommend every 7 to 10 years. But it depends on how much you use them. More kids and pets means more wear and tear!
Ready to learn more about the magic of wood flooring sanding? Let’s dive in and discover how to keep those floors looking stunning!
Table of Contents
Wood Flooring Sanding: Transform Your Home’S Aesthetic

Wood Flooring Sanding
Sanding wood flooring can breathe new life into your home. It helps remove scratches and imperfections. Did you know a simple sanding can bring out the rich colors of your wood? Sanding prepares the surface for refinishing. This means your floors can shine like new! It’s important to choose the right grit paper. Each stage of sanding makes your floor smoother. With the right skills, you can transform dull floors into stunning highlights of your space.
Understanding Wood Flooring Sanding
Definition and purpose of sanding wood floors. Importance of sanding in the refinishing process.
Sanding wood floors means smoothing the surface of the wood. It helps to remove scratches and old finishes. This process is important for making floors look new again. Sanding makes it easier to apply fresh stain or sealant. Without sanding, the new finish may not stick well. A good sanding job leads to better results and a beautiful floor that lasts longer.
What is the purpose of wood flooring sanding?
The purpose of sanding wood flooring is to prepare the surface for refinishing. This ensures a smooth, even finish. Proper sanding helps the new stain or sealant look great and last longer.
- Removes imperfections: It clears away scratches and dents.
- Prepares for stains: It helps stains stick better.
- Creates a uniform surface: Ensures the floor looks even.
Many experts say that proper sanding can improve the look and feel of your floors. So, taking the time to sand can be very rewarding!
Tools and Equipment Needed for Sanding
List of essential tools (sanders, sandpaper, etc.). Safety equipment and precautions to consider.
Sanding wood flooring is fun but needing the right tools is a must! Grab a good sander; a drum or orbital sander works great. Don’t forget sandpaper—buy various grits for a smooth finish. You’ll also want a vacuum for all that dust that will *magically* appear. Safety comes first! Wear goggles, a mask, and ear protection. You wouldn’t want to end up with a surprise dust storm in your face!
| Tool/Equipment | Use |
|---|---|
| Sander | For smoothing out the floor. |
| Sandpaper | Different grits for various finishing. |
| Vacuum | To clean up the dust after sanding. |
| Safety Goggles | Protect your eyes from dust. |
| Mask | Keep dust out of your lungs. |
| Ear Protection | Guard your ears from loud noises. |
Preparing Your Space for Sanding
Steps to take before starting the sanding process. Tips for protecting surrounding areas and furniture.
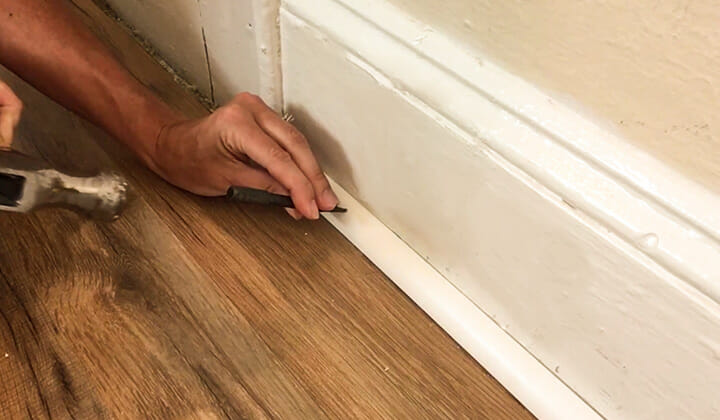
Before you start sanding, it’s essential to get your space ready. First, remove all furniture and items from the room. This keeps them safe and gives you clear space to work. Next, cover any remaining items with plastic sheets. This protects them from dust and debris. Finally, make sure to seal off doors and vents with tape to prevent dust from spreading throughout your home.
- Clear the room completely.
- Cover things you can’t move.
- Seal doors and vents tightly.
What should I do with furniture?
Remove all furniture from the room to avoid damage and dust buildup. You can move smaller items to other rooms or the garage. Protect large pieces with plastic sheets if they can’t be moved.
Step-by-Step Sanding Process
Detailed guide on how to sand wood flooring. Tips for achieving an even finish.
Sanding wood flooring is fun and rewarding! First, clear the area of furniture and dirt. Next, gather your tools: a drum sander, vacuum, and sandpaper in different grits. Start with a coarse grit for rough spots, then move to finer grits for a smooth finish. Follow these steps for the best results:
- Choose the right grit: Start with 36, then use 60, and finish with 100.
- Sand in the direction of the wood grain.
- Vacuum between grits to remove dust.
Taking your time helps create a beautiful look. Aim for an even finish. Patience truly pays off here!
How do you ensure an even finish when sanding?
To achieve an even finish, pay attention to lighting and check for inconsistencies. Use the right technique and overlap your passes with the sander to help blend different areas smoothly.
Common Mistakes to Avoid
List of frequent errors during sanding and how to prevent them. How to correct mistakes if they occur.
Many people make simple mistakes while sanding wood floors. One common error is using the wrong grit sandpaper. This can leave scratch marks and uneven surfaces. Another mistake? Not sanding with the wood grain, which is like running a marathon backwards—hard and messy! To fix these issues, go back and sand with the right paper. Below is a table of common errors and how to avoid them:
| Error | How to Avoid |
|---|---|
| Wrong grit sandpaper | Choose the proper grit for each sanding stage. |
| Sanding against the grain | Sand with the grain for a smooth finish. |
| Skipping grits | Use all grit levels for best results. |
With these tips, your wood floors will shine like stars in a clear night sky. Remember, mistakes happen, but fixing them can turn a “oops” into “wow!”
Maintenance Tips for Sanded Wood Floors
Best practices for maintaining the look and longevity of sanded floors. Recommendations for cleaning and upkeep.
To keep your sanded wood floors looking their best, start with a good cleaning routine. Use a soft broom or a vacuum to sweep up dust and dirt. Then, damp mop with a gentle cleaner designed for wood floors. Remember, water is your floor’s enemy—too much can cause warping! A good rule of thumb is to avoid wearing shoes indoors. Your floors will thank you, and so will your toes!
| Cleaning Tip | Frequency |
|---|---|
| Dusting/Sweeping | Daily |
| Damp Mopping | Weekly |
| Extra Shine | Monthly |
Finally, don’t forget to apply a wood floor polish occasionally. It keeps the surface shiny and protected. With these simple steps, your floors can stay beautiful and endure for years. Who knew wood floors could be high maintenance yet this much fun?
When to Hire a Professional vs. DIY Sanding
Factors to consider when deciding to sand yourself or hire a professional. Cost comparison and potential outcomes of each option.
Deciding whether to sand your wood flooring yourself or call in a pro can feel like choosing between pizza or tacos—both tasty, but one may leave you *screaming in frustration*! Start by **comparing costs**. DIY might sound cheaper, but consider tools you’ll need, which can cost a pretty penny. On the flip side, a pro has the skills to avoid mistakes. Also, think about the outcome; do you want a flawless finish or are you okay with a couple of “unique” spots? Skill level and time are also factors. So, really weigh your options to avoid a sanding disaster!
| Option | Cost | Outcome | Time |
|---|---|---|---|
| DIY | Low initial cost, but tool expenses add up | May look good, but could have flaws | Longer, unless you’re super fast! |
| Professional | Higher upfront cost | Usually a flawless finish | Faster, they know their stuff! |
Conclusion
In conclusion, wood flooring sanding helps restore your floors’ beauty. It removes scratches and stains, making your wood shine again. You can improve your home’s value with this simple process. If you’re ready to sand, gather your tools and start small. For more tips, check online resources or ask a professional. Enjoy your newly refreshed floors!
FAQs
What Tools And Equipment Are Necessary For Sanding Wood Flooring Effectively?
You need a few tools to sand wood flooring well. First, you’ll need a floor sander, which is a big machine that smooths the wood. You should also get sandpaper in different roughness levels, like coarse and fine. Don’t forget a vacuum to clean up the dust and safety goggles to protect your eyes. With these tools, you can make your wood floors nice and smooth!
How Do You Determine The Appropriate Grit Sandpaper To Use For Different Stages Of Sanding Wood Floors?
To choose the right sandpaper grit, start with a rougher grit like 36 or 40 for the first sanding. This helps remove old finishes and big scratches. Then, use a medium grit like 60 or 80 for the next round to smooth out the wood. Finally, finish with a fine grit like 120 or 150 to make the floor nice and smooth. This way, you get a clean and even surface!
What Are The Key Steps In Preparing A Wood Floor For Sanding, And How Can You Ensure The Best Results?
To prepare a wood floor for sanding, start by cleaning the floor. Remove dust and dirt using a broom and vacuum. Next, check for nails or screws sticking up and push them down or remove them. Then, fix any holes or cracks with wood filler. Finally, make sure the room is well-lit to see what you’re doing. This helps you get the best results when you sand your floor!
How Can You Address And Repair Any Damaged Areas In The Wood Flooring Before Sanding?
To fix damaged areas in your wood floor, start by finding the bad spots. You can fill small cracks with wood filler. For bigger holes, you might need to replace parts of the wood. After fixing, let everything dry completely before we sand the floor. Then, your floor will be ready for a smooth finish!
What Safety Precautions Should Be Taken When Sanding Wood Floors To Minimize Health Risks?
When sanding wood floors, we should wear a mask to avoid breathing in dust. Safety glasses protect our eyes from flying particles. Using ear protection helps keep our ears safe from loud noise. It’s also a good idea to keep the room well-ventilated by opening windows or using fans. Always be careful and follow all safety rules!