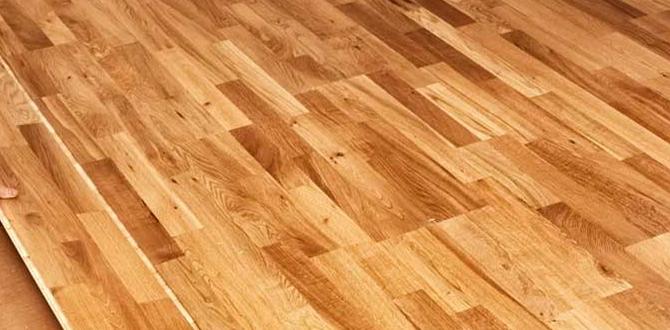
Have you ever walked into a room and felt instantly cozy? Wood flooring can do that. It brings warmth and beauty into any space. But have you thought about how wood flooring installation works? Many people dream of having beautiful wood floors, yet they worry about the installation process.
Imagine transforming a dull room into a stunning area with just a few planks of wood. Sounds fun, right? Installing wood flooring can seem tricky, but it’s easier than you may think. You don’t need to be a professional to achieve this look. In fact, many homeowners take on this project themselves. With the right tools and steps, you can have a beautiful wood floor in no time.
Did you know that wood floors can increase the value of your home? They do much more than just look pretty. Let’s explore the world of wood flooring installation together. You’ll learn everything you need to know to get started on your very own project.
Table of Contents
Wood Flooring Installation: Essential Tips For Success

Wood Flooring Installation
Thinking about wood flooring installation? It’s a great way to upgrade your home. First, choose the right type of wood, like oak or maple. Next, prepare your space by cleaning and leveling the floor. Did you know that proper acclimation of wood can prevent warping? Once everything is ready, you can either glue or nail down the planks. With a little patience and the right tools, you can achieve a beautiful look that will last for years!Understanding Different Types of Wood Flooring
Solid hardwood. Engineered wood.Choosing the right type of wood flooring can feel like picking your favorite ice cream flavor—so many options! Let’s look at two main types: solid hardwood and engineered wood. Solid hardwood is made from a single piece of wood, making it strong and durable. It can last for decades if cared for well. On the other hand, engineered wood is like a superhero. It has a thin layer of real wood on top and layers of plywood beneath. This design makes it more stable in changing climates. Both types have their perks, so consider where you live. Just remember, while solid hardwood might be the golden retriever of flooring, engineered wood is that clever cat that adapts to any situation!
| Type of Flooring | Durability | Cost |
|---|---|---|
| Solid Hardwood | Very High | $$$ |
| Engineered Wood | High | $$ |
Preparing for Wood Flooring Installation
Measuring the area. Evaluating the subfloor.Before you start with wood flooring installation, it’s essential to prepare properly. First, measure the area where you will install the floor. This helps to know how much material you need. Use a tape measure and write down your measurements. Next, evaluate the subfloor. Check if it’s clean, dry, and sturdy. A strong subfloor will support your new floor better. If you find any damage, fix it before installing your wood floor.
Why is measuring and evaluating important?
Measuring correctly ensures you buy the right amount of flooring. It saves time and money. Checking the subfloor helps prevent problems later on, keeping your floor safe and long-lasting.
Key Points:
- Measure length and width accurately.
- Look for signs of damage on the subfloor.
- Fix any issues before installation.
Required Tools and Materials
List of essential tools. Types of flooring materials needed.To start a wood flooring installation, you need the right tools and materials. Here’s what you’ll require:
- Measuring tape to get accurate sizes.
- Chalk line for straight guides.
- Flooring nailer to secure the planks.
- Pull bar for tight fits.
- Saw for cutting pieces to size.
For materials, you’ll need:
- Wood flooring planks in your chosen style.
- Underlayment for added comfort and soundproofing.
- Adhesive, if required by your flooring type.
What do I need to install wood flooring?
You will need tools like a measuring tape, saw, and flooring nailer. Wood flooring planks are essential too. Don’t forget an underlayment for comfort!
Step-by-Step Installation Process
Acclimating wood flooring. Installing underlayment.To start, prepare your wood flooring. First, let the wood panels sit in the room for 48-72 hours. This helps them get used to the space’s temperature and humidity. Acclimating is vital for a good fit. Next, it’s time for underlayment. This layer goes between the floor and the ground. It provides cushioning and sound control. It also helps with moisture. Lay the underlayment evenly on the floor. Make sure to overlap the seams. Your flooring will feel comfortable and last longer!
Why is acclimating wood flooring important?
Acclimating wood flooring prevents future problems. When wood adjusts to a room, it won’t swell or shrink later. This makes your floor look nice and last longer.
What does underlayment do?
- Provides sound reduction
- Offers cushioning
- Helps with moisture control
Techniques for Installing Wood Flooring
Naildown installation. Gluedown installation. Floating installation.Different methods make wood flooring installation easier. Each technique suits various floor types and personal styles. Here are the main methods:
- Naildown Installation: This method involves nailing the planks to a wooden subfloor. It creates a strong bond and is perfect for thicker boards.
- Gluedown Installation: The planks are glued directly to the subfloor. It works well for concrete surfaces and prevents movement.
- Floating Installation: Here, the planks “float” on the surface, linking together without nails or glue. This method is fast and easy, perfect for DIY projects.
What is naildown installation?
Naildown installation is a way to secure wood flooring by nailing it to the subfloor. This technique is great for solid wood planks, as it offers durability and stability.
What is gluedown installation?
Gluedown installation attaches wood flooring directly to the subfloor using adhesive. It’s ideal for floor types that need a firm foundation, like engineered wood on concrete.
What is floating installation?
Floating installation allows planks to connect without being attached to the floor. This makes it easy to install and remove, perfect for those who like change.
Dealing with Common Installation Challenges
Uneven subfloor issues. Dealing with moisture.Installing wood flooring can be a bit tricky. First, let’s talk about uneven subfloors. If your floor feels like a rollercoaster ride, you might need to level it. Use simple self-leveling compounds, or your wooden friends might feel wobbly! Now, the moisture monster can sneak in too. Always check for dampness before installation. A dry floor is a happy floor! Remember, wood hates moisture like cats hate water.
| Challenge | Solution |
|---|---|
| Uneven Subfloor | Use self-leveling compounds to smooth it out. |
| Moisture | Check for dryness before installation. |
Post-Installation Care and Maintenance
Cleaning and upkeep. Managing humidity and temperature.To keep your wood floors looking great, cleaning and maintenance are key. Regularly sweep or vacuum to remove dirt and dust. Use a damp mop with a gentle cleaner. Avoid harsh chemicals. Manage humidity and temperature. Too much moisture can warp wood. A humidifier or dehumidifier can help. Keep your home around 60-80°F and 30-50% humidity for best results. Taking care of your floors makes them last longer!
How do you clean wood flooring?
To clean wood flooring, regularly sweep or vacuum to catch dirt. Use a damp mop with a mild cleaner for deeper cleaning.
Quick Cleaning Tips:
- Use a soft brush or vacuum without a beater bar.
- Never soak the floor with water.
- Wipe spills immediately to avoid damage.
What humidity is best for wood floors?
The best humidity for wood floors is 30-50%. This level prevents warping and keeps wood strong.
FAQs About Wood Flooring Installation
Common questions and answers. Tips for troubleshooting problems.Wondering about wood flooring installation? You’re not alone! Common questions pop up, like how long it takes? Typically, it can take from a few hours to a whole day, depending on your room size. “Do I need to acclimate the wood?” Yes, let it sit for a few days to avoid warps. If squeaks happen, try adding some screws. Finally, keep it clean! A little sweep goes a long way.
| Question | Answer |
|---|---|
| How long does installation take? | It can take several hours to a whole day! |
| Should I acclimate my wood flooring? | Yes, it helps prevent problems. |
| What if my floor squeaks? | Add some screws to fix that! |
Conclusion
In conclusion, wood flooring installation enhances your home’s beauty and value. Choose the right wood type for your space. Preparing the area is key to a successful install. Don’t forget proper care and maintenance to keep it looking great. If you want to learn more, explore different styles and techniques online. Let’s make your space amazing!FAQs
What Are The Essential Tools Required For Installing Wood Flooring?To install wood flooring, you need a few important tools. First, you need a measuring tape to measure the space. A saw is also essential to cut the wood pieces to the right size. You’ll need a hammer or a flooring nailer to secure the wood. Finally, a level helps make sure the floor is even.
How Do You Prepare A Subfloor Before Installing Wood Flooring?To prepare a subfloor, you first clean it well. This means sweeping away dust and dirt. Next, check for any bumps or holes and fix them. You can use a leveling compound for any uneven parts. Finally, make sure the subfloor is dry and ready to hold your new wood flooring.
What Are The Differences Between Solid And Engineered Wood Flooring In Terms Of Installation?When we install solid wood flooring, we usually nail or glue the pieces to the ground. This makes it very strong but can take a long time. With engineered wood flooring, we can either glue it down or use a click-together method, which is quicker. Engineered wood is also thinner, so it can be easier to install in tight spaces. Overall, engineered wood might be better for fast and easy installation.
How Long Does It Typically Take To Install Wood Flooring In An Average-Sized Room?Installing wood flooring in an average-sized room usually takes one to three days. It can depend on the room’s size and shape. You might need extra time if you have to move furniture or prepare the floor. Once we start, it can go quickly!
What Are Some Common Mistakes To Avoid During Wood Flooring Installation?When installing wood flooring, avoid these mistakes. First, don’t forget to let the wood sit in the room for a few days. This helps it adjust to the room’s temperature and humidity. Second, make sure the floor is clean and level before starting. If it’s not, the wood may not fit right. Finally, don’t rush your work. Take your time to measure and cut carefully.
{“@context”:”https://schema.org”,”@type”: “FAQPage”,”mainEntity”:[{“@type”: “Question”,”name”: “What Are The Essential Tools Required For Installing Wood Flooring? “,”acceptedAnswer”: {“@type”: “Answer”,”text”: “To install wood flooring, you need a few important tools. First, you need a measuring tape to measure the space. A saw is also essential to cut the wood pieces to the right size. You’ll need a hammer or a flooring nailer to secure the wood. Finally, a level helps make sure the floor is even.”}},{“@type”: “Question”,”name”: “How Do You Prepare A Subfloor Before Installing Wood Flooring? “,”acceptedAnswer”: {“@type”: “Answer”,”text”: “To prepare a subfloor, you first clean it well. This means sweeping away dust and dirt. Next, check for any bumps or holes and fix them. You can use a leveling compound for any uneven parts. Finally, make sure the subfloor is dry and ready to hold your new wood flooring.”}},{“@type”: “Question”,”name”: “What Are The Differences Between Solid And Engineered Wood Flooring In Terms Of Installation? “,”acceptedAnswer”: {“@type”: “Answer”,”text”: “When we install solid wood flooring, we usually nail or glue the pieces to the ground. This makes it very strong but can take a long time. With engineered wood flooring, we can either glue it down or use a click-together method, which is quicker. Engineered wood is also thinner, so it can be easier to install in tight spaces. Overall, engineered wood might be better for fast and easy installation.”}},{“@type”: “Question”,”name”: “How Long Does It Typically Take To Install Wood Flooring In An Average-Sized Room? “,”acceptedAnswer”: {“@type”: “Answer”,”text”: “Installing wood flooring in an average-sized room usually takes one to three days. It can depend on the room’s size and shape. You might need extra time if you have to move furniture or prepare the floor. Once we start, it can go quickly!”}},{“@type”: “Question”,”name”: “What Are Some Common Mistakes To Avoid During Wood Flooring Installation? “,”acceptedAnswer”: {“@type”: “Answer”,”text”: “When installing wood flooring, avoid these mistakes. First, don’t forget to let the wood sit in the room for a few days. This helps it adjust to the room’s temperature and humidity. Second, make sure the floor is clean and level before starting. If it’s not, the wood may not fit right. Finally, don’t rush your work. Take your time to measure and cut carefully.”}}]}


