Have you ever tried putting up a baseboard only to find it loose? It’s like trying to keep a Lego tower stable with wrong-sized blocks. The key to a sturdy baseboard lies in choosing the right finishing nail. But what size finishing nail for baseboard works best?
Imagine a scene where your dad needs help fixing the baseboards at home. He pulls out a pack of nails, but they don’t quite do the trick. Have you seen the baseboard pulling away after it’s been nailed? This could happen if the nails are the wrong size. It’s like using a tiny spoon to eat a big bowl of soup. Not fun, right?
Choosing the right nail size can be puzzling, yet knowing what you need makes life easier. Did you know that using nails that are too small might not hold well? Like superheroes need the right tools to save the day, you need the right size of finishing nail for baseboards to keep them perfect.
Table of Contents
Choosing The Right Size Finishing Nail For Baseboards

What Size Finishing Nail for Baseboard
Choosing the right size finishing nail for your baseboard can transform your space. Generally, 1.5 to 2-inch nails work best. They hold the baseboard securely without slipping. Have you ever found nails that were too short? They leave baseboards loose, causing trouble. Longer nails may hit wires within walls. Using the perfect size ensures stability and safety. For an easy home project, trust your measurements and select the right tools.
Importance of Choosing the Right Size Finishing Nail
Reasons why nail size matters for baseboards. Impact on aesthetics and structural integrity.
Choosing the right size finishing nail for baseboards is like picking the perfect shoe size. Too big, and it looks bulky. Too small, and it won’t hold well. Using the correct size keeps the baseboards both neat and secure. If the nail is too large, it can damage the wood and make it look unpleasant. On the opposite side, a small one might let your baseboard flop like a lost fish!
| Size | Aesthetics | Integrity |
|---|---|---|
| Too Large | Bulky Appearance | Potential Damage |
| Ideal Size | Sleek Look | Solid Hold |
| Too Small | Unstable | Weak Grip |
Fun fact: Bob the Builder says, “The right nail size can make or break your work!” With the proper nail, your baseboards will be strong and look amazing. Remember, it’s not complicated, and your walls will thank you for it!
Factors to Consider When Selecting Nail Size
Material of the baseboard and wall. Thickness of the baseboard. Type of installation environment.
Choosing the right nail size can be quite a task—a tad like picking the perfect ice cream flavor. But fear not! The material of your baseboard and wall plays a big role. Wooden walls love nails, while brick walls, not so much. For baseboard thickness, think of it like buying shoes—thick baseboards need longer nails. And the installation environment can be as picky as a cat. Moist or dry? It matters. Here’s a sneak peek for those who love tables:
| Factor | Choice |
|---|---|
| Material | Wood or Brick? |
| Thickness | Thick or Thin? |
| Environment | Moist or Dry? |
If in doubt, remember: Imagine your baseboard saying, “Nail, don’t fail me now!” With these tips, you’ll pick the perfect finishing nail the first time.
How to Install Baseboard with Proper Nail Size
Stepbystep installation process. Tips for ensuring a secure and flush fit.
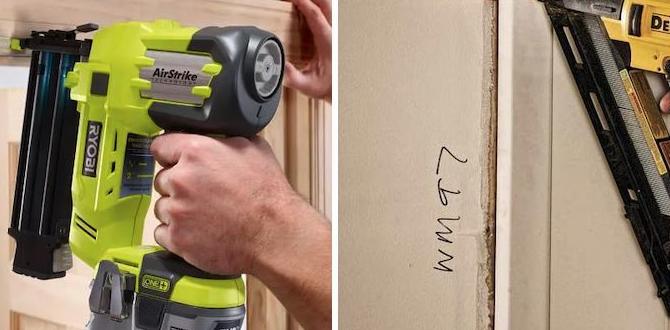
Imagine you’re a carpenter with a mission: to install baseboards that are smoother than a freshly frosted cupcake. First, gather your tools, including finishing nails. For baseboards, 1.5 to 2-inch nails are your secret weapon. Start by placing your baseboard against the wall. Grab a nail gun or hammer for precision, and nail in at angles for a snug bond. Here’s a pro tip: Use a countersink tool to hide the nail heads, like burying treasures. To avoid wobbly edges, ensure the baseboard hugs the wall. Measure twice, nail once—it’s not just carpenter wisdom; it’s your new life motto!
| Step | Tip |
|---|---|
| 1. Gather Tools | Use nail sizes between 1.5 to 2 inches |
| 2. Position Baseboard | Place snugly against the wall |
| 3. Nail at Angles | Keep the base secure and flush |
| 4. Countersink Nails | To hide heads for a smooth finish |
Remember, installing baseboards is like a dance—smooth moves and steady beats. If they could talk, they’d whisper, “Thanks for making us look good!”
Tools Required for Installing Baseboard with Finishing Nails
List of essential tools needed. Advantages of using a nail gun versus traditional hammer.
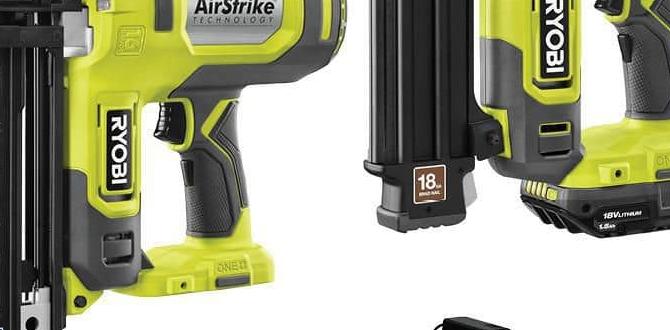
Installing a baseboard involves a variety of tools. You will need a tape measure, saw, level, and pencil. A nail gun can make things easier. It’s quicker than a hammer and saves your energy. Plus, it offers accurate nail placement. A hammer works too, but it’s more tiring and slower. Using a nail gun helps you finish faster with neat results.
Why use a nail gun for baseboards?
A nail gun is faster and provides precision. It allows you to install baseboards swiftly with less effort than using a hammer.
- Tape Measure: For measuring lengths.
- Saw: To cut the wood.
- Level: Ensures straight lines.
- Pencil: For marking measurements.
- Nail Gun: For speed and precision.
Common Mistakes to Avoid When Nailing Baseboards
Top errors that can affect the installation outcome. How to fix mistakes if they occur.
Nailing baseboards can seem simple but watch out for these common errors:
- Misplaced nails: Place them too close to the edge and cracks might appear.
- Wrong nail size: Using nails that are too short or too long can cause issues. Choose the right size for a strong hold.
- Skipping pre-drilling: Not pre-drilling can split the wood.
If mistakes happen, remove and replace the nails carefully. Fill holes with wood filler and touch up with paint for a clean finish.
What’s the ideal finishing nail size for baseboards?
Use 15 or 16-gauge nails that are usually 1.5 to 2 inches long. They provide a secure hold while being small enough to hide easily. This balance ensures your baseboards stay attached without splitting the wood.
FAQs: Addressing Common Concerns About Baseboard Nailing
Answers to frequently asked questions. Guidance on troubleshooting issues.
Commonly Asked Questions About Nailing Baseboards
Many people have queries about baseboard nailing. Here are some answers:
- What size nails should I use? Use 1.5 to 2-inch nails. They work best for securing baseboards.
- Why are my nails popping out? It may be due to wall contraction. Ensure nails are long enough and fully inserted.
Encountering issues like gaps or cracks? Use a putty filler. Always align nails properly. These tips ensure strong and neat baseboards. Benjamin Franklin once said, “By failing to prepare, you are preparing to fail.” Preparation is key in nailing baseboards properly.
Expert Tips for a Professional Finish
Techniques for achieving a seamless look. Advice on handling corners and joints.
Want your baseboards to look flawless? Achieving a seamless finish is easier than you might think! Here’s how:
When working on baseboards, make sure your corners and joints fit snugly. Mitre cuts are your best friends for corners. A 45-degree angle helps them match up like puzzle pieces! For joints where two boards meet, use a technique called coping. This lets one board overlap the other for a tighter fit. To hold it all together, use finishing nails. Experts suggest using nails that are about 1.5 to 2 inches long.
Want to know if you’ve hit the nail on the head? Here’s a quick guide:
| Baseboard Thickness | Recommended Nail Size |
|---|---|
| 1/2 inch | 1.5 inch |
| 3/4 inch | 2 inches |
Remember, a steady hand and a precise eye are key.
As one famous woodworker said, “Measure twice, cut once!” Following these tips will give your room a sharp and professional look.
Conclusion
Choosing the right size finishing nail is key for baseboard installation. Typically, 1.5 to 2-inch nails work best. They securely fasten the board without splitting it. Always consider the board’s thickness and wall type. Now that you know the basics, you can start your project confidently. For more tips, explore guides or ask a knowledgeable adult for help!
FAQs
What Gauge Of Finishing Nail Is Best For Installing Baseboards?
When you’re putting up baseboards, use 16 or 18-gauge finishing nails. These nails are just right for holding the boards in place. They are not too thick and not too thin. You can use a nail gun to put them in easily. This way, your baseboards will stay strong and look nice!
How Long Should Finishing Nails Be For Securing Baseboards To Drywall?
To secure baseboards to drywall, we should use finishing nails about 1.5 inches to 2 inches long. These nails are just the right size to go through the baseboard and into the wall, making sure it stays put. If the nails are too short, the baseboard could fall off. If they are too long, it could cause damage. So, 1.5 to 2 inches is just right!
Can I Use An 18-Gauge Nailer For Attaching Baseboards, Or Is A 16-Gauge Preferred?
You can use an 18-gauge nailer to attach baseboards. An 18-gauge nail is thin but works well for lighter pieces. However, a 16-gauge nailer is often stronger and better for heavy baseboards. So, if you can, choose a 16-gauge nailer for stronger hold.
What Is The Recommended Nail Spacing When Installing Baseboards With Finishing Nails?
When you are putting up baseboards with finishing nails, you should space the nails about 16 inches apart. This helps keep the baseboards secure and looking neat. Start with a nail at each end, then place more nails evenly between. This way, your baseboards will stay firmly in place!
How Do I Choose The Right Length Of Finishing Nail When There Are Different Baseboard Thicknesses?
When picking the right finishing nail length, think about how thick your baseboard is. Choose nails that are about twice as long as the baseboard is thick. This helps them hold the board firmly to the wall. If the baseboard is 1/2 inch thick, use 1-inch nails. This way, your baseboard will stay in place and not fall off.