Quick Summary
You absolutely can use a nailer on MDF molding! With the right nail gun, nails, and a few simple techniques, attaching MDF molding with a nailer is a straightforward and effective way to get professional-looking results for your DIY projects.
Hey DIYers, Jack Shaffer here from Nailerguy! Ever stared at a beautiful piece of MDF molding and wondered if your nailer can handle it? You’re not alone! MDF, or Medium-Density Fiberboard, is a fantastic, budget-friendly material for molding, but it can be a bit tricky compared to solid wood. Using a nailer on MDF molding might seem daunting, especially if you’re new to woodworking. Will it split? Will the nails sink too deep? Don’t worry! This guide is designed to arm you with all the knowledge you need to confidently tackle MDF molding with your nailer. We’ll walk through everything, from choosing the right tools to mastering the technique for a flawless finish. Get ready to elevate your DIY game!
Table of Contents
Why MDF Molding is Great (and a Little Tricky)
MDF molding is a favorite for many DIYers and professionals alike. It’s incredibly stable, meaning it won’t warp or twist with changes in humidity like solid wood can. It’s also smooth, consistent, and usually much more affordable than traditional wood molding. This makes it a perfect choice for adding decorative touches to walls, windows, and doors without breaking the bank.
However, MDF isn’t solid wood. It’s made from wood fibers, resin, and wax, all pressed together. This composition gives it strength but also makes it denser and more prone to splintering or crushing if you don’t use the right approach. This is where choosing the correct nailer and fasteners becomes crucial for a clean, strong installation.
Choosing the Right Nailer for MDF Molding
Not all nail guns are created equal, and for MDF molding, you have a few excellent options. The key is to use a nailer that drives a smaller, thinner fastener and has adjustable depth control. This allows you to set the perfect depth so the nail is secure without damaging the MDF surface.
1. Brad Nailer
A brad nailer is often the go-to tool for MDF molding. It fires thin, headless nails called brads, which are ideal for delicate materials like MDF. The small head of a brad leaves a very small hole, making it easy to conceal.
- Nail Size: Typically uses 18-gauge brad nails. These are thin enough to prevent splitting and leave minimal visible marks.
- Pros: Lightweight, easy to maneuver, excellent for detailed work, minimal surface damage.
- Cons: May not provide the strongest hold for very heavy molding or in situations with significant structural stress.
- Power Source: Available in electric (corded or cordless) and pneumatic (air-powered).
2. Finish Nailer
A finish nailer is another strong contender. It fires slightly larger and thicker nails than a brad nailer, usually 16-gauge. These offer a bit more holding power while still being relatively discreet.
- Nail Size: Typically uses 15-gauge or 16-gauge finish nails.
- Pros: Offers stronger holding power than a brad nailer, suitable for slightly heavier molding or areas requiring more strength, still relatively easy to conceal.
- Cons: The hole left by the nail will be slightly larger than with a brad nailer, requiring a bit more filler or putty.
- Power Source: Available in electric (corded or cordless) and pneumatic.
What to Look For in Your Nailer:
- Adjustable Depth Control: This is non-negotiable! It allows you to control how deep the nail penetrates the MDF, preventing blow-through or excessively deep sink marks.
- No-Mar Tip: A rubber or plastic tip on the nose of the nailer helps protect the surface of the MDF molding from scratches or dents.
- Power: Ensure the nailer has enough power for the thickness of your molding, but not so much that it’s excessive.
For most common MDF molding profiles, an 18-gauge brad nailer is the perfect choice. If you’re working with a heavier, more substantial molding, a 16-gauge finish nailer might be a better option.
Essential Supplies You’ll Need
Beyond your nailer, gathering the right supplies will make the job much smoother and ensure a professional finish. Think of this as your all-in-one checklist, Nailerguy style!
Here’s what you should have ready:
- Your Chosen Nailer: Brad nailer (18-gauge recommended) or finish nailer (16-gauge).
- Nails: Make sure they are the correct gauge and length for your nailer and your molding thickness. For MDF molding, aim for nails that penetrate about 2/3 into the substrate (the wall behind the molding). A common length for trim is 1-1/4″ to 2″.
- Tip: If your molding is 1/2″ thick, aim for nails around 1-1/4″ to 1-1/2″ long. This allows enough length to go through the molding and get a good grip in the drywall or stud behind it.
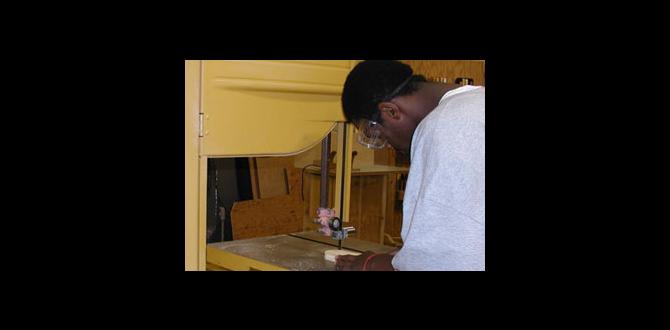
- Safety Glasses: Always the first rule of tool safety! Protect your eyes from flying debris or accidental nail misfires.
- Optional: Ear Protection: Especially with pneumatic nailers or extended use.
- Measuring Tape: For accurate cuts and placement.
- Pencil: For marking cuts and nail placement.
- Miter Saw: For precise angle cuts on corners. A good miter saw is key for professional-looking trim work.
- Stud Finder: To locate wall studs for the most secure attachment.
- Wood Glue: For reinforcing joints and corners, especially mitered corners.
- Caulk Gun and Paintable Caulk: For filling gaps between the molding and the wall, and for filling nail holes.
- Wood Filler or Putty: For filling nail holes.
- Hammer: For gently tapping down any nails that don’t quite set flush.
- Optional: Compressor and Hose: If you’re using a pneumatic nailer. Ensure the regulator is set correctly.
- Optional: Sandpaper (fine-grit): For smoothing any rough spots after filling.
Step-by-Step Guide: Nailing MDF Molding
Alright, let’s get down to business! Follow these steps for a smooth and successful installation of your MDF molding using a nailer.
Step 1: Prepare Your Materials and Workspace
Before you even pick up your nailer, take some time to prepare. This upfront effort saves headaches later!
- Measure and Mark: Measure the lengths of the walls where your molding will go. Use your miter saw to cut your MDF molding pieces to the correct lengths. For corners, you’ll be cutting 45-degree angles so they meet up perfectly.
- Test Fit: Always test fit your molding pieces before you start nailing. Ensure the corners meet cleanly and the pieces are the right length.
- Locate Studs: Use your stud finder to mark the locations of wall studs behind where you’ll be installing the molding. Nailing into studs provides the most secure hold. If you can’t hit a stud, you’ll be relying solely on drywall anchors or the strength of the drywall itself, which is less ideal.
- Acclimate MDF: Let your MDF molding sit in the room where it will be installed for at least 24-48 hours. This helps it adjust to the room’s temperature and humidity, preventing expansion or contraction after installation.
Step 2: Load Your Nailer
This is straightforward but crucial for uninterrupted work. Consult your nailer’s manual if you’re unsure.
- Choose the Right Nails: Select your 18-gauge brads or 16-gauge finish nails in the appropriate length.
- Load the Magazine: Open the magazine on your nailer (usually by pulling back a spring-loaded part) and insert the nails. Make sure they are seated correctly, with the nails facing the right direction according to your tool’s design.
- Connect Power:
- If using a pneumatic nailer, connect it to your air compressor. Check the recommended air pressure for your nailer (often around 80-100 PSI).
- If using an electric or battery-powered nailer, ensure it is charged or plugged in.
Step 3: Set Up Depth Adjustment
This is arguably the MOST IMPORTANT step when using a nailer on MDF molding.
- Find a Scrap Piece: Grab a scrap piece of the same MDF molding you’re using.
- Adjust Depth Dial: Most nailers have a dial or lever near the nose that controls the driving depth. You want the nail to sink just below the surface of the MDF, but not so deep that it blows out the other side or creates a large crater.
- Test Fire: Fire a few test nails into your scrap piece. Adjust the depth setting up or down until you achieve a perfect result. You want the nail head to be slightly recessed, ready for filling.
- Consider the No-Mar Tip: If your nailer has one, ensure it’s in place. This protects the MDF surface from accidental marks from the nailer’s nose.
Step 4: Nailing Technique for MDF Molding
Now for the actual nailing. Hold the nailer firmly and use controlled pressure.
- Position the Nailer: Place the nose of the nailer against the molding. Ensure it’s making good contact with the surface.
- Aim for Studs: Whenever possible, align your nail placement with the stud marks you made earlier. This gives the molding the best possible support.
- Drive the Nails: Press the trigger and apply gentle, consistent pressure. The nail should drive in smoothly. If it bends or stops short, check your air pressure (for pneumatic) or battery life (for cordless), and re-test your depth setting.
- Nail Spacing: For standard molding, aim to place nails every 12-16 inches. Place one near each end of the piece and one or two in between, ensuring at least one nail per stud if possible.
- Corners and Joints: For inside and outside corners, place a nail close to the edge to help hold the joint together securely. Also, place nails at the end of every piece to connect it to flanking pieces.
- Avoid Overdriving: Constantly monitor how the nail is sinking. If it’s going too deep, reduce your depth setting. If it’s not sinking enough, increase it.
- Gentle Pressure: Don’t slam the nailer against the molding. A firm, steady contact is all that’s needed.
Step 5: Reinforce and Secure
For extra strength and a seamless look, consider these additions.
- Glue Joints: Before you nail a mitered corner together, apply a thin bead of wood glue to the mitered faces. This creates a much stronger bond than nails alone. Clamp the joint if possible until the glue sets.
- Edge Nailing: If your molding has a profile, try to nail on the flat surfaces rather than into the decorative curves where it might be more prone to damage.
- Hammer Gentle Taps: If a nail doesn’t sink completely flush, use your hammer to gently tap it the rest of the way in. Be careful not to hit the molding surface too hard.
Step 6: Finishing Touches
Once all your molding is nailed in place, it’s time to make it look like it belongs.
- Fill Nail Holes: Use a good quality wood filler or putty to fill all the nail holes. Choose a color that is close to the MDF, or one that will accept paint well. You can use a putty knife to press it in firmly.
- Caulk Gaps: Apply a thin bead of paintable caulk along the top edge where the molding meets the wall and any other gaps. Smooth it with your finger or a damp cloth for a clean, professional line.
- Sand (Optional): Once the filler and caulk are dry, you can lightly sand any rough spots smooth. Use fine-grit sandpaper to avoid scratching the MDF.
- Prime and Paint: MDF takes paint beautifully. Apply a good primer first, then follow with your desired paint color.
Troubleshooting Common Issues
Even with the best intentions, you might run into a few hiccups. Here’s how to handle them:
- MDF Splitting or Crushing: This is the most common issue.
- Solution: Ensure you’re using the correct nail gauge (smaller is better, like 18-gauge). Make sure your depth setting isn’t too aggressive. Try placing nails about 1/2″ to 3/4″ from the edge of the molding, which provides more material for the nail to grip.
- Nails Not Sinking Deep Enough:
- Solution: Check your air pressure (for pneumatic nailers) – it might be too low. Ensure your battery is fully charged (for cordless). Your depth setting might be too high (meaning the nailer won’t drive as deep). Try a slightly longer nail if your molding and substrate allow.
- Nails Going Too Deep (Blow-Through):
- Solution: Decrease your depth setting! This is the most direct fix. Ensure you are not pressing the nailer too hard against the molding.
- Nails Bending:
- Solution: This can happen if you hit a knot in the MDF (less common than in wood, but possible) or if the nail is too long for the thickness of the material you’re driving into. Ensure you are hitting studs or solid backing. Check your nailer’s performance.
- Molding Not Holding Securely:
- Solution: Make sure you are hitting wall studs consistently. If not, you may need to use construction adhesive in addition to nails. Ensure nails are long enough to penetrate the wall material adequately.
MDF Molding vs. Solid Wood: A Quick Comparison
To help you understand why the nailing technique for MDF is important, let’s quickly look at how it compares to traditional solid wood molding.
| Feature | MDF Molding | Solid Wood Molding |
|---|---|---|
| Stability | Excellent (Resists humidity changes) | Good (but can warp/swell) |
| Cost | Generally lower | Generally higher |
| Nailing Tendency | Prone to splitting/crushing; requires careful depth control and thinner nails. | More forgiving, but can still split if not careful; wider nail range possible. |
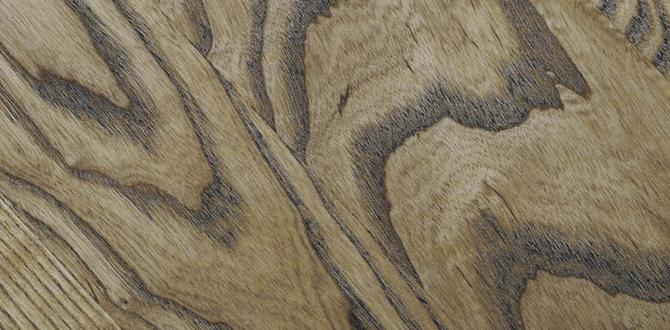
| Surface Finish | Smooth, consistent, excellent for paint. | Natural grain; can be painted or stained. |
| Repair | Filling nail holes is standard; repairs to major damage can be difficult. | Can often be sanded and repaired more easily; wood filler matches better. |
As you can see, while MDF offers many advantages, its susceptibility to damage during nailing is a key difference that requires us to be more precise with our tools. This is why a gun with good depth control and the right fastener are so vital.
For more information on building materials and their properties, resources like Wood Properties from the Forest Products Laboratory (a branch of the U.S. Forest Service) offer deep dives into material science that woodworkers find invaluable.
FAQs: Your MDF Molding Nailing Questions Answered
Here are some common questions DIYers have about using a nailer on MDF molding.
Q1: Can I use a framing nailer on MDF molding?
A: No, absolutely not. Framing nailers are designed for much larger, structural nails and will almost certainly split, crush, or blow through MDF molding. Stick to brad or finish nailers.
Q2: What is the best nail length for 1/2-inch thick MDF molding?
A: For 1/2-inch thick molding, a 1-1/4-inch or 1-1/2-inch nail is