Quick Summary:
Mastering your pneumatic framing nailer safely is crucial. This guide provides clear, step-by-step instructions and essential safety tips for beginners, ensuring confident and secure operation for your construction projects.
Hey there, fellow DIYers and aspiring builders! Jack Shaffer here, your go-to guy for all things nailing and woodworking over at Nailerguy. Today, we’re diving into a tool that can seriously speed up your framing projects: the pneumatic framing nailer. If you’ve ever looked at one of these powerful machines and felt a little intimidated, you’re not alone! They’re incredibly efficient, but like any powerful tool, they demand respect and proper handling. My goal is to make using this nailer feel less like a challenge and more like a breeze. We’ll cover everything from understanding your nailer to firing your first nail, all with safety as our top priority. Get ready to build with confidence!
In this comprehensive guide, we’ll walk you through everything you need to know to operate a pneumatic framing nailer safely and effectively. We start with the absolute basics, ensuring you’re comfortable before you even plug anything in. Then, we’ll get into the nitty-gritty of setup, operation, and crucial safety protocols that will keep you and everyone around you protected. By the end of this article, you’ll have a solid understanding of how to harness the power of your framing nailer for successful and secure project completion.
Let’s kick things off by looking at why this tool is such a game-changer for framing.
Table of Contents
Why Every Serious DIYer Needs a Pneumatic Framing Nailer
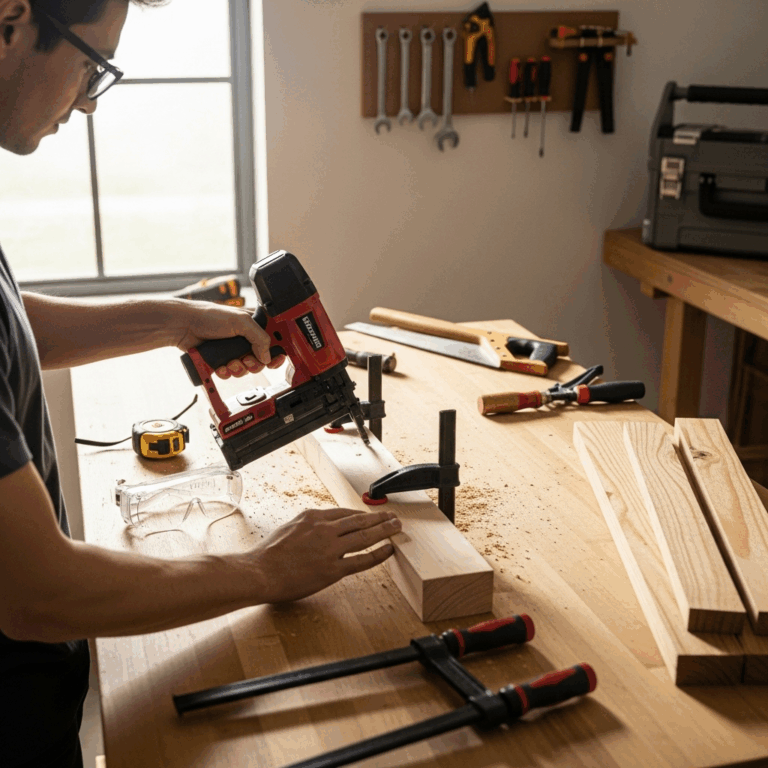
Picture this: you’re building a deck, framing a wall for a shed, or even putting together a large woodworking project that requires strong, quick fastening. Manually driving nails, especially long framing nails, can be a physically demanding and time-consuming task. This is where a pneumatic framing nailer shines. Powered by compressed air, these tools can drive hundreds of nails per minute with remarkable consistency. They make quick work of tasks that would otherwise take hours, saving your back and your time.
The benefits are significant for any DIY homeowner or hobbyist looking to tackle larger projects. Faster assembly, stronger connections, and less fatigue are just the tip of the iceberg. However, this power comes with a responsibility. Understanding how to operate a pneumatic framing nailer safely is paramount. Mishandling these tools can lead to serious injuries, so getting it right from the start is essential. We’ll make sure you’re well-equipped to use yours with confidence and precision.
Understanding Your Pneumatic Framing Nailer: The Basics
Before we even think about firing a nail, it’s important to understand the basic components and how this tool works. A pneumatic framing nailer is essentially a sophisticated air-powered hammer. When you pull the trigger, pressurized air is released, pushing a piston and a driver blade forward. This driver blade strikes the nail, driving it into the wood. The air then resets the piston, ready for the next nail.
Key Components You Should Know
Let’s break down the parts of your nailer:
- Nail Magazine: This is where you load the nails. It’s typically a long, metal channel.
- Driver Blade: The internal part that actually strikes and drives the nail.
- Trigger: Used to fire the nail. Many have safety lockout features.
- Nosepiece (or Contact Trip): The part that rests against the wood. Many nailers have a safety mechanism here that prevents firing unless the nosepiece is pressed against a surface.
- Air Inlet (or Nipple): Where you connect the air hose from your compressor.
- Depth Adjustment Wheel/Knob: Allows you to control how deep the nail is driven.
- Sequential vs. Contact Trip Firing Modes: Some nailers have selectable modes. Sequential firing means you must pull the trigger for each nail. Contact firing allows you to bump the nosepiece against the wood while holding the trigger to fire nails rapidly. We’ll talk more about which is safer for beginners later.
The Air Compressor: Your Nailer’s Best Friend
A pneumatic nailer wouldn’t be much without its power source: an air compressor. You need a compressor that can supply enough airflow (measured in Cubic Feet per Minute, or CFM) and pressure (measured in Pounds per Square Inch, or PSI) to consistently power your nailer. Framing nailers require a good amount of air, so a larger compressor is usually necessary.
- CFM Rating: Check your nailer’s manual. It will specify the CFM required at a certain PSI. Your compressor’s CFM rating should meet or exceed this.
- PSI Setting: You’ll need to set the correct working pressure, usually between 70 and 120 PSI, depending on your nailer.
- Air Hose: Use a good quality air hose of sufficient diameter (typically 3/8″ or 1/2″) and length to connect your compressor to the nailer.
According to the Occupational Safety and Health Administration (OSHA), proper tool maintenance and operation are critical for preventing injuries. Always ensure your air compressor and hose are in good working order.
Essential Safety Gear: Don’t Skip This!
This is arguably the most important section of this guide. A framing nailer is powerful, and it drives sharp objects at high speed. Protecting yourself is non-negotiable. Think of safety gear not as an optional extra, but as part of your essential toolkit.
Your Personal Protective Equipment (PPE) Checklist
- Safety Glasses/Goggles: This is an absolute must, every single time you use the nailer. Flying debris, nail fragments, or even a misfired nail can cause severe eye damage. Ensure they meet ANSI Z87.1 standards.
- Hearing Protection: Nail guns are LOUD. Prolonged exposure to the noise can lead to permanent hearing damage. Earplugs or earmuffs are essential.
- Work Gloves: Padded work gloves will protect your hands from splinters, minor impacts, and improve your grip on the tool, reducing the chance of it slipping.
- Sturdy Footwear: Always wear closed-toe shoes, preferably with steel toes, especially when working with heavy materials or on job sites where dropped items are a risk.
- Dust Mask (Optional but Recommended): If you’re working in a dusty environment (cutting wood, demolition), a dust mask will help protect your lungs.
Creating a Safe Working Environment
Safety isn’t just about what you wear; it’s also about where and how you work.
- Clear the Area: Ensure the workspace is free of clutter, tripping hazards, and any unnecessary people, especially children and pets.
- Proper Lighting: Make sure you have adequate light to see what you’re doing clearly.
- Stable Work Surface: If you’re working on a project that isn’t fixed to the ground, ensure it’s stable. You don’t want your workpiece shifting unexpectedly.
- Ventilation: If using a compressor indoors, ensure good ventilation to avoid the buildup of exhaust fumes.
- Keep Others Informed: Let others know you’ll be using a nail gun so they can maintain a safe distance.
Remember, safety is a shared responsibility. If you’re working with others, make sure everyone understands the safety protocols.
Setting Up Your Pneumatic Framing Nailer for Success
With your safety gear sorted and your workspace prepped, it’s time to get your nailer ready to go. Proper setup ensures efficient operation and, more importantly, safe handling.
-
Connect the Air Hose: Ensure your air compressor is turned off before connecting the air hose. Attach the hose securely to the air inlet fitting on your nailer. Use a quick-connect fitting that locks firmly in place.
-
Check the Compressor Pressure: Turn on your air compressor and let it build up pressure. Consult your nailer’s manual for the recommended operating pressure (PSI). Adjust the regulator on your compressor to achieve this pressure. It’s better to start slightly lower and increase if needed, rather than starting too high.
-
Load the Nails: This process can vary slightly by model, but generally:
- Ensure the air is disconnected from the nailer.
- Locate the loading mechanism on the magazine (usually a spring-loaded pusher).
- Pull back the pusher and insert the framing nails. They typically come collated at an angle (either 21-degree or 30-degree, depending on your nailer). Make sure you’re using the correct nails for your tool.
- Ensure the nails are seated correctly and the pusher is engaged to hold them snugly.
Important Note on Nails: Always use the exact type and size of nails recommended by the nailer manufacturer. Using the wrong nails can cause jams, damage the tool, or lead to dangerous misfires.
-
Select Firing Mode (If Applicable): As a beginner, it is highly recommended to start with sequential trip mode. This requires you to press the nosepiece against the wood AND pull the trigger to fire EACH nail. This significantly reduces accidental firing. Contact trip (or “bump fire”) mode, where you can hold the trigger and bump the nosepiece to fire, is much faster but carries a higher risk of accidental discharge, especially if used carelessly. Get comfortable with sequential before even considering contact trip.
-
Adjust Depth Setting: You’ll want the nail head to be flush with the surface of the wood, or slightly countersunk, depending on the application and whether you’ll be filling nail holes later. Most nailers have a depth adjustment wheel or knob near the nosepiece. Experiment on scrap wood to find the right setting. With the air connected and the safety engaged (see below), test fire into scrap material.
The Importance of the Safety Mechanism
Almost all pneumatic framing nailers come with a safety mechanism. For most tools, this is the “contact trip” or “nosepiece safety.” The nailer will not fire unless this safety is depressed against the workpiece. This is a critical safety feature. Always ensure it is clean and functioning correctly. Many tools also have a trigger lockout that prevents firing when the air is disconnected or the tool is being serviced.
Here’s a quick table to help visualize the setup process:
| Step | Action | Why It’s Important |
|---|---|---|
| 1 | Connect Air Hose | Powers the tool; ensure secure connection. |
| 2 | Set Compressor PSI | Ensures proper nail driving force; prevents damage. |
| 3 | Load Correct Nails | Prevents jams, misfires, and tool damage. |
| 4 | Select Sequential Trip Mode | Crucial for beginner safety to prevent accidental firing. |
| 5 | Adjust Depth | For desired nail finish and structural integrity. |
How to Safely Operate Your Framing Nailer: Step-by-Step
Now that your nailer is set up and you’re geared up in your PPE, let’s get to the core of it – firing those nails safely!
-
Inspect the Tool: Before each use, give your nailer a quick once-over. Check for any visible damage, ensure the magazine is clear of obstructions, and verify that the air fitting is secure.
-
Connect Air Supply (Once you’re ready to use it): Connect the air hose to the nailer. You should hear a hiss of air if the compressor is running and the connection is made. Never connect air to a tool you are not immediately planning to use, as this can lead to accidental firing.
-
Position the Nailer: Place the nosepiece of the nailer firmly against the surface where you want to drive the nail. Ensure it’s at a 90-degree angle to the wood for a straight shot.
-
Engage the Safety: Make sure the safety mechanism on the nosepiece is fully depressed against the wood. This is what allows the nailer to fire.
-
Fire the Nail (Sequential Mode): With the safety engaged and the nailer held firmly in position, gently squeeze the trigger. The nail should fire.
-
Release the Trigger: As soon as the nail is fired, release the trigger. This ensures you’re ready for the next nail and prevents accidental double-firing.
-
Move to the Next Nail: Lift the nailer slightly, reposition it for the next nail, ensure the safety mechanism is again depressed against the wood, and then pull the trigger.
-
Know Your Angles: Always aim to drive nails straight into the wood whenever possible. Angled nails can split wood or fail to provide adequate holding power. Some framing applications require angled nailing, but these should be done with care and knowledge.
-
Maintain Control: Keep a firm grip on the nailer at all times. The recoil, though less than manual hammering, can still cause the tool to move unexpectedly.
-
Never “Dry Fire”: Firing the nailer without a nail in the magazine (called dry firing) can damage the tool’s internal seal and driver blade. Only fire when there is a nail ready to be driven.
-
When Not in Use: Always disconnect the air supply from the nailer when you are done using it, when you are clearing a jam, or when you are performing any maintenance. Also, never point the nailer at yourself or anyone else, even with the air disconnected.
It’s crucial to be aware of your surroundings. The U.S. Consumer Product Safety Commission (CPSC) has reported injuries associated with power nailers. Proper training and adherence to safety guidelines are the best defense.
Troubleshooting Common Framing Nailer Issues
Even with the best care, you might run into a few hiccups. Here are some common problems and how to fix them:
| Problem | Possible Cause | Solution |
|---|---|---|
| Nails Not Firing | No air pressure / Air leaks | Check compressor tank pressure. Check air hose connection. Listen for leaks. |
| Nails Not Firing | Safety mechanism not engaged | Ensure the nosepiece is pressed firmly against the wood. |
| Nails Not Firing | Trigger lockout engaged / tool not armed | Ensure air is connected. Check if the trigger has a lockout switch. |
| Nails Not Driving Deep Enough | Low air pressure | Increase PSI on the compressor regulator. Check for air leaks. |
| Nails Not Driving Deep Enough | Depth adjustment set too high | Lower the depth setting on the nailer. |
| Nails Driving Too Deep (Countersinking) | Excessive air pressure | Lower PSI on the compressor regulator. |
| Nails Driving Too Deep (Countersinking) | Depth adjustment set too low | Increase the depth setting on the nailer. |
| Nail Jamming | Incorrect nail type/size loaded | Remove all nails and reload the correct type/size. |
| Nail Jamming | Damaged nails in magazine | Inspect nails and remove any bent or damaged ones. |
| Nail Jamming | Dirt or debris in the firing mechanism | Disconnect air. Attempt to clear jam with a tool recommended by the manufacturer (often a thin piece of metal or a nail). Never use your fingers. Consult manual for specific jam-clearing instructions. |
| Air Leaking from Tool | Loose air fitting | Tighten the hose connection. |
| Air Leaking from Tool | Internal seal damage | Disconnect air and refer to the manufacturer’s repair manual or contact a service center. |
Clearing a Nail Jam
Nail jams are probably the most common issue. Here’s the safe way to deal with one:
- Disconnect Air: This is the absolute