Summary: Using a pneumatic brad nailer is straightforward. Connect air, load brads, adjust depth, aim, and fire. Safety first! This guide walks you through each step for confident, quality results in your woodworking projects.
Hey there, fellow DIYers and woodworkers! Jack Shaffer here from Nailerguy. Ever stared at a cabinet door, a piece of trim, or a craft project and thought, “Man, I wish there was an easier way to join these pieces of wood”? That’s exactly where a pneumatic brad nailer shines! It might look a little intimidating with its air hose and power, but trust me, it’s one of the handiest tools you can add to your collection. Forget struggling with hammers and tiny nails that bend. A brad nailer lets you drive in those delicate fasteners quickly and precisely, making your projects look professional and saving you tons of time and frustration.
This guide is all about demystifying how to use a pneumatic brad nailer. We’ll break it down into simple steps, cover what you need, and make sure you feel super comfortable with it. By the end, you’ll be ready to tackle trim, build furniture, and so much more with confidence. Let’s get nailing!
Table of Contents
What is a Pneumatic Brad Nailer, Anyway?
A pneumatic brad nailer is a power tool that uses compressed air to drive small, thin nails called “brads” into wood. These brads are much less noticeable than standard nails, making them perfect for decorative work, installing trim, or any project where you want a clean finish without visible nail heads.
Think of it as a precision tool for delicate fastening. It’s powered by an air compressor, which is why it’s called “pneumatic.” The compressor supplies the air pressure needed to operate the nailer. This is different from cordless or electric nailers that use batteries or cords directly.
Why Choose a Pneumatic Brad Nailer?
There are a few great reasons why a pneumatic brad nailer is a favorite among woodworkers and DIYers:
- Speed and Efficiency: Once you get the hang of it, you can drive nails much faster than with a hammer. This is a huge time-saver on larger projects or when you have a lot of trim to install.
- Precision and Control: You get a consistent depth of drive, meaning your nails will be set at the same depth every time. This leads to a much cleaner look.
- Less Wood Damage: The thin brads cause minimal splitting, even in softer woods. This is crucial for delicate moldings or veneers.
- Professional Finish: The small size of brads means they are easy to fill with wood putty, making them virtually invisible for a seamless, professional look.
- Power and Reliability: Pneumatic tools are known for their power and durability. They tend to have a longer lifespan and less downtime compared to some other power sources.
Essential Components of Your Pneumatic Brad Nailer Setup
Before you can start nailing, you need a few key pieces of equipment. It’s like getting ready for any good project – having the right gear makes all the difference!
The Pneumatic Brad Nailer Itself
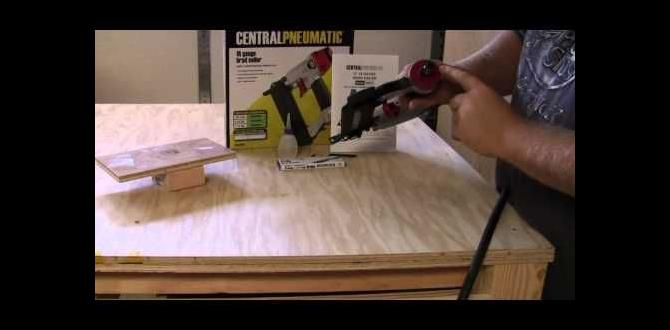
This is your main tool! Brad nailers come in various gauges (thicknesses) and staple sizes. For general woodworking and trim, a 16-gauge brad nailer is a fantastic all-around choice and a great starting point for beginners.
Air Compressor
This is the heart of your pneumatic system. It compresses air and stores it in a tank. For brad nailers, you don’t need an industrial-sized monster. A portable compressor with a tank of around 6 gallons and an output of 2.5 CFM (Cubic Feet per Minute) at 90 PSI (Pounds per Square Inch) is usually more than enough for most DIY tasks.
Look for a compressor that can maintain the PSI the nailer requires. Many home improvement stores have displays where you can see different compressor sizes and capabilities.
Air Hose
You’ll need a length of air hose to connect the compressor to the nailer. A 25-foot hose is standard and often sufficient. Make sure it’s rated for at least 150 PSI for safety. You’ll also need a way to quickly connect and disconnect the hose from both the compressor and the nailer. This usually involves quick-connect fittings.
Air Fittings
These little connectors are super important! You’ll typically need a coupler for the end of the hose that attaches to the nailer and a plug for the compressor’s air outlet. Most air compressors and nailers use standardized fittings (like I/M or T-style), but it’s always good to double-check that they are compatible.
Brad Nails
These are the fasteners! They come in different lengths and gauges. It’s crucial to use the correct size and type of brad for your nailer. Check your nailer’s manual to see what it accepts. For a 16-gauge nailer, you’ll use 16-gauge brads, typically ranging from 3/4 inch to 2 inches in length, depending on your project materials.
Safety Gear (Non-Negotiable!)
This is the most important part. Never skip this!
- Safety Glasses: Always wear ANSI-approved safety glasses or goggles. This is paramount to protect your eyes from flying debris or accidental nail discharge.
- Hearing Protection: Air nailers can be loud. Earplugs or earmuffs will save your hearing in the long run.
- Work Gloves: These provide a better grip and protect your hands.
Step-by-Step: How to Use Your Pneumatic Brad Nailer
Alright, let’s get down to business! Here’s how to safely and effectively use your pneumatic brad nailer:
Step 1: Set Up Your Air Compressor
First things first, get your compressor ready. Plug it in, turn it on, and let it build up pressure. Most compressors have an automatic shut-off when they reach their maximum pressure. You’ll see a pressure gauge on the compressor.
Connect your air hose to the compressor’s air outlet using the appropriate fitting. Ensure the connection is secure.
Step 2: Connect the Air Hose to the Nailer
Before connecting the hose to your brad nailer, make sure the compressor is running and has built up some pressure. However, ensure the nailer is NOT being held against any surface and is pointed away from yourself and others. This prevents accidental firing when you connect air.
Attach the other end of the air hose to the air inlet port on your brad nailer. Most pneumatic tools use quick-connect fittings, so it should just snap into place. You’ll hear a hiss of air as it connects.
Step 3: Load the Brad Nails
This is a simple but crucial step. All pneumatic brad nailers have a magazine (or nose) where you load the nails.
- Release Pressure: It’s a good safety practice to disconnect the air hose from the nailer before loading nails. This completely eliminates the chance of it firing while you’re loading.
- Open the Magazine: Most magazines have a sliding part that you pull back or push open. It often has a spring mechanism.
- Insert the Brads: Place your strip of brads into the magazine, ensuring they are seated correctly against the feeder. The heads of the brads should face towards the driver blade (which is the part that pushes the nail).
- Close the Magazine: Gently close the magazine, allowing the spring to push the first brad into position, ready to be fired.
- Reconnect Air (if disconnected): If you disconnected the hose, reconnect it now.
Tip: Always make sure the brads are aligned correctly. If they jam, you’ll need to clear them before proceeding.
Step 4: Adjust the Air Pressure
This is where you fine-tune the power. The right air pressure is essential for driving nails to the correct depth. Too little pressure, and the nail won’t go in fully; too much, and it might sink too deep or even damage the wood surface.
Check your brad nailer’s manual for the recommended operating pressure, which is usually listed in PSI (Pounds per Square Inch). Most brad nailers operate effectively between 70 and 120 PSI.
Adjust the regulator on your air compressor to match the recommended PSI. Ensure the compressor is supplying enough air (measured in CFM) to keep up with the nailer’s demand, especially if you’re firing rapidly.
Step 5: Adjust the Depth of Drive
Most modern brad nailers have an adjustable depth-of-drive setting. This lets you control how far the nail sinks into the wood.
- Test Fire: Find a scrap piece of the same wood you’ll be using for your project.
- Make an Adjustment: Set your nailer to the recommended pressure. Aim the nailer at the scrap wood and depress the trigger. See how deep the nail goes.
- Fine-Tune: If the nail is too proud (sticking out), you need to set the depth deeper. If it’s sunk too far or even gone through the back of thin material, you need to set the depth shallower. Most nailers have a dial or lever for this adjustment. Experiment until you get the perfect depth – usually, the head of the brad should be just flush with the wood surface, or slightly countersunk if you plan to fill it.
Step 6: Understand Firing Modes (Sequential vs. Contact Actuation)
Your brad nailer likely has two firing modes. Knowing the difference is key to safety and efficiency:
Contact Actuation (Bump Fire):
- How it works: In this mode, you press the nose of the nailer against the wood (actuation) and then pull the trigger to fire. If you keep the trigger pulled and “bump” the nose against different spots, it will fire a nail at each contact.
- Best for: This is great for quickly fastening trim or siding where you need to place many nails rapidly.
Sequential Actuation (Single Fire):
- How it works: You must pull the trigger first, and then press the nose of the nailer against the wood to drive a nail. This allows for precise placement of each nail.
- Best for: This is the safer mode and ideal for detailed work, furniture making, or any situation where you need to place each nail exactly where you want it, avoiding accidental firing.
How to Switch Modes: Check your nailer’s manual. Usually, there’s a switch or button near the trigger or on the side of the tool. Always ensure the air is disconnected when switching modes for safety.
Step 7: The Firing Process
Now for the main event! Ready to fire?
- Wear Your Safety Gear: Double-check that your safety glasses and hearing protection are on.
- Position the Nailer: Place the nose of the brad nailer firmly against the surface where you want to drive a nail. Make sure it’s perfectly perpendicular to the wood for a straight shot.
- Choose Your Mode & Fire:
- For Sequential Mode: Pull the trigger first, then firmly press the nailer’s nose against the wood.
- For Contact Actuation Mode: Press the nailer’s nose against the wood, then pull the trigger. If the trigger is held down, subsequent bumps will fire more nails.
- Release and Repeat: Release the trigger and lift the nailer. Move to the next desired location and repeat the process.
Important! Always aim away from yourself and others, even when just testing. Never treat a nailer like a toy.
Step 8: Troubleshooting & Clearing Jams
Even the best tools can jam sometimes. Don’t panic!
- Disconnect Air: Immediately disconnect the air hose from the nailer. This is the most critical safety step.
- Identify the Jam: Look into the magazine and near the driver blade. Is a nail bent halfway in? Is the magazine misaligned?
- Use Clearance Tool: Most nailers come with a small tool or have a way to access the jam. Gently try to remove the obstruction. You might need needle-nose pliers for a stubborn bent nail.
- Reload and Reconnect: Once the path is clear, reload your brads, reconnect the air, and test on a scrap piece.
Choosing the Right Brad Size
The length and gauge of your brads are essential for a strong, clean connection. Here’s a quick breakdown:
| Brad Gauge | Typical Features | Best For | Example Uses |
|---|---|---|---|
| 18-Gauge (18ga) | Very thin, small head. Minimal hole. | Delicate trim, intricate moldings, picture frames, craft projects, thin wood. | Installing baseboards, crown molding, small decorative elements. |
| 16-Gauge (16ga) | Slightly thicker, small head. Good balance of holding power and discretion. | General trim work, cabinet installation, furniture assembly, medium-thickness woods. | Door and window casings, chair rails, drawer assembly. |
| 15-Gauge (15ga) | Thicker than 16ga, with a slightly larger head. More holding power. | Heavy-duty trim, structurally significant pieces, applications where a bit more strength is needed. | Wider trim profiles, some furniture components where nails need to be more robust. |
Length Matters Too! Always chose a brad length that is long enough to get good penetration into the second piece of wood but not so long that it goes all the way through. For 3/4-inch thick molding, a 1 1/4-inch or 1 1/2-inch brad is often appropriate.
Comparing Pneumatic Brad Nailers to Other Nailer Types
It can be confusing with all the different nailers out there! Here’s a quick look at how pneumatic brad nailers stack up against some other popular types:
| Nailer Type | Power Source | Pros | Cons | Best For |
|---|---|---|---|---|
| Pneumatic Brad Nailer (18ga / 16ga) | Air Compressor + Hose | Lightweight tool, powerful, fast, consistent drives, affordable tool cost. | Requires air compressor and hose, limited mobility. | Trim, molding, decorative work, furniture assembly. |
| Cordless Brad Nailer (18ga / 16ga) | Battery-powered | Highly portable, no hoses or compressors, quick setup. | Heavier tool, battery life limitations, can be more expensive, potential for less consistent power under heavy load. | Same as Pneumatic, especially where mobility is key. |
| Pneumatic Framing Nailer | Air Compressor + Hose | Drives large, strong nails for structural connections, very powerful. | Heavy tool, requires high-PSI compressor, overkill for trim. | Building house frames, decks, structural components. |
| Pneumatic Finish Nailer (15ga / 14ga) | Air Compressor + Hose | Drives thicker nails than brad nailers, good holding power, small head. | Larger holes than brad nailers, potential for wood splitting in thin materials. | Heavier trim, cabinet frames, lighter structural work. |
For most beginners looking to tackle home improvement and woodworking projects involving trim, cabinets, or lighter furniture, a pneumatic brad nailer offers an excellent balance of cost, performance, and ease of use. The need for an air compressor is the main consideration.
Safety First: Always!
I can’t stress this enough. Working with power tools requires respect and caution. Here are the cardinal rules for using your brad nailer:
- Always wear safety glasses. No exceptions.
- Turn off and disconnect the air supply before loading nails, clearing jams, or performing any maintenance.
- Never point the nailer at yourself or anyone else. Even when the air supply is disconnected, there is a chance of accidental firing if the safety mechanism is tampered with.
- Keep