Quick Summary: Mastering how to use a pin nailer for picture frames is easy! This guide breaks down the process, from choosing the right nailer and nails to expert framing tips, ensuring you create beautiful, secure frames with confidence. Get ready to elevate your DIY projects!
Hey there, fellow DIYers and woodworkers! Jack Shaffer here, your go-to guy for all things nailers and projects. So, you’ve decided to tackle some picture framing, and you’re eyeing that sleek pin nailer? Great choice! But maybe you’re wondering, “How do I actually use this thing without messing it up?” It’s a common question, and honestly, it’s easier than you might think. Forget glue-only methods that leave you holding your breath, hoping for the best. With the right technique, a pin nailer can be your secret weapon for creating stunning, durable frames perfect for showcasing your cherished memories or artwork.
This guide is all about demystifying the pin nailer for framing. We’ll walk through everything you need to know, step by step. We’ll cover the tools, the techniques, and some pro tips to make sure your first (or next!) frame project is a resounding success. Ready to nail it?
Table of Contents
What is a Pin Nailer and Why Use It for Frames?
First things first, let’s get acquainted with our star tool. A pin nailer, also sometimes called a micro-pinner, is a type of pneumatic (or sometimes battery-powered) nail gun that drives extremely fine, headless or nearly headless nails, often called brads or pins, into wood. Think of them as super-thin, almost invisible nails that hold things together without being a big visual distraction.
So, why is this the go-to for picture frames? Simplicity itself::
- Minimal Damage: Because the nails are so small and often headless, they leave tiny, easily concealable holes. This is crucial for picture frames where a clean, professional look is paramount. You won’t have big nail heads sticking out, ruining the aesthetics.
- Strong Hold: While they’re tiny, when used correctly with wood glue, these nails provide excellent holding power as the glue dries. They act like microscopic clamps, keeping your mitered corners perfectly aligned.
- Speed and Efficiency: Compared to manually hammering tiny brads, a pin nailer dramatically speeds up the framing process. It’s satisfyingly quick and reduces the chances of accidentally splitting delicate molding.
- Versatility: Beyond frames, pin nailers are fantastic for other delicate woodworking tasks like attaching small trim, assembling intricate small boxes, or even securing veneer.
The whole point is to get a strong, clean bond where the fasteners themselves are virtually undetectable. It’s the professional touch that makes your DIY projects look like they came right from a custom frame shop.
Choosing Your Pin Nailer and Supplies
Before we start driving nails, let’s make sure you have the right gear. Selecting the correct pin nailer and accessories will make your job much easier and safer.
Types of Pin Nailers
Pin nailers generally fall into a few categories:
- Pneumatic (Air-Powered): These are the workhorses. They require an air compressor and a hose. They’re typically lighter, more powerful, and more affordable upfront than electric models. The downside is the need for an air compressor and managing the hose.
- Cordless (Battery-Powered): These offer the ultimate freedom of movement. No cords, no hoses! They run on rechargeable batteries. They can be pricier and sometimes a bit heavier than their pneumatic counterparts, and battery life is something to consider for long sessions.
- Electric (Corded): Less common for pin nailers, but they exist. They plug directly into an outlet. Convenience is high, but you’re tethered to a power source.
For picture framing, any of these can work well. Pneumatic is a solid choice if you already have a compressor or plan on tackling other DIY projects that require one. Cordless is fantastic for portability and ease of use, especially for those smaller, quick framing jobs.
Essential Accessories
Beyond the nailer itself, you’ll need a few other key supplies:
- Air Compressor (for pneumatic nailers): If you go the pneumatic route, ensure your compressor has enough CFM (Cubic Feet per Minute) and PSI (Pounds per Square Inch) to run the pin nailer. Most small framing jobs won’t demand a huge compressor. Check your nailer’s manual for recommendations. For reliable information on air compressors, resources like the U.S. Department of Energy’s tips on appliances can be helpful, though more focused on general efficiency, similar principles apply to tool performance needs.
- Hose and Fittings (for pneumatic): A standard air hose and the correct fittings to connect it to your compressor and nailer.
- Pin Nails: This is critical! Pin nailers use specific nails. They come in different lengths and gauges (thickness). For most standard picture frames made of wood molding, you’ll likely be using 23-gauge or 21-gauge pins. Common lengths are 3/4 inch to 1 1/2 inches. Always check your nailer’s specifications for the recommended nail size and type.
- Wood Glue: Even with pins, wood glue is essential for a strong, lasting bond. Use a good quality wood glue.
- Clamps: Corner clamps or band clamps are invaluable for holding your frame pieces tightly together while you drive the pins and the glue dries.
- Safety Gear: Always, always, always wear safety glasses! Hearing protection is also recommended, especially if using a compressor or working for extended periods.
Understanding Nail Gauges
Nail gauges indicate the thickness of the nail. A higher gauge number means a thinner nail. So, a 23-gauge nail is thinner than a 21-gauge nail. This is why pin nails are so great for fine woodworking—they’re barely visible.
| Gauge | Diameter (approx.) | Use Case for Framing | Visibility |
|---|---|---|---|
| 23 Gauge | 0.025 inches (0.63mm) | Very delicate moldings, small frames, craft projects. Ideal when absolute invisibility is key. | Extremely minimal; virtually invisible. |
| 21 Gauge | 0.039 inches (1mm) | Most standard wood picture frames, slightly larger moldings, general fine woodworking. Offers a bit more holding power. | Very minimal; easily concealed. |
Always choose the thinnest nail that provides adequate holding power for your specific project. For most standard picture frame molding, the 21-gauge is a great all-around choice, while the 23-gauge is for when you want that “invisible” look on very thin materials.
Step-by-Step Guide: How to Use a Pin Nailer for Picture Frames
Alright, gear is ready, let’s get down to business! Framing with a pin nailer is a rewarding process, especially when you nail those perfect 45-degree mitered corners.
Step 1: Prepare Your Frame Pieces
This is where the precision starts before you even pick up the nailer. You need to cut your molding to the correct lengths with perfect 45-degree mitered cuts. If your cuts aren’t accurate, your corners won’t meet cleanly, and no amount of nailing will fix that.
- Use a miter saw or a miter box and hand saw for accurate cuts.
- Ensure the inside edge of your cut will be the correct length for your artwork or photo.
- Dry-fit the pieces to confirm they form a perfect rectangle or square with tight corners.
Step 2: Apply Wood Glue
This is non-negotiable for a strong frame. Even though the pin nailer holds things while the glue sets, the glue is what makes the joint truly permanent and robust.
- Apply a thin, even bead of wood glue to the angled surface of one of the mitered pieces.
- Don’t overdo it. Too much glue will squeeze out excessively and create a mess. A thin bead is usually sufficient.
Step 3: Clamp the Corner
Now, bring your two pieces together to form the corner. This is where clamps are your best friend.
- Use a corner clamp or strap clamp to hold the two pieces tightly together at the mitered joint.
- Ensure the faces of the molding are perfectly flush and the joint is as tight as possible. The clamp will hold this precisely while you work.
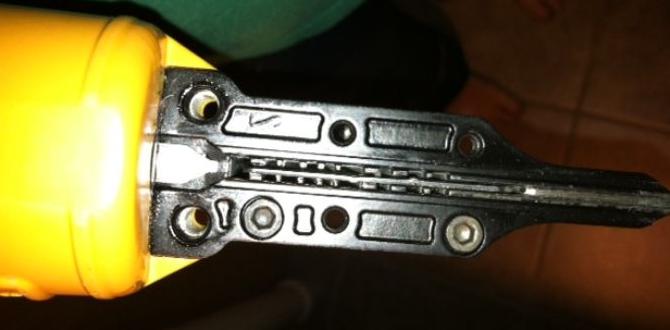
Step 4: Load Your Pin Nailer
Refer to your pin nailer’s manual for the exact loading procedure, but generally:
- Ensure the tool is disconnected from its power source (air hose or battery removed). Safety first!
- Open the nail magazine.
- Insert a strip of the correct-sized pin nails. Make sure they are seated correctly and facing the right direction (usually nose-down or nose-up, depending on the model). Some nailers have counters to track nails if you need them, but for frames, you’ll often just load a fresh strip.
- Slide the magazine cover shut until it clicks securely.
Step 5: Adjust Depth and Fire
Most pin nailers have an adjustable depth setting. This controls how deep the pin is driven. You want it deep enough to be secure but not so deep that it blows out the other side of delicate molding.
Setting the Depth:
- Start with a medium depth setting on a scrap piece of the same molding you’re using.
- Fire a pin. Check if it’s sunk slightly below the surface but not completely hidden or blown out the back.
- Adjust the depth setting up or down as needed and test again until you achieve the perfect depth.
Firing the Pin:
- Ensure the nailer’s safety tip (usually aContact Trigger or Safety Nose) is firmly pressed against the wood surface at the corner joint.
- You might need to position the nailer slightly angled to aim into the corner meat of the molding, not right on the edge.
- Squeeze the trigger. You should hear a satisfying “thwack” as the pin is driven.
- For a solid joint, you’ll typically want to drive two pins into each corner. Space them a few inches apart for good holding power. Place one near the front edge and one slightly deeper into the mitered joint.
Step 6: Repeat for All Corners
Once one corner is pinned, release the clamp, move the clamp to the next corner, apply glue, and repeat the process. Work your way around all four corners of the frame.
A good tip for consistency is to use the same number of pins and space them similarly in each corner.
Step 7: Clean Up and Dry
Wipe away any excess glue squeeze-out with a damp cloth before it dries. Dried glue can be harder to remove and might affect the finish later.
- Let the glue dry completely according to the manufacturer’s instructions (usually at least 30-60 minutes for initial set, but 24 hours for full cure for maximum strength).
- Keep the clamps on during the initial drying phase to ensure the joints remain tight and aligned.
Step 8: Finishing Touches
Once the glue is fully dry, your frame is structurally sound. Now for the visual aspect:
- Filling Holes: The pin holes are tiny, but you might want to conceal them entirely. You can use a dab of wood putty or a wax stick that matches your frame’s color and gently fill the holes.
- Sanding: Once any putty is dry, lightly sand the entire frame to smooth any rough spots and prepare it for finishing.
- Finishing: Apply your desired finish – paint, stain, varnish, or oil.
- Adding Glass and Backing: Once the finish is dry, you can install your glass, photo or artwork, and backing material.
Check out resources like Woodworking Network’s guide to wood glue for more in-depth information on adhesives, which is foundational to any strong joint.
Tips for Perfect Picture Frames with a Pin Nailer
Here are a few extra pointers from my workshop to yours to help you achieve pro-level results:
- Practice on Scraps: Before you commit to your actual project, grab some scrap pieces of molding and practice your cuts and nailing technique. Get a feel for the depth settings and how to position the nailer.
- Use the Right Nailer Depth: It’s worth repeating – setting the depth correctly is crucial. Too shallow and the joint won’t be secure; too deep and you risk damaging delicate molding or driving the nail out the other side.
- Angle Your Nails: For the strongest hold, try to angle the pins slightly into the joint, rather than driving them straight through the end grain. This helps them grip the wood better. You can sometimes achieve this by tilting the nailer slightly.
- Don’t Skip Glue: Seriously, it’s the backbone of the joint. The pins are just there to hold things while the glue does its permanent work.
- Sharp Blades are Key: For those perfect miter cuts, ensure your saw blade is sharp. A dull blade can tear the wood fibers, leading to gaps in your corners.
- Consider Frame Size: For very large or heavy frames, you might need to supplement with larger fasteners or a stronger joinery method. Pin nails are best suited for frames made from lighter molding and for artwork that isn’t excessively heavy.
- Safety is Paramount: Always wear safety glasses. Never point the nailer at yourself or others. Disconnect the power source (air or battery) before loading or performing maintenance.
| Common Picture Frame Problems & Solutions | Pin Nailer Tip |
|---|---|
| Gaps in mitered corners | Ensure cuts are precisely 45 degrees. Clamp corners tightly before nailing. Use two pins per corner, angled into the joint. |
| Pins not sinking enough | Increase the depth setting on your pin nailer. |
| Pins blowing out the back/side | Decrease the depth setting. If using very thin molding, consider 23-gauge nails. |
| Weak joints | Ensure consistent use of quality wood glue. Don’t rush the drying time. |
| Visible nail holes | Use a putty stick or wood filler matched to your finish for a seamless look. |
| Frame bowing or warping | Ensure balanced nailing on all sides. Avoid over-clamping that can distort the frame before glue sets. Allow adequate drying time. |
Frequently Asked Questions About Pin Nailers for Frames
Still have questions? No worries! Here are some common queries beginners have about using pin nailers for picture frames:
Q1: Can I use a pin nailer without wood glue?
A: While a pin nailer will hold pieces together temporarily, especially for lightweight projects, it’s highly recommended to always use wood glue for picture frames. The glue provides the lasting structural integrity. The pins primarily hold the joint perfectly flush while the glue cures.
Q2: What is the best type of pin nailer for DIY picture framing?
A: For DIY picture framing, an electric (corded or cordless) or a small pneumatic pin nailer is excellent. Cordless offers the most convenience, while pneumatic is cost-effective if you already have a compressor. The key is a tool that can drive 21-gauge or 23-gauge pins.
Q3: How many pins should I use per corner?
A: For most standard picture frame molding, using two pins per corner is ideal. Space them a few inches apart, usually one near the front edge and one a bit further back into the joint, to provide balanced holding power as the glue dries.
Q4: Do I need a special compressor for a pin nailer?
A: Most small pneumatic pin nailers don’t require a large, high-CFM compressor. A small pancake style compressor is usually sufficient.