A pin nailer is perfect for fastening small, delicate trim pieces without marring the wood. By following a few simple steps, you can achieve a clean, professional look for your DIY projects with ease and confidence.
Ever tried to attach a thin piece of delicate trim, only to end up with a split piece of wood or visible nail heads that ruin the finish? It’s a common frustration for DIYers! Sometimes, a standard nail gun just feels like overkill, too powerful for those fine details. But what if I told you there’s a tool designed specifically for this kind of job? Meet the pin nailer. This little marvel drives tiny headless nails, offering a secure hold without damaging your precious materials. In this guide, I’ll walk you through exactly how to use a pin nailer, making delicate trim work a breeze. You’ll be adding those finishing touches like a pro in no time!
Table of Contents
What is a Pin Nailer and Why Use One for Delicate Trim?
Think of a pin nailer as the precision scalpel of the nail gun world. Unlike brad nailers or finish nailers, which drive slightly larger nails that leave a visible head or require filling, pin nailers drive near-microscopic headless nails, also known as pins. These pins are incredibly thin, often just .031 inches (0.79 mm) in diameter. Because they are so small and headless, they leave virtually no visible mark on the surface of your wood.
This makes them ideal for:
- Attaching delicate trim pieces, like molding for dollhouses or intricate decorative elements.
- Securing small paneling or beadboard where you want a smooth, clean finish.
- Working with soft woods or veneers that are easily dented or split.
- Projects where a flawless surface is paramount, and filling nail holes is undesirable.
- Cabinetry and fine furniture where aesthetics are key.
Using a pin nailer means you can achieve a secure connection without compromising the beauty of your material. It’s the secret weapon for that professional, high-end finish.
Choosing the Right Pin Nailer
Before we dive into how to use one, let’s briefly touch on choosing the right pin nailer for your needs. There are a few main types, and understanding them will ensure you get the best tool for the job:
Types of Pin Nailers
- Pneumatic (Air-Powered): These are the most common and often the most powerful. They require an air compressor to operate. They are generally lighter to hold for extended periods compared to corded electric models. For the best performance and the most professional results for delicate trim, pneumatic is often the preferred choice.
- Cordless (Battery-Powered): These offer great portability and convenience, as they don’t require an air hose or compressor. They run on rechargeable batteries. While newer models are very capable, they can sometimes be heavier than their pneumatic counterparts and might have slightly less driving power or a slower fire rate for very demanding tasks.
- Electric (Corded): Less common for pin nailers compared to other nail gun types, these plug directly into a wall outlet. They offer consistent power but can be tethered by the cord, which might limit maneuverability, especially when working with intricate trim in awkward spaces.
For delicate trim work, consistency in power and control is key. Most professionals opt for pneumatic because of their reliability and lighter weight in hand. However, a good quality cordless model can be an excellent choice for DIYers who value freedom of movement.
Essential Tools and Materials
To successfully use a pin nailer for delicate trim, you’ll need a few things on hand. Having everything ready before you start will make the process smooth and efficient:
For Your Pin Nailer:
- Pin Nailer: Ensure it’s the correct type (pneumatic, cordless, or electric) for your power source.
- Compressor (if pneumatic): Make sure it’s the right size for your nailer and has a regulator to control air pressure.
- Air Hose and Fittings (if pneumatic): A good quality hose and quick-connect fittings are essential.
- Power Source: Either an electrical outlet or a fully charged battery depending on your nailer type.
- Pin Nails: This is crucial! Make sure you buy the correct size and gauge (diameter) of pins that your nailer is designed to accept. They come in various lengths, typically from 1/2 inch to 1 inch. For delicate trim, shorter pins are usually best.
For Your Project:
- Your Delicate Trim Pieces: The star of the show!
- Workpiece to Attach Trim To: The surface where the trim will be installed.
- Measuring Tape and Pencil: For accurate placement.
- Safety Glasses: Absolutely non-negotiable. Protect your eyes!
- Work Gloves (Optional): For a better grip and some protection.
- Clamps: Essential for holding trim pieces securely in place while you nail them.
- Wood Glue (Optional but Recommended): For a stronger bond.
- Sandpaper: For any minor touch-ups.
- Wood Filler/Putty (Optional): For any unforeseen blemishes, though the goal with pin nailing is to avoid needing this!
Step-by-Step Guide: How to Use a Pin Nailer for Delicate Trim
Now, let’s get to the action! Following these steps will help you achieve beautiful, clean results every time you use your pin nailer.
Step 1: Prepare Your Workspace and Materials
First things first, set up your workspace. Ensure it’s well-lit and clear of clutter. You’ll need space to move around your project comfortably. Now, bring your trim pieces and the workpiece into this area. Inspect your trim for any defects. Measure and mark the exact placement of your trim pieces on the workpiece.
For any project, it’s always a good idea to have a reference. You can find great examples and inspiration at the Wood Magazine website for project ideas and techniques.
Step 2: Set Up Your Pin Nailer
This step varies slightly depending on your nailer type:
- For Pneumatic Nailers:
- Connect the air hose to your compressor and the nailer. Ensure the connector is secure.
- Turn on your compressor and let it build pressure.
- Consult your pin nailer’s manual for the recommended air pressure. Generally, for delicate trim, you’ll want to start with a lower pressure setting (e.g., 70-90 PSI) to avoid blowing through the wood. You can always increase it slightly if needed. A pressure regulator on your compressor is key here.
- For Cordless Nailers:
- Ensure the battery is fully charged and properly inserted into the nailer.
- Load the pin nails into the magazine.
- For Electric Nailers:
- Plug the nailer into a power outlet.
- Load the pin nails into the magazine.
Loading Pin Nails: Open the magazine (usually by pulling back a spring-loaded follower). Insert a strip of pin nails, ensuring they are seated correctly against the back of the magazine. Close the magazine until it latches securely. Make sure the nails are facing the right direction according to your nailer’s design. Most magazines will have a clear indicator.
Step 3: Test Fire and Adjust Air Pressure
This is arguably the most critical step for delicate materials! You absolutely must test fire your pin nailer on a scrap piece of the same wood you’ll be using for your project before firing it on the actual trim.
Hold the nailer against the scrap wood as if you were going to nail it. Press the safety contact tip (the part that sits on the wood) firmly down, then pull the trigger. The pin should drive in flush or slightly below the surface. If the pin:
- Sticks out too far or doesn’t drive deeply enough: Increase the air pressure slightly (if pneumatic) or check if the nailer has depth adjustment settings.
- Blows through the wood or causes excessive splintering: Decrease the air pressure immediately (if pneumatic) or adjust depth settings.
Keep adjusting in small increments until the pin drives in cleanly and is flush or barely below the surface. This ensures you’re not damaging the delicate material.
Step 4: Position and Secure the Trim
Now, place your trim piece exactly where you want it on your workpiece. For precise placement, especially with long pieces, it’s helpful to use a guide strip or align it carefully with your pencil marks. This is where clamps come in handy. Use clamps to hold the trim piece firmly against the workpiece. This is crucial because the pin nailer itself doesn’t exert much holding force; the nails do.
Tip: If you’re using wood glue for extra strength, apply a thin, even bead to the back of the trim piece before positioning it. Then, clamp it securely.
Step 5: Drive the Pin Nails
Hold the pin nailer firmly with the safety contact tip pressed square against the surface of the trim, right where you want to place a nail. The safety tip must be depressed for the nailer to fire, which prevents accidental firing. Then, pull the trigger.
- Placement: For delicate trim, aim to place nails about 1 to 2 inches from the ends of the trim piece and then space them evenly every 4 to 6 inches. Avoid placing them too close to edges, as this can still cause splitting with even the smallest pins.
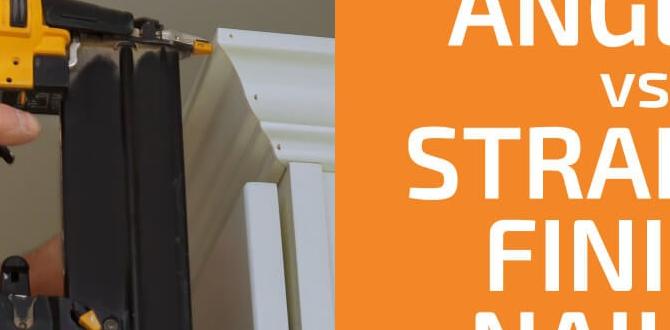
- Angle: Drive the nails straight into the wood whenever possible. If you need to nail at an angle, be extra cautious as this increases the risk of the pin bending or not seating properly.
- Depth: As you’ve tested, the pin should go in flush or be barely visible. With headless pins, you don’t need to worry about countersinking.
Continue this process, moving along the trim piece, ensuring the safety contact tip is always pressed firmly against the wood before you pull the trigger. If you’re working with long trim pieces, you might want to nail one end, then move the clamp and nail the other end, to ensure stability.
Step 6: Finishing Touches
Once all your trim pieces are attached, carefully remove the clamps. Inspect your work. The pins should be virtually invisible! If by some chance a pin is slightly proud (sticking up), you can very gently tap it down with a small nail set and a hammer, being careful not to dent the wood. If a pin is too deep or caused a tiny mark, a dab of matching wood filler or colored putty can be used, though with careful setup, this is rarely needed.
For most projects using pin nails on delicate trim, the goal is so unmarred a finish that no filler is required. A light sanding with fine-grit sandpaper (220 grit or higher) can smooth any minor imperfections. Then, you’re ready for paint or stain!
Best Practices for Using a Pin Nailer on Thin Wood
Working with thin or delicate wood requires a bit of extra care. Applying these best practices will save you headaches and ensure a professional finish:
- Always Test Fire: I can’t stress this enough! Test on scrap wood of the exact same species and thickness.
- Lower Air Pressure: Start low and increase gradually. It’s easier to add more power than to fix damage from too much pressure.
- Use Shorter Pins: Don’t use a 1-inch pin to attach a 1/4-inch thick piece of trim. Select pins that are slightly longer than the thickness of your trim piece, so they have enough to grip the substrate without poking through excessively.
- Maintain a Square Strike: Hold the nailer perpendicular to the surface for the most consistent results and to prevent bent pins.
- Don’t Over-Nail: While pins are small, too many can still weaken delicate material or create an uneven look. Space them appropriately.
- Use Opposite Support: When nailing into a thin piece of trim that’s attached to a thicker backing, make sure the backing is solid. If you’re attaching trim to trim, consider if the underlying trim is substantial enough to hold the pin. Sometimes, adding a backing strip is wise.
- Work Slowly and Deliberately: Especially when you’re new to pin nailing, take your time. Rushing can lead to mistakes.
- Keep the Nailer Clean: Ensure the magazine and firing mechanism are free of dust and debris so the pins feed smoothly.
When to Use a Pin Nailer vs. Other Nailers
It’s helpful to know where a pin nailer fits into the toolbox compared to its cousins, the brad nailer and the finish nailer.
| Nailer Type | Nail Size (Typical) | Headless? | Primary Use Cases | Pros for Trim Work | Cons for Trim Work |
|---|---|---|---|---|---|
| Pin Nailer | 0.031″ – 0.041″ diameter | Yes | Very delicate trim, small moldings, craft projects, picture frames, attaching small decorative elements. | Virtually invisible fastening, no filling needed, minimal wood damage, ideal for thin materials. | Least holding power, can bend if not fired correctly, requires lower air pressure (pneumatic), not for structural work. |
| Brad Nailer | 0.047″ – 0.062″ diameter | Yes | Small trim, baseboards, window/door casings, craft projects, cabinet face frames. | Small, easily filled nail head, good holding power for its size, versatile for many DIY trim jobs. | Nail head is visible and requires filling/sanding, can still split very thin wood if not careful. |
| Finish Nailer | 0.076″ – 0.091″ diameter | Minimal/Small | Larger trim, baseboards, crown molding, chair rails, framing (light duty). | Strongest holding power among these three, can handle slightly more demanding trim work. | Nail head is more prominent and requires filling, can easily split delicate wood, overkill for very fine trim. |
As you can see, the pin nailer is king when the absolute smallest, most invisible fastener is required, especially for the most delicate of materials. A brad nailer is a great all-arounder for most standard DIY trim, and a finish nailer is for when you need more holding power.
Troubleshooting Common Pin Nailing Issues
Even with the best intentions, you might run into a snag. Here are some common issues and how to fix them:
Issue: Pins are not driving fully.
- Cause: Low air pressure (pneumatic), battery is low (cordless), nailer is faulty, nails are the wrong size.
- Solution: Increase air pressure slightly (pneumatic). Charge or replace the battery (cordless). Check to ensure you are using the correct gauge and length of pins recommended for your nailer. Clean the nailer’s nose/plunger area.
Issue: Pins are bending or “fingering.”
Fingering happens when a pin bends and flares out at the tip instead of driving straight.
- Cause: Air pressure is too high, nailer is not held square to the surface, hitting a knot or very hard grain, pins are too long for the material.
- Solution: Reduce air pressure. Ensure the nailer is held perfectly perpendicular to the wood. Try a slightly shorter pin. If you hit a knot, try repositioning the nail slightly.
Issue: Wood is splitting or denting.
- Cause: Air pressure too high, nails are too close to the edge of the wood, using nails that are too thick for the wood, material is extremely brittle.
- Solution: Reduce air pressure. Move the nail placement further from the edge. Ensure you are using the thinnest pin your nailer can fire. You might need to pre-drill or use a different fastening method if the wood is too fragile even for a pin nailer.
Issue: Nailer jams.
This can happen with any nailer.
- Cause: Bent nails, debris in the magazine, faulty driver blade, incorrect nail loading.
- Solution: Unplug the nailer (or disconnect air). Carefully remove the magazine and clear any jammed pins. Check the driver blade for damage. Ensure nails are loaded correctly and are the right size. Consult your manual for detailed jam