Quick Summary:
Learning how to use a nailer safely at home is simple. Always wear safety glasses, keep fingers clear of the nose, and never point it at anyone. Understand your nailer type, inspect it before use, and maintain a firm grip. Following these essential steps ensures safe and effective nailing for all your DIY projects.
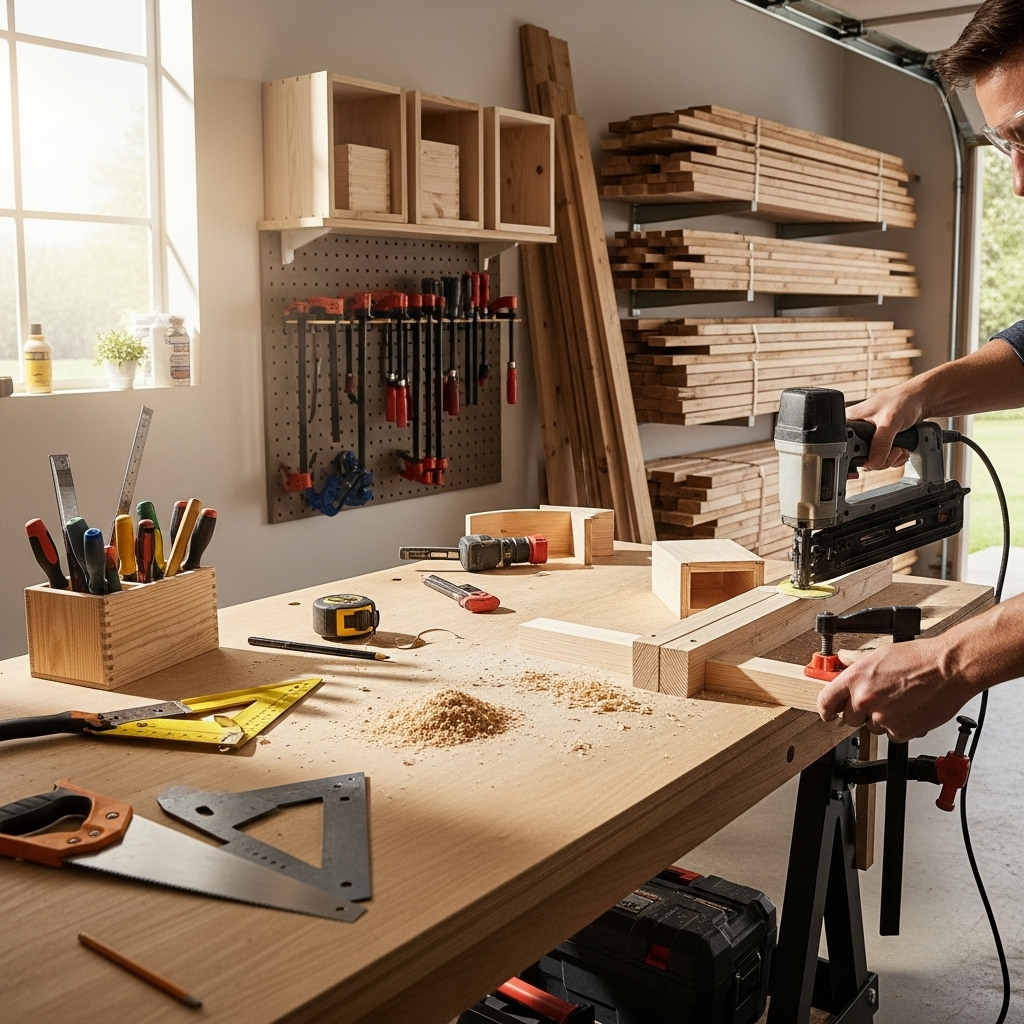
Hey there, DIY enthusiasts! Jack Shaffer here from Nailerguy. Ever looked at a nail gun and felt a mix of excitement and a tiny bit of nerves? I get it. These powerhouses can make projects fly by, but like any great tool, they demand respect and know-how. The good news? Using a nailer safely at home is totally achievable, even if you’re just starting out. Today, we’re going to break down everything you need to know, step by step, so you can tackle your projects with confidence and peace of mind. We’ll make sure you feel ready to nail it!
Table of Contents
Why Nailer Safety is Your Top Priority
Nailers are fantastic tools that can speed up woodworking and home improvement projects immensely. They drive nails much faster and with more force than a hammer, making tasks like framing, trim work, and even simple repairs a breeze. However, with great power comes the need for great responsibility. Misusing a nailer can lead to serious injuries, ranging from minor cuts and bruises to deeper wounds that require medical attention. Understanding and practicing proper safety procedures isn’t just about following rules; it’s about protecting yourself and anyone working around you.
Think of your nailer as a powerful extension of your own hands. Just like you wouldn’t swing a hammer wildly or point a tool unsafely, the same principles apply here. The goal is to harness the power of the nailer efficiently and effectively without becoming a statistic. By learning the fundamental safety practices, you’ll not only prevent accidents but also become a more skilled and respected DIYer.
Understanding Your Nailer: Know Your Tool
Before you even pick up a nailer, it’s crucial to understand the different types and how they operate. Each type has its own nuances, power source, and best-use applications. Knowing what you have and how it works is the first pillar of safe operation.
Common Nailer Types and Their Power Sources
Nailers come in various forms, each suited to different jobs. Here’s a quick rundown:
- Electric Nailers (Corded & Cordless): These are powered by electricity. Corded models plug into an outlet, offering continuous power but limiting your range. Cordless models use rechargeable batteries, providing more freedom of movement, but can be heavier and have a limited run time per charge.
- Pneumatic Nailers (Air-Powered): These are the most common type for professional use and serious DIYers. They require an air compressor and an air hose to operate. They’re often powerful, lightweight at the tool itself, and can shoot nails rapidly.
- Gas-Powered Nailers: These use a combination of fuel cells (like propane or butane) and a battery to fire nails. They offer excellent portability as they don’t require cords or hoses, but they need specific fuel cartridges and can sometimes have a distinct exhaust smell.
Reading Your Nailer’s Manual
This might sound obvious, but the owner’s manual is your best friend when it comes to understanding your specific nailer. It contains vital information about:
- Setup and Operation: Specific instructions on loading nails, connecting air hoses (if applicable), and charging batteries.
- Safety Features: Details about the contact tip, firing modes, and any built-in safety mechanisms.
- Maintenance: How to clean and maintain your tool for optimal performance and longevity.
- Troubleshooting: What to do if something isn’t working correctly.
Don’t just toss that manual aside! Keep it in a safe place, or even better, take photos of the key safety and operational pages to keep on your phone.
Essential Safety Gear: Your First Line of Defense
Every tool has its risks, and nailers are no exception. Investing in and consistently using the right Personal Protective Equipment (PPE) is non-negotiable. This gear is designed to protect you from flying debris, errant nails, and the noise generated by the tool.
Eyes: Always Wear Safety Glasses
This is the golden rule of using any power tool, especially a nailer. Tiny wood fragments, nail fragments, or even a nail ricocheting can cause severe eye damage. Always opt for ANSI Z87.1-compliant safety glasses or goggles that fit snugly and offer side protection. Regular eyeglasses or sunglasses are NOT sufficient.
Hands: Use Gloves (Sometimes)
Gloves aren’t always mandatory for nailer operation, but they can be beneficial for several reasons:
- Grip: Providing a more secure grip on the tool, reducing slippage.
- Protection: Shielding hands from minor scrapes and splinters when handling lumber or loading nails.
- Vibration Dampening: Some gloves offer slight vibration reduction for prolonged use.
However, be cautious with very thick or loose-fitting gloves, as they could potentially interfere with your grip or trigger operation in some nailer models. Always test your dexterity with gloves on before starting a job.
Hearing: Protect Your Ears
Nailers, particularly pneumatic ones, can be quite loud. Prolonged exposure to loud noise can cause permanent hearing damage. Always use earplugs or earmuffs when operating a nailer. Look for hearing protection that offers an adequate Noise Reduction Rating (NRR) for the task at hand. For more detail on protecting your hearing, resources like the National Institute on Deafness and Other Communication Disorders offer valuable information on noise-induced hearing loss.
Other Important PPE Considerations
- Footwear: Always wear sturdy, closed-toe shoes, preferably steel-toed boots, to protect your feet from dropped tools or materials.
- Clothing: Wear work clothes that fit well and don’t have loose sleeves or pant legs that could get caught in the tool or project materials.
Pre-Operation Checks: Inspect Before You Inhale (Air!)
Just like a pilot performs pre-flight checks, you should always inspect your nailer and its accessories before each use. This simple habit can prevent a lot of potential problems and ensure everything is in working order, keeping you safe and efficient.
Inspecting the Nailer Itself
- Damage: Look for any cracks, breaks, or loose parts on the body of the nailer.
- Nose/Contact Tip: Ensure the safety contact tip is present, not damaged, and moves freely. This is the part that must be pressed against the work surface for the nailer to fire.
- Trigger: Check that the trigger operates smoothly and returns to its resting position.
- Air Inlet (Pneumatic): If using a pneumatic nailer, check the air inlet for damage and ensure it’s clean.
- Battery (Cordless): If using a battery-powered nailer, ensure the battery is properly seated and charged.
Checking Your Nails (Fasteners)
Using the wrong type or size of nails can cause jams, damage your nailer, and lead to misfires. Always use the specific type, size, and gauge of nails recommended by your nailer’s manufacturer.
- Correct Type: Ensure you are using the correct collation angle (e.g., 0, 15, 20, 30, 34 degrees) and type (e.g., brad nails, finish nails, framing nails) for your specific nailer model. See your manual for recommendations.
- Straightness: Only use nails that are perfectly straight. Bent nails will cause jams.
- No Surface Residue: Ensure nails are clean and free of excessive oil or debris that could contaminate the tool.
For Pneumatic Nailers: Air Compressor and Hose Check
If you’re using a pneumatic nailer, several checks are critical:
- Air Pressure: This is vital! The manual will specify the correct operating pressure range (PSI) for your nailer. Too low, and it won’t drive nails properly; too high, and you risk damage to the tool or project, and increased recoil. Always use a regulator on your compressor to set the correct PSI. A good starting point is often around 90-100 PSI, but always refer to your nailer’s manual.
- Air Hose: Inspect the air hose for any leaks, cracks, or worn spots. Ensure the fittings are secure and not damaged. A leaky hose wastes air and reduces efficiency.
- Water/Oil Filter: If your compressor has a water or oil separator, ensure it’s functioning correctly and being drained regularly. Moisture or oil in the air line can damage the nailer over time.
Loading Your Nailer Safely: A Gentle Process
Loading a nailer correctly is straightforward but requires attention to detail. Improper loading can lead to jams or safety hazards.
Step-by-Step Loading Guide
- Disconnect Power Source: Whether it’s unplugging the cord, removing the battery, or disconnecting the air hose, ALWAYS disconnect the power source before loading or performing any maintenance. This is the MOST CRITICAL safety step.
- Open the Magazine: Most nailers have a spring-loaded magazine. Locate the release lever or mechanism and gently open it.
- Insert Nails: Place the strip of nails into the magazine, ensuring they are seated correctly against the feeder mechanism. Pay attention to the orientation of the nails (head up or down, facing the correct way for the magazine).
- Close the Magazine: Carefully close the magazine until it clicks or locks into place. Ensure it is fully closed and secure.
- Reconnect Power Source: Once the magazine is loaded and closed, reconnect the power source (plug in, insert battery, or attach air hose).
Pro Tip: Never force nails into the magazine. If they don’t fit easily, recheck the nail type and orientation.
Firing Modes: Choose Wisely for Safety
Many modern nailers come with different firing modes. Understanding these modes and using the appropriate one for your task is crucial for both safety and efficiency. Your nailer may have a selector switch, often located near the trigger.
Sequential Trip (Single Fire) Mode
- How it Works: In this mode, the nailer fires only one nail per trigger pull. To fire again, you must release the trigger and then press it again.
- Safety Advantage: This is the safest mode and the one you should use for most tasks, especially when precision and control are paramount. It greatly reduces the chance of accidental firing.
- Best For: Trim work, furniture making, detailed projects where exact nail placement is required.
Contact Trip (Bump Fire) Mode
- How it Works: In this mode, the nailer will fire a nail every time the safety contact tip is pressed against a surface, as long as the trigger is held down. You can “bump” the tip against the wood and fire nails in rapid succession.
- Safety Caution: This mode is fast but less precise and carries a higher risk of accidental firing. Never engage this mode unless you are absolutely clear on your nailing path and have a firm grip.
- Best For: Framing, sheathing, and other large construction tasks where speed is essential and precise single-nail placement isn’t the primary concern.
Always start with Sequential Trip mode until you are very comfortable and experienced with your nailer. Then, if your project demands it, you can switch to Contact Trip with extreme caution and full understanding of its implications.
Safe Nailer Operation: The Do’s and Don’ts
This is where we bring it all together. Following these operational guidelines will significantly reduce the risk of accidents.
The Golden Rules of Nailer Operation
- Always wear eye and hearing protection. (We can’t say this enough!)
- Keep your fingers away from the nose of the nailer. The firing mechanism is powerful.
- Never point the nailer at yourself or anyone else. Even when disconnected, it’s a habit to avoid.
- Ensure the safety contact tip is depressed against a solid surface before firing. This is the primary safety feature.
- Maintain a firm grip and good balance. This prevents recoil from knocking you off balance or causing unintended shots.
- Never “dry fire” the nailer. This means firing without a nail in the chamber, which can damage the tool.
- Be aware of your surroundings. Ensure no one is behind your target material where a nail could blow through, and be mindful of electrical wires or plumbing within walls.
- Do not operate the nailer on a ladder or unstable surface if possible. If you must, ensure you have excellent footing and stability.
- Disconnect the power source when the nailer is not in use, when changing nails, or when moving to a new location.
A great resource for general tool safety, including power tools, can be found on the Occupational Safety and Health Administration (OSHA) website, which provides guidelines on worker safety. While OSHA often deals with workplace safety, its principles are universally applicable to home use.
Table: Nailer Safety Checklist – Before, During, and After Use
| Phase | Key Safety Checks | Notes |
|---|---|---|
| Before Use |
|
First line of defense: Never skip these checks. |
| During Use |
|
Active safety: Constant vigilance is key. |
| After Use |
|
Securing the tool: Prevents accidental discharge later. |
Troubleshooting Common Nailer Issues Safely
Even with the best practices, you might encounter a hiccup. Here’s how to handle them safely:
Nail Jamming
This is the most common issue. If a nail jams:
- Immediately disconnect the power source (air hose, battery, or unplug).
- Do not try to force it.
- Consult your manual. It will detail how to safely access the jam clearing mechanism, usually via a small access panel on the nose of the gun.
- Use a pointed tool (like a nail set or a sturdy screwdriver) to carefully remove the jammed nail.
- Ensure the path is clear before reassembling and reconnecting power.
Nail Not Firing
If the nailer won’t fire, check these:
- Is the power source connected and active? (Air connected and compressor running/charged, battery inserted and charged, plug in the wall).
- Is the safety contact tip depressed against a solid surface?
- Is the magazine loaded correctly?
- Is air pressure at the correct level? (For pneumatic).
- Is the firing mode set correctly?
Nail Not Driving Fully
This often relates to:**
- Insufficient air pressure (pneumatic).
- Weak battery (cordless).
- Incorrect nail gauge (too thick for the setting).
- Extremely hard wood that your nailer struggles with.
- The nailer itself may need servicing.
If you’re constantly experiencing issues or aren’t comfortable troubleshooting, it’s always best to seek professional help or consultation from the tool manufacturer.
Maintaining Your Nailer for Longevity and Safety
A well-maintained nailer is a safe nailer. Regular maintenance ensures it functions as intended and reduces the likelihood of malfunctions that could lead to injury.
Cleaning Your Nailer
After each significant use, or as recommended by the manufacturer:
- Disconnect the power source (air hose, battery,