Quick Summary:
Mastering how to use a nailer for picture frames is simple with the right tool and technique. This guide shows you the easy steps for strong, beautiful frames, ensuring a professional finish every time. Get ready to hang your art with confidence!
Ever looked at a beautifully framed picture and wondered how it was put together? You might think it takes a professional carpenter to get those neat, strong joints. But what if I told you that with the right nailer, you can achieve that same flawless finish right in your workshop? It’s true!
Putting together picture frames can feel a little daunting if you’re new to woodworking. The corners need to be perfectly aligned and strong, and using the wrong fasteners can lead to split wood or a shaky frame. Don’t worry, though! With a little know-how, you’ll be crafting picture frames like a pro.
This guide is here to hold your hand every step of the way. We’ll break down exactly which nailer is best for the job, how to use it safely and effectively, and share some pro tips for perfect results. Get ready to create stunning frames for your cherished photos and artwork!
Table of Contents
Why a Nailer is Your Best Friend for Picture Frames
When assembling picture frames, precision and strength are key. Traditional methods like wood glue and clamps can work, but they often lack the speed and durability that a nail gun offers. A nailer drives small fasteners quickly and efficiently, creating strong joints that hold your frame together for years to come. This means less waiting for glue to dry and more time enjoying your finished piece.
Think about those delicate corners where the frame pieces meet. A regular hammer and nail might be too big, potentially splitting the wood or making the head visible and unsightly. A dedicated frame nailer, or even a smaller brad nailer, is designed for this exact purpose. They use slender nails (like brads or finishing nails) that are less likely to cause damage and are easier to conceal.
Using a nailer also significantly speeds up your workflow, especially if you plan on making multiple frames. You can assemble a frame in minutes rather than what might feel like hours of careful hammering and clamping. This efficiency is a huge plus for any DIY enthusiast looking to complete projects faster and with better results.
So, if you’re ready to elevate your framing game and achieve professional-looking results with ease, choosing the right nailer and understanding how to use it is your first step to success!
Choosing the Right Nailer for Picture Frames
Not all nailers are created equal, especially when it comes to delicate woodworking like picture frames. For this specific task, you want a tool that’s precise, powerful enough, and won’t damage your wood. Here’s a breakdown of the most suitable options:
| Nailer Type | Best For | Why it Works for Frames |
| Brad Nailer (18-gauge) | General picture framing, small trim, craft projects. | Ideal for narrow molding and delicate wood. The thin nails (brads) leave a small hole that’s easy to fill. Offers good holding power without splitting the wood. |
| Finesse Nailer / Pin Nailer (23-gauge) | Very delicate frames, intricate work, where nail head must be invisible. | Drives extremely thin headless or near-headless pins. Leaves almost no visible mark, perfect for tiny frames or where aesthetics are paramount. Holding power is minimal; best used in conjunction with glue. |
| Framing Nailer (Usually 15 or 16-gauge) | Larger, heavier duty frames or structural wood projects. | Generally too powerful and uses nails that are too large for typical picture frames. While it can technically join wood, it’s overkill and likely to damage delicate frame materials. |
For most DIY picture framing projects, an 18-gauge brad nailer is your sweet spot. It strikes a perfect balance between holding power, size of the nail, and ease of use. It’s versatile enough for various wood types and profiles commonly used in picture framing.
A 23-gauge pin nailer is more of a specialty tool. If you’re building very small, intricate frames where even a brad nail mark would be too noticeable, this is your go-to. Just remember that pin nails don’t offer much structural holding power on their own, so glue becomes even more critical.
You’ll likely see framing nailers mentioned for construction, but I strongly advise against using them for picture frames. They use much larger nails that can easily split the wood you’re working with and leave unsightly marks. Stick to the smaller gauges for this delicate work.
Pneumatic vs. Electric vs. Battery-Powered Nailers
The type of power source for your nailer is also something to consider:
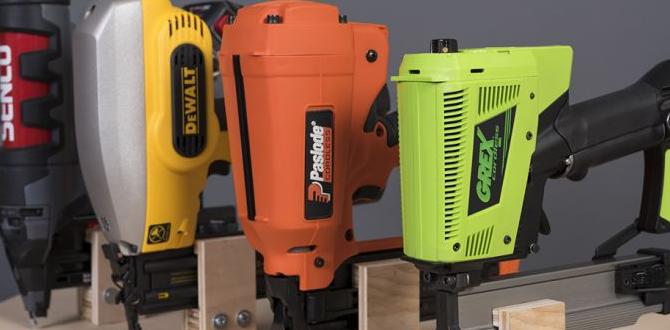
- Pneumatic Nailers: These are powered by an air compressor. They are often lighter, more powerful, and less expensive upfront. However, you need to buy and maintain an air compressor, which can be bulky.
- Electric (Corded) Nailers: These plug into a wall outlet. They are convenient as they don’t require an air compressor, but you’re tethered by a cord, which can limit mobility.
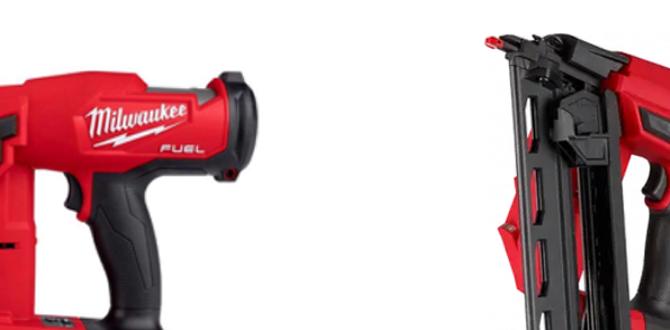
- Battery-Powered Nailers: The most convenient for portability. They run on rechargeable batteries, offering freedom of movement. Modern battery nailers are powerful, but they tend to be heavier and more expensive.
For picture framing, any of these can work. If you already have an air compressor, a pneumatic brad nailer is a great choice. If portability is king and you want to avoid compressors, an electric or battery-powered model will serve you well. Many beginners find battery-powered nailers to be the easiest to start with due to their all-in-one nature.
Essential Tools and Materials for Frame Building
Before you power up your nailer, let’s gather everything you’ll need. Having all your supplies ready makes the entire process smoother and more enjoyable.
Tools You’ll Need:
- Picture Frame Nailer: As discussed, an 18-gauge brad nailer is highly recommended.
- Air Compressor (if using pneumatic): With a regulator to control pressure.
- Air Hose and Fittings (if using pneumatic): Ensure they are compatible with your nailer.
- Safety Glasses: Absolutely crucial! Always protect your eyes.
- Ear Protection: Nailers can be loud.
- Work Gloves: For a secure grip and protection.
- Measuring Tape: For accurate frame dimensions.
- Miter Saw or Miter Box and Hand Saw: To cut frame corners at a precise 45-degree angle. A miter saw offers the most accuracy and ease.
- Wood Glue: Essential for adding strength to the joint.
- Clamps: Corner clamps or strap clamps are helpful for holding pieces together while gluing and nailing.
- Sandpaper: For smoothing edges before and after assembly.
- Wood Filler or Glazing Compound: To patch any small nail holes for a seamless finish.
- Small Hammer or Nail Set: For sinking nail heads slightly below the surface if your nailer doesn’t do it perfectly.
- Pencil: For marking.
Materials for Your Frame:
- Frame Moulding: Choose wood that suits your style and the picture you’re framing.
- Nails: Ensure they are the correct size for your nailer (e.g., 18-gauge brads, typically 1” to 1-1/2” long for most picture frames).
- Backing Board: Cardboard, foam board, or thin plywood for the back of the frame.
- Glass or Acrylic Sheet: To protect your artwork or photo.
- Mounting Hardware: D-rings, wire, or saw-tooth hangers for hanging.
Step-by-Step Guide: How to Use a Nailer for Picture Frames
Now that you have all your gear, let’s get to building! Follow these steps to create a sturdy and beautiful picture frame.
Step 1: Cut Your Frame Pieces
This is arguably the most critical step for a perfect frame. You need to cut your chosen moulding at a precise 45-degree angle on each end so that when joined, they form a 90-degree corner. Always measure twice and cut once!
- Measure the opening size of your artwork or photo. (e.g., if your photo is 8×10 inches, you’ll need to account for the moulding width and cut so the inside dimensions of the assembled frame match those.) A common method is to measure the length of the shortest side of your artwork/photo and add twice the width of your moulding. Then measure the length of the longest side and add twice the moulding width.
- Use a miter saw or a miter box and hand saw to make your cuts. Ensure the saw is set to exactly 45 degrees. Cut the first piece, then measure and cut the second piece to match. Repeat for the remaining two pieces, ensuring you have two pairs of identical lengths.
- Make sure your cuts are clean and accurate. Any slight inaccuracy here will result in gaps in your corners.
Step 2: Dry Fit and Prepare for Nailing
Before you add glue or nails, assemble the frame pieces without them to check the fit.
- Bring the four cut pieces together to form the frame rectangle.
- Check that all four corners meet snugly. There should be no visible gaps. If there are small gaps, you might need to re-cut or adjust.
- Once you’re satisfied with the fit, prepare your workspace. Lay out your pieces logically for assembly. Have your nailer loaded and ready.
Step 3: Apply Wood Glue
Wood glue is your secret weapon for making the frame joints incredibly strong. The nails add quick holding power while the glue cures.
- Apply a thin, even bead of wood glue along one of the 45-degree cut edges that will join to another piece. Be careful not to use too much, as excess glue can be messy and hard to clean up.
- Wipe away any immediate squeeze-out with a damp cloth.
Step 4: Position and Clamp (Optional but Recommended)
This step helps ensure your frame stays square and the glue joint is tight while you nail.
- Bring the two pieces of moulding together to form a corner.
- If you have corner clamps, use them to hold the corner tightly together.
- Alternatively, a band clamp or strap clamp that wraps around the entire frame can hold all four corners securely.
- If you don’t have specialized clamps, you can often hold the corner together firmly with your hands while you drive the first few nails.
Step 5: Load and Prepare Your Nailer
This is where the nailer comes into play. Safety first!
- Read your nailer’s manual: Every nailer is slightly different. Familiarize yourself with its specific operation and safety features.
- Load the nails: Insert the correct gauge and length of brads into the nailer’s magazine. Make sure they are seated properly.
- Set air pressure (pneumatic): Connect your air hose and set the regulator to the manufacturer’s recommended pressure for your nailer and wood type. A good starting point for 18-gauge brads into soft wood is around 80-90 PSI. Too much pressure can blow through delicate wood; too little won’t drive the nail fully. This Old House has a great overview of pneumatic nail guns.
- Wear safety glasses: This is non-negotiable.
Step 6: Drive the Nails
This is the moment of truth!
- Position the nailer’s tip firmly against the frame piece. For picture frames, it’s best to drive nails from the side of the moulding into the end grain of the adjoining piece. This provides the strongest connection.
- Aim for two nails per corner, spaced a short distance apart, to ensure a solid hold.
- Keep the nails about 1/2 inch to 3/4 inch away from the very edge of the wood to avoid splitting.
- Ensure the nailer’s safety contact tip is pressed flush against the wood before you pull the trigger. This is a critical safety feature.
- Squeeze the trigger gently to drive the nail. The nail should go in straight and penetrate both pieces of wood.
- If the nail doesn’t go in all the way, you might need to adjust air pressure (if pneumatic) or consider using a nail set to gently tap the head flush.
- Repeat for all four corners, driving at least two nails into each joint.
Step 7: Clean Up Excess Glue
Once the nails are in place, you might have a little glue squeeze-out.
- Use a damp cloth to wipe away any excess glue that has oozed out. It’s much easier to clean it now than after it dries.
Step 8: Let Glue Cure and Remove Clamps
Patience is key here for maximum strength.
- Allow the glue to cure completely according to the manufacturer’s instructions. This usually takes at least 30-60 minutes for initial set, but 24 hours for full strength.
- Once the glue has set, you can remove your clamps. The frame should now hold its shape independently.
Step 9: Sand and Fill Nail Holes
For that professional, seamless look, it’s time for finishing touches.
- Lightly sand the entire frame, paying attention to the corners and anywhere glue might have dried.
- If your nailer didn’t sink the nail heads flush, use a nail set to gently tap them a little further in.
- Fill any small nail holes with wood filler that matches your wood color. Apply carefully with a putty knife or your finger.
- After the wood filler dries, sand the filled areas smooth.
Step 10: Finish the Frame
Now, make your frame truly shine!
- You can paint, stain, or varnish your frame as desired.
- Apply your chosen finish in thin, even coats.
- Allow the finish to dry completely between coats.
Step 11: Install Glass, Artwork, and Backing
The final assembly to make it a picture frame!
- Carefully place the glass or acrylic into the frame recess.
- Position your artwork or photo on top of the glass.
- Add your backing board. Secure it in place. You can use small glazier points, staples, or even small brads driven carefully along the edge. Another common method is to use flexible points that are pushed into the wood.
- Attach your hanging hardware (D-rings and wire, or a saw-tooth hanger) to the back of the frame. Ensure it’s centered and securely attached. Check out Popular Mechanics for tips on hanging.
Tips for Perfect Picture Frame Nails
Even with the right tool, a few extra tips can make your nailing experience and results even better:
- Test Fire: Always test fire your nailer on a scrap piece of the same moulding you are using. This helps you dial in the air pressure (if pneumatic) and ensure the nails are driving correctly without damaging the wood.
- Nail Placement: Drive nails about 1/2 inch to 3/4 inch from the corner’s outer edge. This prevents splitting the delicate end of the moulding. For extra strength on wider mouldings, you can add a third nail.
- Angle Matters: Drive nails at a slight angle, pointing towards the majority of the wood piece. This enhances holding power.
- Glue is Non-Negotiable: Don’t skip the wood glue! Nails provide quick assembly and hold, but glue provides the long-term structural integrity that makes a frame last.
- Consistent Pressure: Apply consistent pressure when firing. If you don’t press the nailer head firmly against the wood, the nail might not drive fully or could ricochet.
- Watch for Blow-Through: If your wood is very thin or soft, even an 18-gauge nailer can cause a nail to blow through the other side. Reduce air pressure, use slightly shorter nails, or add a small piece of wood behind your work for support during nailing.
- Keep Your Workpiece Still: Ensure your frame pieces are stable and don’t shift while you